 Skip to content
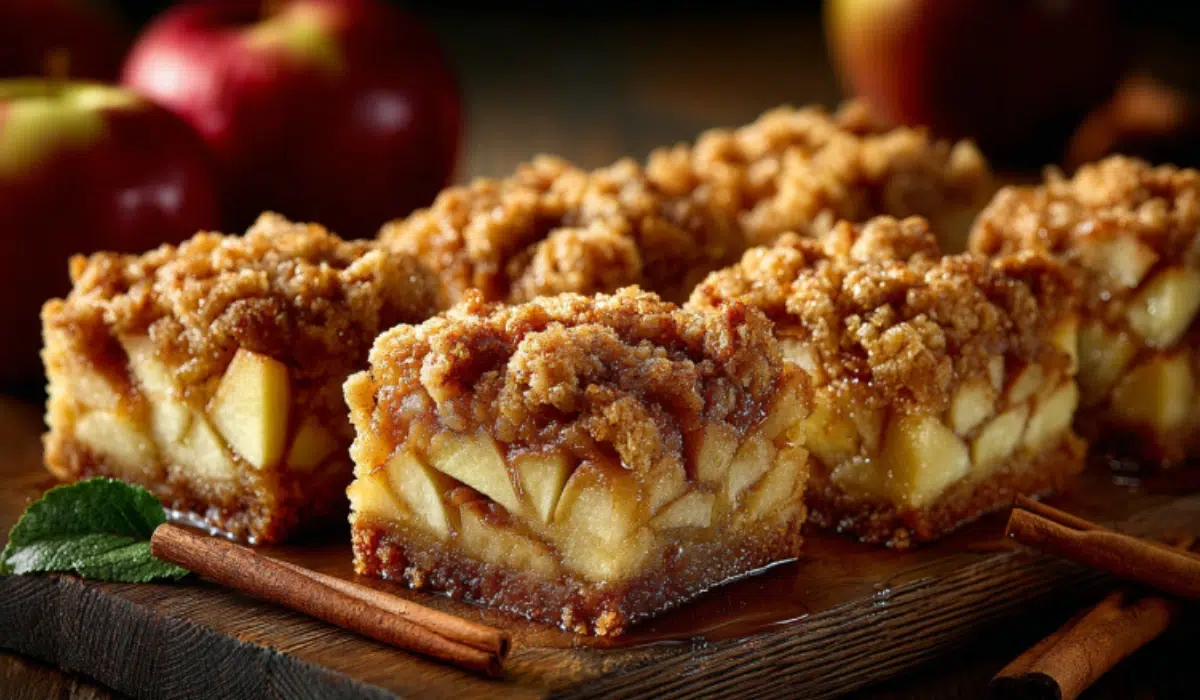
If fall had a flavor, it would taste like these Apple Bars. Buttery shortbread crust meets tender spiced apples under a golden crumb topping, creating a dessert that’s both cozy and irresistible. These Apple Bars bring everything you love about apple pie in a simple, hand-held version that’s perfect for sharing or sneaking straight from the pan. With easy steps and everyday ingredients, they deliver big flavor without the fuss.
Why You’ll Love This Apple Bars Recipe
These Apple Bars are the kind of dessert that disappear fast. Here’s why they’ll become a favorite in your kitchen:
- Easy and Foolproof: No rolling dough or tricky crust just press, bake, and enjoy.
- Every Bite Feels Like Fall: Sweet-tart apples, cinnamon, and buttery crumble capture the perfect autumn balance.
- Make-Ahead Friendly: They hold up beautifully for gatherings or meal prep desserts.
- Customizable: Choose crumb topping or a simple vanilla glaze to match your mood.
- Perfect for Sharing: Bake-sale ready, potluck approved, and always crowd-pleasing just like our cinnamon sugar blondies.
Apple Bars Recipe
These Apple Bars feature a buttery shortbread crust, cinnamon-spiced apple filling, and crumb topping the perfect handheld dessert that tastes like classic apple pie in every bite.
16
bars25
minutes45
minutes230
kcalIngredients
- For the Shortbread Base
8 tbsp unsalted butter, softened
¼ cup + 2 tbsp light brown sugar, packed
1¼ cups all-purpose flour
½ tsp salt
- For the Apple Filling
6 cups diced apples (Granny Smith or Honeycrisp)
2 tbsp lemon juice
2 tbsp unsalted butter
2 tsp apple pie spice (or cinnamon + nutmeg)
¾ cup granulated sugar
- For the Crumb Topping
½ cup all-purpose flour
¼ cup light brown sugar, packed
½ tsp cinnamon
4 tbsp cold unsalted butter, diced
- Optional Glaze
½ cup powdered sugar
1 tbsp milk
¼ tsp vanilla extract
Directions
- Preheat & Prepare:
Heat oven to 325°F (165°C). Line an 8-inch square pan with parchment paper, leaving overhang for easy removal. Lightly grease the sides. - Make the Base:
Beat butter and brown sugar until smooth. Add flour and salt; mix until crumbly. Press into pan and prick with a fork. Bake for 15–20 minutes until lightly golden. Increase oven to 350°F (175°C). - Cook the Filling:
Toss apples with lemon juice. Melt butter in a skillet; stir in apple pie spice. Add apples and cook 5 minutes. Add sugar and cook 6–10 minutes until glossy and thickened. - Make the Crumb Topping:
Combine flour, sugar, and cinnamon. Cut in butter until pea-sized crumbs form. - Assemble:
Spread apple filling over crust. Sprinkle topping evenly. Bake 35–40 minutes until golden brown. Cool completely before slicing. - Optional Glaze:
Whisk powdered sugar, milk, and vanilla. Drizzle over cooled bars.
Notes
- Best Apples: Mix Granny Smith (tart) and Honeycrisp (sweet) for balanced flavor.
- Storage: Keep at room temp for 2 days, or refrigerate up to 5.
- Freezing: Wrap bars individually and freeze for 3 months.
- Texture Tip: Pre-cooking apples prevents sogginess.
- Variation: Add caramel drizzle or a handful of chopped pecans for extra crunch.
Nutrition Facts
- Calories: 230kcal
- Fat: 10g
- Saturated Fat: 6g
- Cholesterol: 25mg
- Sodium: 75mg
- Carbohydrates: 34g
- Fiber: 1g
- Sugar: 22g
- Protein: 2g
These bars combine apple pie comfort with a modern shortcut, and if you want a seasonal twist, try pumpkin bars with cream cheese frosting. Once you try them, you’ll see why no one stops at one square.
Ingredients Needed For Apple Bars Recipe
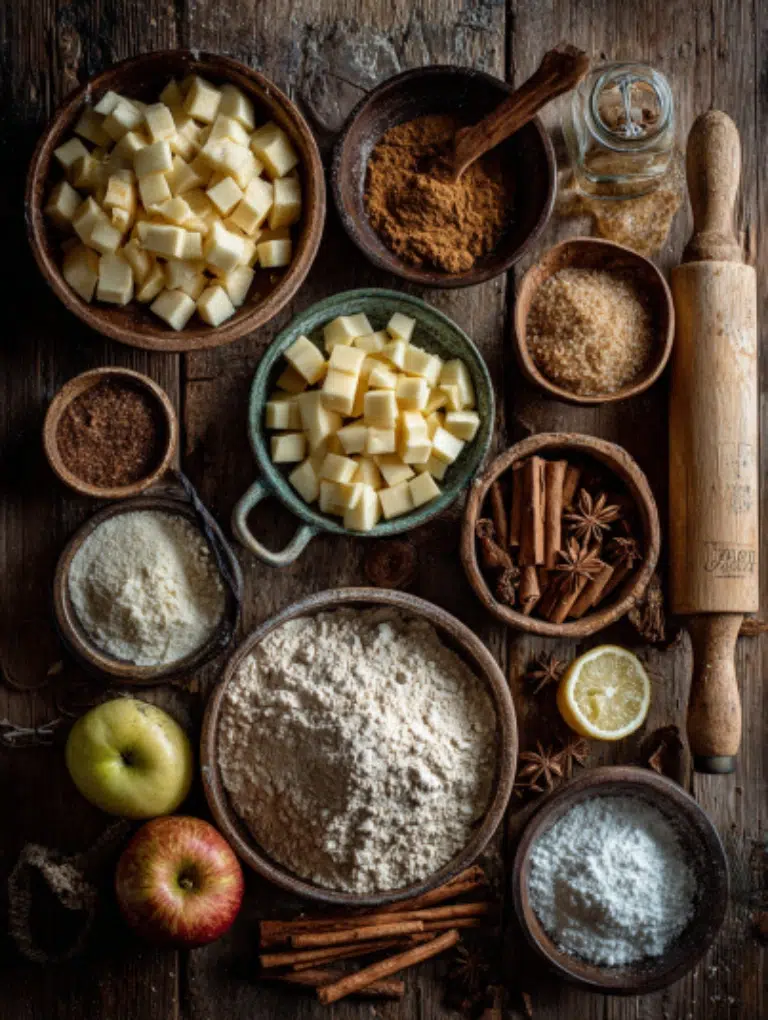
For the Shortbread Base
- 8 tablespoons unsalted butter, softened to room temperature
- ¼ cup plus 2 tablespoons light brown sugar, packed
- 1¼ cups all-purpose flour
- ½ teaspoon fine salt
For the Apple Filling
- 6 cups diced apples (Granny Smith or Honeycrisp work best)
- 2 tablespoons lemon juice
- 2 tablespoons unsalted butter
- 2 teaspoons apple pie spice or a mix of cinnamon and nutmeg
- ¾ cup granulated sugar
For the Crumb Topping
- ½ cup all-purpose flour
- ¼ cup packed light brown sugar
- ½ teaspoon cinnamon or apple pie spice
- 4 tablespoons cold unsalted butter, diced
What You’ll Need
- 8-inch square baking pan
- Parchment paper or aluminum foil (for easy removal)
- Mixing bowls (medium and large)
- Rubber spatula or wooden spoon
- Skillet for pre-cooking apples
- Wire rack for cooling
Notes & Substitutions
- Apples: Pick firm baking apples such as Granny Smith or other pie-friendly varieties, and skip Red Delicious since it tends to turn mushy when heated, as noted by Iowa State University Extension.
- Butter: For a dairy-free version, use high-quality plant-based butter. The texture stays nearly identical.
- Flour: Substitute 1:1 gluten-free baking blend for a gluten-free variation.
- Spice Blend: No apple pie spice? Use 1½ teaspoons cinnamon, ¼ teaspoon nutmeg, and a pinch of allspice.
- Sugar: Swap half the granulated sugar in the filling with coconut sugar for a deeper caramel note.
How to Make Apple Bars
Step 1: Prep and Preheat
Set your oven to 325°F (165°C) and line an 8-inch square pan with parchment paper, leaving a bit of overhang for easy lifting later. Lightly grease the sides so nothing sticks.
Pro tip: A parchment sling makes removing cooled bars much simpler.
Step 2: Make the Shortbread Base
In a mixing bowl, cream butter and brown sugar together until smooth and fluffy about 30 seconds. Add the flour and salt, then mix on low until crumbly but cohesive. The dough should hold together when squeezed.
Press the dough evenly into the prepared pan and prick the surface with a fork to prevent bubbling.
Bake for 15–20 minutes, or until lightly golden. Remove and increase oven temperature to 350°F (175°C). Let the crust cool slightly.
Step 3: Cook the Apple Filling
While the crust bakes, combine diced apples and lemon juice in a large bowl.
In a skillet, melt butter over medium heat and stir in apple pie spice. Add the apples and toss well to coat.
Cook for 5 minutes until apples begin to soften, then sprinkle in granulated sugar. Continue cooking for 6–10 minutes, stirring occasionally. The apples will release juice first, then thicken as moisture evaporates.
When the mixture turns sticky and glossy, remove from heat.
Tip: Stop cooking while apples are still slightly firm; they’ll finish softening in the oven.
Step 4A: Add the Crumb Topping
Mix flour, brown sugar, and cinnamon in a small bowl. Add cold butter cubes and work them in with your fingers or a fork until coarse crumbs form pea-sized bits are perfect.
Spread the cooked apples evenly over the crust, then sprinkle the crumb topping over the filling.
Bake for 35–40 minutes, until the top turns golden and crisp.
Cool completely on a wire rack before slicing.
Step 4B (Optional): Glazed Finish
Skip the crumb topping for a simpler twist: after baking the base and apple layer, whisk ½ cup powdered sugar with 1 tablespoon milk and drizzle over the cooled bars.
Flavor boost: Add ¼ teaspoon vanilla extract or a dash of cinnamon to the glaze.
Step 5: Slice and Serve
Once fully cooled, lift the bars out using the parchment sling and cut into squares.
Serve plain, dusted with powdered sugar, or topped with a scoop of vanilla ice cream.
Pro Tips & Troubleshooting
Expert Tips
- Choose the right apples: A mix of Granny Smith and Honeycrisp gives the best texture and flavor balance tart meets sweet without turning mushy.
- Pre-cook the filling: Cooking the apples before baking helps prevent a soggy crust and creates that glossy, caramel-like coating, as recommended by the National Center for Home Food Preservation.
- Cool completely before slicing: The bars firm up as they cool, making clean cuts easier and preventing the filling from spilling.
- Line the pan: A parchment sling isn’t optional it keeps cleanup simple and ensures perfect edges every time.
- Flavor twist: Add a drizzle of homemade caramel or a sprinkle of sea salt for a bakery-style finish or go all in with our caramel apple cheesecake bars.
Common Mistakes to Avoid
- Overmixing the crust: Stop once the dough looks crumbly but holds when pressed. Overworking leads to tough texture.
- Undercooked apples: Raw apples release liquid while baking, which can make the base soggy. Always cook them until slightly sticky first.
- Cutting too early: Warm bars crumble apart. Wait at least 1 hour before slicing.
- Skipping the chill: For neat slices, chill the pan for 30 minutes before cutting.
Pan Size Conversions
| Pan Size | Yield | Bake Time |
|---|---|---|
| 8-inch square | 16 small bars | 35–40 min |
| 9-inch square | 20 thinner bars | 30–35 min |
| 9×13-inch | 24 bars | 25–30 min |
If you scale up to a larger pan, increase apple filling by 50% for even layers.
Serving, Storage & Variations
Serving Suggestions
These Apple Bars shine at any occasion serve them warm with vanilla ice cream for a classic dessert, or room temperature for bake sales and potlucks.
For a cozy touch, dust with powdered sugar or drizzle a light vanilla glaze just before serving. Want a fall-inspired flair? Add a dash of caramel sauce and crushed pecans on top.
Pairing ideas: A mug of hot coffee, apple cider, or even a scoop of cinnamon gelato complements these bars perfectly.
These Apple Bars shine at any occasion serve them warm with vanilla ice cream for a classic dessert, or room temperature for bake sales and potlucks; s’more bars are another crowd-pleasing choice.
Storage Guidelines
- Room Temperature: Keep the bars in an airtight container for up to 2 days, which aligns with USDA guidance for fruit pies shared by University of Illinois Extension.
- Refrigerator: Extend freshness to 5 days by storing them chilled. Let them sit at room temp for 10 minutes before serving for best texture.
- Freezer: Freeze individual bars well wrapped for up to about 3 months and reheat in the oven for best texture, a method consistent with Clemson Cooperative Extension guidance for baked fruit pies.
Reheating Tips
- Oven: Warm bars on a baking sheet at 300°F (150°C) for 8–10 minutes to revive the crisp base.
- Microwave: Heat one bar for 15–20 seconds if you’re short on time.
- Pro tip: A quick reheat brings back the buttery crust and fills your kitchen with that cinnamon-apple aroma again.
Recipe Variations
- Gluten-Free: Swap all-purpose flour with a 1:1 gluten-free blend texture stays light and crumbly.
- Dairy-Free: Use vegan butter and skip the glaze or make it with almond milk.
- Spice It Up: Add a pinch of cardamom or ginger to the filling for extra warmth.
- Caramel Apple Bars: Drizzle salted caramel over the filling before adding the crumb topping.
- Vegan Option: Use coconut oil in the crust and topping, and skip eggs (none are used here anyway).
Want more variations? Check the FAQ below for tips on freezing, customizing, and troubleshooting your Apple Bars.
Nutritional Information
The values below reflect one bar when you cut an 8-inch pan into 16 pieces. I based the numbers on the ingredient list and serving size from our test batch, aligned with the King Arthur data set calculated using ESHA Genesis.
| Nutrient | Amount per bar |
|---|---|
| Calories | 230 |
| Total Fat | 10 g |
| Saturated Fat | 6 g |
| Carbohydrates | 34 g |
| Total Sugars | 22 g |
| Added Sugars | 17 g |
| Fiber | 1 g |
| Protein | 2 g |
| Cholesterol | 25 mg |
| Sodium | 75 mg |
What this means for you:
- Butter in the shortbread base provides richness and a crisp bite.
- Apples naturally contribute fiber with virtually no fat, as reported by USDA FoodData Central, which supports a satisfying texture without extra richness.
- Lemon juice brightens flavor so the bars taste balanced, not overly sweet.
- Apple pie spice adds aroma without extra calories.
Note: Ingredient swaps change the numbers. Use an online calculator with your exact brands to confirm any adjustments.
Conclusion
These Apple Bars prove that homemade desserts don’t need to be complicated to taste incredible. With a buttery crust, tender cinnamon-spiced apples, and a crisp crumb or sweet glaze on top, each bite feels like a slice of cozy fall comfort.
They store well, travel easily, and fit any occasion from a simple family snack to a potluck favorite. Once you bake them, the hardest part will be waiting for them to cool before sneaking a square.
If you try this recipe, leave a comment and star rating below I’d love to hear how yours turned out. And if you added your own twist, like caramel drizzle or nut topping, tell us about it!
Sharing your results helps others too, so feel free to pin it or post your bars on Facebook and tag your friends.
What’s your favorite apple variety for baking? Drop your answer in the comments!
Frequently Asked Questions (FAQ)
How do I keep the base from getting soggy?
Pre-cook the apple filling until most liquid evaporates and the mixture looks glossy. Let the crust par-bake until lightly golden. Cool the bars fully before slicing so the layers set.
Which apples work best for apple bars?
Use a mix of tart and sweet. Granny Smith brings structure and tang. Honeycrisp adds juicy sweetness. Avoid soft apples like Red Delicious because they turn mushy.
Can I make apple bars ahead and freeze them?
Yes. Bake, cool completely, then cut and wrap each bar tightly. Freeze in a bag for up to 3 months. Thaw overnight in the fridge, then warm at 300°F for 8 to 10 minutes.
How do I adjust this recipe for a 9×13 pan?
Increase the apple filling by about 50 percent for even layers. Bake at 350°F, checking at 25 minutes. Bars in a larger pan bake a bit faster since the layer is thinner.
Can I swap the crumb topping for a simple glaze?
Yes. Skip the crumb, bake the base and apple layer, cool, then drizzle a quick glaze made with powdered sugar and milk. Add vanilla or cinnamon for flavor.
How do I make these gluten free or dairy free?
Use a 1:1 gluten-free baking blend in the crust and topping. For dairy free, choose a good plant-based butter and use non-dairy milk in the glaze. Texture stays close to the original.
How long do apple bars stay fresh?
They keep for 2 days at room temperature in an airtight container or up to 5 days in the fridge. For best texture after chilling, let bars stand 10 minutes or reheat gently.


