 Skip to content
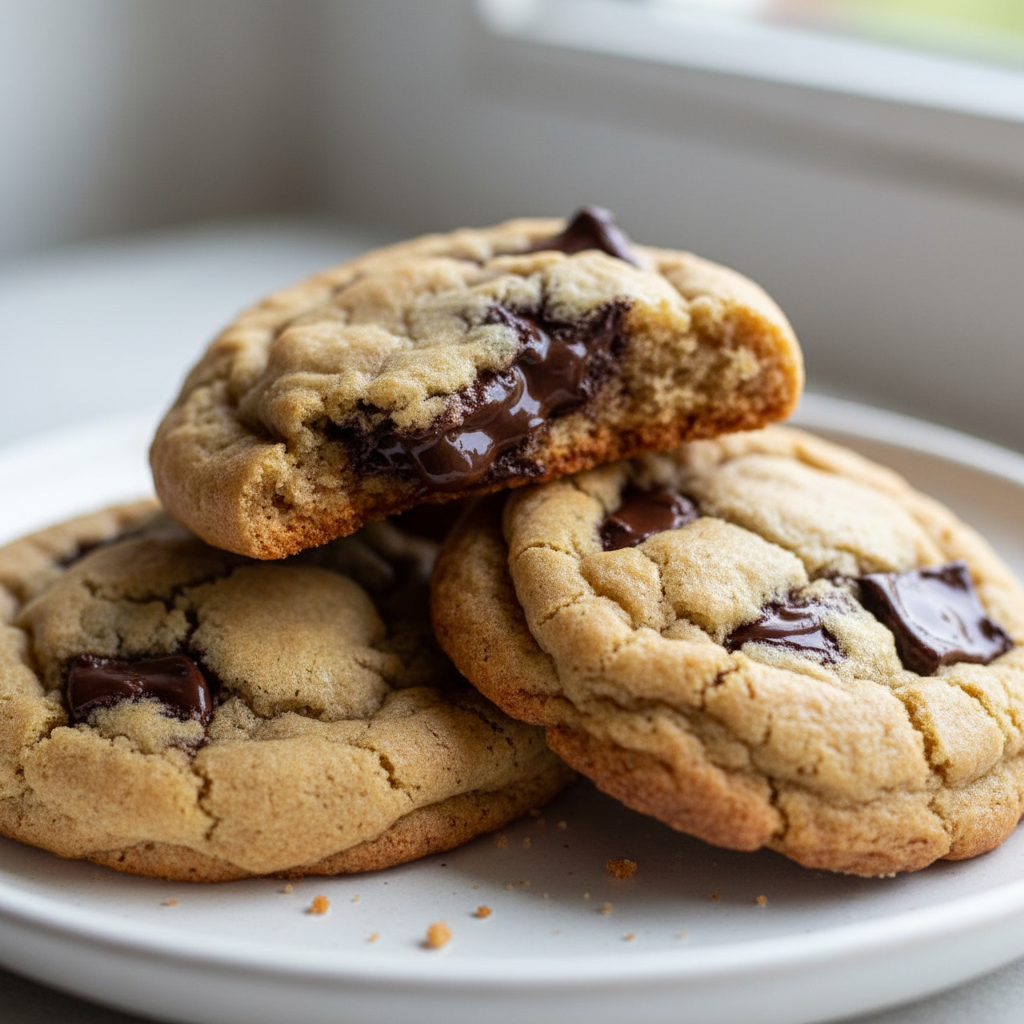
 There’s something truly magical about the aroma of ripe bananas mingling with the nutty, complex scent of brown butter. It’s a combination that promises comfort and pure indulgence. Today, I’m thrilled to share my absolute favorite recipe for Brown Butter Banana Cookies. These aren’t just any banana cookies; they are an experience—crispy at the edges, delightfully chewy in the center, and bursting with deep, rich flavor. Whether you’re a seasoned baker or just starting out, this detailed guide will help you master these irresistible homemade cookies, achieve perfect texture, and understand the simple science behind every delicious bite.
Why You’ll Love These Brown Butter Banana Cookies
I am so excited for you to try these Brown Butter Banana Cookies because they have a secret ingredient that elevates them to a whole new level: dark rum. Just one to two teaspoons added to the mashed banana mixture works wonders.
The science behind it is fascinating yet simple. Dark rum enhances the natural banana flavor through a process called esterification. This means it helps to bring out and deepen those fruity, sweet notes, adding a subtle warmth and complexity without any overt alcoholic taste (the alcohol bakes off!). It also contributes to a slightly more tender crumb by mildly inhibiting gluten development, ensuring your cookies are perfectly soft and chewy.
Unforgettable Flavor Profile: Expect crispy edges, wonderfully chewy centers, and a deep, toasty brown butter flavor that perfectly complements the enhanced banana notes. Each bite is a harmonious blend of textures and tastes.
Bake-Off Worthy Results: You don’t need to be a professional baker to achieve professional-level results with this recipe. My expert tips and techniques will guide you to cookies that look and taste like they came from a gourmet bakery, perfect for impressing guests or simply treating yourself.
User-Friendly & Rewarding: Despite their gourmet taste, these cookies are surprisingly straightforward to make. I’ve designed this recipe for consistent success, ensuring you get delicious, rewarding results every time you bake them.
Ingredients Needed
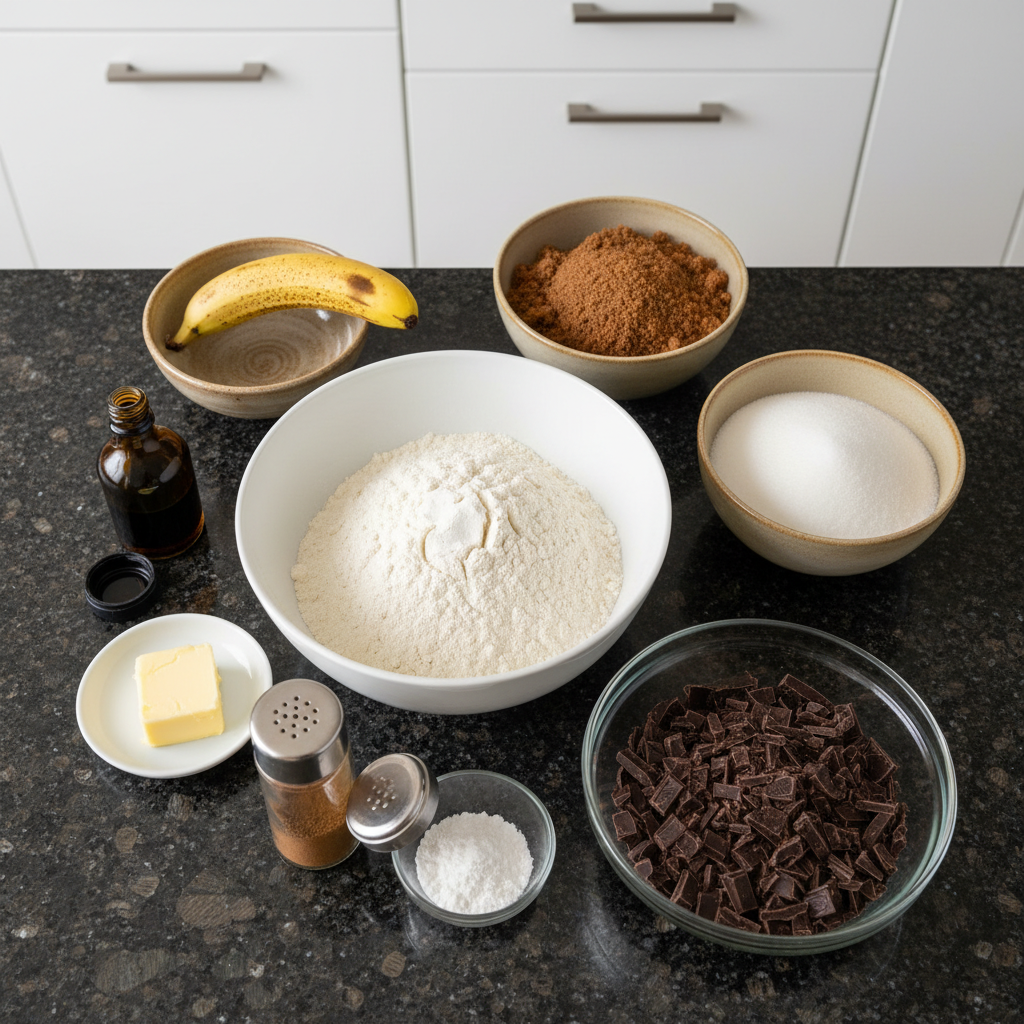
- 16 (1 cup) tablespoons salted butter (or salted vegan butter substitute)
- 80 (1/2 cup) grams brown sugar
- 220 (1 cup) grams white sugar
- 110 (1 cup) grams medium banana, ripe
- 1/2 teaspoon cinnamon
- 1 teaspoon vanilla extract
- 330 (2 1/4 cups) grams all-purpose flour
- 2 teaspoons baking powder
- 1 teaspoon Diamond Crystal kosher salt (1/2 teaspoon if using Morton’s)
- 113 (1 bar) grams 70% chocolate (chopped into thin, almost shattery, pieces)
Ingredient Notes & Substitutions
Bananas: The key to truly flavorful banana cookies lies in using very ripe bananas with plenty of brown spots. These bananas are naturally sweeter and have more moisture, which directly impacts the cookie’s texture and intensifies that wonderful banana flavor.
Butter: I always recommend using salted butter in this recipe. The salt enhances all the other flavors, creating a perfect sweet-salty balance. If you’re looking for a dairy-free option, a good quality salted vegan butter substitute works beautifully here too.
Sugars: We use a combination of brown sugar for its molasses notes and moisture, which contributes to a chewy center, and white sugar for that desirable crispiness around the edges.
Chocolate: For these Brown Butter Banana Cookies, I prefer using 70% chocolate chopped into thin, almost shattery pieces. This allows the chocolate to melt beautifully and distribute evenly throughout the dough, giving you rich pockets of chocolate in every bite, unlike chips that hold their shape more. Of course, you can experiment with other chocolate variations like milk chocolate, dark chocolate chips, or even white chocolate. Feel free to get creative with other add-ins like oats, butterscotch chips, shredded coconut, or plump raisins!
Salt: Precision with salt matters! I specify Diamond Crystal kosher salt because its crystal size is different from Morton’s kosher salt. If you’re using Morton’s, you’ll only need half the amount. For an extra special touch and a burst of salty notes, a sprinkle of flaky salt like Maldon on top of the warm cookies is absolutely divine.
Dark Rum (Optional, but Recommended): While optional, I genuinely recommend adding 1-2 teaspoons of dark rum. As I mentioned, it really boosts that banana flavor without making the cookies taste boozy, adding a subtle depth you’ll truly appreciate.
How to Make Brown Butter Banana Cookies
Making these Brown Butter Banana Cookies is a delightful process, and I’ll walk you through each step to ensure perfect results.
Preheat Oven
First things first, preheat your oven to 375°F. This ensures it’s at the perfect temperature when your cookie dough is ready.
Brown the Butter
In a small saucepan, melt 8 tablespoons of the salted butter over medium-low heat. Stir frequently with a spatula. You’ll notice the butter fizzing and the milk solids beginning to separate and collect at the bottom. Keep stirring until these flecks turn a beautiful golden brown and the butter itself has a deep, almost dark golden-brown color with a wonderfully nutty aroma. This usually takes about 2-3 minutes after the fizzing starts. Once it’s a deep golden brown, remove it from the heat immediately. Pour the browned butter into a separate bowl and whisk it gently to help it cool down slightly. This stops the cooking process and gets it ready for the next step.
Cream Butter & Sugars
In the bowl of a stand mixer fitted with the paddle attachment, combine the remaining 8 tablespoons of room temperature butter with your cooled browned butter. Add the 80 grams of brown sugar and 220 grams of white sugar. Mix on medium speed for 3-4 minutes until the mixture is visibly light and fluffy. This creaming process incorporates air, which is crucial for a tender cookie.
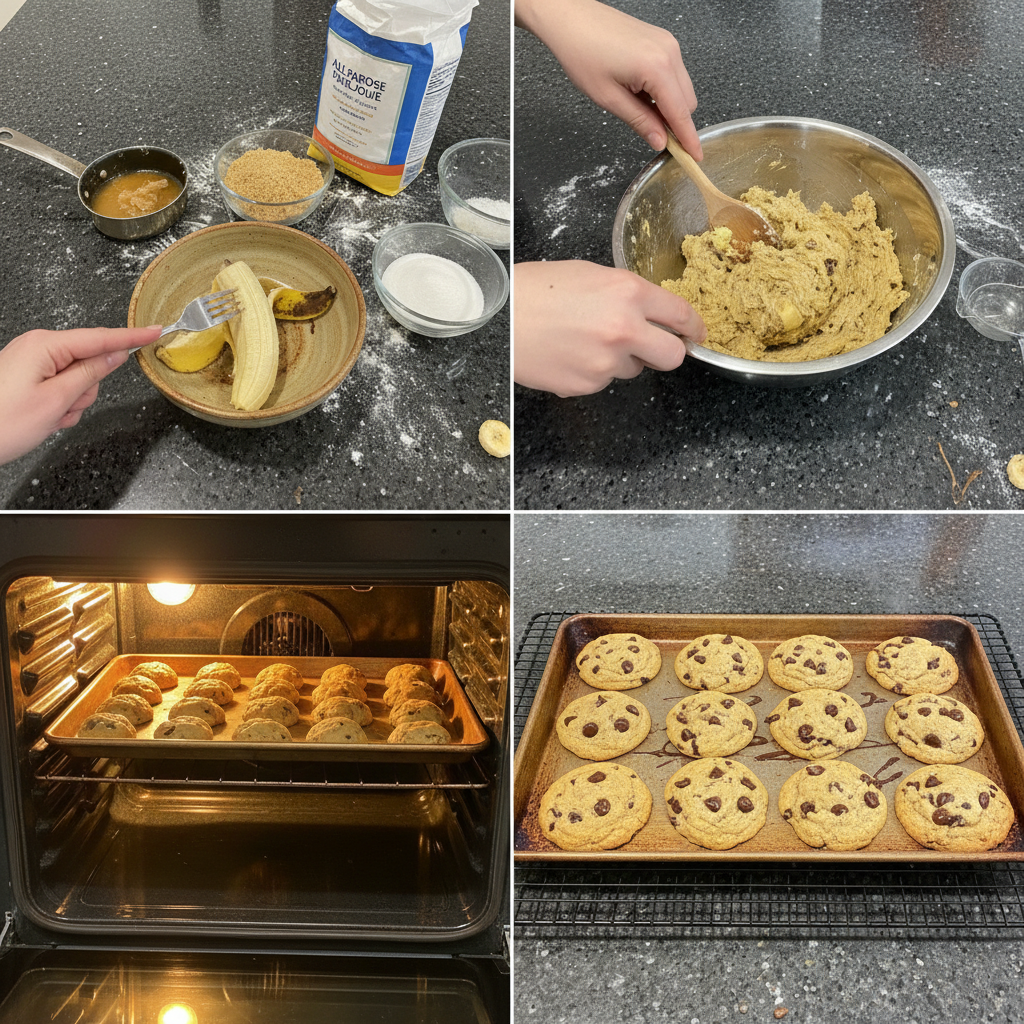
Prepare Banana Mixture
While your mixer is working its magic, take your ripe banana and mash it together with 1/2 teaspoon of cinnamon until it’s a completely smooth purée. I can’t stress this enough: no chunks! Mashing the cinnamon directly into the banana ensures that delicious spice is fully integrated and clinging to every bit of banana, making its flavor truly noticeable in the final cookie.
Incorporate Wet Ingredients
Now, add your smooth banana mixture and 1 teaspoon of vanilla extract to the mixer. Continue mixing on medium speed for another 2-3 minutes until everything is fully incorporated and beautifully blended.
Whisk Dry Ingredients
In a separate bowl, whisk together the 330 grams of all-purpose flour, 2 teaspoons of baking powder, and 1 teaspoon of kosher salt. Whisking ensures these ingredients are evenly distributed before adding them to the wet mixture.
Combine Wet & Dry
Stop your mixer. Gradually add the dry ingredients to the wet cookie dough, using a spatula to gently fold everything together until just combined and smooth. Be careful not to overmix here, as overmixing can lead to tough cookies. Once the flour mixture is mostly incorporated, add your chopped 70% chocolate. Mix briefly, just until the chocolate is evenly distributed throughout the fluffy dough.
Scoop & Prepare for Baking
Line a large baking sheet with parchment paper. Using a kitchen scale for precision, measure out nine even 4-ounce scoops of cookie dough. Place them evenly on the prepared baking sheet, ensuring you leave plenty of space between each one for spreading.
Bake
Bake your cookies at 375°F for 13-14 minutes. Here’s my expert trick: take them out when they still look slightly underdone in the center. Trust me on this! The residual heat will continue to cook them, giving you that perfect chewy center.
Pan-Bang & Swirl
Immediately upon removing the baking sheet from the oven, gently but firmly smack the hot baking sheet on the counter a few times. This pan-banging technique helps to flatten the cookies slightly and create those gorgeous crinkly tops. While the cookies are still warm and pliable, use a slightly larger bowl or cup to gently swirl around the edges of each cookie. This helps to form them into beautifully perfect circles. Finish with a generous sprinkle of flaky salt on top for a delightful textural and flavor contrast.
Cool & Enjoy
Allow the cookies to cool on the baking sheet for at least 15 minutes before devouring them. This cooling time allows them to set properly and finish cooking from the residual heat, ensuring they hold their shape and have that ideal chewy texture.
Perfecting Your Brown Butter Banana Cookies: Advanced Techniques & Troubleshooting
Let’s dive deeper into some techniques and solutions to ensure your Brown Butter Banana Cookies are consistently perfect every time.
Why Combining Browned & Room-Temperature Butter is Superior
You might wonder why this recipe calls for a unique combination of browned butter and room-temperature butter. It’s truly the best of both worlds for both flavor and texture. Brown butter brings an incredible deep, toasty flavor to the cookies, adding layers of nutty complexity that plain butter simply can’t. However, if you were to use only browned butter, it would be too warm and liquidy after browning, or it would seize if cooled completely. Neither scenario is ideal for creaming effectively.
By combining the rich brown butter with additional room-temperature butter, we achieve a balance. The room-temperature butter provides the perfect consistency for creaming with the sugars, allowing for proper aeration of the dough. This aeration is crucial for a light, fluffy dough that spreads just right in the oven, leading to flavorful cookies with those coveted crispy edges and a wonderfully chewy center. This hybrid approach ensures you get all the incredible flavor benefits of brown butter without compromising the textural integrity of your cookies.
Troubleshooting Common Cookie Issues
Even seasoned bakers encounter cookie challenges now and then. Here’s how to troubleshoot some common issues you might face with your Brown Butter Banana Cookies.
Cookies Not Spreading Enough (Puffy Cookies): If your cookies are coming out too thick and not spreading, there are a few likely culprits. Your oven might be too hot, causing the edges to set too quickly. The dough could be too cold, making it less likely to spread. Too much flour, especially if you’re using volumetric measurements, or an overly active baking powder can also contribute. Make sure you are pan-banging the cookies firmly and immediately after baking. To fix, check your oven temperature with a thermometer, let your dough warm up slightly to room temperature before baking, always weigh your ingredients (especially flour!) with a kitchen scale for accuracy, and give those baking sheets a good smack on the counter.
Cookies Spreading Too Much (Flat, Greasy Cookies): On the flip side, if your cookies are spreading too much and ending up thin and greasy, the butter might have been too warm or even melted before creaming. Not enough flour, insufficient leavening, or an oven that’s running too cool can also cause this. Ensure your butter is at a true room temperature (soft but not melted) before you start. Always measure your flour accurately by weight. If your dough feels very soft or warm before baking, a quick chill in the refrigerator for 15-30 minutes can help prevent excessive spreading.
Dark Bottoms: Nobody wants burnt bottoms on their delicious cookies! This can happen if you’re using dark-colored baking sheets, which absorb more heat, or if your oven has hot spots, or if the cookies are baking too long on a direct lower rack. To avoid this, always use light-colored baking sheets lined with parchment paper. Consider baking on a higher rack, or rotate your baking sheets halfway through the baking time. It’s also a good idea to check your oven’s temperature calibration with an oven thermometer.
Pro Tips & Common Mistakes to Avoid
Baking is an art and a science, and these pro tips will help you consistently achieve perfect Brown Butter Banana Cookies. I’ll also highlight common pitfalls so you can steer clear of them.
Pro Tips for Perfect Brown Butter Banana Cookies
- Precision is Key: In baking, accuracy is paramount. Always measure your ingredients by weight (grams) using a kitchen scale, especially flour and sugar. This eliminates variability and ensures consistent, reliable results every single time.
- Don’t Skip the Rum: While optional, that small amount of dark rum truly works wonders. It significantly enhances the banana flavor without any alcoholic taste, as the alcohol bakes off, leaving only delicious depth.
- Master the Mash: Mash your ripe banana with cinnamon until it’s a completely smooth purée. This prevents unwanted chunks in your cookies and ensures the banana and cinnamon flavor is evenly distributed throughout.
- Embrace the Underbake: This is a game-changer! Take your cookies out of the oven when they still look slightly underdone in the center. The residual heat will continue to cook them as they cool, guaranteeing a wonderfully chewy center and prolonged freshness.
- The Pan-Bang & Swirl: Don’t skip these steps! Immediately after baking, smack the hot baking sheet on the counter a few times for those desirable crinkly tops. Then, use a bowl or cup to swirl around the edges of the still-warm cookies to form perfect circles.
- Flaky Salt Finish: A sprinkle of flaky salt (like Maldon) on top of the warm cookies is absolutely crucial. It provides a delightful textural contrast and perfectly balances the sweetness with a touch of savory, enhancing the overall flavor.
Common Mistakes to Avoid
- Overbaking: This is one of the most common mistakes. Overbaking leads to hard, dry, crispy cookies, rather than the desired crispy edges and chewy center. Always watch for the visual cues of being slightly underdone.
- Chunky Banana: Not mashing the banana into a smooth purée will result in uneven texture and distribution of banana flavor in your cookie dough. Take the time to get it smooth!
- Overmixing Dry Ingredients: Once you add the flour, mix just until combined. Overmixing develops too much gluten, which can lead to tough, dense cookies.
- Skipping the Pan-Bang: If you skip pan-banging, your cookies will remain overly puffy instead of developing those lovely flatter, crinkly tops that make them so appealing.
- Volumetric Measurements: Relying on cups instead of grams for ingredients like flour can lead to inconsistent results. The way flour is packed into a cup can vary wildly, affecting the final texture of your cookies.
Serving & Storage
Now that you’ve baked these incredible Brown Butter Banana Cookies, let’s talk about the best ways to enjoy and store them.
Serving Ideas
These Brown Butter Banana Cookies are a versatile dessert or snack that can be enjoyed in many ways. I highly recommend eating them freshly baked and warm, especially with that sprinkle of flaky salt on top—it truly melts into perfection.
For a classic treat, pair them with a tall, cold glass of milk. If you’re feeling indulgent, a scoop of vanilla ice cream alongside a warm cookie is heavenly. They also make a fantastic companion to your morning coffee or an afternoon cup of tea. These cookies are perfect for any occasion, whether it’s a casual potluck, a celebratory party, or simply a comforting homemade treat to brighten your day.
Storage and Make-Ahead
Proper storage is key to keeping your Brown Butter Banana Cookies delicious, and make-ahead options can simplify your baking.
Storing Baked Cookies: Once fully cooled, store your baked cookies in an airtight container at room temperature. They will remain wonderfully fresh and chewy for up to 3-4 days. I advise against refrigerating baked cookies, as the cold air can dry them out and make them hard.
Reheating Leftover Cookies: If you want to recapture that fresh-from-the-oven warmth and gooey chocolate, simply warm a leftover cookie briefly in the microwave for 10-15 seconds. Alternatively, you can pop them into a low oven (around 300°F or 150°C) for a few minutes until they are soft and warm again.
Make-Ahead Options (Dough): This recipe is excellent for make-ahead baking! You can prepare the dough and chill it overnight or for up to 3 days in the refrigerator. Chilling the dough actually deepens the flavors and can even improve the texture of the baked cookies.
Freezing Dough: For ultimate convenience, you can freeze the cookie dough. Simply scoop out the dough balls onto a baking sheet lined with parchment paper and freeze until solid. Once frozen, transfer the dough balls to a freezer-safe zip-top bag or container. They will keep well in the freezer for up to 1-2 months. When you’re ready to bake, you can bake them directly from frozen—just add a few extra minutes (usually 2-4 minutes) to the baking time.
Conclusion
I hope you’re as excited as I am about these incredible Brown Butter Banana Cookies. With their crispy edges, perfectly chewy centers, and the delightful depth added by the hint of dark rum, they truly are a standout recipe. By following my detailed steps and incorporating the expert tips I’ve shared, I’m confident that even beginner bakers can achieve amazing, bakery-worthy results.
Don’t hesitate to give this recipe a try, experiment with different chocolate variations, and perhaps even add other mix-ins to make them your own. I encourage you to share your creations with friends and family, or simply savor them yourself. Feel free to print this recipe for your collection or explore other delicious baking recipes on my site!
FAQ
Can I freeze the cookie dough, and how do I bake it from frozen?
Yes, absolutely! You can freeze the cookie dough. Scoop the dough into balls, place them on a parchment-lined baking sheet, and freeze until solid. Then transfer them to a freezer-safe bag or container. To bake from frozen, simply place the dough balls on a baking sheet and add an extra 2-4 minutes to the baking time.
How can I prevent the bottoms of my brown butter banana cookies from getting too dark?
To prevent dark bottoms, always use light-colored baking sheets lined with parchment paper. If you notice your oven has hot spots, try rotating your baking sheets halfway through baking. You might also consider baking on a slightly higher rack or checking your oven’s temperature calibration.
Why is it recommended to measure ingredients by weight (grams) in baking?
Measuring ingredients by weight, especially flour and sugar, provides far more accuracy and consistency compared to using volumetric cups. The way ingredients are packed into a cup can vary, leading to inconsistent results. Weighing ensures you always use the exact amount specified in the recipe.
What’s the best way to store these brown butter banana cookies to keep them fresh?
Once completely cooled, store your baked cookies in an airtight container at room temperature. They will stay fresh and delicious for 3-4 days. Avoid refrigerating baked cookies, as this can dry them out.
Are these cookies eggless, and what impact does that have on the texture?
Yes, these are eggless cookies! The absence of eggs contributes to a distinctively chewy center and a wonderfully tender crumb. The ripe banana and the combination of butters provide the necessary moisture and binding agents, resulting in a unique and delightful texture.
What types of chocolate are best for brown butter banana cookies?
I highly recommend using 70% chocolate, chopped into thin, almost shattery pieces. This provides an intense chocolate flavor and melts beautifully throughout the cookie. However, you can certainly use other chocolate variations like semi-sweet chocolate chips or chunks, just note the texture of the melted chocolate will be slightly different.
What kind of banana should I use for these cookies?
For the best flavor and moisture, you should use very ripe bananas. Look for bananas with plenty of brown spots on the peel; these are much sweeter and softer, which is crucial for achieving the perfect banana flavor and texture in your cookies.
Best Brown Butter Banana Cookies
Ingredients
Equipment
Method
- Preheat your oven to 375°F (190°C).
- In a small saucepan, melt 8 tablespoons of the salted butter over medium-low heat. Stir frequently. Continue stirring until the milk solids turn a beautiful golden brown and the butter itself has a deep, almost dark golden-brown color with a wonderfully nutty aroma (this usually takes about 2-3 minutes after the fizzing starts). Immediately remove from heat, pour into a separate bowl, and whisk gently to cool slightly.
- In the bowl of a stand mixer fitted with the paddle attachment, combine the remaining 8 tablespoons of room temperature butter with your cooled browned butter. Add the 80 grams of brown sugar and 220 grams of white sugar. Mix on medium speed for 3-4 minutes until the mixture is visibly light and fluffy.
- While your mixer is working, mash your ripe banana together with 1/2 teaspoon of cinnamon until it's a completely smooth purée, ensuring no chunks. If using, add 1-2 teaspoons of dark rum to the mashed banana mixture.
- Now, add your smooth banana mixture and 1 teaspoon of vanilla extract to the mixer. Continue mixing on medium speed for another 2-3 minutes until everything is fully incorporated and beautifully blended.
- In a separate bowl, whisk together the 330 grams of all-purpose flour, 2 teaspoons of baking powder, and 1 teaspoon of kosher salt.
- Stop your mixer. Gradually add the dry ingredients to the wet cookie dough, using a spatula to gently fold everything together until just combined and smooth. Be careful not to overmix. Once the flour mixture is mostly incorporated, add your chopped 70% chocolate. Mix briefly, just until the chocolate is evenly distributed throughout the fluffy dough.
- Line a large baking sheet with parchment paper. Using a kitchen scale for precision, measure out nine even 4-ounce scoops of cookie dough. Place them evenly on the prepared baking sheet, ensuring you leave plenty of space between each one for spreading.
- Bake your cookies at 375°F (190°C) for 13-14 minutes. Take them out when they still look slightly underdone in the center.
- Immediately upon removing the baking sheet from the oven, gently but firmly smack the hot baking sheet on the counter a few times. This helps to flatten the cookies slightly and create those gorgeous crinkly tops. While the cookies are still warm and pliable, use a slightly larger bowl or cup to gently swirl around the edges of each cookie to form them into beautifully perfect circles. Finish with a generous sprinkle of flaky salt on top for a delightful textural and flavor contrast.
- Allow the cookies to cool on the baking sheet for at least 15 minutes before devouring them.


