 Skip to content
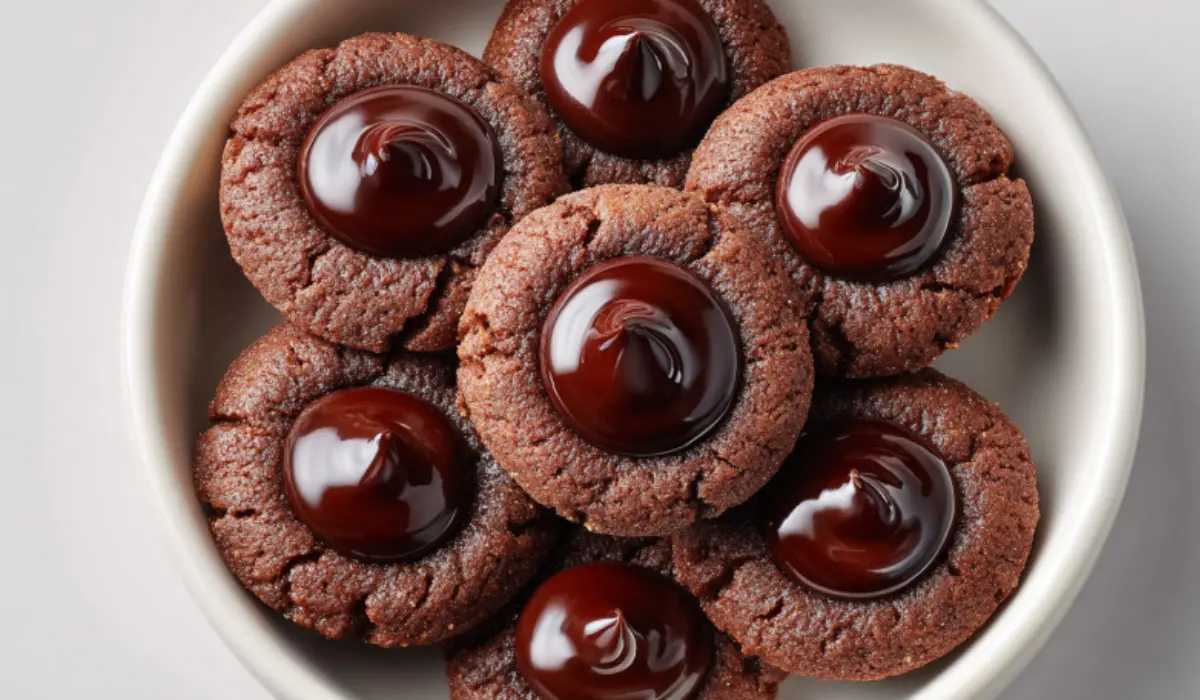
Rich, fudgy, and filled with silky ganache, these chocolate thumbprint cookies are the treat you’ll want on every holiday tray. Each bite combines a tender cocoa cookie with a glossy chocolate center that looks as good as it tastes. The best part? They’re simple to make with pantry staples, and you’ll learn a few tricks that guarantee perfect indents and smooth, set ganache every time. If you’ve been searching for the ultimate chocolate thumbprint cookies, this version brings both flavor and ease together.
Table of Contents
Why You’ll Love This Recipe
- Quick to make: the dough comes together in minutes, no complicated steps.
- Simple ingredients: you’ll find everything in a standard pantry, no fancy extras needed.
- Perfect texture: tender cocoa cookie with a soft, glossy ganache that sets beautifully.
- Holiday-ready: ideal for cookie swaps, gifting, or adding variety to your dessert table.
- Crowd-pleaser: rich chocolate flavor that appeals to both kids and adults.
Unlike many versions, this recipe gives you both clear baking cues and pro tips so your cookies look bakery-perfect every time.
Ingredients Needed
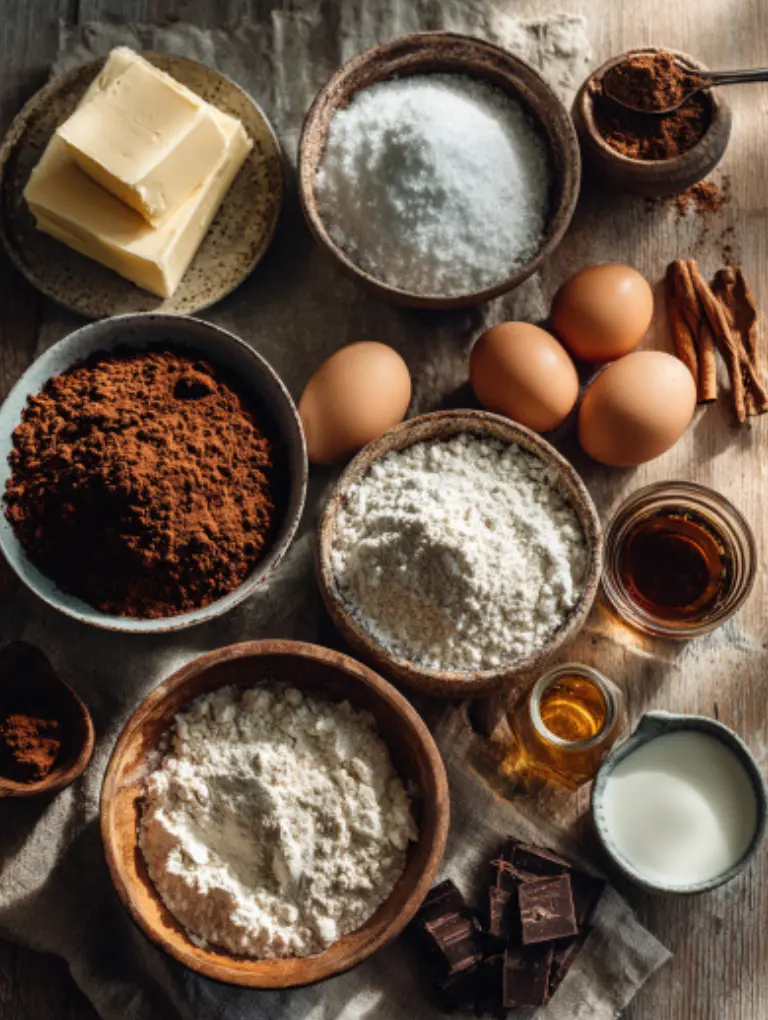
For the Chocolate Cookie Base
- ¾ cup unsalted butter, softened: room temperature helps it cream smoothly.
- 1 cup powdered sugar: keeps the dough soft and tender.
- 1 large egg: binds the dough and adds richness.
- 1 teaspoon vanilla extract: rounds out the chocolate flavor.
- 2 cups all-purpose flour: gives structure.
- ¼ cup unsweetened cocoa powder: natural cocoa works, Dutch process adds deeper flavor.
- ¾ teaspoon kosher salt: balances sweetness.
- ½ teaspoon ground cinnamon: subtle warmth that makes the chocolate pop.
- Sanding sugar: gives the outside a sparkle and crunch.
For the Ganache Filling
- ¼ cup heavy whipping cream: creates a smooth, shiny filling.
- 2 ounces semi-sweet chocolate, chopped: use bars for the silkiest ganache.
Optional Toppings
- Flaky sea salt for contrast
- Crushed peppermint for a festive twist
- Sprinkles for color
- Toasted nuts for crunch
Notes & Substitutions
- Butter: Dairy-free stick margarine works but the cookies may spread slightly more.
- Flour: A 1-to-1 gluten-free blend can be used, though cookies may bake a bit more delicate.
- Chocolate: Semi-sweet balances best, but dark chocolate creates a richer filling. Chocolate chips can work in a pinch, though chopped bars melt more evenly.
- Cocoa type: Natural cocoa works, and Dutch process adds deeper flavor, as Iowa State University Extension explains.
- Cinnamon: Optional, but it adds warmth without being overpowering.
Equipment
Stand mixer or hand mixer, cookie scoop, parchment paper, wire rack, small saucepan, heatproof bowl, kitchen scale.
How to Make Chocolate Thumbprint Cookies
1. Prepare your baking setup
Preheat the oven to 350°F (175°C). Line two baking sheets with parchment paper. Have a wire rack ready for cooling.
2. Mix the dough
In a large bowl, beat softened butter and powdered sugar on medium speed until fluffy, about 3–4 minutes. Add the egg and vanilla extract, mixing until fully combined.
Tip: Creaming adds air for a tender cookie texture.
In a separate bowl, whisk together flour, cocoa powder, salt, and cinnamon. With the mixer on low, slowly add the dry mixture to the wet ingredients until a soft dough forms.
Visual cue: The dough should come together without dry streaks but remain slightly soft.
3. Shape and indent
Roll dough into 1¼-inch balls. Roll each ball in sanding sugar for sparkle. Place 2 inches apart on prepared sheets.
Using your thumb or the back of a ½ teaspoon, press a ½-inch wide, ½-inch deep indent into the center of each.
Pro tip: If edges crack, gently pinch them back together for a smooth finish.
4. Bake
Bake both sheets at once, rotating halfway, for 8–10 minutes until the cookies are set but not overly firm.
Check: Cookies should look slightly puffed and dry on top but still soft to the touch.
5. Reinforce the indents
Let cookies cool on the sheet for 10–15 minutes. Re-press the centers gently to deepen the wells if needed.
This ensures plenty of space for the ganache filling.
6. Make the ganache
Heat heavy cream in a small saucepan (or microwave-safe bowl) until steaming but not boiling. Pour over chopped semi-sweet chocolate and let sit for 2 minutes. Stir until smooth and glossy.
Mini-tip: Add 1 teaspoon butter for extra shine if desired.
7. Fill and set
Spoon or pipe about 1 teaspoon ganache into each cooled cookie. Chill for 10 minutes so the ganache sets before serving.
Pro Tips & Troubleshooting
Expert Tips
- Weigh ingredients: Using grams gives consistent results and prevents dry or overly sticky dough.
- Room temperature butter and egg: They mix more evenly, creating a smoother dough.
- Scoop consistently: Use a cookie scoop so all cookies bake evenly.
- Re-indent after baking: Pressing the centers again while warm guarantees room for plenty of ganache.
- Set ganache correctly: Let it cool slightly before filling so it’s thick enough to hold shape but still pourable.
Common Mistakes to Avoid
- Overmixing the dough: Leads to tough cookies, notes Iowa State University Extension. Mix just until the flour disappears.
- Using overheated cream: If cream boils, it can cause the ganache to split. Heat only until steaming.
- Overbaking: The cookies should still feel soft when removed. They firm up as they cool.
- Shallow indents: If the indent is too small, the ganache won’t sit neatly inside.
Quick Tricks
- If the dough cracks badly, roll each ball again right before indenting to reduce splits.
- For shiny ganache, add a teaspoon of corn syrup or butter while stirring.
- If your ganache is too runny, refrigerate for a few minutes until it thickens slightly.
Serving, Storage & Variations
Serving Ideas
- Sprinkle with flaky sea salt for a sweet-salty bite.
- Add crushed peppermint candy for a festive holiday cookie tray, or bake Halloween chocolate chip cookies for party-ready variety.
- Dust lightly with espresso powder for a mocha twist.
- Pair with coffee, hot chocolate, a glass of milk, a double chocolate chip frappuccino, or pumpkin pancakes for a cozy menu.
Storage & Freezing
- Room temperature: Store cookies in an airtight container for up to 5 days.
- Refrigerator: Extend freshness to about a week, though the ganache will firm up.
- Freezer: Freeze unfilled cookies for up to 2 months. Fill with ganache after thawing for best results. You can also freeze the dough balls before baking for up to 3 months, and read about edible cookie dough if you want a safe no-bake option, and follow guidance from the USDA’s FoodKeeper app for storage best practices.
Reheating
- To refresh day-old cookies, warm briefly in a 300°F oven for 3–4 minutes. This softens the cookie base without melting the ganache.
Variations
- Peppermint Chocolate Thumbprints: Stir crushed candy cane into the ganache or sprinkle on top.
- Orange Zest Twist: Add 1 teaspoon orange zest to the dough for a citrus-chocolate pairing.
- Mocha Thumbprints: Add 1 teaspoon espresso powder to the dough or ganache, or try Halloween crinkle cookies for a bold cocoa look.
- Coconut Pecan Style: Use a coconut-pecan topping (German chocolate inspired) instead of ganache.
- White Chocolate Center: Replace the ganache with melted white chocolate for contrast.
Nutritional Information
Each cookie (about 24 per batch) provides the following:
| Nutrient | Amount per cookie |
|---|---|
| Calories | 135 |
| Fat | 8 g |
| Carbohydrates | 15 g |
| Protein | 2 g |
| Fiber | 1 g |
| Sugar | 9 g |
| Saturated Fat | 5 g |
| Sodium | 75 mg |
Notes
- Values are approximate and based on standard ingredient brands.
- Using dark chocolate or dairy-free alternatives will slightly adjust the numbers.
- If you make swaps or add toppings, use a nutrition calculator like Cronometer or MyFitnessPal to double-check your values.
- These cookies include cocoa, a source of flavanols that may support heart health when enjoyed in moderation, according to the Harvard T.H. Chan School of Public Health. The American Heart Association notes ongoing research on cocoa flavanols and recommends enjoying chocolate in moderation.
Conclusion
These chocolate thumbprint cookies strike the perfect balance of rich cocoa flavor and a smooth, glossy ganache center. They’re easy enough for a weekday bake yet elegant enough for holiday trays or gift boxes. With simple ingredients, clear steps, and a few pro tips, you’ll end up with bakery-style cookies that impress every time.
If you try this recipe, leave a comment and star rating below your feedback helps other bakers too. Share your batch on Pinterest or Facebook so friends can enjoy them as well.
What variation will you try first peppermint, mocha, or classic sea salt? Let us know in the comments!
Frequently Asked Questions
Can I use Dutch process cocoa instead of natural cocoa?
Yes, Dutch process cocoa gives the cookies a deeper, more intense chocolate flavor. Natural cocoa works fine too, but the flavor is lighter.
Why did my thumbprint cookies crack and how do I prevent it next time?
Cracks usually happen when the dough is too cold or too dry. Make sure your butter is softened, don’t overpack the flour, and roll each ball smoothly before pressing the indent.
How long does ganache take to set inside the cookies?
At room temperature, ganache usually sets in 30 minutes to 1 hour. To speed things up, refrigerate the cookies for about 10 minutes after filling.
Can I freeze the dough or the baked cookies with ganache?
Yes! Freeze unbaked dough balls for up to 3 months, then bake straight from frozen (adding 1–2 minutes to the bake time). Baked cookies can also be frozen before filling. If freezing filled cookies, keep them layered with parchment in an airtight container.
What chocolate works best for the ganache, chips or bars?
Chopped chocolate bars melt more smoothly and give a shinier finish. Chocolate chips can work, but they often contain stabilizers that make the ganache slightly thicker.
How do I make these gluten free or dairy free?
Use a 1-to-1 gluten-free flour blend in place of all-purpose flour and swap butter and cream for dairy-free alternatives. The texture will be a little softer but still delicious.
How big should the indent be and when should I re-indent?
Each indent should be about ½-inch wide and ½-inch deep. Press once before baking and again while the cookies are still warm to make room for the filling.
Chocolate Thumbprint Cookies
Tender cocoa cookies filled with silky chocolate ganache, these thumbprint cookies are festive, easy to bake, and perfect for gifting, holiday trays, or anytime chocolate cravings strike.
24
cookies20
minutes10
minutes135
kcalIngredients
- For the Cookies
¾ cup unsalted butter, softened
1 cup powdered sugar
1 large egg
1 teaspoon vanilla extract
2 cups all-purpose flour
¼ cup unsweetened cocoa powder
¾ teaspoon kosher salt
½ teaspoon ground cinnamon
Sanding sugar
- For the Ganache
¼ cup heavy whipping cream
2 ounces semi-sweet chocolate, chopped
- Optional Toppings
Flaky sea salt
Crushed peppermint
Sprinkles
Toasted nuts
Directions
- Preheat oven to 350°F (175°C). Line baking sheets with parchment.
- Beat butter and powdered sugar until fluffy. Mix in egg and vanilla.
- Whisk flour, cocoa, salt, and cinnamon. Add to butter mixture, mix until dough forms.
- Roll dough into 1¼-inch balls, coat with sanding sugar, and place 2 inches apart.
- Press a ½-inch wide, ½-inch deep indent into each ball.
- Bake for 8–10 minutes, rotating sheets halfway.
- Cool for 10–15 minutes, then re-indent centers if needed.
- Heat cream until steaming, pour over chopped chocolate, rest 2 minutes, stir smooth.
- Spoon or pipe ganache into cookies. Chill 10 minutes before serving.
Notes
- Use chocolate bars instead of chips for smoother ganache.
- Dutch process cocoa makes a richer flavor; natural cocoa gives a lighter taste.
- Roll dough twice if cracks form when pressing indents.
- Freeze unbaked dough balls for up to 3 months.
Nutrition Facts
- Calories: 135kcal
- Fat: 8g
- Saturated Fat: 5g
- Sodium: 75mg
- Carbohydrates: 15g
- Fiber: 1g
- Sugar: 9g
- Protein: 2g


