Skip to content
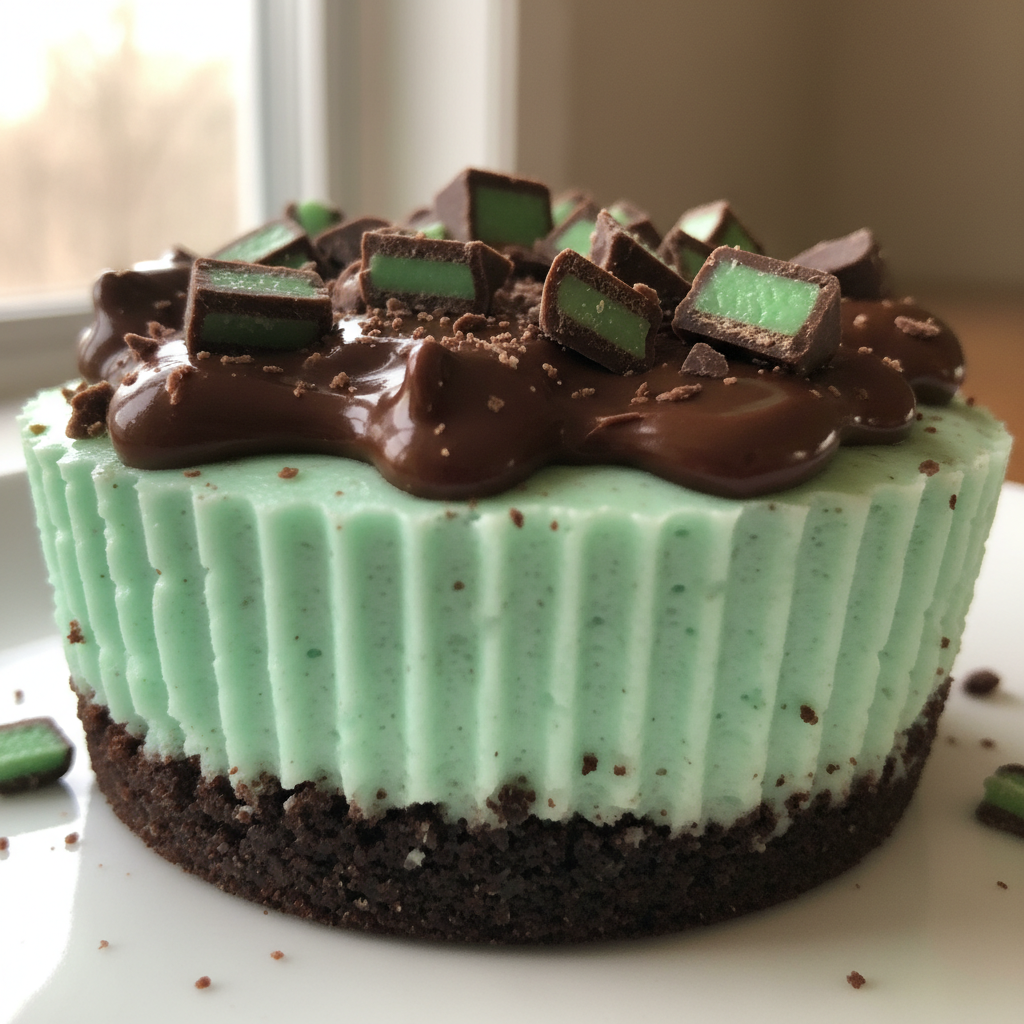
 There’s something truly magical about a dessert that looks impressive but is secretly simple to make. Today, I am thrilled to share my absolute favorite recipe for Andes Mint Mini Cheesecakes. These individual treats are perfect for any occasion, from casual gatherings to elegant holiday spreads, and they truly stand out with their unique, deeply integrated mint chocolate flavor. Get ready to bake a batch of these irresistible, creamy delights that will have everyone asking for the recipe. This comprehensive guide ensures a delightful baking experience for everyone, promising a truly decadent treat.
Why You’ll Love This Recipe
I know you will fall head over heels for this Andes Mint Mini Cheesecake recipe, and here is why. My unique twist incorporates finely crushed Andes mints directly into the velvety cream cheese batter. This ensures a consistent, integrated mint flavor throughout every bite, offering a subtle textural contrast that plain mint extract alone cannot achieve. Instead of a simple melted chocolate topping, I elevate these minis with a rich, glossy mint chocolate ganache. This ganache creates a smooth, stable, and visually stunning finish with a superior mouthfeel, setting beautifully to complete the decadent experience. These mini cheesecakes are the perfect party dessert, offering ideal portion control for any gathering. They are also a fantastic holiday dessert, especially as a festive St. Patrick’s Day treat. They perfectly satisfy that sweet tooth, are surprisingly easy to make, and always impress with their creamy, mint-flavored, chocolatey goodness.
Ingredients Needed
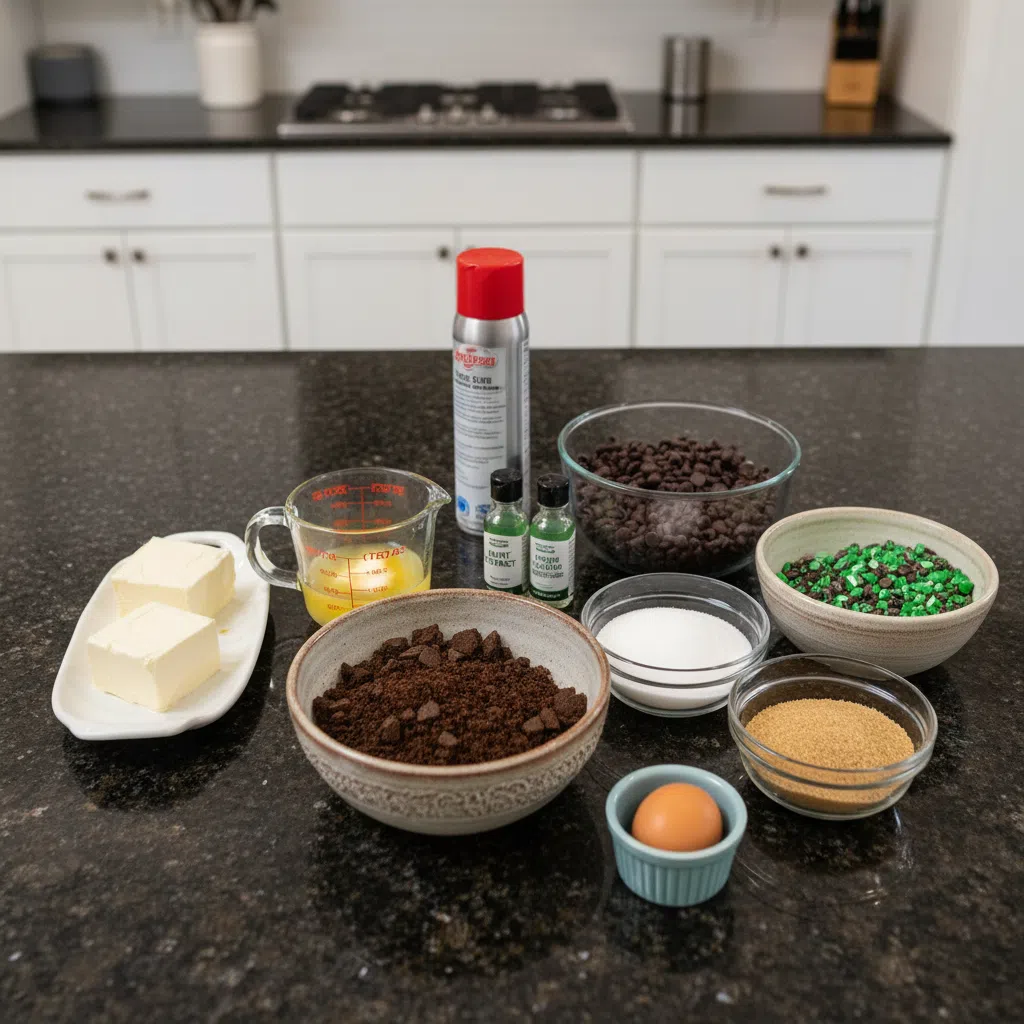
- Nonstick baking spray
- 1¼ cups chocolate graham cracker crumbs
- 2 tablespoons sugar
- 4 tablespoons butter melted
- 2 8 ounce boxes of cream cheese softened
- ¼ cup plus 2 tablespoons sugar
- 1 egg
- 1 teaspoon mint extract
- 4 drops green food coloring
- 1¼ cups chocolate chips
- 15 Andes mints coarsely chopped
Ingredient Notes & Substitutions
- Cream Cheese: It is absolutely critical to use full-fat cream cheese that is at room temperature. This ensures your cheesecake batter will be silky smooth and free of any lumps, resulting in that perfectly creamy texture we all crave.
- Chocolate Graham Crackers: For the most delicious chocolate crust, I recommend using chocolate graham cracker crumbs. If you are making your own from whole crackers, you will need approximately 8-9 full graham crackers to get 1¼ cups of crumbs.
- Mint Extract: If you find yourself without mint extract, you can use crème de mint as a 1:1 substitute. It works beautifully to achieve that vibrant mint flavor.
- Andes Mints: We use Andes mints in two ways for this recipe. A portion will be finely crushed and folded into the cheesecake batter for infused flavor, and the remaining will be coarsely chopped for garnishing the top, adding both taste and visual appeal.
- For the Mint Chocolate Ganache: For that gorgeous, glossy ganache topping, you will need a small amount of heavy cream, typically 2-3 tablespoons, in addition to the listed chocolate chips. Make sure to have it on hand!
- Green Food Coloring: This is entirely optional, but I love how just a few drops of green food coloring enhance the visual appeal, making these Andes Mint Mini Cheesecakes even more festive.
How to Make Andes Mint Mini Cheesecakes
Step 1: Prep & Crust
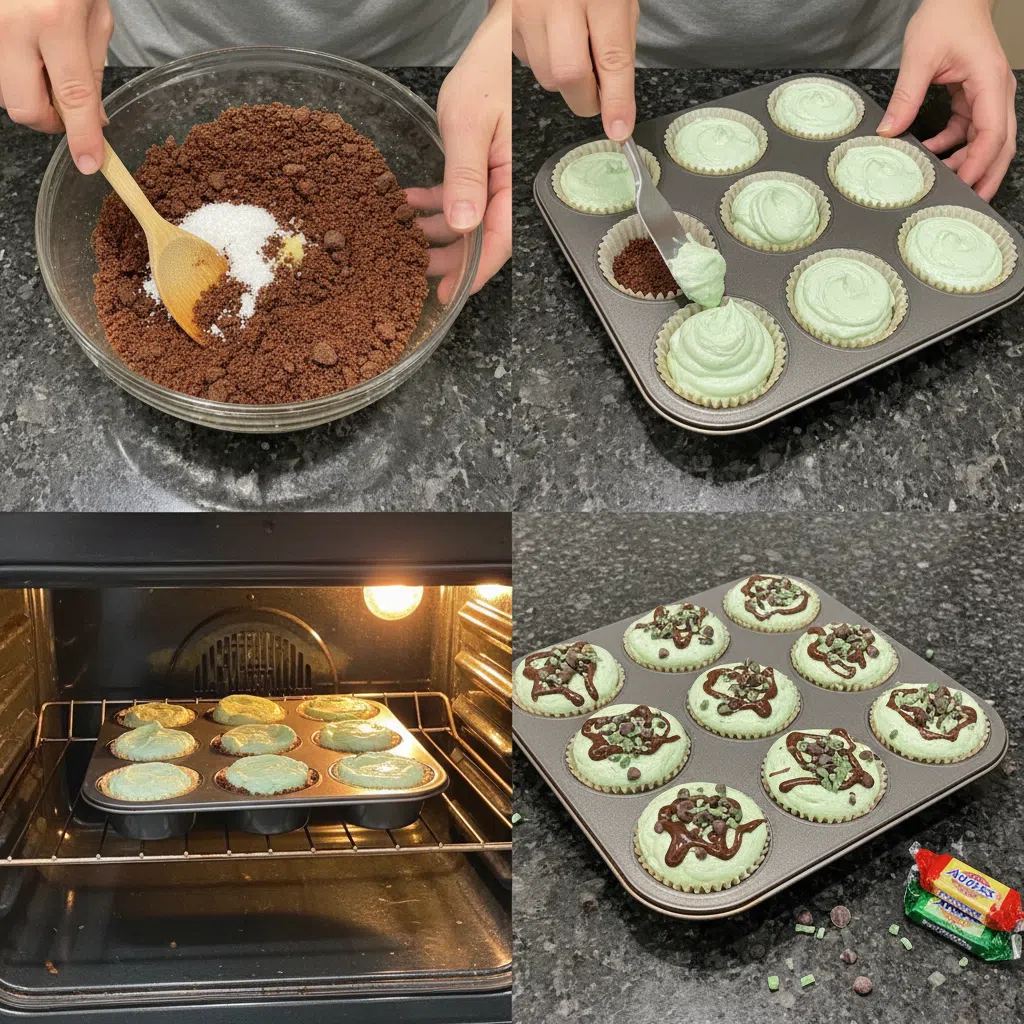
First, preheat your oven to 325 degrees F and generously spray your mini cheesecake pan with nonstick baking spray. In a medium bowl, combine the chocolate graham cracker crumbs, 2 tablespoons of sugar, and the melted butter. Mix these fragrant crumbs until they are well combined and resemble moist sand. Divide this mixture evenly among the cavities of your mini cheesecake pan. Press the crumbs down firmly and evenly with the back of a spoon to form a stable chocolate graham cracker crust base. This firm pressing is key for a crust that holds together beautifully.
Step 2: Cheesecake Filling
In your stand mixer, using the paddle attachment, blend the softened full-fat cream cheese and ¼ cup plus 2 tablespoons of sugar until the mixture is beautifully smooth and creamy. Remember, using room temperature ingredients is an expert tip for a lump-free batter. Next, add the egg, mint extract, and green food coloring, mixing just until everything is incorporated on low speed. This is where our unique twist comes in: gently fold in a portion of the finely crushed Andes mints into the cream cheese batter. Be careful not to over-mix the cream cheese mixture after adding the egg, as this can introduce too much air, which often leads to unwanted cracks in your finished cheesecake. This process is how we achieve a silky mint cheesecake filling.
Step 3: Bake & Cool
Spoon the cream cheese mixture over the chocolate graham cracker crusts, dividing it evenly among the cavities. Bake the mini cheesecakes for 20 minutes. Ovens can vary, so look for visual cues: the edges should be set, but the center should still have a slight jiggle. If they seem too jiggly, you can extend the baking time by a few minutes. It is a common mistake to open the oven door while they are baking, so resist the urge! Once baked, turn off the oven, prop open the oven door with a wooden spoon, and allow the cheesecakes to cool down slowly in the oven for about 5-10 minutes. This slow cooling method helps prevent cracks.
Step 4: Chill Thoroughly
After the initial slow cool in the oven, remove the mini cheesecakes from the oven and allow them to come to room temperature on a wire rack. Then, transfer them to the refrigerator. Chilling for several hours or even overnight before removing them from the pan is absolutely crucial. This optimal chilling time ensures proper setting, allows the flavors to fully develop, and makes for incredibly easy removal from the pan, giving you firm, delicious Andes Mint Mini Cheesecakes.
Step 5: Make and Top with Mint Chocolate Ganache
Now for the decadent topping! Instead of just melted chocolate chips, we are making a rich, glossy mint chocolate ganache. In a microwave-safe bowl, combine the chocolate chips and 2-3 tablespoons of heavy cream. Heat in 30-second intervals, stirring well after each, until the mixture is smooth and fully melted. For an extra burst of minty flavor, you can stir in a tiny drop of mint extract. Allow the ganache to cool slightly until it is still pourable but starting to thicken. Carefully spoon a generous amount of this luscious ganache over each chilled mini cheesecake, letting it cascade down the sides slightly. While the ganache is still wet, garnish each mini cheesecake with the remaining coarsely chopped Andes mints for that ultimate mint chocolate appeal.
Choosing Your Mini Cheesecake Pan & The Perfect Ganache
Choosing Your Mini Cheesecake Pan & Baking Tips
Selecting the right pan is key to perfect mini cheesecakes. A dedicated mini cheesecake pan with removable bottoms is fantastic because it makes for incredibly easy removal. Simply run a thin knife around the edge before pushing up the bottom. If you are using a standard cupcake pan, I highly recommend using cupcake liners. They will make removal much easier and protect your pan. If using a cupcake pan with liners, you do not need to spray the pan itself. While the baking time is generally similar, mini cheesecakes in a standard cupcake pan might require a slight adjustment, possibly baking for 22-25 minutes. When it comes to baking settings, I generally recommend using the regular bake setting in your oven. It provides a more even and gentle heat, which is ideal for cheesecakes, preventing them from baking too quickly or cracking.
The Secret to the Perfect Mint Chocolate Ganache
Our unique twist truly shines with a homemade mint chocolate ganache. To make this smooth, stable chocolate ganache, you will need 1¼ cups of chocolate chips and 2-3 tablespoons of heavy cream. In a microwave-safe bowl, combine the chocolate chips and heavy cream. Heat in 30-second intervals in the microwave, stirring well after each, until the chocolate is fully melted and the mixture is smooth and glossy. You can also use a double boiler method for melting chocolate, which provides more gentle heat and reduces the risk of seizing. Once smooth, stir in a tiny drop of mint extract to infuse that delightful Andes mints flavor. Allow the ganache to cool slightly; it should still be pourable but thick enough to coat the back of a spoon. This consistency is perfect for pouring over your chilled cheesecakes, where it will set into a beautiful, glossy topping.
Pro Tips & Troubleshooting
Pro Tips for Perfect Mini Cheesecakes
- Room Temperature Ingredients: Always make sure your cream cheese and eggs are at room temperature. This is an expert tip that ensures your batter blends smoothly and lump-free, creating a truly silky cheesecake.
- Full-Fat Cream Cheese: For the richest flavor and the best, creamiest texture, stick with full-fat cream cheese. It makes all the difference!
- Optimal Chilling: Chilling your mini cheesecakes for several hours or, even better, overnight is crucial for maximum flavor development and a firm, perfectly set texture.
- Crushing Andes Mints: For the batter, finely crush your Andes mints so they distribute evenly and subtly throughout. For the garnish, coarsely chop them to create a lovely visual and textural contrast.
- Even Crust: When pressing down your chocolate graham cracker crust, use the bottom of a glass or a flat-bottomed measuring cup. This helps create a stable, even base for your cheesecake.
Common Mistakes to Avoid
- Over-mixing Batter: It is so important not to over-mix the cream cheese mixture, especially after adding the egg. Over-mixing introduces too much air, which can cause your cheesecakes to puff up excessively and then crack as they cool.
- Opening Oven Door: Resist the temptation to open the oven door while your mini cheesecakes are baking. Drastic temperature fluctuations can lead to cracking, which is a common cheesecake problem.
- Still Jiggly Cheesecakes: If your cheesecakes are still quite jiggly after the recommended baking time, do not panic. Look for edges that are set with just a slight jiggle in the very center. If they seem truly undercooked, you can bake them for an additional 2-5 minutes. Remember, residual heat will continue to cook them as they cool.
- Soggy Crust: To prevent a soggy crust, ensure your butter-crumb mixture is well-pressed into the pan. Sometimes, a brief pre-bake of just the crust for 5-7 minutes can also help, though it is not strictly necessary for this recipe.
Serving & Storage
Serving Ideas
These Andes Mint Mini Cheesecakes are incredibly versatile and are great party desserts! They are perfect for a special holiday dessert, especially festive for a St. Patrick’s Day treat. For garnish, beyond simply chopped Andes mint candy, I love to add a dollop of freshly whipped cream, some delicate chocolate shavings, or even a fresh mint sprig for an elegant touch. They pair wonderfully with a hot cup of coffee or a rich hot chocolate for the ultimate indulgent experience.
Storage and Make-Ahead
Andes Mint Mini Cheesecakes last beautifully in the fridge for up to 3-4 days. Just make sure to store them in an airtight storage container to maintain their freshness and prevent them from absorbing any refrigerator odors. These mini cheesecakes are also excellent for freezing for long-term storage! Once fully chilled and set, place them in a single layer on a baking sheet and freeze until firm. Then, transfer them to freezer bags, ensuring they are double-wrapped to prevent freezer burn. Store them in a sturdy freezer container for up to 2 months. To defrost, simply transfer them to the refrigerator and allow them to thaw slowly overnight. This safe defrosting method helps maintain their creamy texture. These are truly excellent make-ahead desserts, reducing any stress when entertaining!
Conclusion
I hope you are as excited as I am to try these absolutely irresistible Andes Mint Mini Cheesecakes. With their unique mint-infused batter and the glossy, rich ganache topping, they truly are a decadent, creamy, mint-flavored, chocolatey dream come true. Whether you are a beginner baker or a seasoned pro, you will find joy and success in creating these stunning individual treats. I encourage you to whip up a batch soon! Please come back and leave a comment about your experience, or share your beautiful creations on social media. Happy baking!
FAQ
- Q1: What is the best way to prevent cracks in mini cheesecakes?
- A1: The best way to prevent cracks is to ensure all your ingredients, especially cream cheese and eggs, are at room temperature. Avoid over-mixing the batter after adding the egg, which can incorporate too much air. Finally, cool the cheesecakes slowly by propping open the oven door and allowing them to cool gradually, then chilling thoroughly.
- Q2: Can I substitute crème de mint for mint extract, and what’s the cooking time in a cupcake pan?
- A2: Yes, you can substitute crème de mint for mint extract in a 1:1 ratio. If using a standard cupcake pan with liners, the baking time will be very similar, around 20-25 minutes, but always check for set edges and a slight center jiggle.
- Q3: What’s the best way to store and freeze Andes Mint Mini Cheesecakes?
- A3: Store chilled mini cheesecakes in an airtight container in the refrigerator for up to 3-4 days. To freeze, individually freeze them until solid, then double-wrap them in freezer bags and place them in a sturdy freezer container for up to 2 months. Defrost slowly in the refrigerator overnight.
- Q4: Can this mini cheesecake recipe be scaled up to a full-size cheesecake?
- A4: While theoretically possible, simply doubling the recipe for a full-size cheesecake is not recommended. Full-size cheesecakes require significant adjustments in baking time, often a lower oven temperature, and sometimes a water bath to prevent cracking and ensure even cooking. It is best to find a dedicated full-size cheesecake recipe.
- Q5: Should I use cupcake liners when making mini cheesecakes in a muffin tin?
- A5: Yes, I highly recommend using cupcake liners when making mini cheesecakes in a muffin tin. They make for much easier removal and protect your muffin tin from any sticking or residue.
- Q6: What kind of baking setting should I use for cheesecakes: regular or convection?
- A6: For cheesecakes, I always recommend using the regular bake setting. Convection can sometimes be too intense and uneven for delicate cheesecakes, potentially causing them to cook too quickly on the outside or crack.
- Q7: My mini cheesecakes are still jiggly after baking for the recommended time. What should I do?
- A7: It is common for cheesecakes to have a slight jiggle in the center, even when done, as they will continue to set as they cool. Look for edges that are firm and set. If they seem truly undercooked, you can bake them for an additional 2-5 minutes. Then, proceed with the slow cooling method to prevent cracks.
- Q8: How do I easily remove mini cheesecakes from pans with removable bottoms?
- A8: Once the cheesecakes are thoroughly chilled, gently run a thin knife or a small offset spatula around the very edge of each cheesecake. Then, simply push up from the bottom of the pan to release them cleanly.
- Preheat your oven to 325 degrees F and generously spray your mini cheesecake pan with nonstick baking spray.
- In a medium bowl, combine the chocolate graham cracker crumbs, 2 tablespoons of sugar, and the melted butter. Mix these crumbs until well combined and they resemble moist sand.
- Divide this mixture evenly among the cavities of your mini cheesecake pan. Press the crumbs down firmly and evenly with the back of a spoon to form a stable chocolate graham cracker crust base.
- In your stand mixer, using the paddle attachment, blend the softened full-fat cream cheese and ¼ cup plus 2 tablespoons of sugar until smooth and creamy.
- Next, add the egg, mint extract, and green food coloring, mixing just until everything is incorporated on low speed. Gently fold in a portion of the finely crushed Andes mints into the cream cheese batter. Be careful not to over-mix after adding the egg.
- Spoon the cream cheese mixture over the chocolate graham cracker crusts, dividing it evenly among the cavities.
- Bake the mini cheesecakes for 20 minutes. The edges should be set, but the center should still have a slight jiggle. Do not open the oven door while they are baking.
- Once baked, turn off the oven, prop open the oven door with a wooden spoon, and allow the cheesecakes to cool slowly in the oven for about 5-10 minutes.
- After the initial slow cool in the oven, remove the mini cheesecakes from the oven and allow them to come to room temperature on a wire rack.
- Transfer them to the refrigerator and chill for several hours or even overnight before removing them from the pan. This ensures proper setting and easy removal.
- In a microwave-safe bowl, combine the chocolate chips and 2-3 tablespoons of heavy cream. Heat in 30-second intervals, stirring well after each, until the mixture is smooth and fully melted. Optionally, stir in a tiny drop of mint extract for extra flavor.
- Allow the ganache to cool slightly until it is still pourable but starting to thicken. Carefully spoon a generous amount over each chilled mini cheesecake, letting it cascade down the sides slightly.
- While the ganache is still wet, garnish each mini cheesecake with the remaining coarsely chopped Andes mints for ultimate appeal.