 Skip to content
 Delicious No-Bake Bunny Oreo Balls for Easter
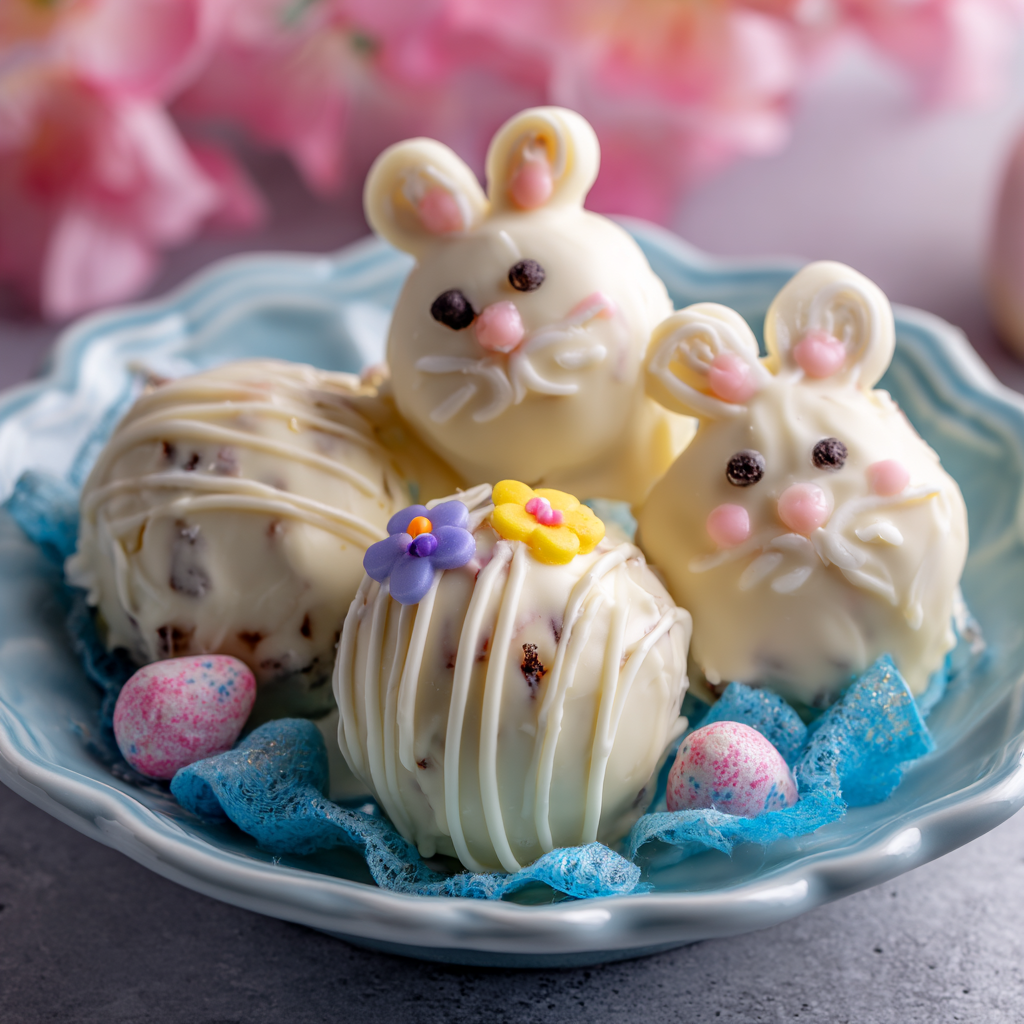
Easter is a time for bright colors, fun traditions, and, of course, delicious treats! Get ready to create a festive dessert that’s as charming as it is easy. These no-bake Bunny Oreo balls are the perfect addition to your spring celebrations. They are simple to make, require no oven time, and bring a touch of playful joy to any gathering. Perfect for parties, Easter baskets, or a fun afternoon activity with the kids, these delightful Bunny Oreo balls are sure to be a hit!
Why You’ll Love These Bunny Oreo Balls
You will adore these festive treats for many reasons! They simplify holiday baking, offering a delightful shortcut to a professional-looking dessert.
- Quick & Easy: Prepare them in under an hour of active time with just a few basic ingredients.
- No-Bake Delight: Keep your oven free for other dishes, making them perfect for busy holidays.
- Kid-Friendly Fun: Involve your little ones in shaping and decorating for a memorable Easter activity.
- Adorable & Customizable: Personalize each bunny with various candies and colors to match your theme.
- Irresistible Flavor: Enjoy the classic, beloved combination of rich Oreo cookies and tangy cream cheese.
Ingredients
To make these delightful Bunny Oreo balls, you’ll only need a handful of items. Gather your ingredients, and let the fun begin!
- 36 Oreo Cookies (1 standard family-size package)
- 8 oz cream cheese, full-fat and softened
- 16 oz white chocolate melting wafers
- Candy Bunny Decorations (such as sugar bunny ears, edible eyes, pink heart sprinkles for noses, or mini chocolate chips for eyes)
Notes & Substitutions
You have options to customize your Bunny Oreo balls to your taste and dietary needs.
- Oreo Cookies: The original chocolate Oreo cookies work best for their classic flavor and dark contrast. You can also try Golden Oreos or seasonal flavors like mint or peanut butter for a twist. Avoid using double-stuffed Oreos, as the extra filling can make the mixture too soft. For gluten-free needs, use certified gluten-free Oreo cookies.
- Cream Cheese: Always use full-fat cream cheese for the best texture and flavor. Ensure it is fully softened to room temperature before mixing. This prevents lumps and helps create a smooth, pliable dough.
- White Chocolate: Melting wafers or candy melts are ideal for dipping because they melt smoothly and harden quickly with a nice sheen. White chocolate chips or white chocolate bark are good alternatives, though they may require a bit of shortening or coconut oil to achieve a dippable consistency. You can also add gel food coloring to melted white chocolate to create vibrant pastel bunnies.
- Candy Decorations: Get creative! Options include edible bunny ears, edible markers to draw faces, sprinkles, or small candies to create adorable bunny features. Think pink mini heart sprinkles for noses or tiny pearl sprinkles for a fluffy tail.
Equipment
Gathering your tools before you start makes the process smooth and enjoyable. You won’t need anything fancy for these festive Bunny Oreo balls.
- Food processor (essential for fine crumbs)
- Large mixing bowl
- Baking sheet
- Parchment paper or silicone baking mat
- Microwave-safe bowl (for melting chocolate)
- Dipping tools (fork, spoon, or candy dipping tool)
Instructions
Making these adorable Bunny Oreo balls is a breeze. Follow these simple steps for perfect results every time.
Step 1: Prepare Oreo Crumbs
Place the entire package of Oreo cookies, including the cream filling, into a food processor. Pulse the cookies until they break down into very fine crumbs. Ensure there are no large chunks left, as this creates a smooth texture for your Bunny Oreo balls.
Step 2: Mix Oreo and Cream Cheese
Transfer the fine Oreo crumbs to a large mixing bowl. Add the softened cream cheese. Use a sturdy spoon or your hands to mix until the crumbs and cream cheese are fully incorporated. The mixture should form a thick, dough-like consistency that is easy to roll.
Step 3: Initial Chill
Cover the mixing bowl with plastic wrap and refrigerate the mixture for about 10 minutes. This brief chill time firms up the mixture slightly, making it much easier to handle and roll into uniform balls without sticking too much to your hands.
Step 4: Roll and Chill Oreo Balls
Line a baking sheet with parchment paper or a silicone baking mat. Scoop the chilled mixture into uniform 1-inch balls. A small cookie scoop works perfectly for this. Place each rolled ball onto the prepared baking sheet, ensuring they don’t touch. Once all balls are formed, refrigerate them for another 20-30 minutes, or until they are firm and hold their shape well. This firmness is crucial for easy dipping.
Step 5: Melt and Dip in White Chocolate
Melt the white chocolate melting wafers according to package directions. You can use a microwave, heating in 30-second intervals and stirring until smooth, or a double boiler. Once melted, dip each thoroughly chilled Oreo ball into the chocolate using a fork or dipping tool. Gently tap off any excess chocolate against the side of the bowl. Place the dipped Bunny Oreo balls back onto the parchment-lined baking sheet.
Step 6: Decorate as Bunnies
Work quickly after dipping! While the chocolate is still wet, immediately attach your candy bunny decorations. This could include edible bunny ears, tiny pink heart sprinkles for noses, or edible sugar eyes. If the chocolate starts to set, you can use a tiny dab of extra melted chocolate as “glue” to secure decorations.
Step 7: Final Chill
Once all your Bunny Oreo balls are dipped and decorated, refrigerate the baking sheet. Chill them until the white chocolate coating is completely set and firm. This usually takes another 15-20 minutes.
Tips for Dipping & Decorating
- Keep Oreo Balls Cold: Always dip thoroughly chilled Oreo balls to prevent them from crumbling or melting into the warm chocolate.
- Work Quickly: Have all your decorations ready before you start dipping. White chocolate sets relatively fast, so you need to be efficient with your decorating.
- Use a Toothpick: A toothpick can help gently guide the excess chocolate off the ball before placing it on the parchment, ensuring a clean finish.
- Chocolate Temperature: Ensure your melted chocolate isn’t too hot, as excessive heat can cause the Oreo balls to soften too much.
- Get Creative: Experiment with different colors of chocolate or types of candy for unique bunny expressions and accessories.
Pro Tips & Troubleshooting
Achieving perfect Bunny Oreo balls is easy with a few tricks up your sleeve. These tips will help you avoid common pitfalls.
- Perfectly Softened Cream Cheese: Always let your cream cheese come to room temperature. This ensures it blends smoothly with the Oreo crumbs, preventing lumps and creating a consistent, pliable mixture for your Bunny Oreo balls.
- Avoiding Chocolate Seizing: To keep your chocolate smooth, ensure your melting bowl and tools are completely dry. Even a tiny drop of water can cause chocolate to seize and become thick or clumpy.
Understanding the science behind chocolate’s properties is key to successful dessert making. Learn more about how to prevent chocolate from seizing.
- Sticky Mixture? If your Oreo and cream cheese mixture feels too sticky to roll, refrigerate it for an additional 15-20 minutes. This will firm it up and make it much easier to handle.
- Mess-Free Rolling: If the mixture still sticks to your hands, try lightly buttering your palms or dusting them with a tiny bit of powdered sugar. Keeping your hands cool also helps.
- Working in Batches: When dipping, melt chocolate in smaller batches if necessary to maintain its ideal temperature and consistency. This also prevents the remaining chocolate from setting too quickly.
- Even Coating: For a thin, smooth chocolate shell, tap the fork gently against the side of the bowl to remove excess chocolate. This ensures a clean, professional finish for your Bunny Oreo balls.
Serving, Storage & Variations
These delightful Bunny Oreo balls are versatile and perfect for many occasions. Here’s how to best enjoy and store them, plus ideas for creative twists.
Serving Suggestions
Arrange your finished Bunny Oreo balls on a festive platter. For an extra touch of spring, dye some shredded coconut flakes green with food coloring to resemble grass, and nestle the bunnies amongst it. They make an excellent addition to an Easter dessert board, alongside cookies and other treats. You can also use them as charming cupcake toppers or wrap them individually for small party favors.
Storage Instructions
Store your Bunny Oreo balls in an airtight container in the refrigerator. When properly stored, they will remain fresh and delicious for 1-2 weeks. For longer storage, you can freeze them. Place the set balls in a single layer on a baking sheet, freeze until solid, then transfer to a freezer-safe bag or container. They will last for up to 1-2 months. Thaw in the refrigerator before serving.
For optimum freshness and safety, it’s always advisable to follow recommended food safety guidelines for perishable desserts.
Flavor & Decoration Variations
- Oreo Flavors: Don’t limit yourself to original! Try mint Oreos with green chocolate for a springtime look, or peanut butter Oreos with milk chocolate.
- Chocolate: Experiment with milk chocolate or dark chocolate for dipping if you prefer a different flavor profile.
- Other Easter Themes: Instead of bunnies, decorate your balls as little chicks using yellow chocolate and orange candy beaks, or as colorful speckled eggs using pastel chocolate and sprinkles.
- Drizzle & Sprinkles: Once the main chocolate coating has set, drizzle contrasting colored melted chocolate over your Bunny Oreo balls. Finish with a sprinkle of festive Easter nonpareils or sanding sugar.
Nutrition
These delightful Bunny Oreo balls are a decadent treat. While exact nutrition varies based on specific brands and decorations used, a typical serving size (one ball) generally contains approximately 150-180 calories, with about 8-10 grams of fat, 20-25 grams of carbohydrates, and 1-2 grams of protein. They are primarily a source of sugar and fat, perfect for an occasional indulgence.
| Nutrition Facts (per ball, approx.) |
| :———————————- |
| Calories: 165 |
| Total Fat: 9g |
| Saturated Fat: 5g |
| Cholesterol: 10mg |
| Sodium: 70mg |
| Total Carbohydrates: 20g |
| Dietary Fiber: 0g |
| Total Sugars: 17g |
| Protein: 1g |
FAQ
Got questions about making these adorable no-bake treats? Here are some common inquiries about Bunny Oreo balls.
- Can I use generic sandwich cookies instead of Oreos? Yes, you can! Any brand of chocolate sandwich cookies will work, but ensure they are crushed very finely for the best texture.
- How long do these take to set in the refrigerator? The initial mixture needs 10 minutes to chill, and then the rolled balls require 20-30 minutes. After dipping, the chocolate will set in about 15-20 minutes in the fridge.
- Can I make these ahead of time for a party? Absolutely! These are a fantastic make-ahead treat. Store them in an airtight container in the refrigerator for up to two weeks.
- Is it possible to make these without a food processor? Yes, you can place the Oreos in a sturdy zip-top bag and crush them with a rolling pin until they form fine crumbs. This takes a bit more effort but works perfectly.
- Why did my chocolate become thick and clumpy when melting? This is often due to “seizing,” caused by contact with even a tiny amount of water or overheating. Ensure your bowl and tools are completely dry.
- Are these Bunny Oreo Balls gluten-free? You can easily make them gluten-free by using certified gluten-free Oreo cookies. All other ingredients are typically naturally gluten-free, but always check labels.
Conclusion
These no-bake Bunny Oreo balls are truly a delightful and straightforward way to bring festive cheer to your Easter celebration. Their ease of preparation, combined with their irresistible flavor and adorable appearance, makes them a perfect choice for busy parents and beginner bakers alike. We hope you feel inspired to create these charming treats for your family and friends. Get rolling, get dipping, and enjoy the delicious results of these fun, family-friendly Bunny Oreo balls!
Delicious No-Bake Bunny Oreo Balls for Easter
Ingredients
Equipment
Method
- Place the entire package of Oreo cookies, including the cream filling, into a food processor. Pulse the cookies until they break down into very fine crumbs. Ensure there are no large chunks left, as this creates a smooth texture for your Bunny Oreo balls.
- Transfer the fine Oreo crumbs to a large mixing bowl. Add the softened cream cheese. Use a sturdy spoon or your hands to mix until the crumbs and cream cheese are fully incorporated. The mixture should form a thick, dough-like consistency that is easy to roll.
- Cover the mixing bowl with plastic wrap and refrigerate the mixture for about 10 minutes. This brief chill time firms up the mixture slightly, making it much easier to handle and roll into uniform balls without sticking too much to your hands.
- Line a baking sheet with parchment paper or a silicone baking mat. Scoop the chilled mixture into uniform 1-inch balls. A small cookie scoop works perfectly for this. Place each rolled ball onto the prepared baking sheet, ensuring they don't touch. Once all balls are formed, refrigerate them for another 20-30 minutes, or until they are firm and hold their shape well. This firmness is crucial for easy dipping.
- Melt the white chocolate melting wafers according to package directions. You can use a microwave, heating in 30-second intervals and stirring until smooth, or a double boiler. Once melted, dip each thoroughly chilled Oreo ball into the chocolate using a fork or dipping tool. Gently tap off any excess chocolate against the side of the bowl. Place the dipped Bunny Oreo balls back onto the parchment-lined baking sheet.
- Work quickly after dipping! While the chocolate is still wet, immediately attach your candy bunny decorations. This could include edible bunny ears, tiny pink heart sprinkles for noses, or edible sugar eyes. If the chocolate starts to set, you can use a tiny dab of extra melted chocolate as "glue" to secure decorations.
- Once all your Bunny Oreo balls are dipped and decorated, refrigerate the baking sheet. Chill them until the white chocolate coating is completely set and firm. This usually takes another 15-20 minutes.


