 Skip to content
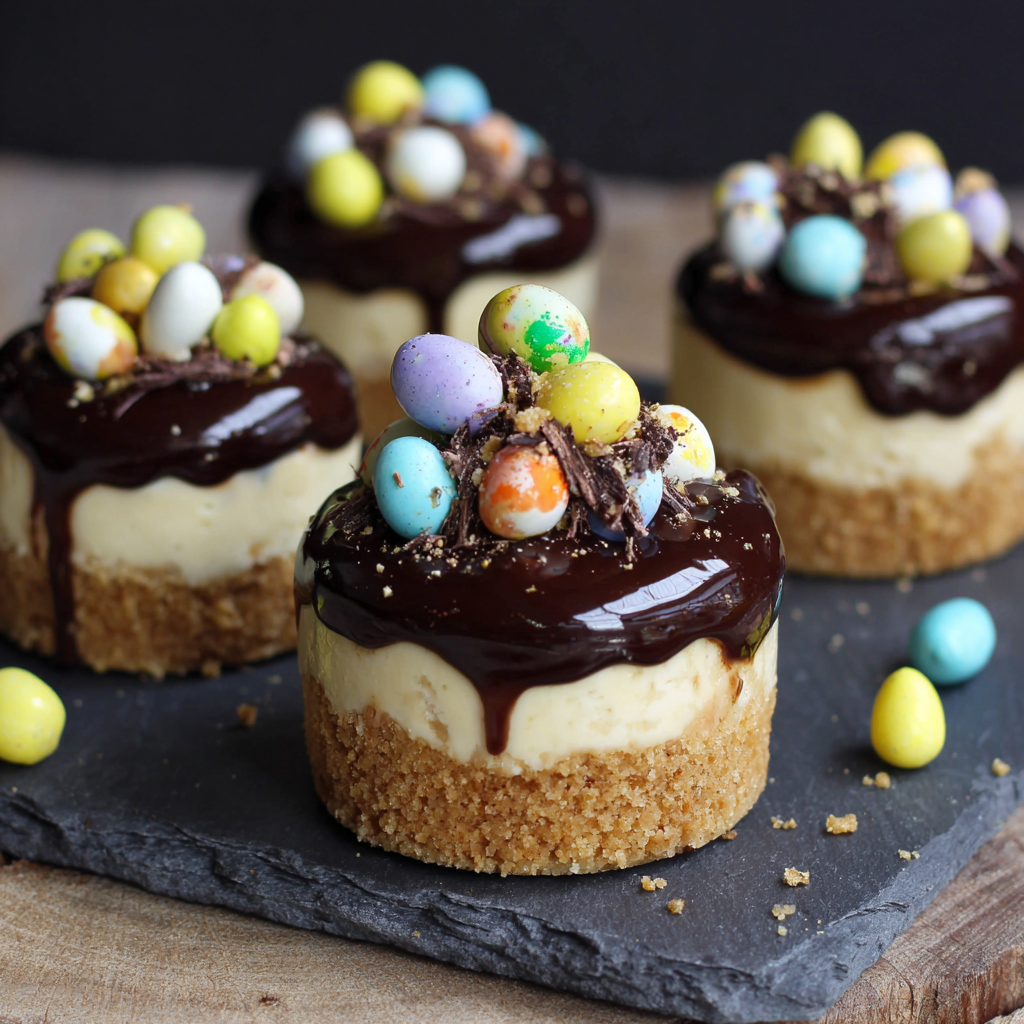
 Welcome to the ultimate guide for a show-stopping Easter dessert that requires zero oven time! This delightful no-bake Mini Egg cheesecake is incredibly simple yet stunningly delicious. It features a rich, creamy filling packed with crunchy Cadbury Mini Eggs, all nestled on a classic graham cracker crust. Perfect for spring gatherings, this recipe guarantees a stress-free and impressive treat.
Why You’ll Love This No-Bake Mini Egg Cheesecake
Making this dessert is a joy, especially for busy parents and beginner bakers. Here are the top reasons you’ll adore this easy no-bake Mini Egg cheesecake:
- No Baking Required: Say goodbye to ovens and hot kitchens. This recipe simplifies dessert creation.
- Creamy, Rich Texture: Enjoy a luxurious, melt-in-your-mouth cheesecake filling every time.
- Packed with Mini Eggs: Every bite offers that beloved crunch and chocolatey goodness of Cadbury Mini Eggs.
- Excellent Make-Ahead Option: Prepare it the day before your event and let it chill, reducing day-of stress.
- Customizable Festive Decoration: Get creative with toppings to make your cheesecake uniquely yours for any spring celebration.
Ingredients
To create this irresistible No-Bake Mini Egg Cheesecake, gather these fresh ingredients. Quality ingredients ensure the best flavor and texture for your dessert.
- For the Graham Cracker Crust:
- 2 Cups (240g) graham cracker crumbs (about 15 full sheets)
- 1/3 Cup (67g) packed light brown sugar
- 1/2 Cup (113g) unsalted butter, melted
- For the Mini Egg Cheesecake Filling:
- 1 1/4 Cups (300ml) heavy whipping cream, cold
- 24 Oz (678g) full-fat brick-style cream cheese, room temperature (not the spread)
- 1/2 Cup (100g) granulated sugar
- 2 Tbsp powdered sugar
- 1/4 Cup (60g) sour cream, room temperature
- 1 tsp pure vanilla extract
- 1 Cup (8oz, 215g) Cadbury Mini Eggs, roughly chopped
- For the Chocolate Ganache Topping (Optional):
- 1/2 Cup (93g) semi-sweet chocolate chips
- 1/2 Cup (120ml) heavy whipping cream
- For the Chocolate Whipped Cream Nests (Optional):
- 1 1/4 Cups (300ml) cold heavy whipping cream (separate from filling cream)
- 2 Tbsp granulated sugar
- 2 Tbsp unsweetened cocoa powder (regular or Dutch processed)
- 1/4 tsp pure vanilla extract
- For Garnish:
- 36 Cadbury Mini Eggs (about 4.5 Oz), whole
Notes & Substitutions
Achieve the perfect texture for your no-bake cheesecake by following these tips. Always use the specified ingredients for best results.
Understanding the emulsion process helps explain why certain techniques are essential for successful dairy foams.
- Heavy Cream: Ensure your heavy cream is very cold before whipping. This helps it reach stiff peaks quickly.
- Cream Cheese: Use only full-fat, brick-style cream cheese. Spreadable or reduced-fat cream cheese will not set properly.
- Temperature Matters: Both cream cheese and sour cream should be at room temperature. This prevents lumps in your filling.
- Mini Eggs: Crush Mini Eggs to your desired chunkiness. Some prefer fine crumbs, while others love larger pieces for more crunch.
- Crust Alternatives: Substitute graham crackers with crushed Oreos, shortbread cookies, or digestive biscuits for a different base.
- Sweetness Control: Adjust the amount of granulated sugar in the filling to match your personal taste preference.
Equipment
Having the right tools makes creating this no-bake Mini Egg cheesecake even simpler. Gather these items before you begin.
- 9 or 10-inch springform pan
- Food processor (optional, for crushing cookies or Mini Eggs)
- Hand mixer or stand mixer with a whisk attachment
- Large mixing bowls
- Rubber spatula
- Angled spatula (for smoothing the filling)
- Piping bag with Wilton Tip 4B (for chocolate nests, optional)
- Small saucepan (for ganache)
Instructions
Creating this easy no-bake Mini Egg cheesecake is straightforward. Follow these steps for a delightful spring dessert. This easy recipe makes baking simple for busy parents and beginners!
Make the Graham Cracker Crust
- Combine 2 cups (240g) graham cracker crumbs, 1/3 cup (67g) packed light brown sugar, and 1/2 cup (113g) melted unsalted butter in a medium bowl. Mix until the crumbs are evenly moistened.
- Press the mixture firmly and evenly into the bottom of a 9 or 10-inch springform pan. Use the back of a spoon or a flat-bottomed glass for a compact crust.
- Place the prepared crust in the freezer for at least 15 minutes to chill and set while you prepare the filling. The foundation of your no-bake Mini Egg cheesecake is a sturdy crust.
Make the Mini Egg Cheesecake Filling
- Roughly chop 1 cup (215g) Cadbury Mini Eggs into small pieces. Set aside.
- In a large, chilled bowl, whip 1 1/4 cups (300ml) cold heavy whipping cream using a hand mixer or stand mixer on medium-high speed. Continue beating until stiff peaks form. Set aside in the refrigerator.
- In another large mixing bowl, beat 24 oz (678g) room temperature full-fat brick-style cream cheese with 1/2 cup (100g) granulated sugar, 2 tablespoons powdered sugar, 1/4 cup (60g) room temperature sour cream, and 1 teaspoon pure vanilla extract. Beat on medium speed until the mixture is completely smooth and creamy, scraping down the sides of the bowl as needed. This easy no-bake Mini Egg cheesecake comes together beautifully.
- Gently fold the reserved whipped cream into the cream cheese mixture using a rubber spatula. Fold until just combined, being careful not to deflate the whipped cream.
- Fold in the roughly chopped Cadbury Mini Eggs until evenly distributed throughout the filling.
- Spread your delicious no-bake Mini Egg cheesecake mixture evenly over the chilled graham cracker crust in the springform pan. Smooth the top with an angled spatula.
- Cover the pan loosely with plastic wrap and refrigerate overnight, or for at least 8 hours, to allow the cheesecake to set completely. This is crucial for a firm texture.
Make the Chocolate Ganache (Optional)
- Place 1/2 cup (93g) semi-sweet chocolate chips in a heatproof bowl.
- Heat 1/2 cup (120ml) heavy whipping cream in a small saucepan over medium heat until it just begins to simmer around the edges. Do not boil.
- Pour the hot cream over the chocolate chips. Let stand for 5 minutes to allow the chocolate to melt.
- Whisk the mixture until smooth and glossy.
- Allow the ganache to cool to room temperature before using. The chocolate ganache elevates this no-bake Mini Egg cheesecake with a glossy finish.
Make the Chocolate Whipped Cream (Optional)
- Chill a large mixing bowl and whisk attachment in the freezer for 10-15 minutes.
- Pour 1 1/4 cups (300ml) cold heavy whipping cream into the chilled bowl. Add 2 tablespoons granulated sugar, 2 tablespoons unsweetened cocoa powder, and 1/4 teaspoon pure vanilla extract.
- Whip on medium-high speed until stiff peaks form. Be careful not to overmix, or it may become grainy.
- Transfer the whipped cream to a piping bag fitted with Wilton Tip 4B if desired.
Assembly & Decoration
- Once the cheesecake is fully set, carefully remove the sides of the springform pan. Run a thin knife around the edge if needed.
- Pour the cooled chocolate ganache over the top of the cheesecake. Gently spread it to the edges with an angled spatula, allowing some to drip down the sides for a rustic look.
- Chill the cheesecake briefly (about 15-20 minutes) to allow the ganache to set slightly.
- Pipe chocolate whipped cream nests around the edges of the cheesecake.
- Fill the whipped cream nests with whole Cadbury Mini Eggs for a beautiful, festive finish. Carefully prepare your assembled no-bake Mini Egg cheesecake for serving.
Pro Tips & Troubleshooting
Achieve the best texture for your no-bake Mini Egg cheesecake by following these tips. These insights ensure a perfect dessert every time.
- Cream Cheese Temperature: Always use room temperature cream cheese. Cold cream cheese will result in a lumpy filling.
- Whipping Cream: Your heavy cream must be very cold to whip properly to stiff peaks. If it’s not cold enough, it won’t thicken.
- Crust Compaction: Press the graham cracker crust very firmly into the pan. This prevents it from crumbling when sliced.
- Chill Time is Key: Do not rush the refrigeration process. An overnight chill (at least 8 hours) is essential for the cheesecake to set completely.
For a stable dessert that holds its shape, understanding the essential setting principles for no-bake cheesecakes is crucial.
- Ganache Consistency: Ensure the ganache is cooled to room temperature before pouring. If it’s too warm, it will melt the cheesecake filling.
- Avoid Overmixing: Overmixing the cream cheese mixture or the whipped cream can lead to a deflated or grainy cheesecake. Mix until just combined.
- Clean Slices: For neat portions, run a sharp knife under hot water, wipe it clean, and then slice. Repeat for each cut.
Serving Suggestions, Storage & Variations
This festive no-bake Mini Egg cheesecake is versatile and delicious. Here’s how to serve, store, and customize it.
- Serving:
- Serve your no-bake Mini Egg cheesecake thoroughly chilled for the best texture and flavor.
- Pair individual slices with a warm cup of coffee, a refreshing tea, or a scoop of vanilla ice cream for an indulgent treat.
- Storage:
- Store any leftover cheesecake covered tightly with plastic wrap in the refrigerator for up to 5 days.
- For longer storage, freeze the whole cheesecake or individual slices. Wrap it tightly in plastic wrap, then aluminum foil, for up to 3 months.
- Thaw frozen cheesecake slowly in the refrigerator overnight before serving to maintain its creamy texture.
- Make Ahead:
- The graham cracker crust can be prepared 1-2 days in advance and stored in the refrigerator or freezer.
- The chocolate ganache can be made up to 2 weeks ahead and stored in the fridge. Gently reheat it in a microwave or saucepan before use.
- The entire cheesecake can be assembled up to 2 days ahead and kept refrigerated, allowing flavors to meld beautifully.
- Variations:
- Add different Easter candies like chocolate bunnies, Robin Eggs, or pastel-colored M&Ms to the filling or as garnish.
- Swirl in a vibrant fruit puree such as raspberry or strawberry into the cheesecake filling for a fruity twist.
- Experiment with different crusts like crushed Oreo cookies for a chocolate base or buttery shortbread for a rich flavor. Personalize your no-bake Mini Egg cheesecake with creative twists.
Nutrition Information
| Nutrient | Amount Per Serving (1/12th of cake) |
|---|---|
| Calories | 550 kcal |
| Total Fat | 42g |
| Saturated Fat | 25g |
| Cholesterol | 120mg |
| Sodium | 250mg |
| Total Carb | 38g |
| Dietary Fiber | 1g |
| Total Sugars | 30g |
| Protein | 6g |
Frequently Asked Questions (FAQ)
Find quick answers to common questions about making this delightful no-bake Mini Egg cheesecake.
- Can I use low-fat cream cheese? No, avoid low-fat or whipped cream cheese. It lacks the fat content needed for the cheesecake to set properly.
- Why isn’t my cheesecake setting? Your no-bake Mini Egg cheesecake needs sufficient chill time, at least 8 hours or preferably overnight. Also, ensure you used full-fat brick cream cheese and very cold heavy cream.
- Can I omit the ganache or whipped cream? Yes, both are optional decorations. The cheesecake filling itself is incredibly delicious and perfectly satisfying on its own.
- How far in advance can I make this? You can prepare the entire cheesecake up to two days in advance and keep it refrigerated. It also freezes beautifully for up to three months.
- Can I make this in individual portions? Absolutely! Press the crust into ramekins or cupcake liners, then add the filling. Adjust chill time for smaller portions.
Conclusion
This no-bake Mini Egg cheesecake offers a perfect blend of simplicity, rich flavor, and festive charm. It’s truly an ideal dessert for Easter celebrations, spring gatherings, or whenever you crave a creamy, chocolatey treat without the hassle of baking. With its easy steps and incredible taste, it’s sure to become a family favorite. Whip up this stunning no-bake Mini Egg cheesecake today and delight everyone with your stress-free creation! Don’t forget to share your beautiful creations with us!
External Links
Understanding the emulsion process helps explain why certain techniques are essential for successful dairy foams. For more on the science behind whipping heavy cream, explore this detailed guide.
For a stable dessert that holds its shape, understanding the essential setting principles for no-bake cheesecakes is crucial.
Easy No-Bake Mini Egg Cheesecake
Ingredients
Equipment
Method
- Combine 2 cups (240g) graham cracker crumbs, 1/3 cup (67g) packed light brown sugar, and 1/2 cup (113g) melted unsalted butter in a medium bowl. Mix until the crumbs are evenly moistened.
- Press the mixture firmly and evenly into the bottom of a 9 or 10-inch springform pan. Use the back of a spoon or a flat-bottomed glass for a compact crust.
- Place the prepared crust in the freezer for at least 15 minutes to chill and set while you prepare the filling.
- Roughly chop 1 cup (215g) Cadbury Mini Eggs into small pieces. Set aside.
- In a large, chilled bowl, whip 1 1/4 cups (300ml) cold heavy whipping cream using a hand mixer or stand mixer on medium-high speed. Continue beating until stiff peaks form. Set aside in the refrigerator.
- In another large mixing bowl, beat 24 oz (678g) room temperature full-fat brick-style cream cheese with 1/2 cup (100g) granulated sugar, 2 tablespoons powdered sugar, 1/4 cup (60g) room temperature sour cream, and 1 teaspoon pure vanilla extract. Beat on medium speed until the mixture is completely smooth and creamy, scraping down the sides of the bowl as needed.
- Gently fold the reserved whipped cream into the cream cheese mixture using a rubber spatula. Fold until just combined, being careful not to deflate the whipped cream.
- Fold in the roughly chopped Cadbury Mini Eggs until evenly distributed throughout the filling.
- Spread your delicious mixture evenly over the chilled graham cracker crust in the springform pan. Smooth the top with an angled spatula.
- Cover the pan loosely with plastic wrap and refrigerate overnight, or for at least 8 hours, to allow the cheesecake to set completely.
- Place 1/2 cup (93g) semi-sweet chocolate chips in a heatproof bowl.
- Heat 1/2 cup (120ml) heavy whipping cream in a small saucepan over medium heat until it just begins to simmer around the edges. Do not boil.
- Pour the hot cream over the chocolate chips. Let stand for 5 minutes to allow the chocolate to melt.
- Whisk the mixture until smooth and glossy.
- Allow the ganache to cool to room temperature before using.
- Chill a large mixing bowl and whisk attachment in the freezer for 10-15 minutes.
- Pour 1 1/4 cups (300ml) cold heavy whipping cream into the chilled bowl. Add 2 tablespoons granulated sugar, 2 tablespoons unsweetened cocoa powder, and 1/4 teaspoon pure vanilla extract.
- Whip on medium-high speed until stiff peaks form. Be careful not to overmix, or it may become grainy.
- Transfer the whipped cream to a piping bag fitted with Wilton Tip 4B if desired.
- Once the cheesecake is fully set, carefully remove the sides of the springform pan. Run a thin knife around the edge if needed.
- Pour the cooled chocolate ganache over the top of the cheesecake. Gently spread it to the edges with an angled spatula, allowing some to drip down the sides for a rustic look.
- Chill the cheesecake briefly (about 15-20 minutes) to allow the ganache to set slightly.
- Pipe chocolate whipped cream nests around the edges of the cheesecake.
- Fill the whipped cream nests with whole Cadbury Mini Eggs for a beautiful, festive finish.


