 Skip to content
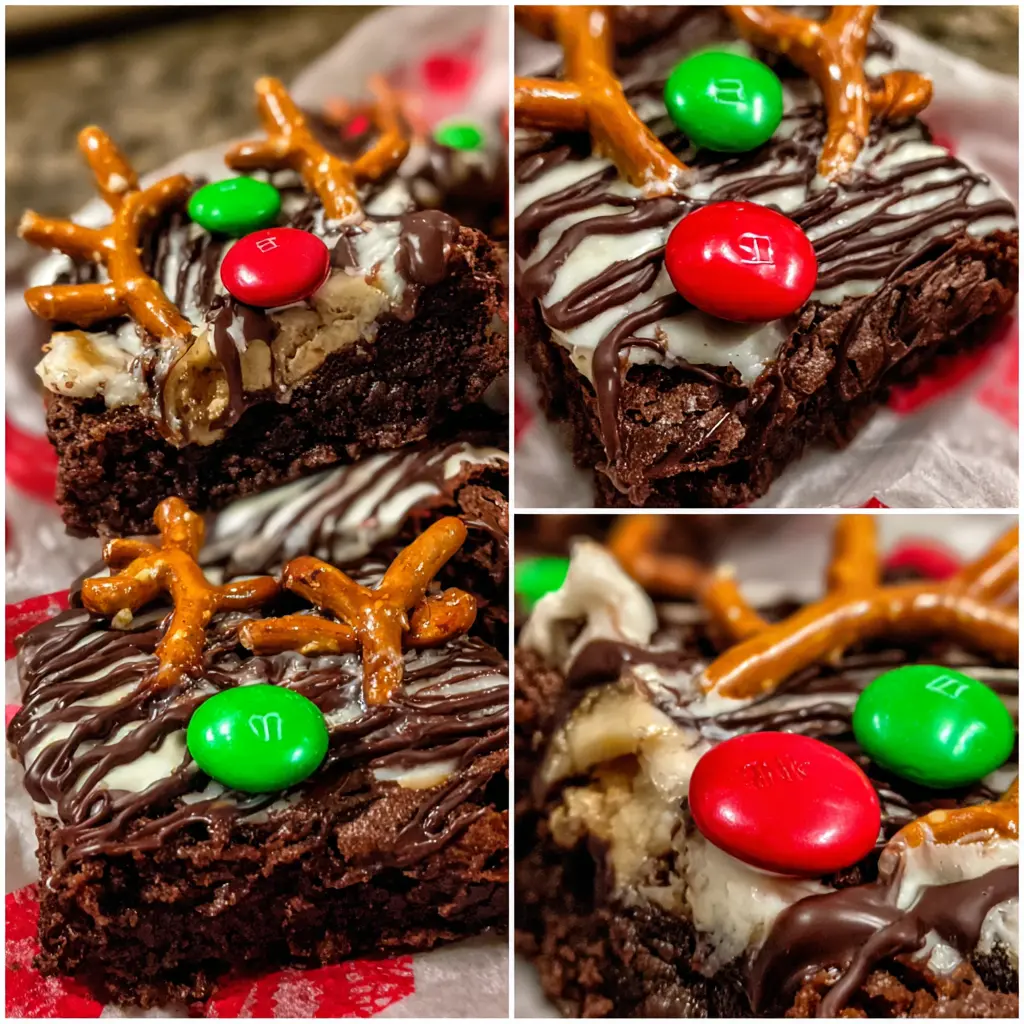
The holiday season is truly magical, filled with warmth, joy, and of course, delicious treats. Get ready to embark on a delightful baking adventure with these adorable Easy Rudolph Brownies! This recipe is wonderfully simple and incredibly fun to make, perfect for bakers of all ages and skill levels, even absolute beginners. You will love transforming ordinary brownies into charming reindeer that are sure to bring huge smiles to everyone’s faces. It’s time to gather your loved ones and bake up some unforgettable holiday cheer together!
Why You’ll Love These Easy Rudolph Brownies
These charming brownies are more than just a simple treat; they are a truly festive experience everyone will adore! Here is exactly why you will absolutely fall in love with making our Easy Rudolph Brownies this holiday season:
- Incredibly Quick & Easy: Using a convenient boxed mix means minimal effort for maximum holiday cheer, saving you valuable time.
- Fun for All Ages: Decorating these cute reindeer is a fantastic, hands-on activity perfect for both kids and adults, sparking creativity.
- Perfect for Any Occasion: These adorable brownies make a charming addition to holiday parties, school events, or cozy family nights alike.
- Guaranteed Smiles: Their delightful, whimsical appearance instantly brightens any room and spreads festive joy to everyone.
- Customizable Fun: Easily adapt the brownie base or decorations to fit your taste and specific creative vision perfectly.
Ingredients
Gather your very simple ingredients for these incredibly Easy Rudolph Brownies! You likely have many of these essential items already stocked in your pantry, making this a budget-friendly and super convenient recipe for all your holiday baking needs.
- Boxed brownie mix: Choose your absolute favorite brand for the best base.
- Ingredients as directed on brownie mix box: These usually include oil, eggs, and water.
- Mini pretzel twists: These form the perfect, crunchy antlers for your reindeer.
- Red candies: M&M’s, small gumdrops, or vibrant red sprinkles for Rudolph’s iconic nose.
- White candies: M&M’s or convenient edible candy eyes create the friendly eyes.
- Chocolate chips: About 1/2 cup, specifically for melting and using as delicious “glue.”
Notes & Substitutions
Feel absolutely free to personalize your Easy Rudolph Brownies to suit your preferences! For a delightful from-scratch touch, effortlessly substitute the boxed mix with your most cherished homemade brownie recipe. If you cannot find red M&M’s, simply try a small round piece of red licorice or a vibrant dot of red frosting for the nose. While store-bought edible candy eyes are incredibly convenient, you can also easily pipe small white frosting circles and add a tiny chocolate dot for pupils. Melted chocolate works wonderfully as an adhesive, but a small dab of stiff frosting also does the trick. You can also opt for gluten-free or vegan brownie mixes and compatible candies to suit any specific dietary needs.
Equipment
You will only need a few basic and readily available kitchen tools to effortlessly make these adorable brownies.
- 9×13 inch baking pan
- Mixing bowls
- Measuring cups and spoons
- Whisk or electric mixer (for convenience)
- Parchment paper (optional, but highly recommended for easy lifting)
- Sharp knife or pizza cutter (for neat slicing)
- Microwave-safe bowl or double boiler (for melting chocolate)
- Small piping bag or Ziploc bag (for precise chocolate application)
Instructions
Let’s begin baking and create your absolutely delightful Easy Rudolph Brownies! Follow these incredibly straightforward, step-by-step instructions for a guaranteed batch of festive treats everyone will adore.
- Prepare Brownies: Start by preheating your oven to the exact temperature specified on your chosen brownie mix box. Then, in a spacious large mixing bowl, meticulously combine the brownie mix with the required oil, eggs, and water. Stir the mixture gently until it is just combined; it is essential not to overmix the batter. Carefully pour the smooth batter evenly into your prepared 9×13 inch baking pan.
- Bake Brownies: Place the pan into the preheated oven and bake strictly according to the package directions. Baking times typically range from 20 to 25 minutes, but always keep a close eye on your brownies. A toothpick or cake tester inserted into the very center should come out with moist crumbs attached, not wet batter.
- Cool Brownies Completely: This step is truly crucial for success! Once beautifully baked, carefully remove the brownies from the oven and allow them to cool completely on a wire rack. Rushing this important step will inevitably make them crumbly and exceedingly difficult to cut neatly. Allow at least one full hour, or even longer, for optimal and thorough cooling.
- Cut Brownies: Once the brownies are fully cooled and firm, use a sharp knife or a pizza cutter to meticulously slice them into uniform rectangular shapes. Aim for appealing 2-inch by 3-inch rectangles for the best Rudolph design. You can also experiment with cookie cutters for different shapes, but rectangles are definitely the easiest for creating the reindeer look.
- Melt Chocolate: Place approximately 1/2 cup of your chocolate chips into a microwave-safe bowl. Microwave in short 30-second intervals, stirring thoroughly after each interval, until the chocolate is gloriously smooth and fully melted. Alternatively, you can use a double boiler method on the stovetop. This perfectly melted chocolate will serve as your edible and delicious “glue” for your Easy Rudolph Brownies.
- Attach Antlers: Dip the pointed ends of two mini pretzel twists into the prepared melted chocolate. Gently press one pretzel onto each top corner of a brownie rectangle, precisely creating Rudolph’s distinctive antlers. Hold each pretzel in place for a few crucial seconds until the chocolate begins to set and secure.
- Add Eyes: Dip the back of two white candies (M&M’s or delightful edible candy eyes) into the melted chocolate. Carefully press them onto the brownie just below the antlers, ensuring enough space remains for Rudolph’s bright red nose.
- Place Red Nose: Take one vibrant red candy (an M&M or a small gumdrop) and dip its back into the melted chocolate. Position it with care exactly in the center of the brownie, just below the eyes, to form Rudolph’s iconic, glowing red nose.
- Pipe Pupils (if DIY eyes): If you are cleverly using plain white candies for the eyes, transfer any remaining melted chocolate into a small piping bag or a convenient Ziploc bag with a tiny corner carefully snipped off. Pipe small, neat dots onto the very center of each white candy to create expressive pupils.
- Allow to Set: Let your beautifully decorated Easy Rudolph Brownies sit undisturbed at room temperature for at least 30 minutes, or until the melted chocolate has completely hardened and set. This vital step ensures all the charming decorations are firmly attached before you serve these festive treats.
Pro Tips & Troubleshooting
Make your batch of Easy Rudolph Brownies absolutely perfect every single time with these incredibly helpful and insightful tips!
For a more in-depth guide to achieving consistently delicious results, refer to these expert tips for baking perfect brownies.
- Fudgy Brownies: For an unbelievably extra fudgy and moist texture, try slightly underbaking your brownies by just a minute or two from the package directions.
- Clean Cuts: Lightly grease your sharp knife or pizza cutter with a touch of non-stick cooking spray before cutting for beautifully smooth, super clean edges. Remember to wipe it clean between cuts.
- Smooth Chocolate: When melting chocolate, always avoid overheating it. If it appears too thick, simply stir in 1/2 teaspoon of coconut oil or shortening to easily thin it out.
- Secure Antlers: If your pretzels are stubbornly falling off, try using a slightly thicker layer of melted chocolate as glue, or even a small dab of stiff frosting.
- Homemade Eyes: Use melted white chocolate wafers for the eye base, then pipe tiny dark chocolate dots for expressive pupils.
- Fixing Mishaps: If a decoration accidentally falls off, simply reapply it with a bit more melted chocolate. No problem at all!
- Speedy Cooling: Place the entire baking pan of brownies into the refrigerator for about 30 minutes to cool them much faster before proceeding with cutting and decorating.
Serving, Storage, & Variations
Serving Suggestions
Present your finished and festive Easy Rudolph Brownies on a beautiful holiday platter for maximum visual impact and cheer. They pair absolutely wonderfully with a refreshing cold glass of milk, a comforting mug of hot cocoa, or even a generous scoop of creamy vanilla ice cream. These charming treats also make delightful, heartfelt edible holiday gifts when thoughtfully packaged in clear bags tied with a pretty ribbon.
Storage Instructions
Store your delicious brownies in a completely airtight container at comfortable room temperature for up to 3-4 days, maintaining their freshness. If you opted to use frosting as your decorative glue, it’s best to refrigerate them for extended freshness. You can also successfully freeze undecorated brownies for up to 3 months; simply thaw them completely before you decorate your Easy Rudolph Brownies.
Flavor & Decoration Variations
Get incredibly creative and experiment with your Easy Rudolph Brownies! Use delicious mint or festive peppermint flavored brownie mixes for a delightful holiday twist. Experiment boldly with various other candies for the noses, perhaps red gumdrops or even a vibrant dollop of red frosting. Add a sprinkle of edible glitter or white sprinkles around Rudolph’s face for a magical, snowy effect. Try using chocolate-covered pretzels for unique, gourmet antlers, or make charming mini Rudolph brownie bites by cutting smaller shapes.
Nutrition Information
Please remember that the following nutrition facts for these Easy Rudolph Brownies are approximate values only. They will vary quite significantly based on your specific brownie mix brand, any additional ingredients you use (like oil, eggs), and the exact types and amounts of candies utilized for decoration. This information is provided for general guidance only and should not be considered a substitute for professional dietary advice or a doctor’s recommendation.
| Nutrient | Amount Per Serving (approx.) |
|---|---|
| Calories | 250-300 |
| Total Fat | 12-15g |
| Saturated Fat | 3-5g |
| Cholesterol | 20-30mg |
| Sodium | 150-200mg |
| Total Carb | 35-45g |
| Sugars | 25-35g |
| Protein | 2-3g |
To ensure all ingredients are safe to consume, especially when baking for others, review essential food safety tips for baking.
FAQ
- Q: Can I use homemade brownies for this recipe?
A: Absolutely! Feel completely free to substitute your cherished homemade brownie recipe instead of a mix. Just ensure your homemade brownies are fully cooled and very firm before you begin decorating your adorable Easy Rudolph Brownies. - Q: What can I use instead of M&M’s for Rudolph’s nose?
A: Many alternatives work perfectly! Red gumdrops, a small dot of vibrant red frosting, a small piece of red licorice, or even a single red sprinkle can all wonderfully serve as Rudolph’s iconic nose. - Q: How far in advance can I actually make and decorate these festive treats?
A: You can certainly decorate these delightful brownies up to 2-3 days in advance if you store them properly in an airtight container at room temperature. For optimal freshness and texture, making them the day before serving is highly recommended. - Q: My pretzels keep falling off the brownies! What is the best way to fix this common issue?
A: Ensure you are consistently using a sufficient amount of melted chocolate or a stiff frosting as your edible glue. Firmly hold each pretzel in place for a few crucial seconds to allow the chocolate to begin setting and adhering properly. - Q: Can kids actively help with the decorating process?
A: Yes, absolutely! Decorating these Easy Rudolph Brownies is a fantastic, highly engaging, and very kid-friendly activity. Just ensure proper adult supervision, especially when handling the warm melted chocolate.
Conclusion
These utterly delightful Easy Rudolph Brownies offer a truly perfect blend of charming simplicity and abundant festive fun, making them an ideal and memorable holiday baking project for absolutely everyone. Their enchanting appearance and utterly delicious chocolatey taste will undeniably be a huge hit at any cheerful gathering or a cozy night in with loved ones. We sincerely hope this beginner-friendly guide inspires you to create some magical and cherished memories in your kitchen this holiday season. Get ready to spread immense joy and share your adorable creations with all your friends and family! Happy baking, and have a wonderful holiday!


