 Skip to content
 There’s nothing quite like the aroma of freshly baked homemade granola wafting through your kitchen. It’s a smell that instantly evokes comfort, health, and a promise of deliciousness. Forget those overpriced, overly sweet store-bought versions; making your own homemade granola is a truly rewarding experience. Not only do you get to control every single ingredient, but you also unlock a level of fresh, vibrant flavor and satisfying crunch that simply can’t be matched. Whether you’re seeking a reliable recipe for a nutritious breakfast, a healthy snack, or expert tips to achieve those coveted, clumpy clusters, you’ve come to the right place. I’m going to show you how to create the most delicious, healthy, and customizable granola you’ve ever tasted.
Why You’ll Love This Recipe
I am so excited to share the special touches that make this homemade granola recipe truly stand out. It’s all about creating those irresistible crunchy clusters and a depth of flavor you’ll adore.
The Cluster Secret: My unique twist for super clumpy granola involves a natural binder. By incorporating a flax egg (or chia seeds) into the wet mixture, we create a plant-based mucilage that effectively glues everything together, giving you those satisfying clumps without relying on excessive sugar or egg whites. It’s a game-changer for homemade granola.
Flavor & Texture Boost: Beyond the oats, nuts, and seeds, I add shredded coconut to the dry mix. This isn’t just for a hint of tropical flavor; it provides a wonderful chewy texture that contrasts beautifully with the crisp oats and toasts up gorgeously in the oven.
Pro-Clumping Technique: This is crucial for maximum clusters. Immediately after baking, I gently press the warm granola down onto the sheet pan with a spatula. This simple action creates more contact points between the ingredients. Then, the magic happens as it cools completely undisturbed. This allows the sugars to crystallize and the binders to set, locking in those desirable, large clusters.
Healthier & Customizable: When you make homemade granola, you control what goes in. This recipe is naturally healthier, allowing you to manage sugar levels and avoid artificial additives. Plus, it’s easily adaptable for vegan and gluten-free diets, making it perfect for a wholesome breakfast or snack. You can tailor it to your dietary needs and preferences.
Ease & Satisfaction: You will be amazed at how simple it is to prepare such a versatile, crunchy, golden brown treat at home. The satisfaction of pulling a pan of warm, fragrant homemade granola from the oven for meal prep or instant enjoyment is unmatched.
Ingredients Needed

- 3 cups old-fashioned (rolled) oats
- 3/4 cup slivered almonds
- 1/2 cup raw sunflower seeds
- 1/2 cup raw pumpkin seeds
- 1/2 teaspoon ground cinnamon
- 1/2 teaspoon salt
- 1/2 cup Grade A dark amber maple syrup
- 2 tablespoons unsalted butter, melted
- 2 tablespoons canola or other neutral oil
- 1 teaspoon vanilla (or almond extract)
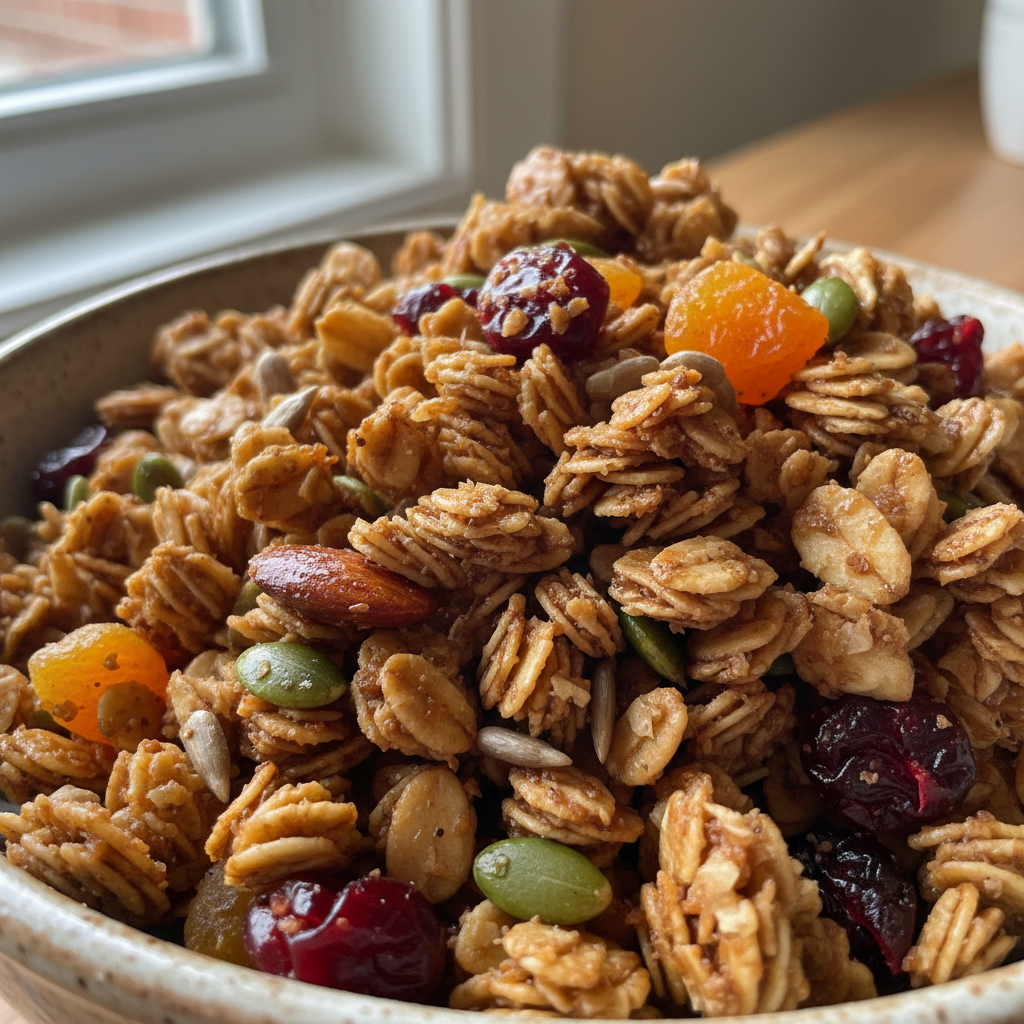
- 1 cup mixed dried fruit, such as cherries, apricots, golden raisins, or dried plums
Ingredient Notes & Substitutions
Oats: For the absolute best texture and those coveted clumps in your homemade granola, always reach for old-fashioned oats, also known as rolled oats. Avoid quick oats, as they can become mushy during baking. If you are making gluten-free granola, be sure to use certified gluten-free rolled oats to ensure no cross-contamination.
Nuts & Seeds: This recipe features a delightful mix of slivered almonds, sunflower seeds, and pumpkin seeds. Feel free to unleash your creativity here. You can easily customize this blend with your favorite nuts like pecans, walnuts, or cashews, or add more seeds such as chia seeds or flax seeds for extra nutritional punch and binding power.
Sweeteners: Maple syrup not only provides a lovely sweetness but also acts as a binding agent for our granola clusters. Honey or brown rice syrup are excellent alternatives if you prefer a different flavor profile or have specific dietary needs.
Fats: Unsalted butter and canola oil (or another neutral oil like grapeseed or vegetable oil) are key to achieving that perfect crispness and richness. For a vegan option, simply substitute the unsalted butter with an additional 2 tablespoons of canola oil or melted coconut oil.
Flavor Enhancers: Ground cinnamon adds a beautiful warmth to the granola, while vanilla extract or almond extract elevates the overall aroma. Don’t hesitate to experiment with other warm spices like nutmeg, ginger, or cardamom to create different flavor experiences.
Dried Fruit: The recipe calls for a mix of dried fruit, such as cherries, apricots, golden raisins, or dried plums. Remember this golden rule: always add your dried fruit only after the granola has fully cooled. This prevents the fruit from becoming hard, burning, or losing its tender chewiness during baking.

How to Make Homemade Granola
Follow these steps to create your perfect batch of homemade granola. Every step is designed to guide you to golden, crunchy perfection.
Step 1: Preheat the Oven & Prep Your Pan
Preheat your oven to 325°F (160°C). Line a large baking sheet with parchment paper. This step is essential for easy cleanup and ensures your homemade granola won’t stick, making the whole process much smoother.
Step 2: Combine Dry Ingredients
In a large bowl, combine the old-fashioned oats, slivered almonds, raw sunflower seeds, raw pumpkin seeds, ground cinnamon, and salt. Stir these ingredients until they are thoroughly mixed. You want an even distribution of all the dry components.
Step 3: Prepare Wet Ingredients (Including the Twist!)
In a medium bowl, stir together the maple syrup, melted unsalted butter, canola oil (or other neutral oil), and vanilla extract (or almond extract) until they are well blended and smooth. Now for our unique twist: for extra clumping power, whisk in 1 tablespoon of ground flaxseed (or chia seeds) mixed with 3 tablespoons of water. Let this mixture sit for 5 minutes to thicken slightly before adding it to your wet ingredients. This creates a natural binder that helps those clusters form.
Step 4: Coat the Granola
Drizzle the syrup mixture over the oat mixture. Stir thoroughly until all the dry ingredients are evenly coated. Every oat and seed should look glistening and moist, indicating it’s ready for baking. Spread the mixture in an even layer onto your prepared Sweet Heritage sheet pan.
Step 5: Bake to Golden Perfection
Bake for about 55 minutes, gently stirring occasionally (once or twice after the first 25-30 minutes, being careful not to break up nascent clusters). Continue to bake until the granola turns a beautiful, rich golden brown. As expert chefs always say, “The darker the granola gets, the crunchier it’ll be later. You want it on the brown side of golden brown, not actually brown. Just be careful not to burn it!”
Step 6: Encourage Clumps (The Secret Technique!)
Immediately after removing the baking sheet from the oven, gently press the warm granola down onto the sheet pan with a spatula to help form large clusters. This crucial step creates more contact points, which will lock in the clumps as it cools. Do not disturb it further once pressed.
Step 7: Cool Completely & Add Dried Fruit
Let the granola cool completely undisturbed on a wire rack. This is absolutely vital for achieving ultimate crispness and for the clusters to set firmly. While it cools, snip or chop any of the larger pieces of mixed dried fruit into ¼-inch bits. Once the granola is fully cool (this can take 1-2 hours), stir the dried fruit into the granola.
Step 8: Store & Serve
When completely cool, transfer your homemade granola to an airtight container. Refrigerate for up to 4 weeks to maintain its freshness and crunch. Serve it with yogurt and fresh berries or any of your favorite toppings.
Mastering Crunchy, Clumpy Granola & Baking Wisdom
Achieving that perfect crunch and those delightful clusters in your homemade granola is an art, but it’s one you can master with a few key insights. I’m here to share the secrets that will elevate your granola game.
The Science of Granola Clusters
Our unique twist truly makes a difference here. The flax egg or chia seeds act as a natural binder. The mucilage from these seeds creates a sticky network that helps glue all the oats, nuts, and seeds together, forming those desirable large clusters. Beyond the binder, the critical step of pressing the warm granola immediately after baking is essential. This creates more surface contact, encouraging the ingredients to fuse. Then, allowing it to cool completely undisturbed allows the sugars to crystallize and the binders to set firmly, locking in those gorgeous clumps. Using enough maple syrup, a liquid sweetener, also contributes significantly to this binding action.
Baking for Optimal Crispness and Preventing Soggy Granola
Temperature & Time: I recommend baking at 325°F (160°C) for a longer duration, around 55 minutes, for a reason. This lower temperature prevents the granola from burning while slowly drying it out, which is the key to ultimate crispness. This method also helps prevent common issues like soggy granola.
Even Baking: To ensure every piece of your homemade granola is beautifully golden brown, gently stir it once or twice during baking. This promotes uniform coloring without breaking up the nascent clusters. I also recommend rotating your baking sheet halfway through to prevent uneven baking, especially if your oven has hot spots.
Cooling is Key: This cannot be overstated. Optimal cooling methods for maximum crispness mean allowing the granola to cool completely and undisturbed on the sheet pan. Storing it before it’s fully cool is a sure fire way to end up with soggy granola, as moisture will become trapped.
Baking Sheet Choice: The type of baking sheet you use can impact your results. I prefer light-colored, heavy-duty baking sheets. They distribute heat more evenly, which reduces the risk of burning that darker, thinner pans might cause.
Nutritional Insights & Customizing Your Healthy Granola
One of the best reasons to make homemade granola is the ability to control exactly what goes into it, allowing you to create a truly healthy and beneficial breakfast or snack. Let’s explore why this recipe is so good for you and how you can make it your own.
Is Homemade Granola Healthier? (Nutritional Breakdown)
Absolutely, homemade granola is generally healthier than many store-bought options. When you make it yourself, you control the amount of sugar, allowing you to reduce it significantly compared to commercial brands that often load up on sweeteners. You also avoid artificial additives, preservatives, and unhealthy fats often found in processed versions.
This homemade granola recipe is packed with nutritional benefits. It’s rich in whole grains from the old-fashioned oats, which are an excellent source of dietary fiber crucial for digestive health and satiety. The nuts and seeds—slivered almonds, sunflower seeds, and pumpkin seeds—contribute healthy protein and unsaturated fatty acids, including omega-3s, which are heart-healthy. These ingredients also provide essential vitamins and minerals, making this a nutrient-dense choice. Overall, this recipe is a heart-healthy breakfast or snack option, thanks to its whole ingredients and controlled sugar content.
Beyond the Recipe: Creative Mix-Ins & Adaptations
The beauty of homemade granola lies in its versatility. Once you have this base recipe mastered, the possibilities for customization are endless!
Chocolate & Spices: If you’re a chocolate lover, you can certainly add chocolate chips. The key is knowing when to add other common mix-ins: always add chocolate chips only after the granola has fully cooled to prevent them from melting or burning. For an extra layer of flavor, consider additional spices like nutmeg, ginger, or cardamom, which can create distinct flavor profiles.
Additional Nuts & Seeds: Feel free to experiment with other nuts such as pecans or walnuts, or add more seeds like hemp seeds or extra chia seeds if you want even more binding power and nutrients.
Sweetener Swaps: While maple syrup is my preferred choice for its flavor and binding qualities, you can also use honey or even a touch of brown sugar. If using brown sugar, you might need to slightly reduce the liquid sweetener content.
Flavor Extracts: Don’t limit yourself to vanilla or almond extract. Consider other extracts like coconut extract for a tropical twist, or orange extract for a bright, citrusy note.
Pro Tips & Troubleshooting
Even though making homemade granola is straightforward, a few expert tips can ensure spectacular results, and knowing how to troubleshoot common issues will save you from kitchen mishaps. These are the nuggets of wisdom I’ve gathered over years of baking.
Pro Tips for Perfect Granola
Don’t Overstir: While a gentle stir once or twice during baking helps promote even browning, resist the urge to constantly stir. Too much agitation will break up those precious clusters as they try to form, so keep stirring to a minimum.
Bake Until Deep Golden Brown: This is crucial for ultimate crunch. The darker your granola gets, the crispier it will be once cooled. Aim for a rich golden brown color, but always keep a careful eye on it to prevent burning. That fine line between perfect and burnt can be crossed quickly!
The Press & Cool Method: I cannot stress this enough. Gently press the warm granola with a spatula right after you take it out of the oven. Then, let it cool completely undisturbed on the baking sheet. This is the secret handshake for letting the binders set and creating those impressive clumps.
Timing Mix-Ins: Always add delicate ingredients like mixed dried fruit or chocolate chips after your homemade granola has fully cooled. Adding them too early will cause dried fruit to harden or burn, and chocolate chips to melt into a messy puddle.
Optimal Coating is Key: Make sure every single oat and seed is evenly coated with the wet mixture. This uniform coating is vital for consistent crispness and even browning across the entire batch.
Parchment Power: Always line your baking sheet with parchment paper. It’s a simple step that guarantees effortless cleanup and ensures your delicious granola doesn’t stick to the pan.
Common Granola Mistakes to Avoid
Burning the Granola: This is perhaps the most common pitfall. Baking at too high a temperature or for too long can quickly transform perfectly golden brown granola into a burnt mess. Keep a very close watch, especially during the last 15-20 minutes of baking time.
Soggy Granola: If your granola ends up soggy, it’s usually due to underbaking, storing it before it’s completely cool, or an imbalance in the wet ingredients. Ensure it’s fully crisp and totally cool before you even think about putting it in a container.
Lack of Clusters: This frequently happens if you stir too often during baking, don’t press the warm granola after baking, or fail to allow it to cool undisturbed. Patience truly is a virtue when it comes to clumpy granola.
Uneven Baking: If your granola is spread too thick on the baking sheet, or if you don’t rotate the baking sheet halfway through, some parts can burn while others remain disappointingly pale.
Adding Dried Fruit Too Early: Incorporating dried fruit before baking can cause it to become hard, chewy, or even burnt. Always add your dried fruit after the granola has completely cooled.
Serving & Storage
Once you’ve made a batch of this delicious homemade granola, you’ll find it incredibly versatile. Here are some of my favorite ways to enjoy it, along with essential tips for keeping it fresh and crunchy.
Creative Ways to Enjoy Your Homemade Granola
Classic Breakfast Topping: Sprinkle generously over Greek yogurt or cottage cheese, then top with a handful of fresh berries for a perfectly balanced and satisfying breakfast. It’s a staple in my kitchen!
Cereal-Style: For a hearty and wholesome alternative to traditional cereal, simply pour a bowl of homemade granola and add your favorite milk.
Quick Snack: When you need an energy boost on the go, grab a handful of granola alone as a snack. It’s satisfying and delicious just as it is.
Yogurt Parfait: Layer your homemade granola with creamy yogurt and fresh berries (or any other fruit) to create a beautiful and utterly delicious yogurt parfait. It’s as lovely to look at as it is to eat.
Smoothie Booster: Add a spoonful or two to your smoothies for an extra layer of crunch, a boost of dietary fiber, and added nutrients.
Dessert Topping: Think outside the breakfast box! This granola makes a fantastic crunchy topping for vanilla ice cream, fruit crisps, or baked apples.
With Nut Butter: For a protein-packed snack, pair a handful of granola with a dollop of peanut butter. You can enjoy it on toast or just by itself.
Storage & Make-Ahead Tips
Airtight Storage: Once your homemade granola is completely cool to the touch, transfer it to an airtight container. You can store it at room temperature for up to 2 weeks. For extended freshness and to maintain optimal crispness, I recommend refrigerating it for up to 4 weeks. This method really helps to keep it at its best.
Freezing: For even longer storage, homemade granola can be frozen in a freezer-safe airtight container for up to 3 months. When you’re ready to enjoy it, simply thaw it at room temperature before serving. While freezing is an option, I find it’s rarely needed given how well it keeps in the fridge and how quickly I tend to go through a batch!
Maintaining Crispness: The golden rule for crunchy granola is to protect it from moisture and air. Always ensure your storage container is tightly sealed after each use. Humidity is the enemy of crispness!
Conclusion
Making your own homemade granola is a culinary triumph that offers unparalleled taste, satisfying crunchy clusters, and endless customizability. With my unique twist of using a flax egg for binding and the crucial press-and-cool technique, you can achieve those coveted clumps every time, even if you’re new to baking granola. This recipe empowers you to create a healthy, delicious, and versatile breakfast or snack that truly fits your preferences. I encourage you to experiment with different nuts, seeds, dried fruit, and spices to make it uniquely yours. Dive in, enjoy the process, and savor the incredible results. I can’t wait to see what delicious granola creations you come up with!
FAQ
Is homemade granola healthier than store-bought options?
Yes, homemade granola is generally healthier! When you make it yourself, you have complete control over the sugar content and can choose high-quality whole grains, nuts, and seeds. This allows you to create a more nutrient-dense and heart-healthy option, packed with dietary fiber, protein, healthy fats, vitamins, and minerals, without the artificial additives often found in highly processed store-bought varieties.
What are the best tips for making crunchy, clumpy granola?
For crunchy, clumpy granola, incorporate a flax egg (or chia seeds) into your wet mixture as a natural binder. Immediately after baking, gently press the warm granola down onto the baking sheet with a spatula. Then, let it cool completely undisturbed on the baking sheet or wire rack. Baking at a lower temperature (325°F/160°C) for a longer duration and gently stirring occasionally also contributes to ultimate crispness and clump formation.
How long can homemade granola be stored, and what is the best method?
Homemade granola stores exceptionally well! Once it’s completely cool, transfer it to an airtight container. It will stay fresh and crunchy at room temperature for up to 2 weeks, or you can refrigerate it for up to 4 weeks. Airtight containers are crucial for maintaining its crispness and extending its shelf life.
What are creative ways to enjoy homemade granola?
There are so many ways to enjoy your homemade granola! Sprinkle it over Greek yogurt or cottage cheese with fresh berries, eat it like cereal with milk, grab a handful alone as a snack, layer it into a yogurt parfait, add it to smoothies for extra crunch, or even use it as a crunchy topping for vanilla ice cream.
Can this granola recipe be adapted for vegan or gluten-free diets?
Absolutely! This recipe is easy to adapt. For a vegan version, simply substitute the unsalted butter with an additional 2 tablespoons of canola oil or melted coconut oil. For gluten-free granola, ensure you use certified gluten-free rolled oats to avoid any gluten contamination.
What ingredients can I substitute or add to customize my granola?
Customization is key with homemade granola! You can swap the nuts and seeds—try pecans, walnuts, or add extra chia seeds. Experiment with different dried fruit options like cherries, apricots, golden raisins, or dried plums. If you love chocolate, add chocolate chips after the granola has fully cooled. You can also explore different spices beyond cinnamon, such as nutmeg or ginger, for varied flavor profiles.
How do I prevent my granola from burning?
To prevent your homemade granola from burning, bake it at the recommended lower temperature of 325°F (160°C) for a longer duration. Gently stir it occasionally to promote even browning, and keep a close eye on its color as it nears the end of the baking time—it should be a rich golden brown. Rotating the baking sheet halfway through can also help prevent uneven baking and hot spots.
Ultimate Homemade Granola: Crunchy Clusters & Easy Recipe
Ingredients
Equipment
Method
- Preheat your oven to 325°F (160°C). Line a large baking sheet with parchment paper. This step is essential for easy cleanup and ensures your homemade granola won’t stick, making the whole process much smoother.
- In a large bowl, combine the old-fashioned oats, slivered almonds, raw sunflower seeds, raw pumpkin seeds, ground cinnamon, and salt. Stir these ingredients until they are thoroughly mixed. You want an even distribution of all the dry components.
- In a medium bowl, stir together the maple syrup, melted unsalted butter, canola oil (or other neutral oil), and vanilla extract (or almond extract) until they are well blended and smooth. Now for our unique twist: for extra clumping power, whisk in 1 tablespoon of ground flaxseed (or chia seeds) mixed with 3 tablespoons of water. Let this mixture sit for 5 minutes to thicken slightly before adding it to your wet ingredients. This creates a natural binder that helps those clusters form.
- Drizzle the syrup mixture over the oat mixture. Stir thoroughly until all the dry ingredients are evenly coated. Every oat and seed should look glistening and moist, indicating it’s ready for baking. Spread the mixture in an even layer onto your prepared Sweet Heritage sheet pan.
- Bake for about 55 minutes, gently stirring occasionally (once or twice after the first 25-30 minutes, being careful not to break up nascent clusters). Continue to bake until the granola turns a beautiful, rich golden brown. As expert chefs always say, “The darker the granola gets, the crunchier it’ll be later. You want it on the brown side of golden brown, not actually brown. Just be careful not to burn it!”
- Immediately after removing the baking sheet from the oven, gently press the warm granola down onto the sheet pan with a spatula to help form large clusters. This crucial step creates more contact points, which will lock in the clumps as it cools. Do not disturb it further once pressed.
- Let the granola cool completely undisturbed on a wire rack. This is absolutely vital for achieving ultimate crispness and for the clusters to set firmly. While it cools, snip or chop any of the larger pieces of mixed dried fruit into ¼-inch bits. Once the granola is fully cool (this can take 1-2 hours), stir the dried fruit into the granola.
- When completely cool, transfer your homemade granola to an airtight container. Refrigerate for up to 4 weeks to maintain its freshness and crunch. Serve it with yogurt and fresh berries or any of your favorite toppings.


