 Skip to content
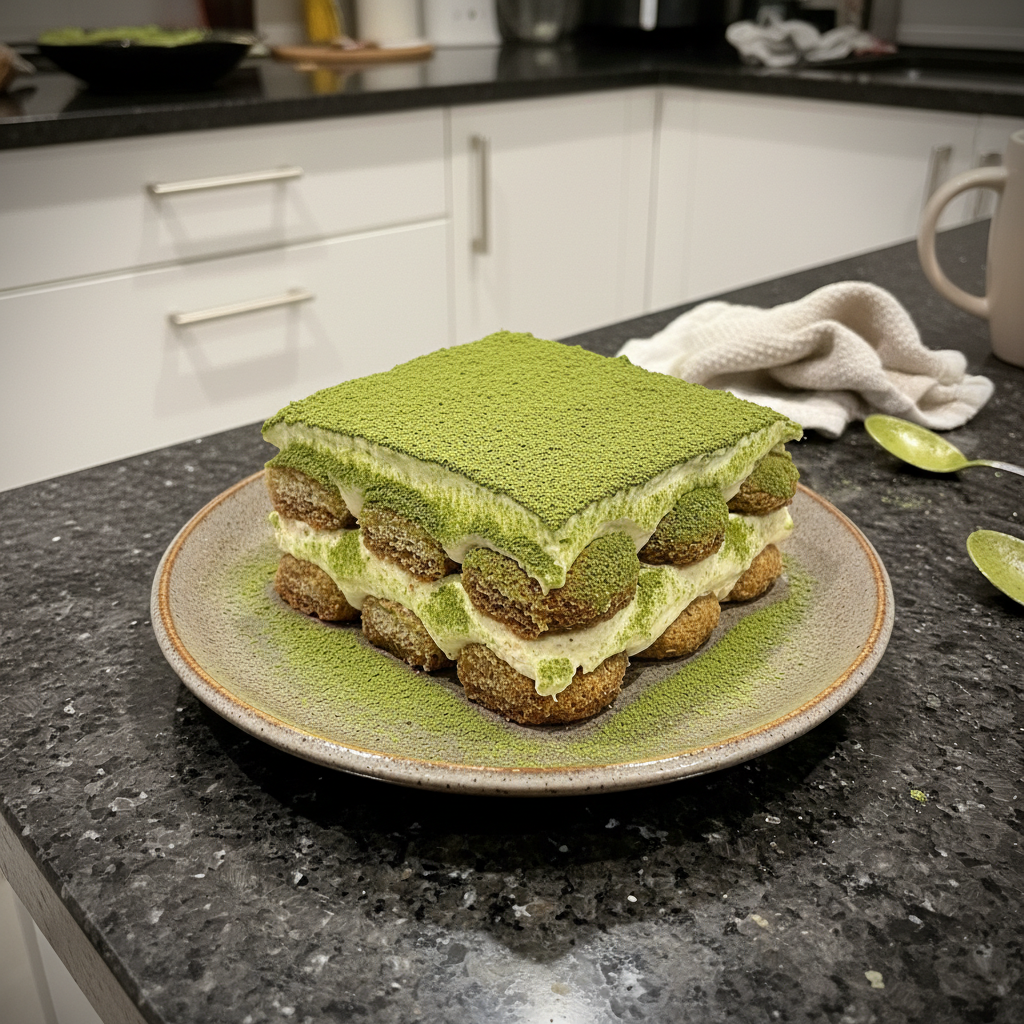
 There’s something truly magical about the way a classic tiramisu melts in your mouth layers of delicate ladyfingers, rich cream, and bold coffee. But what if we infused that timeless elegance with the vibrant, earthy allure of Japanese matcha? In my kitchen, this idea blossomed into a delightful reality, creating a Matcha Tiramisu that’s quickly become a favorite.
This Matcha Tiramisu recipe is my modern, delightful twist on the classic Italian dessert, perfect for any occasion, from a quiet afternoon treat to an elegant dinner party. Whether you’re a seasoned baker or a curious beginner, you’re in for a treat. I’ve cracked the code to achieving a perfectly stable, incredibly Creamy texture that avoids the dreaded runny cream, ensuring your dessert is as beautiful as it is delicious. Get ready to master a reliable, easy-to-follow recipe, packed with valuable insights for success!
Why You’ll Love This Recipe
I know the frustration of a tiramisu that looks gorgeous in the dish but turns into a soupy mess when you try to serve it. My passion for perfect desserts led me to solve the common problem of “runny tiramisu cream.” This Matcha Tiramisu recipe is designed to give you a beautifully set, stable dessert every single time.
The secret lies in a concept I’ve perfected for a stabilized mascarpone cream. While the core recipe is wonderfully straightforward, I’ll share an optional, advanced technique later: a touch of white chocolate ganache can be the ultimate game-changer. The structural integrity of cocoa butter solids, which firm up upon chilling, is the scientific logic behind this. Even a subtle inclusion prevents that frustrating runny cream and truly enhances the delicate Green tea flavor of the matcha with a gentle sweetness and an unbelievably improved texture.
You’ll love how reliable this recipe is for home cooks, guaranteeing an elegant presentation that will impress anyone. The balance of earthy matcha and subtle sweetness is simply delightful, and the joy of creating a stunning No-bake dessert with such perfect results is truly unmatched.
Ingredients Needed

- 3 large egg yolks
- 70 g granulated sugar
- 225 g Mascarpone cheese, Room temperature ingredients
- 350 g Whipping cream
- 2 teaspoons Matcha powder, Sifted matcha
- 1 teaspoon vanilla extract
- 2 teaspoons Matcha powder, Matcha powder
- 1 tablespoon granulated sugar
- 120 g hot water
- 24-30
- 2 teaspoons Matcha powder
Ingredient Notes & Substitutions
Matcha Powder: When it comes to Matcha powder, quality truly makes a difference in this No-bake dessert. You’ll find ceremonial grade and culinary grade Matcha grades on the market. For its vibrant color and sweeter, less bitter flavor, I highly recommend using ceremonial grade matcha in this recipe. Always remember to use Sifted matcha to prevent any lumps, ensuring a silky smooth finish in both the cream and the soak.
Mascarpone Cheese: Always opt for high-quality, full-fat Mascarpone cheese. Crucially, ensure your Mascarpone cheese is at Room temperature ingredients. This makes it much easier to incorporate smoothly into the egg mixture, preventing any unwanted lumps and ensuring that luxurious Creamy texture.
Whipping Cream: In the US, you’ll often see both </Whipping cream> (around 30-35% milk fat) and Heavy cream (36%+ milk fat). Either works beautifully here, but Heavy cream will give you a slightly richer, firmer cream, which I prefer for its decadence. You’re aiming for Medium peaks a beautiful, soft structure that still flows.
Ladyfingers: You have a choice between soft and crunchy . For the best structure in your Matcha Tiramisu, I generally lean towards crunchy as they hold their shape a bit better. However, both types will soften beautifully once properly soaked in the matcha mixture. The key is in the dipping!
Egg Yolks: We’ll be using a Double boiler method to gently cook the Egg yolks, ensuring Food safety by pasteurizing them without scrambling. This step is essential for both texture and peace of mind.
Substitutions: For those with dietary needs, Dairy-free alternatives can be explored using coconut cream (the thick, solid part from a can of full-fat coconut milk, chilled overnight) or specific vegan mascarpone brands. Additionally, Gluten-free ladyfingers> are readily available in many specialty stores, making this No-bake dessert accessible to more people.

How to Make Matcha Tiramisu
Creating this </Matcha Tiramisu> is a delightful journey, and I’ll walk you through each step to ensure your success.
Prepare the Sabayon Base
First, set up your Double boiler. Fill a pot with about an inch of water and bring it to a gentle boil. In a large mixing bowl that fits snugly into the pot without touching the water, whisk together your Egg yolks and Granulated sugar. Once the water begins to boil, turn off the heat. Place your bowl on top of the pot. Continuously whisk the egg mixture for about 5 minutes until the sugar fully dissolves, and the mixture becomes pale yellow and slightly thickened. This gentle cooking pasteurizes the eggs, ensuring Food safety and preventing any risk of Salmonella poisoning.
Remove the bowl from the pot and immediately add the Mascarpone cheese, which should be at Room temperature ingredients. Whisk everything together until the mixture is completely smooth and wonderfully silky. Set this aside.
Whip the Matcha Cream
In a separate mixing bowl, combine the Whipping cream, Sifted matcha powder, and Vanilla extract. Using an Electric hand mixer fitted with a Whisk attachment, whip the cream until it forms Medium peaks. The cream should have a beautiful, defined structure, leaving trails from the whisk, but still be fluid and not overly stiff. Be careful not to Overwhipping mascarpone cream, causing water to separate> at this stage.
Gently add the whipped matcha cream to your mascarpone mixture. Use a to carefully fold them together until no streaks of either cream remain, ensuring a uniform, delicate green hue throughout. Set this aside.
Prepare the Matcha Soak
In a shallow bowl, combine the </Matcha powder>, </Granulated sugar>, and </Hot water>. Use a small matcha whisk, milk frother, or even a regular whisk to combine these ingredients until the mixture is slightly frothy, which usually takes about 30 seconds. Make sure there are no lumps of matcha for a smooth, even flavor.
Assemble Your Matcha Tiramisu
Now for the layering! Take a and very briefly dip both sides into the matcha soak just enough to coat it. The key here is speed; do NOT let it sit in the liquid or soak all the way through, or you’ll end up with a Mushy tiramisu. Let any excess liquid drip off, then place the ladyfinger in the bottom of your chosen Serving containers. Continue this process until you have a flat, even layer of soaked .
Next, add a generous layer of your beautiful mascarpone cream over the . Use a to gently smooth it evenly across the layer. Repeat this process: another layer of briefly soaked , followed by another creamy layer of mascarpone.
Chill and Serve
Once assembled, cover your Matcha Tiramisu and transfer it to the fridge. This Chilling time is crucial for the Creamy texture to firm up and for the to fully soften and absorb the delightful matcha flavor. Chill for at least 4 hours, but ideally, leave it overnight. This extended Chilling time allows all the flavors to meld beautifully and the structure to set perfectly.
Just before serving, take out your beautifully chilled Matcha Tiramisu and sprinkle the top generously with a final dusting of Matcha powder (sifted, of course!). Enjoy!
Essential Tools & Customization for Your Matcha Tiramisu
Essential Equipment for Success
Having the right tools in your kitchen can make all the difference when crafting this elegant Matcha Tiramisu. Here’s what I recommend:
- Double Boiler Setup: You’ll need a medium-sized pot (about 2-3 quarts) and a heat-safe mixing bowl (glass or stainless steel) that fits snugly over the pot without touching the simmering water. This ensures even, gentle heat for your egg yolks.
- Electric Hand Mixer with Whisk Attachment: Essential for efficiently whipping the egg mixture and, most importantly, achieving those perfect Medium peaks for your Whipping cream. A Whisk attachment provides the necessary aeration.
- Rubber Spatula: Indispensable for gently folding the whipped cream into the mascarpone mixture without deflating it, preserving that light and airy Creamy texture.
- Shallow Bowl: Ideal for dipping your into the matcha soak, allowing for quick, even coating without oversoaking.
- Serving Container(s): For the base recipe, an 8×8 or 9×9 inch Baking pan works perfectly. For individual portions, consider elegant Serving containers like glass ramekins or small clear dessert cups.
- Matcha Whisk (Chasen) or Small Whisk/Frother: A traditional bamboo Matcha whisk is perfect for creating a lump-free matcha soak, but a small regular whisk or even a milk frother will also do the trick.
Customizing Your Matcha Tiramisu
One of the joys of cooking is making a recipe truly your own! This Matcha Tiramisu is incredibly versatile.
Serving Dish Sizes & Yields: This recipe is perfectly suited for an 8×8 inch square dish, yielding about 6-8 generous servings. If you’re hosting a larger gathering, you can easily double the recipe to fit a 9×13 inch casserole dish, which typically serves 12-16. For individual presentations, which always impress, simply layer the ingredients into individual ramekins or clear dessert glasses. Just be mindful that the ingredient quantities will need to be scaled up or down accordingly.
Flavor Variations: While the Green tea flavor of matcha is exquisite, you could explore other tea-infused desserts. Consider replacing the Matcha powder with powder for a rich, roasted tea flavor that offers a different kind of depth. For an extra touch of indulgence, grate some White chocolate between the layers its delicate sweetness complements the matcha beautifully.
Dietary Adaptations: For those avoiding dairy, you can experiment with Dairy-free alternatives. Look for specific vegan mascarpone brands, or use the thick cream from a can of full-fat coconut milk (chilled overnight) as a substitute for whipping cream, though the texture will be slightly different. For a Gluten-free ladyfingers option, many specialty stores now carry gluten-free versions that work wonderfully in this recipe. Be aware that any substitutions might alter the final texture slightly, but they still result in a delicious No-bake dessert.
Pro Tips & Troubleshooting
Pro Tips for a Perfect Matcha Tiramisu
Achieving a truly stellar Matcha Tiramisu is all about attention to detail. Here are my top tips:
- The Ultimate Stability Secret: For an exceptionally stable mascarpone cream that absolutely won’t run, consider incorporating a touch of White chocolate ganache. Melt about 50g of good quality white chocolate with 2 tablespoons of warm Whipping cream, then allow it to cool slightly before gently folding it into your finished mascarpone mixture. The cocoa butter in the white chocolate provides extra structural integrity upon chilling, ensuring a perfectly firm slice every time.
- Room Temperature Mascarpone: This is a non-negotiable! Using Mascarpone cheese, room temperature ensures it blends smoothly with the egg mixture, preventing any lumps and guaranteeing a silky, consistent cream.
- Master the Ladyfinger Soak: This is crucial. Do not completely soak ladyfingers; briefly dip both sides. A quick, decisive dip is all it takes for them to absorb enough liquid without becoming soggy.
- Quality Matcha for Best Flavor: Invest in High-quality ceremonial grade matcha for the most vibrant color and exquisite Green tea flavor. Always use Sifted matcha to ensure it incorporates smoothly into both the cream and the soak, preventing any powdery lumps.
- Proper Chilling is Key: This is perhaps the most important tip. Your Matcha Tiramisu needs Chilling time at least 4 hours, but preferably overnight to allow the cream to firm up completely and the to soften beautifully. Patience here will be greatly rewarded.
- Egg Safety First: Always use the Double boiler method for your Egg yolks to gently cook and pasteurize them. This ensures Food safety without the risk of scrambling.
Common Mistakes to Avoid
Even experienced bakers can stumble, but knowing the pitfalls helps us avoid them!
- Oversoaking Ladyfingers: This is the number one culprit for a Mushy tiramisu. A quick dip, flip, and out is all you need. If they sit too long, they’ll absorb too much liquid and disintegrate.
- Overwhipping Cream: Overwhipping mascarpone cream, causing water to separate> can lead to a grainy texture or, worse, cause the cream to “break” and become runny. Aim for Medium peaks it should hold its shape but still be soft and smooth.
- Insufficient Chilling: Trying to serve your Matcha Tiramisu too soon is a common error. Not chilling long enough results in loose cream and hard ladyfingers and a disappointing texture. Give it time to set!
- Bland or Bitter Matcha: This often happens due to using low-quality culinary matcha, which can be dull or have a pronounced bitter taste. Not sifting the matcha can also lead to pockets of bitterness. Always sift and choose a good quality ceremonial grade for best results.
- Cream Not Firming Up: If your cream isn’t setting, it could be due to Overwhipping mascarpone cream, not using Room temperature ingredients for your mascarpone (which can prevent proper ), or not folding the mixtures together gently enough, leading to deflated cream.
Serving & Storage
Serving Suggestions
The presentation of your Matcha Tiramisu is almost as important as its taste! I love to elevate this dessert with a few simple touches.
Before serving, always Sprinkle generously with sifted matcha powder right before serving. This adds a beautiful pop of color and an aromatic flourish. For an elegant display, especially if you’ve made individual portions, Serve in individual clear containers to showcase layers for elegant presentation>. If you’ve made it in a larger Baking pan, carefully cut it into perfect squares, serving each slice like a mini cake. It pairs wonderfully with a simple cup of green tea or, for those who enjoy the contrast, a light, unsweetened coffee. Remember to consider Food photography if you want to capture its beauty!
Storage and Make-Ahead Tips
This Matcha Tiramisu is an excellent No-bake dessert to prepare in advance, making it perfect for entertaining or enjoying throughout the week. In fact, it often tastes even better the next day as the flavors deepen and meld.
Refrigeration: To maximize its shelf life and prevent it from drying out or absorbing other odors, store your Matcha Tiramisu in an container in the refrigerator. It will stay fresh and delicious for 3-4 days. I often use Cake boxes or a dish with a tight-fitting lid.
Freezing: Yes, you can freeze Matcha Tiramisu! For best results, freeze it in an airtight, freezer-safe container for up to 1 month. If you’re freezing individual portions, wrap them tightly in plastic wrap before placing them in the container. To thaw, simply transfer it to the refrigerator and let it defrost slowly, typically overnight. This slow thawing helps maintain its beautiful Creamy texture.
Make-Ahead: As a No-bake dessert, this recipe is ideal for making ahead. Preparing it the day before you plan to serve it is my preferred method. This allows for optimal Chilling time (overnight is best!), which is crucial for the cream to set perfectly and the to soften to their ideal consistency, creating a truly harmonious flavor.
Conclusion
And there you have it a perfectly stable, unbelievably creamy, and vibrantly delicious Matcha Tiramisu! We’ve navigated the common pitfalls together, ensuring your dessert boasts a flawless Creamy texture and a captivating Green tea flavor, all thanks to those thoughtful techniques.
I hope you feel confident that even as a beginner, you can achieve a beautifully stable and profoundly delicious dessert, effortlessly overcoming any potential Troubleshooting desserts challenges. Don’t hesitate to experiment with the and I’ve shared to truly make this Matcha Tiramisu your own. I encourage you to share your beautiful creations, print out this recipe for your culinary adventures, and perhaps even explore more Matcha baking recipes or other No-bake matcha desserts> from my collection!
FAQ
Why is my matcha tiramisu wet or runny?
A runny Matcha Tiramisu is a common frustration, often caused by Oversoaking ladyfingers>, Overwhipping mascarpone cream, or insufficient Chilling time. Remember to dip ladyfingers very briefly, whip cream to Medium peaks, and allow ample chilling time (at least 4 hours, preferably overnight). For ultimate stability, consider incorporating a small amount of white chocolate ganache as a pro tip; the cocoa butter helps the cream set beautifully.
Is it safe to consume raw eggs in matcha tiramisu?
In this recipe, we use a Double boiler method to gently heat and whisk the Egg yolks with sugar. This process effectively pasteurizes the eggs, ensuring Food safety by reducing the risk of Salmonella poisoning without fully cooking them.
How long should matcha tiramisu chill for optimal texture and flavor?
For the best Creamy texture and deepest flavor, your Matcha Tiramisu should chill in the refrigerator for at least 4 hours. However, I highly recommend chilling it overnight. This extended Chilling time allows the cream to firm up completely and the to fully absorb the matcha soak, creating a perfectly harmonious dessert.
What are the best pan sizes and serving options for this recipe?
This recipe is designed for an 8×8 inch square Baking pan for a standard yield. For individual Serving containers, use ramekins or clear dessert cups. If you’re doubling the recipe for a larger gathering, a 9×13 inch casserole dish works perfectly. Adjust ingredient quantities accordingly for different pan sizes.
Can I make matcha tiramisu ahead of time or freeze it?
Yes, Matcha Tiramisu is an excellent Make-ahead dessert! It can be stored in an airtight container in the refrigerator for 3-4 days. You can also it in an airtight, freezer-safe container for up to 1 month. Thaw frozen tiramisu slowly in the refrigerator overnight for best results.
What is the best grade of matcha to use for tiramisu, and why?
For a no-bake dessert like tiramisu, I recommend using ceremonial grade Matcha powder. This grade of Matcha grades offers a more vibrant green color and a sweeter, less bitter Green tea flavor compared to culinary grade matcha. It significantly enhances the overall quality and taste of your Matcha Tiramisu.
What equipment do I need to make matcha tiramisu?
You’ll need a Double boiler setup (pot and heat-safe bowl), an Electric hand mixer with a Whisk attachment, a , a shallow bowl for the matcha soak, your chosen Serving containers (e.g., Baking pan or individual ramekins), and a matcha whisk or small regular whisk for lump-free matcha incorporation.
Matcha Tiramisu
Ingredients
Equipment
Method
- Set up a double boiler: fill a pot with about an inch of water and bring it to a gentle boil. In a large mixing bowl that fits snugly into the pot without touching the water, whisk together egg yolks and granulated sugar.
- Once the water boils, turn off the heat. Place your bowl on top of the pot. Continuously whisk the egg mixture for about 5 minutes until the sugar fully dissolves and the mixture becomes pale yellow and slightly thickened.
- Remove the bowl from the pot and immediately add the room temperature mascarpone cheese. Whisk everything together until the mixture is completely smooth and silky. Set aside.
- In a separate mixing bowl, combine the whipping cream, sifted matcha powder (for cream), and vanilla extract.
- Using an electric hand mixer with a whisk attachment, whip the cream until it forms medium peaks. Be careful not to overwhisk.
- Gently add the whipped matcha cream to your mascarpone mixture. Use a spatula to carefully fold them together until no streaks remain, ensuring a uniform green hue. Set aside.
- In a shallow bowl, combine 2 teaspoons matcha powder (for soak), 1 tablespoon granulated sugar, and hot water.
- Use a small matcha whisk, milk frother, or regular whisk to combine these ingredients until the mixture is slightly frothy, about 30 seconds. Ensure no lumps remain.
- Briefly dip both sides of a ladyfinger into the matcha soak, just enough to coat it; do not let it sit. Let any excess liquid drip off, then place it in the bottom of your chosen serving container.
- Continue this process until you have a flat, even layer of soaked ladyfingers.
- Add a generous layer of your mascarpone cream over the ladyfingers. Use a spatula to gently smooth it evenly.
- Repeat this process: another layer of briefly soaked ladyfingers, followed by another creamy layer of mascarpone.
- Cover your matcha tiramisu and transfer it to the fridge. Chill for at least 4 hours, but ideally, leave it overnight, allowing flavors to meld and structure to set.
- Just before serving, sprinkle the top generously with the final 2 teaspoons of sifted matcha powder. Enjoy!


