 Skip to content
 Valentine’s Day is just around the corner, and in my kitchen, that means it’s time for something truly special. Forget crowded restaurants; there’s nothing quite as heartfelt as a homemade treat baked with love. If you’re looking to create an irresistible dessert that’s perfect for sharing with your sweetheart, you’ve come to the right place. I am so excited to share my recipe for Mouthwatering Valentine’s Day Red Velvet Cookies. This isn’t just any cookie recipe; it’s a small-batch wonder designed for two, complete with a delightful twist and all my expert tips to ensure your success. Get ready to bake some magic!
Why You’ll Love This Mouthwatering Red Velvet Cookie Recipe
This Mouthwatering Red Velvet Cookie Recipe is truly a labor of love, and it’s packed with reasons to adore it.
Our unique twist transforms these cookies from simple candy-filled treats into something truly gourmet. While the original recipe calls for white chocolate peanut butter hearts, I’ve found that a dollop or swirl of homemade tangy cream cheese frosting is an absolute game-changer. For an even more authentic red velvet experience, I also recommend incorporating a tablespoon of buttermilk into the dough. The buttermilk provides that characteristic subtle tang of red velvet and reacts beautifully with the baking soda to enhance the vibrant red color, giving you a more tender, cake-like crumb. The cream cheese frosting, a traditional pairing for red velvet, adds a rich, creamy texture and elevates the flavor profile, making these cookies truly mouthwatering.
Perfect for Two: This is a dessert specifically designed for a special occasion for two. No overwhelming batch, just enough deliciousness to share.
Ease and Reliability: I’ve streamlined the process by using melted butter, which simplifies the mixing and consistently delivers soft, chewy, and wonderfully crackly cookies every time.
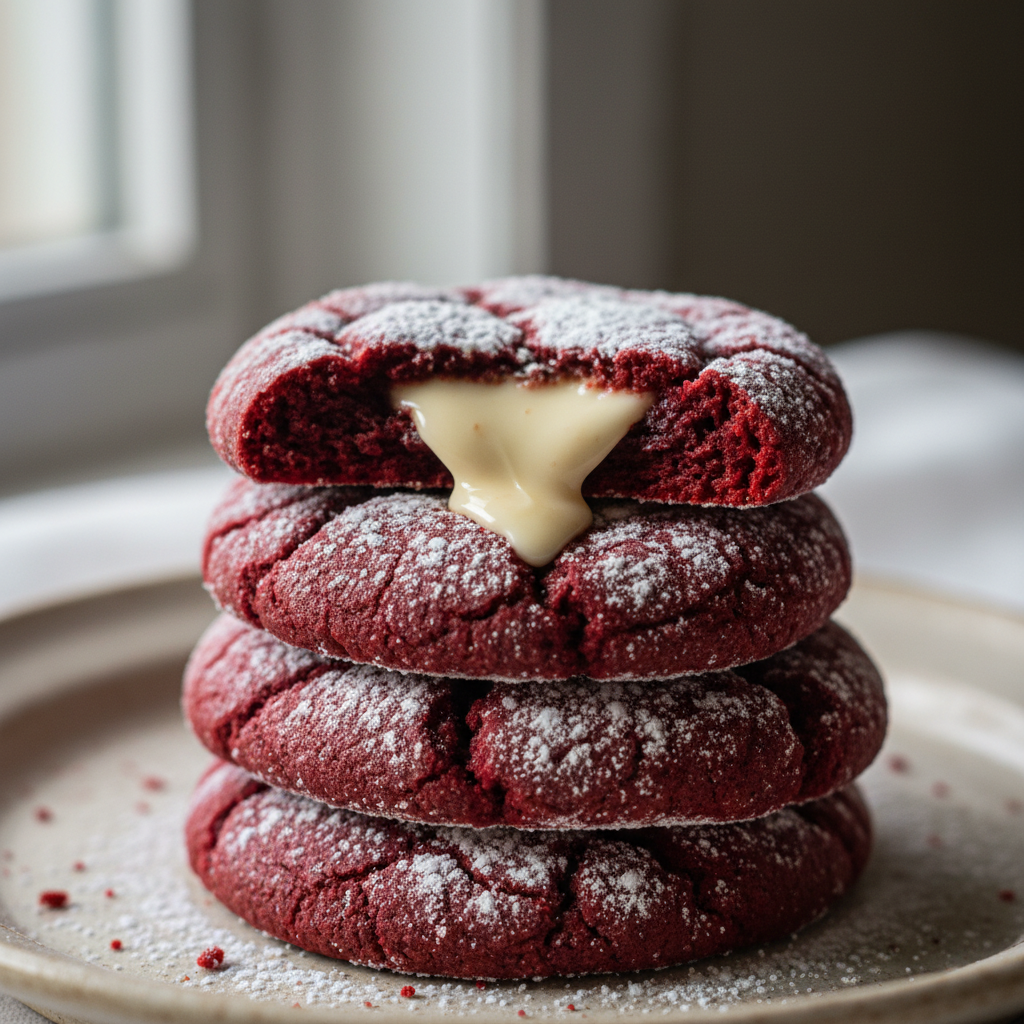
Sensory Appeal: Prepare for the softest, chewiest cookies with a stunning bright red hue and beautiful crackly tops. The rich, creamy frosting provides the perfect contrast, making every bite an experience.
Ingredients Needed for Your Red Velvet Cookies

Here are the precise ingredients you will need to create these delightful cookies.
4 tablespoons unsalted butter, melted
1/3 cup granulated sugar, plus extra for rolling
1 large egg yolk
1/2 teaspoon vanilla extract
1 teaspoon red gel food coloring
1/2 cup + 1 tablespoon all-purpose flour
2 tablespoons unsweetened cocoa powder
1/4 teaspoon baking soda
1/8 teaspoon fine salt
6 white chocolate peanut butter hearts (like Reese’s)
Ingredient Notes & Customization (Our Unique Twist Included!)
Red Gel Food Coloring: For that iconic, vibrant red color, red gel food coloring is absolutely essential. Brands like Wilton or AmeriColor are fantastic choices because they provide intense color without adding excess liquid, which can thin out your dough and alter the texture. Liquid food coloring can make your cookies less vibrant and can sometimes require adjusting other ingredients.
Cocoa Powder: The type of unsweetened cocoa powder you use can significantly impact both the color and flavor of your red velvet cookies. Natural cocoa powder is slightly acidic, which interacts with baking soda to create lift and can enhance the reddish hue. Dutch-processed cocoa powder, which has been alkalized, is darker and less acidic, often resulting in a deeper, browner color rather than a bright red. For this recipe, I recommend unsweetened natural cocoa powder to help achieve the classic red velvet look and flavor.
Our Unique Twist: Homemade Tangy Cream Cheese Frosting & Buttermilk:
Buttermilk: To truly capture the essence of traditional red velvet, I highly recommend incorporating 1 tablespoon of buttermilk into your wet ingredients (along with the melted butter, sugar, egg yolk, and vanilla). This adds a subtle tang and helps create a more tender, cake-like crumb. If you don’t have buttermilk on hand, you can easily make a substitute by adding 1/2 teaspoon of white vinegar to 1 tablespoon of regular milk and letting it sit for 5 minutes before using.
Cream Cheese Frosting: This is where the magic truly happens! Instead of store-bought candy, I suggest making a simple, small-batch cream cheese frosting. It’s the perfect complement to the red velvet flavor. A basic frosting can be made with 2 ounces cream cheese (softened), 1 tablespoon unsalted butter (softened), 1/2 cup powdered sugar, and 1/4 teaspoon vanilla extract. Simply beat these together until smooth and creamy. You can pipe or swirl this onto your cooled cookies for a truly irresistible finish.
Heart Alternatives: If you prefer not to use the cream cheese frosting or the white chocolate peanut butter hearts, there are other heart-shaped chocolate options you can use. Consider caramel hearts or Dove dark chocolate hearts for a different flavor profile.

How to Make Mouthwatering Red Velvet Cookies
Here is my step-by-step guide to making these Mouthwatering Red Velvet Cookies.
First, preheat your oven to 350 degrees Fahrenheit. Line a small baking sheet with parchment paper, or if you have one, a silicone mat. This will prevent sticking and ensure easy cleanup.
In a medium bowl, stir together the melted unsalted butter, granulated sugar, large egg yolk, vanilla extract, and red gel food coloring. Stir very well until the mixture is smooth and a vibrant, uniform red color.
Next, sprinkle the all-purpose flour, unsweetened cocoa powder, baking soda, and fine salt evenly over the wet ingredients. Stir just until everything is combined and no dry streaks of flour remain. Be careful not to overmix, as this can lead to tough cookies.
Press the dough flat and evenly in the bowl, then visually divide it in half. From each half, you should be able to get three cookies, for a total of six.
Roll each dough ball gently in your hands until smooth, then roll them lightly in extra granulated sugar. This sugar coating will give your cookies a beautiful sparkle and a delightful crackly crust. Space the dough balls evenly on your prepared baking sheet.
Bake for 10-12 minutes. The cookies are ready when they have spread nicely, the tops have started to crackle, and they appear dry around the edges and on top.
Let the cookies rest on the baking sheet for 2 minutes. This helps them set up before you move them. Then, carefully transfer them to a wire rack to cool completely.
After the cookies have cooled for at least 10 minutes, you have a choice. If you are using the white chocolate peanut butter hearts, gently press one into the center of each cookie. Then, move the cookies to the fridge for 30 minutes to help the hearts set and prevent them from melting too much. If you are using our unique twist of homemade cream cheese frosting, wait until the cookies are completely cool, then pipe or swirl a dollop of frosting onto each cookie.
Bring the cookies to room temperature before serving for the best texture and flavor experience.
Mastering Red Velvet Color & Texture
The classic red velvet flavor profile is truly captivating: a subtle tang, a delicate hint of cocoa, and a wonderfully creamy finish, often attributed to its origins in the early 20th century, where acidic ingredients reacted with cocoa powder to reveal a reddish hue. It’s a dessert that balances richness with a slight brightness, making it utterly unique.
Achieving the Iconic Red Color: For that signature vibrant red, red gel food coloring is your best friend. Unlike liquid food coloring, gel coloring is highly concentrated, allowing you to achieve an intense hue without adding excess moisture to your dough. This means your cookies retain their perfect texture. If liquid coloring is your only option, you’ll need to use more of it, but be aware that it might slightly alter the dough’s consistency.
Cocoa Powder Deep Dive: The type of unsweetened cocoa powder you use dramatically affects the final color and flavor. Natural cocoa powder is acidic and reacts with baking soda to create leavening and deepen the red color. Dutch-processed cocoa powder, on the other hand, is less acidic and typically yields a darker, less vibrant red, leaning more towards a brownish-red. For a truly iconic red velvet, I recommend sticking with natural unsweetened cocoa powder.
Buttermilk’s Role (for the twist): My unique twist of incorporating buttermilk (or a milk and vinegar substitute) into the dough not only enhances the characteristic tang but also helps achieve a more vibrant red color. The acidity in buttermilk reacts with the baking soda, contributing to the beautiful color and a tender, cake-like crumb.
Pro Tips & Troubleshooting for Perfect Cookies
Even experienced bakers can benefit from a few extra insights. Here are my best tips for creating perfect red velvet cookies and avoiding common pitfalls.
Pro Tips for Success
Melted Butter Magic: Using melted butter simplifies the mixing process and is key to a wonderfully chewy texture in these Red Velvet Cookies. It ensures the fat is evenly distributed, contributing to a consistently soft crumb.
Achieving Uniform Shapes: For perfectly round and consistent cookies, I recommend using a small cookie scoop. If you don’t have one, weighing your dough balls to ensure they are all the same size is another excellent method. This ensures even baking and a professional look.
Don’t Overmix: When you add the all-purpose flour and unsweetened cocoa powder, mix just until combined. Overmixing develops the gluten in the flour too much, which can lead to tough, dense cookies instead of soft, tender ones.
Chilling for Structure (Make-Ahead): Even a short chill time of 30 minutes for your Cookie Dough can work wonders. Chilling prevents excessive spreading in the oven, helps the cookies hold their shape, and can even enhance their flavor. It’s also a great make-ahead strategy!
Baking Cues: Trust your eyes! Look for visual cues of doneness: the cookies should have beautiful crackly tops, their edges should be set, and they should appear dry on the surface. These are more reliable indicators than just relying on the clock alone.
Common Mistakes to Avoid
Cookies Collapsing: If your cookies collapse after cooling, several factors could be at play. It might be due to old baking soda that has lost its leavening power, overly soft or warm Cookie Dough, or simply under-baking. Ensure your ingredients are fresh and your dough is properly chilled.
Excessive Spreading: Cookies spreading too much is a common frustration. This can happen if your butter was too warm when you started, you didn’t use enough all-purpose flour, the dough wasn’t sufficiently chilled, or your Baking Temperature was off. Always ensure your butter is melted but not hot, and chill your dough.
Dull Color: A lack of vibrant red is usually due to insufficient Red Gel Food Coloring or using liquid food coloring, which is less potent. Always use a good quality gel coloring for the best results.
Overbaking: Overbaked cookies become dry and crumbly. To avoid this, rely on those visual cues for doneness, like the crackly tops and set edges, rather than just the timer. Pull them out when they look done, even if it’s a minute or two early.
Serving & Storage Suggestions
Once your Mouthwatering Valentine’s Day Red Velvet Cookies are baked and adorned, here’s how to best enjoy and preserve them.
Elegant Serving Ideas for Your Valentine
Romantic Presentation: For a small batch dessert for two, presentation is everything. Arrange two cookies beautifully on a small, charming plate. This simple act elevates the treat and makes it feel extra special.
Temperature: These cookies, especially with our tangy cream cheese frosting twist, are best enjoyed at room temperature. This allows the frosting to be perfectly creamy and the cookie to be wonderfully tender.
Garnishes: For a festive and elegant touch, consider a light dusting of powdered sugar over the frosted cookies, a subtle sprinkle of cocoa powder, or a few fresh berries like bright red strawberries or raspberries.
Storage and Make-Ahead Tips
Baked Cookies Storage:
Airtight Container: Always store your baked cookies in an airtight container to keep them fresh.
Room Temperature: If your cookies are plain or have the candy hearts, they can be stored at room temperature for 3-4 days.
Refrigerator: If you’ve opted for the delicious homemade cream cheese frosting, it’s best to store them in the fridge. They will keep well for 5-7 days. Remember to bring them to room temperature before serving for the best texture and flavor.
Make-Ahead Dough: You can prepare the Cookie Dough in advance! Simply wrap it tightly in plastic wrap or place it in an airtight container and store it in the fridge for up to 2-3 days. Chilling the dough can actually enhance its flavor and prevent spreading during baking.
Freezing Baked Cookies: Once your cookies are completely cool, place them in a single layer on a baking sheet and freeze until solid. Then, transfer them to an airtight freezer bag or container. They can be frozen for up to 2-3 months. Thaw them at room temperature when you’re ready to enjoy.
Freezing Cookie Dough: Shape your Cookie Dough into balls, then freeze them flat on a baking sheet until solid. Transfer the frozen dough balls to an airtight freezer bag. When you want fresh cookies, you can bake them directly from frozen, adding a couple of extra minutes to the Baking Temperature.
Your Perfect Valentine’s Day Treat Awaits!
There you have it your guide to creating truly Mouthwatering Valentine’s Day Red Velvet Cookies. With our unique twist of tangy cream cheese frosting and the subtle depth from buttermilk, these cookies are more than just a sweet treat; they’re a heartfelt gesture. This small-batch cookie recipe is approachable for all skill levels, making it the perfect choice for your holiday baking. I encourage you to try this recipe and delight someone special this Valentine’s Day.
Red Velvet Cookie FAQs
Q: What makes Red Velvet Cookies unique in flavor and texture?
A: Red Velvet Cookies are unique for their subtle tang, a delicate hint of cocoa, and a wonderfully tender, slightly chewy texture, especially when buttermilk is included. The tang typically comes from the reaction of acidic ingredients like buttermilk and cocoa with baking soda, and the texture is often soft and cake-like.
Q: What’s the best type of red food coloring to use for vibrant red velvet cookies?
A: For the most vibrant red velvet cookies, I highly recommend using red gel food coloring. Gel coloring is much more concentrated than liquid food coloring, allowing you to achieve an intense color without adding excess moisture to your dough, which could affect its consistency.
Q: How can I prevent my red velvet cookies from collapsing after baking?
A: Cookies collapsing after baking can be due to a few factors: your baking soda might be old and less active, your cookie dough might have been too soft or warm, or the cookies might have been under-baked. Ensure your baking soda is fresh, chill your dough, and bake until the edges are set and the tops appear dry and crackly.
Q: What are some creative alternatives to the heart-shaped candies in these cookies?
A: The best creative alternative is our unique twist: a homemade tangy cream cheese frosting dolloped or swirled onto the cooled cookies. However, if you prefer other heart-shaped chocolate options, you could use caramel hearts or dark chocolate hearts for a different flavor profile.
Q: What are the best ways to store Red Velvet Sugar Cookies to keep them fresh?
A: To keep Red Velvet Sugar Cookies fresh, store them in an airtight container. If they are plain or contain candy centers, they can stay at room temperature for 3-4 days. If frosted with cream cheese frosting, store them in the refrigerator for up to 5-7 days. Bring refrigerated cookies to room temperature before serving.
Q: Can I prepare the red velvet cookie dough in advance for Valentine’s Day?
A: Yes, you can! You can prepare the red velvet cookie dough in advance and store it tightly wrapped in plastic wrap or an airtight container in the fridge for up to 2-3 days. Chilling the dough actually helps to prevent spreading and enhances the flavor.
Q: How many cookies does this recipe make?
A: This small-batch recipe is designed to make 6 delicious cookies.
Q: Can red velvet cookies or dough be frozen?
A: Yes, both baked red velvet cookies and the dough can be frozen. For baked cookies, cool them completely, then freeze flat before transferring to an airtight freezer bag for up to 2-3 months. For dough, shape into balls, freeze until solid on a baking sheet, then transfer to a freezer bag; bake from frozen, adding a few minutes to the baking time.
Mouthwatering Valentine’s Day Red Velvet Cookies (Small Batch!)
Ingredients
Equipment
Method
- Preheat your oven to 350°F (175°C). Line a small baking sheet with parchment paper or a silicone mat.
- In a medium bowl, stir together the melted unsalted butter, 1/3 cup granulated sugar, large egg yolk, 1/2 teaspoon vanilla extract, 1 teaspoon red gel food coloring, and 1 tablespoon buttermilk (if using the twist). Stir very well until the mixture is smooth and a vibrant, uniform red color.
- Sprinkle the all-purpose flour, unsweetened cocoa powder, baking soda, and fine salt evenly over the wet ingredients. Stir just until everything is combined and no dry streaks of flour remain. Avoid overmixing.
- Press the dough flat and evenly in the bowl, then visually divide it into 6 equal portions.
- Roll each dough ball gently in your hands until smooth, then roll them lightly in the extra granulated sugar. Space the dough balls evenly on your prepared baking sheet.
- Bake for 10-12 minutes. The cookies are ready when they have spread nicely, the tops have started to crackle, and they appear dry around the edges and on top.
- Let the cookies rest on the baking sheet for 2 minutes. Then, carefully transfer them to a wire rack to cool completely.
- If making the Cream Cheese Frosting (Optional Twist): In a small bowl, beat together 2 ounces softened cream cheese, 1 tablespoon softened unsalted butter, 1/2 cup powdered sugar, and 1/4 teaspoon vanilla extract until smooth and creamy.
- Once cookies are cooled for at least 10 minutes: If using white chocolate peanut butter hearts, gently press one into the center of each cookie, then move to the fridge for 30 minutes to help the hearts set. If using the homemade cream cheese frosting, pipe or swirl a dollop onto each completely cooled cookie.
- Bring the cookies to room temperature before serving for the best texture and flavor experience.


