 Skip to content
 There’s something truly magical about the combination of rich chocolate and creamy peanut butter. It’s a pairing that always delivers, but what if I told you I’ve discovered a way to elevate your classic peanut butter brownies to an entirely new level of decadence? My recipe for Fudgy Salted Crunchy Peanut Butter Brownies takes everything you love about this dessert and adds an irresistible twist. Prepare yourself for chewy, fudgy perfection with pockets of salty, crunchy peanut butter goodness. I’ll guide you through every step to ensure your homemade brownies are the best you’ve ever made.
Why You’ll Love This Recipe
I know you’ve probably had your share of peanut butter brownies, but trust me, this recipe is different. My secret? A generous swirl of salted crunchy peanut butter finished with a sprinkle of flaky sea salt on top. This isn’t just a simple garnish; it’s a game-changer for the taste and texture profile.
Textural Contrast: Forget just creamy swirls! The crunchy peanut butter bits introduce an exciting texture that plays beautifully against the ultra-fudgy brownie. Each bite offers a delightful surprise that keeps you coming back for more.
Flavor Amplification: The flaky sea salt on top isn’t just for looks. It’s here to make the classic sweet-and-salty profile truly sing. The salt makes the peanut butter ‘pop’ and perfectly balances the richness of the chocolate, ensuring a decadent experience without being overly sweet. It’s a sophisticated touch that elevates these fudgy brownies.
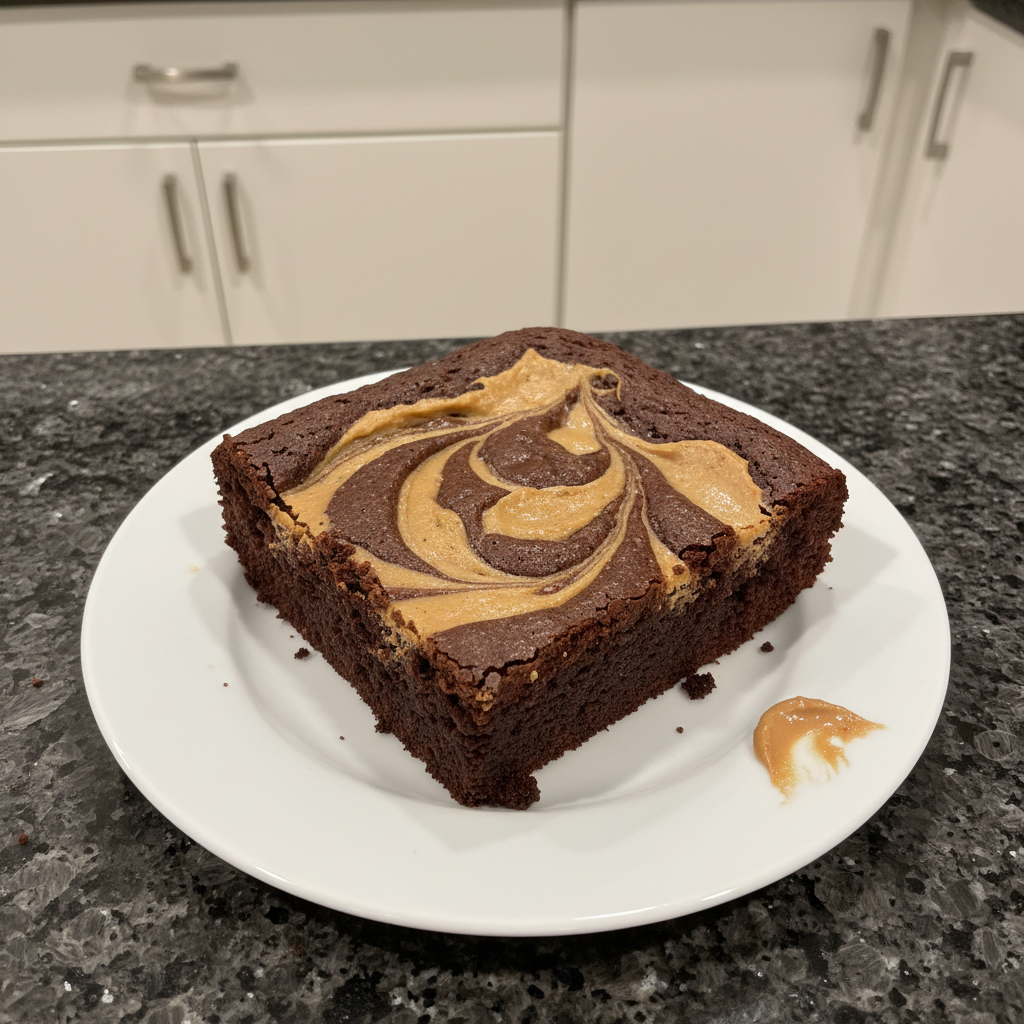
Visual Appeal: The distinct ribbons of peanut butter, shimmering with flaky sea salt, create a bakery-worthy presentation that’s sure to impress.
Decadent yet Balanced: These homemade brownies satisfy every chocolate and peanut butter craving without being cloyingly sweet, hitting that perfect sweet and salty note.
Showstopper Dessert: Whether it’s for a special occasion or a simple family treat, these chewy brownies are an absolute showstopper.
Relatively Straightforward: Despite their impressive results, these peanut butter brownies are an achievable recipe for any home cook looking to bake something truly special.
Ingredients Needed

- 1 cup unsalted butter (227g)
- 1 cup semisweet chocolate chips (divided (175g))
- 1¼ cups all-purpose flour (150g)
- ½ cup unsweetened cocoa powder (50g)
- 1 teaspoon salt
- 1 cup granulated sugar (200g)
- 1 cup firmly packed light brown sugar (220g)
- 3 large eggs
- 1 tablespoon vanilla extract
- ½ cup creamy peanut butter
Ingredient Notes & Substitutions
Chocolate: For these homemade brownies, I recommend using good quality semisweet chocolate chips. They strike the perfect balance of sweetness and chocolate flavor. If you prefer a richer, deeper chocolate profile, feel free to use dark chocolate chips. For a sweeter brownie, milk chocolate chips can be used, but adjust the sugar slightly if you do.
Cocoa Powder: This recipe calls for unsweetened natural cocoa powder. This provides a classic, robust chocolate flavor. If you only have Dutch-processed cocoa powder, you can use it, but be aware it will produce a slightly darker, milder flavored brownie since it’s less acidic.
Peanut Butter: It’s important to note that the recipe uses creamy peanut butter in the brownie batter for a smooth texture, but the star of the swirl is **salted crunchy peanut butter**. This creates that amazing textural contrast. For best results in baking, I always recommend using commercial, no-stir peanut butter brands rather than natural peanut butter, which tends to separate and can make the batter inconsistent.
Sugars: The combination of granulated sugar and light brown sugar is key for achieving that signature fudgy, chewy brownie texture. Granulated sugar provides crispness, while brown sugar adds moisture and chewiness, contributing to the rich depth of these fudgy brownies.
Eggs: Always use room temperature eggs! This ensures they emulsify smoothly into the chocolate mixture, resulting in a more uniform and velvety batter. It’s a simple expert tip that makes a big difference.
Flour: All-purpose flour is my go-to for these peanut butter brownies. If you need a gluten-free option, a 1:1 gluten-free baking blend can work, but be mindful that it might slightly alter the final texture, sometimes making them a bit more delicate.
Dairy-Free Option: If you need to make these dairy-free, you can easily substitute the unsalted butter with a high-quality dairy-free butter alternative. The results will still be wonderfully fudgy.

How to Make Fudgy Peanut Butter Brownies
Prep the Pan & Oven
First, preheat your oven to 350°F (175°C). Prepare an 8×8 inch baking pan by spraying it generously with baking spray, then lining it with parchment paper, leaving an overhang on two sides. This creates “slings” that will make lifting your homemade brownies out incredibly easy once they’re cooled. This simple step ensures easy removal and clean slices.
Melt Chocolate & Butter
In a small saucepan, melt the unsalted butter over medium heat. Once fully melted, remove the pan from the heat and immediately whisk in ½ cup of the semisweet chocolate chips. Continue whisking until the chocolate is completely melted and you have a smooth, glossy, irresistible chocolate mixture. If you prefer, you can also do this in a large bowl in the microwave: melt the butter, then stir in the chocolate until smooth. Just be sure no water gets into your melting chocolate, as this can cause it to seize.
Combine Dry Ingredients
In a separate bowl, sift together the all-purpose flour and unsweetened cocoa powder. Sifting prevents lumps and aerates the dry ingredients, leading to a smoother batter. Whisk in the salt to ensure it’s evenly distributed.
Mix Batter
Transfer your cooled chocolate-butter mixture to a large bowl. Whisk in the granulated sugar, light brown sugar, room temperature eggs, and vanilla extract until the mixture is smooth and well combined. Gently fold in the sifted flour mixture with a spatula until just combined. Be careful not to over-mix the batter, as this can develop gluten and lead to tough, cakey brownies instead of the fudgy ones we’re aiming for. Finally, fold in the remaining ½ cup of semisweet chocolate chips. Pour the luscious batter into your prepared 8×8 inch baking pan and use a spatula to spread it evenly to the edges.
The Signature Swirl
Now for the unique twist! Drop spoonfuls of the **salted crunchy peanut butter** over the top of the brownie batter. Then, using the tip of a knife or a skewer, gently swirl it into the batter. The key here is minimal swirling to create beautiful, distinct ribbons and pockets of peanut butter, not to fully incorporate it. This is how you achieve that stunning visual and distinct flavor in every bite.
Bake to Perfection
Bake your peanut butter brownies for 40 to 45 minutes, or until the center doesn’t wobble when the pan is gently shaken. If you’re aiming for a super fudgy center, I find 35 minutes is often perfect. After about 25 minutes, if you notice the peanut butter swirl beginning to brown too much, lightly cover the brownies with aluminum foil for the remainder of the bake time (this might add 5 to 10 minutes to the total bake time). The most crucial step? Let the brownies cool completely in the pan before slicing. This allows them to set properly, ensuring that incredible fudgy texture and clean slices.
Perfecting Your Peanut Butter Brownies: Fudginess & Pan Adjustments
Achieving Your Perfect Fudgy or Chewy Texture
The quest for the perfect brownie often comes down to texture, and I’m here to help you achieve yours.
Bake Time: As I mentioned, bake time is paramount. For a truly super fudgy brownie, aim for around 35 minutes. If you also love other fudgy desserts, be sure to check out our peppermint fudge recipe. If you prefer a slightly chewier, more set texture, bake for 40-45 minutes. The visual cue to look for is a center that doesn’t wobble when the pan is gently shaken. The edges should be set, but the center might still look a little moist.
Chilling Batter (Advanced Tip): For an even more intense fudginess, try chilling your prepared brownie batter in the pan for 30-60 minutes before baking. This subtly solidifies the fats and sugars, contributing to a denser, fudgier crumb.
Chocolate Ratio: While we’re not altering this specific recipe, generally, a higher ratio of chocolate to flour tends to result in fudgier brownies. It’s a great principle to keep in mind for future brownie experiments.
Don’t Overbake: This is the golden rule for fudgy brownies! Overbaking is the primary culprit behind dry, cakey brownies. When you pull them from the oven, they should look slightly underdone in the center. They will continue to set as they cool.
Brownie Baking Pan Size & Bake Time Adjustments
The 8×8 inch baking pan is ideal for these thick, fudgy brownies. However, I know you might have other pan sizes, so here’s how to adjust.
8×8 Inch Pan (Standard): This recipe is perfectly calibrated for an 8×8 inch metal baking pan, yielding thick, decadent peanut butter brownies. It’s also perfect for making other treats like our pumpkin bars with cream cheese frosting.
9×13 Inch Pan: If you opt for a larger 9×13 inch pan, your brownies will be thinner and will bake faster. Expect the bake time to be approximately 25-35 minutes. Start checking at 25 minutes and monitor closely for doneness.
Other Square Pans (e.g., 9×9): For a 9×9 inch pan, the brownies will be slightly thinner than in an 8×8. You’ll likely need to reduce the bake time by about 5-10 minutes. Always use the wobble test as your guide.
Cooling Time: Regardless of your pan size, proper cooling is absolutely critical for the brownies to set and develop their ultimate fudgy texture. Don’t rush this step!
Pro Tips & Troubleshooting
Pro Tips for Perfect Peanut Butter Brownies
Over my years as a chef, I’ve picked up a few tricks that guarantee success every time. Here are my top expert tips for these homemade brownies:
- Room Temperature Eggs: This might seem small, but using room temperature eggs ensures a smoother emulsification with the other ingredients, leading to a beautifully uniform batter.
- Accurate Flour Measurement: For consistent results, I highly recommend using a kitchen scale to measure your all-purpose flour. If you don’t have one, use the fluff-spoon-level method: gently fluff the flour in its container, spoon it into your measuring cup, and then level it off with a straight edge.
- The Art of the Swirl: When it comes to the peanut butter swirl, less is truly more. Use a knife or skewer for minimal swirling. You want distinct ribbons of salted crunchy peanut butter, not a completely mixed-in swirl.
- Clean Slices Every Time: For bakery-perfect cuts, ensure your brownies are completely cooled. Use a sharp knife that you wipe clean with a damp cloth or run under warm water between each slice.
- Preventing Chocolate Seizing: When melting chocolate, ensure absolutely no water comes into contact with it. Even a single drop can cause the chocolate to seize and become grainy.
- Sift Dry Ingredients: Always sift your flour and unsweetened cocoa powder. This prevents lumps and aerates the dry ingredients, contributing to a lighter, more even crumb.
Common Mistakes to Avoid
Even the best bakers make mistakes, but knowing what to avoid can save your homemade brownies!
- Using Cold Eggs: As mentioned, cold eggs won’t emulsify properly, leading to a lumpy batter and a less uniform texture.
- Over-mixing the Batter: This is a big one! Over-mixing develops gluten, which results in tough, cakey brownies rather than the desired fudgy, chewy ones. Mix until just combined.
- Over-swirling the Peanut Butter: If you over-swirl the salted crunchy peanut butter, it will blend completely into the batter, losing its distinct visual appeal and those delightful pockets of flavor that make this recipe unique.
- Skipping the Sift: Skipping the sifting of flour and cocoa powder can lead to a less uniform batter and unwanted pockets of dry ingredients.
- Overbaking: The primary cause of dry brownies is overbaking. Always err on the side of slightly underdone for maximum fudginess.
Serving & Storage
Serving Ideas
These peanut butter brownies are incredibly versatile when it comes to serving. I love them in many ways:
- Temperature Versatility: Serve them chilled for an extra dense, fudge-like chew, at room temperature for classic gooeyness, or slightly warmed for a fresh-baked feel.
- Classic Pairings: A tall, cold glass of milk is always a winner. For an indulgent treat, add a scoop of vanilla ice cream, or pair them with a hot cup of coffee or tea.
- Garnishes: A final sprinkle of flaky sea salt truly enhances the unique twist of these brownies. For extra flair, a drizzle of melted chocolate or even a little extra melted creamy peanut butter can elevate them further.
Storage and Make-Ahead
These fudgy peanut butter brownies are so good, you’ll want to enjoy them for days!
- Room Temperature Storage: Once completely cooled, store your homemade brownies in an airtight container at room temperature for up to 3-4 days. This helps maintain their fudginess.
- Refrigeration: For a slightly longer shelf life, you can refrigerate the brownies for up to a week. Be aware that refrigeration can alter the texture slightly, making them denser. I recommend bringing them to room temperature before serving for the best experience.
- Freezer Storage: Brownies freeze beautifully! For freezer storage, wrap individual brownies or the entire slab tightly in plastic wrap, then an additional layer of aluminum foil. Place them in a freezer-safe bag or container and they’ll keep for up to 2-3 months.
- Thawing & Reheating: To thaw frozen brownies, simply let them sit at room temperature for a few hours. For a warm, fresh-baked feel, you can briefly warm them in the microwave for 15-20 seconds or in a low oven (250°F / 120°C) for 5-10 minutes.
Conclusion
There you have it – my ultimate recipe for Fudgy Salted Crunchy Peanut Butter Brownies. These chewy brownies are pure indulgence, a delightful blend of rich chocolate and that irresistible, slightly salty, crunchy peanut butter swirl. It’s a dessert that truly stands out from other brownie recipes.
With all my expert tips and careful instructions, you’re now equipped to create bakery-quality homemade brownies right in your own kitchen. I encourage you to try this recipe, experiment with your favorite serving ideas, and savor every fudgy bite. Don’t forget to share your creations and explore more delicious dessert recipes on my blog!
Frequently Asked Questions (FAQ)
Q: What is the best type of pan to use for fudgy peanut butter brownies?
A: I highly recommend an 8×8-inch metal baking pan for optimal thickness and fudginess. Always line it with parchment paper for easy removal.
Q: How should I store leftover peanut butter brownies to keep them fresh?
A: Store fully cooled brownies in an airtight container at room temperature for 3-4 days to maintain their fudginess. For longer storage, you can refrigerate them for up to a week, but let them come to room temperature before serving.
Q: Can I freeze peanut butter brownies, and what is the best way to thaw them?
A: Yes, these fudgy brownies freeze wonderfully! Wrap them tightly in plastic wrap and then foil, storing them in a freezer-safe bag for up to 2-3 months. Thaw at room temperature, or warm briefly in the microwave for a fresh-baked taste.
Q: What’s the secret to achieving a super fudgy or gooey brownie center?
A: The key is to slightly underbake them! Aim for a bake time closer to 35 minutes, where the center still has a slight wobble when gently shaken. It’s also crucial to let them cool completely before cutting.
Q: Can I use natural peanut butter for the swirl, or do I need commercial creamy peanut butter?
A: For the swirl, I strongly recommend using commercial, no-stir crunchy peanut butter. Its thicker consistency holds up better and creates those distinct ribbons. Natural peanut butter tends to be runnier and might blend into the batter too much, losing the visual and textural impact of the unique twist.
Q: How do I prevent my homemade peanut butter brownies from becoming tough or dry?
A: The two main culprits are over-mixing the batter and overbaking. Ensure you gently fold the dry ingredients until just combined, and always monitor your bake time closely, leaning towards slightly underdone for maximum fudginess.
Q: What type of cocoa powder is best for brownies?
A: This recipe uses unsweetened natural cocoa powder, which provides a classic, rich chocolate flavor. Dutch-processed cocoa powder, while also an option, is less acidic and yields a darker, milder chocolate taste.
Q: How much should I swirl the peanut butter into the batter?
A: Less is more! Use a knife or skewer for minimal swirling. You want to create distinct, visible ribbons and pockets of peanut butter, not fully blend it into the batter. This ensures both visual appeal and pockets of intense peanut butter flavor.
Q: How do I get clean cuts when slicing brownies?
A: The secret to clean slices is to let your brownies cool completely. Then, use a sharp knife and wipe the blade clean with a damp cloth or run it under warm water between each cut.
The combination of granulated sugar and light brown sugar is key for achieving that signature fudgy, chewy brownie texture. Granulated sugar provides crispness, while brown sugar adds moisture and chewiness, contributing to the rich depth of these fudgy brownies.
Fudgy Salted Crunchy Peanut Butter Brownies: The Ultimate Recipe
Ingredients
Equipment
Method
- Preheat your oven to 350°F (175°C).
- Prepare an 8x8 inch baking pan by generously spraying it with baking spray, then lining it with parchment paper, leaving an overhang on two sides. This creates 'slings' for easy removal once cooled.
- In a small saucepan, melt the unsalted butter over medium heat.
- Once the butter is fully melted, remove the pan from the heat and immediately whisk in ½ cup of the semisweet chocolate chips until completely melted and you have a smooth, glossy chocolate mixture.
- In a separate bowl, sift together the all-purpose flour and unsweetened cocoa powder to prevent lumps and aerate the ingredients.
- Whisk in the salt to ensure it's evenly distributed.
- Transfer your cooled chocolate-butter mixture to a large bowl.
- Whisk in the granulated sugar, light brown sugar, room temperature eggs, and vanilla extract until the mixture is smooth and well combined.
- Gently fold in the sifted flour mixture with a spatula until just combined. Be careful not to over-mix, which can develop gluten and lead to tough, cakey brownies.
- Finally, fold in the remaining ½ cup of semisweet chocolate chips.
- Pour the luscious batter into your prepared 8x8 inch baking pan and use a spatula to spread it evenly to the edges.
- Drop spoonfuls of the salted crunchy peanut butter over the top of the brownie batter.
- Using the tip of a knife or a skewer, gently swirl it into the batter. The key is minimal swirling to create beautiful, distinct ribbons and pockets of peanut butter.
- Bake your brownies for 40 to 45 minutes, or until the center doesn’t wobble when the pan is gently shaken. For a super fudgy center, 35 minutes is often perfect.
- After about 25 minutes, if the peanut butter swirl begins to brown too much, lightly cover the brownies with aluminum foil for the remainder of the bake time.
- Let the brownies cool completely in the pan before slicing. This allows them to set properly, ensuring that incredible fudgy texture and clean slices.
- Once cooled and sliced, sprinkle with flaky sea salt for an enhanced sweet-and-salty finish.


