 Skip to content
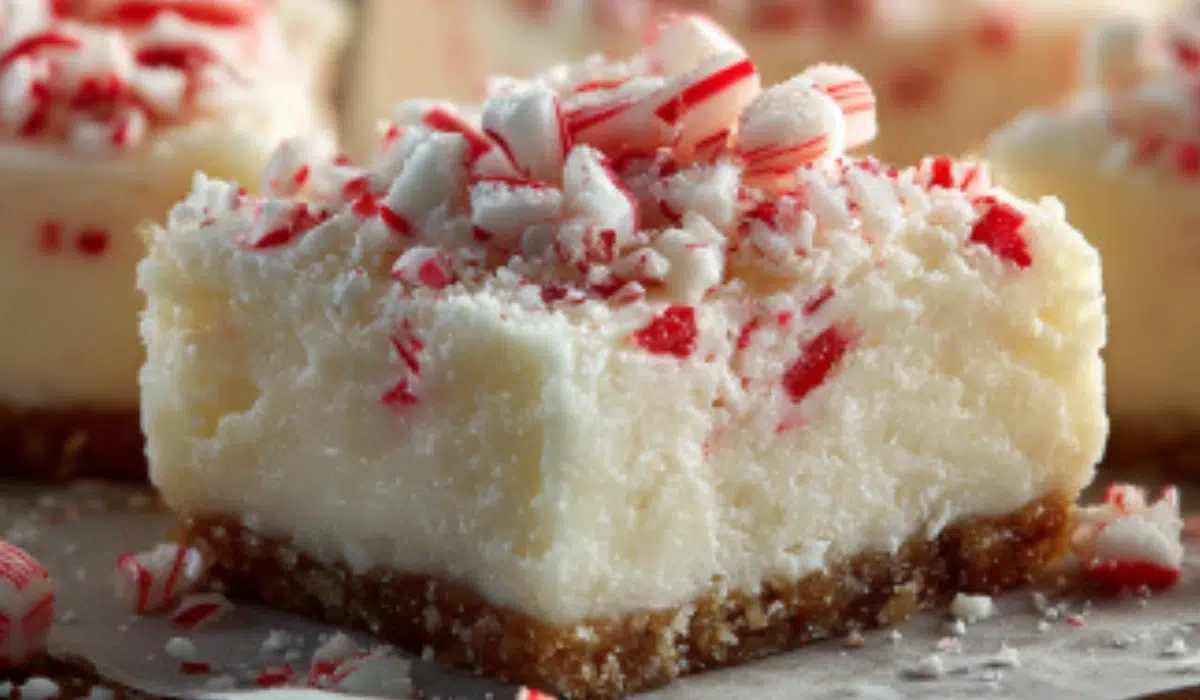
Peppermint fudge is the kind of holiday treat that wins over everyone at the table. Smooth, creamy, and laced with a cool mint flavor, it brings the perfect mix of rich chocolate and refreshing crunch from crushed candy canes. This version keeps things simple without cutting corners on taste, so you get a dessert that looks festive, feels indulgent, and takes far less effort than it seems. Whether you’re making a last-minute gift or just craving something sweet, this peppermint fudge delivers.
Table of Contents
Why You’ll Love This Recipe
- Quick and easy. You melt, stir, and chill. No thermometer.
- Simple ingredients. White chocolate, condensed milk, peppermint extract, and candy canes you likely already have.
- Festive flavor. Cool mint balances sweet, creamy fudge for a crowd favorite.
- Picture worthy. A snowy white base with red candy cane flecks looks like instant holiday cheer.
- Gift ready. Cut clean squares, box them up, and you have a homemade present in minutes. Pair a box of fudge with Oreo truffles for a chocolate-mint gift duo that looks bakery-worthy.
This peppermint fudge stands out because the method keeps the chocolate silky and the mint clean, not sharp. You get a smooth bite with a light crunch on top, which feels cozy and impressive without extra work. Ready for the ingredient list next?
Ingredients Needed
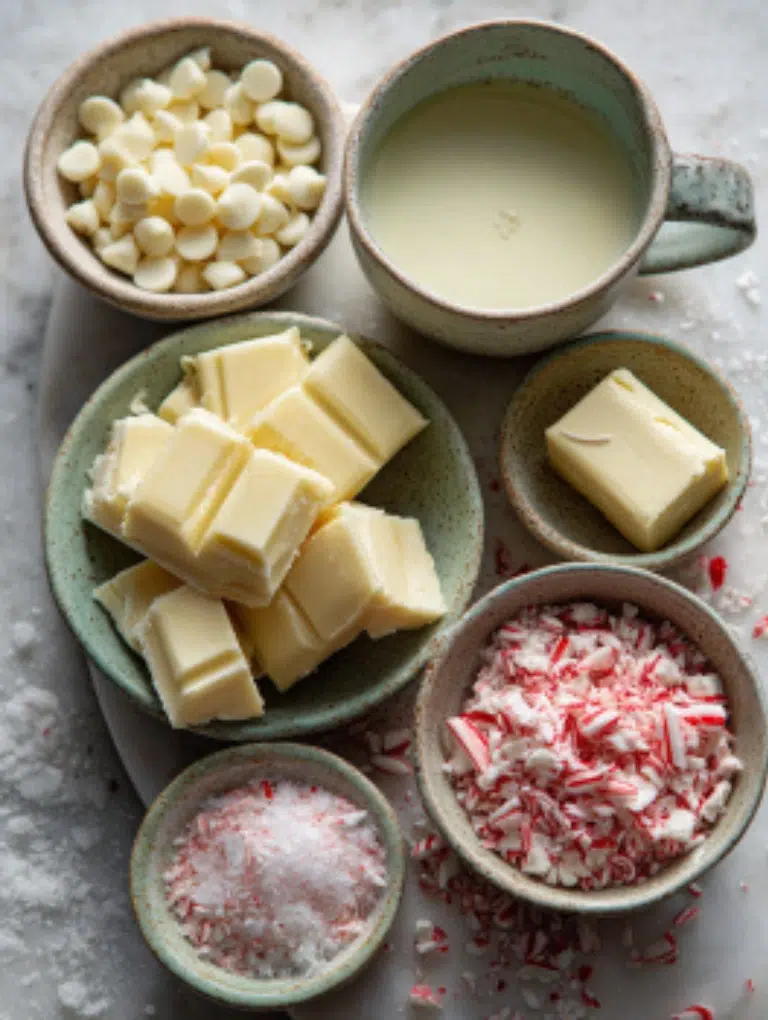
Here’s everything you need to make smooth, festive peppermint fudge. I’ve grouped them for clarity and added a few helpful notes.
For the Base
- 20 ounces vanilla baking chips (two 10-ounce packages): choose a brand with cocoa butter for easier melting
- 1 can (14 ounces) sweetened condensed milk: full-fat for the creamiest texture
- 1 tablespoon unsalted butter: adds richness and helps the fudge set
- Pinch of salt: balances sweetness
For the Peppermint Flavor
- ½ teaspoon peppermint extract: use a pure extract for a clean taste
- 1 ½ cups crushed candy canes: keep some pieces slightly chunky for crunch
Optional Garnishes
- A few drops of red or green food coloring: swirled in for a festive look
- Extra crushed candy canes for topping
- Dark or white chocolate drizzle for contrast
Notes & Substitutions
- Peppermint extract vs oil: Oil is more concentrated, so use just a drop or two if substituting.
- Dairy-free option: Replace condensed milk with a coconut-based condensed milk and use dairy-free white chocolate.
- Gluten-free note: Most candy canes are gluten-free, but double-check the label.
- Budget swaps: Bars often melt more smoothly because many meet the FDA white chocolate standard of at least 20 percent cocoa butter, as defined in the eCFR.
- Texture control: For less crunch, stir in only half the candy canes and sprinkle the rest on top.
How to Make Peppermint Fudge
This recipe works in more than one way, so you can pick the method that fits your mood or time frame. Each step includes tips to guarantee creamy, minty squares every time.
10-Minute Microwave Method
- Prepare the pan. Line an 8-inch square pan with parchment or foil, leaving some overhang to lift the fudge out later. Lightly coat with nonstick spray.
- Melt the base. In a large microwave-safe bowl, combine white chocolate chips, condensed milk, butter, and a pinch of salt. Heat in 30-second bursts, stirring between each, until nearly melted.
- Tip: Stop when just a few lumps remain residual heat will finish the melt without burning.
- Add the flavor. Stir in peppermint extract and most of the crushed candy canes. Fold gently until smooth.
- Add color (optional). Drop in food coloring and swirl lightly for a marbled effect.
- Chill and set. Spread the mixture evenly in the pan, top with remaining candy canes, and refrigerate for at least 2 hours. Lift out, cut into squares, and serve.
Classic Stovetop Method
- Set up the pan as above.
- Melt slowly. Combine chocolate, condensed milk, butter, and salt in a heavy-bottomed saucepan. Stir constantly over low heat until smooth.
- Cue: The mixture should look glossy and thick, not grainy or dry.
- Finish with flavor. Remove from heat, stir in peppermint extract and crushed candy canes.
- Pour and chill. Spread in prepared pan, sprinkle more candy canes on top, and refrigerate for 2–3 hours.
Layered Peppermint Bark Fudge Option
- Base layer. Melt half of the chocolate mixture (without peppermint) and pour into the pan. Chill until just set, about 20 minutes.
- Top layer. Melt the remaining chocolate mixture, this time with peppermint extract and candy canes. Pour over the base layer.
- Decorate. Swirl lightly for a bark-style look, top with candy canes, and chill until firm.
Pro Tips & Troubleshooting
Expert Tips
- Melt gently. White chocolate scorches fast, so keep the heat low or use short microwave bursts. Stop when some lumps remain and stir until smooth. Keep water and steam away; even tiny droplets can make chocolate seize, as the Exploratorium explains.
- Add extract last. Stir peppermint in after melting so the flavor stays bright and doesn’t dull under heat.
- Line the pan well. Parchment or foil with overhang makes lifting and cutting the fudge easy.
- Clean cuts. Use a warm knife (dip in hot water, then wipe dry) for sharp, bakery-style squares.
Common Mistakes to Avoid
- Overheating chocolate. Leads to a clumpy, grainy texture.
- Skipping the chill time. Cutting too soon makes the fudge fall apart.
- Too much peppermint. A heavy hand turns it toothpaste-like; measure carefully.
- Uneven candy cane size. Crushing too finely makes the fudge gritty, while giant chunks make it hard to slice.
Creative Trick
For a pretty marbled effect, drop a little red food coloring into the melted mixture and swirl lightly with a toothpick before chilling. It looks festive without changing the flavor.
Serving, Storage & Variations
Serving Ideas
- Cut into small squares and place in mini cupcake liners for party trays.
- Build a holiday dessert board with fudge squares, Caramel Apple Cheesecake Bars, and fresh berries.
- For a colorful tray, add a pile of Halloween Crinkle Cookies beside the peppermint fudge.
- Wrap in parchment, tie with ribbon, and gift in a festive tin.
- Drop a cube into hot cocoa for a minty twist.
Storage Guide
- Room temperature: Store in an airtight container for up to 5 days in a cool spot.
- Fridge: Keeps up to 2 weeks; wrap tightly and seal well because refrigeration can introduce odors and surface moisture that promote bloom, as ISU Extension notes.
- Tip: Layer pieces with parchment so they don’t stick together.
For broader confectionery guidance, culinary educators at Escoffier note storage windows of one to two weeks at room temp and up to three weeks refrigerated.
Freezing and Thawing
- Wrap tightly in plastic wrap, then foil, and place in a freezer bag.
- Freeze for up to 3 months.
- For best results, thaw in the refrigerator before bringing to room temperature to minimize condensation and bloom on the surface, as ISU Extension advises.
Variations
- Dark chocolate version: Swap white chips for semisweet chocolate.
- Swirl style: Alternate dark and white chocolate layers for a bark look.
- Dairy-free: Use coconut condensed milk and dairy-free chips.
- Extra crunch: Stir in chopped nuts with the candy canes.
- Gluten-free: Most versions already qualify, just double-check candy cane labels.
- Party platter idea: Serve fudge with nostalgic S’more Bars for a fun chocolate spread.
Nutritional Information
Here’s an approximate breakdown per serving (based on a 16-square batch):
| Nutrient | Amount per Serving |
|---|---|
| Calories | 354 kcal |
| Fat | 12 g |
| Saturated Fat | 8 g |
| Carbohydrates | 56 g |
| Protein | 4 g |
| Cholesterol | 8 mg |
| Sodium | 110 mg |
| Calcium | 70 mg |
| Potassium | 92 mg |
Nutrition Note: Values are calculated from standard ingredients and may vary with substitutions. If you adjust the recipe, use an online tracker like MyFitnessPal or Cronometer to double-check values.
Conclusion
Peppermint fudge is that rare dessert that looks fancy but takes almost no effort. With just a few ingredients and simple steps, you get creamy squares packed with cool mint and a festive crunch that everyone loves. It’s a recipe you’ll turn to again and again for holiday parties, edible gifts, or when a sweet craving hits. For another show-stopping chocolate dessert, try our Dubai Chocolate Cake.
If you make this fudge, leave a comment and a star rating so others know how it turned out. Share your batch on Pinterest or Facebook to spread a little holiday cheer. What fun twist did you try dark chocolate swirl, dairy-free, or maybe extra candy canes? Let us know below!
Frequently Asked Questions (FAQ)
Can I use peppermint oil instead of peppermint extract, and how much should I use?
Yes, but peppermint oil is much stronger than extract. Use only 1–2 drops instead of ½ teaspoon extract, and taste before adding more.
What kind of white chocolate melts best for fudge, chips or baking bars?
Baking bars melt more smoothly than chips because they usually contain more cocoa butter. If using chips, add a teaspoon of butter to help them melt evenly.
Why did my peppermint fudge not set, and how can I fix it?
If your fudge is soft, it may need more chill time. If it’s still gooey, re-melt it gently, stir in extra melted white chocolate, and chill again.
How do I make this recipe dairy-free or vegan without losing the creamy texture?
Swap condensed milk for coconut condensed milk and use dairy-free white chocolate chips. The texture stays creamy, and the flavor has a light coconut twist.
Can I make peppermint fudge in the microwave, or should I use the stovetop?
Both methods work. The microwave is faster and easier, while the stovetop gives you more control over melting.
How long does peppermint fudge last at room temperature and in the fridge?
At room temperature, it lasts about 5 days in a sealed container. In the fridge, it can stay fresh for up to 2 weeks.
Can I freeze peppermint fudge, and what is the best way to thaw it without condensation?
Yes, freeze tightly wrapped pieces for up to 3 months. Thaw in the fridge overnight, then bring to room temp to avoid surface moisture.
Peppermint Fudge
Creamy peppermint fudge swirled with crushed candy canes. A festive, easy-to-make holiday treat that looks beautiful, tastes indulgent, and makes the perfect edible gift.
16
squares10
minutes5
minutes354
kcalIngredients
20 oz vanilla baking chips (bars or chips)
1 can (14 oz) sweetened condensed milk
1 tbsp unsalted butter
Pinch of salt
½ tsp peppermint extract
1 ½ cups crushed candy canes
Few drops red or green food coloring (optional)
Directions
- Line an 8-inch square pan with parchment or foil, leaving overhang for easy removal. Lightly coat with nonstick spray.
- In a large microwave-safe bowl, combine baking chips, condensed milk, butter, and salt. Heat in 30-second intervals, stirring until smooth.
- Stir in peppermint extract and most of the crushed candy canes.
- Add food coloring if desired and swirl lightly.
- Spread mixture into prepared pan, top with remaining candy canes, and refrigerate for at least 2 hours.
- Lift out and cut into squares.
Notes
- Use baking bars with cocoa butter for smoother melting.
- If substituting peppermint oil, use just 1–2 drops instead of extract.
- For dairy-free fudge, use coconut condensed milk and dairy-free chips.
- Store airtight at room temp (5 days), fridge (2 weeks), or freeze (3 months).
Nutrition Facts
- Calories: 354kcal
- Fat: 12g
- Saturated Fat: 8g
- Cholesterol: 8mg
- Sodium: 110mg
- Potassium: 92mg
- Carbohydrates: 56g
- Protein: 4g
- Calcium: 70mg


