Skip to content
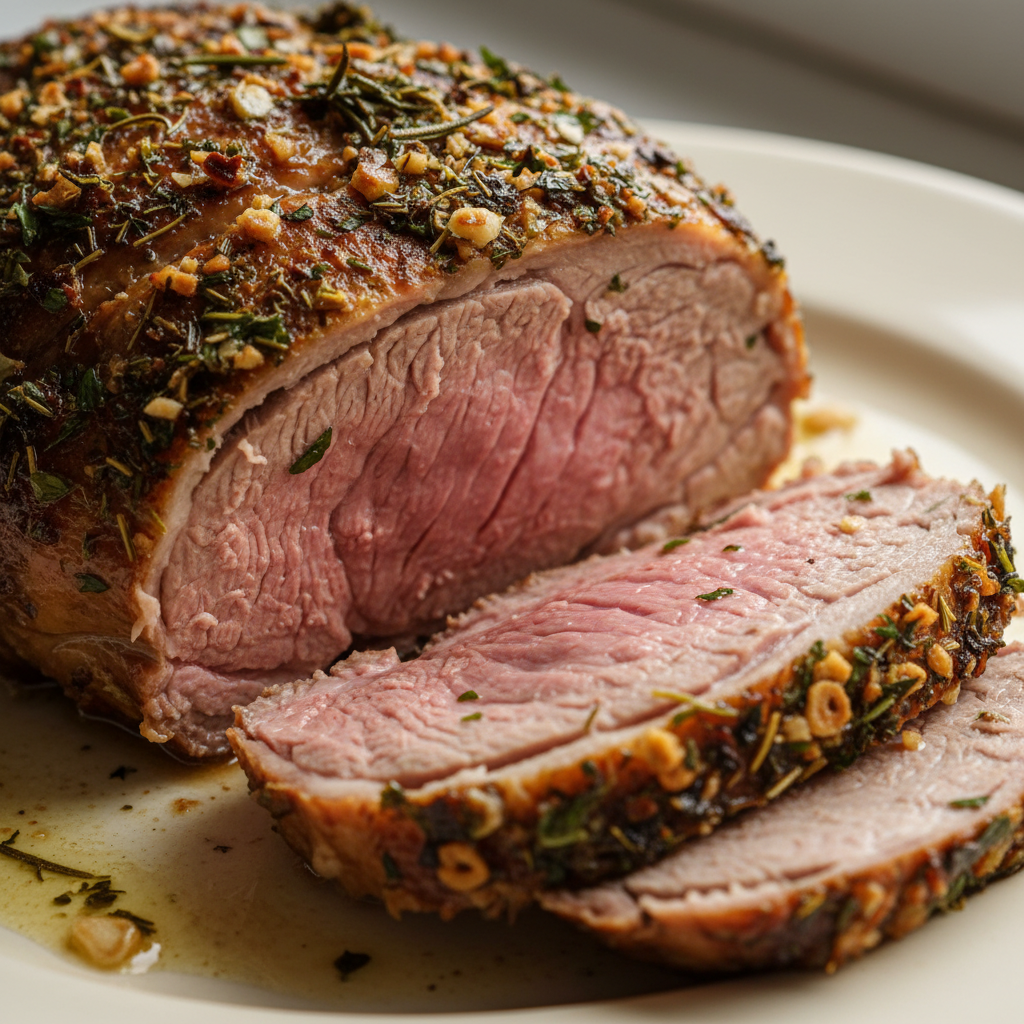
 There’s something truly special about a beautifully roasted leg of lamb gracing your table, especially for a holiday roast or Easter dinner. The aroma alone promises a feast! But achieving that perfectly tender, juicy interior with a crisp, flavorful crust can sometimes feel like a culinary challenge. Over the years in my kitchen, I’ve perfected a method for roasted leg of lamb that guarantees incredible results every single time. Get ready to impress everyone with this show-stopping centerpiece!
Why You’ll Love This Recipe
My recipe for boneless roasted leg of lamb isn’t just another set of instructions; it’s a game-changer. I’ve incorporated a unique two-step process that elevates a simple lamb roast into a truly restaurant-quality dish.
The secret is in the prep: I insist on a 24-hour dry brine using 1 teaspoon of kosher salt per pound of meat. This isn’t just about seasoning; it’s a scientific process that draws out surface moisture and then reabsorbs the seasoned liquid, leading to unparalleled flavor penetration throughout the meat and a much crispier exterior when cooked.
Next, we sear: Before the oven, we give the boneless leg of lamb a high-heat stovetop sear in a cast iron skillet. This crucial step creates an incredible, deeply browned crust through the Maillard reaction. This chemical magic develops profound savory flavors and helps to “lock in” the juices, ensuring a significantly juicier and more tender roast than any oven-only method could achieve.
You’ll love how this approach takes the stress out of cooking, guaranteeing a consistently juicy and tender lamb with a gorgeous browned crust. It’s the ideal way to create a memorable Easter dinner or holiday roast with minimal fuss on the day itself.
Ingredients Needed

Here’s everything you’ll need to make this perfect roasted leg of lamb:
- 1 boneless leg of lamb (about 5 pounds)
- 5 cloves garlic (minced)
- 10 cloves garlic (roughly sliced)
- 1/4 cup parsley (minced)
- 5 tablespoons rosemary (chopped)
- 5 teaspoons kosher salt (or 1 teaspoon per pound of meat)
- 1 1/2 teaspoons black pepper
- 2 tablespoons olive oil
- 1 1/2 cups water
Ingredient Notes & Substitutions
Boneless Leg of Lamb: When choosing your boneless leg of lamb, look for one that is plump and has a relatively even thickness for consistent cooking. Lamb origins can affect flavor; American lamb is typically robust, while Australian and New Zealand lamb tend to be milder and leaner. Any of these will work beautifully with this recipe.
Herbs: Rosemary and garlic are classic pairings for lamb for a reason; their robust flavors complement the meat beautifully. For a different twist, you could experiment with adding fresh mint or oregano, which also pair wonderfully with lamb. Always opt for fresh herbs for the best aromatic impact.
Kosher Salt: Kosher salt is essential for our dry brining process. Its larger flakes allow for better absorption and adherence to the meat. The guideline of 1 teaspoon per pound of meat is perfect for optimal seasoning and flavor penetration.
Olive Oil: Use a good quality extra virgin olive oil for both seasoning and searing. It adds a subtle richness and helps achieve that beautiful crust.
Essential Equipment: You will need a sturdy roasting pan with a wire rack to allow for even air circulation around the lamb. Butcher’s twine is crucial for tying the boneless leg of lamb into a compact cylinder, ensuring even cooking. If you don’t have twine, metal skewers can help hold the roast’s shape. An oven-safe digital thermometer and an instant-read thermometer are non-negotiable for achieving perfect lamb doneness and stress-free cooking.

How to Make Perfect Roasted Leg of Lamb
Let’s walk through my tried-and-true method for a perfectly roasted leg of lamb. Each step is designed to build flavor and ensure a tender, juicy result.
Step 1: Superior Prep – The Dry Brine & Tying
First, pat your boneless leg of lamb very, very dry with paper towels. This is a critical step for developing a crispy exterior. Now, the magic of the 24-hour dry brine: rub the lamb all over with 1 teaspoon of kosher salt per pound. This draws out moisture, then reabsorbs it, infusing the meat with deep flavor and helping create that desirable crisp skin. Place the lamb uncovered in the refrigerator for 24 hours. Preparing it a day ahead not only enhances flavor penetration but also makes cooking day much smoother.
After the dry brine (or if you’re skipping the 24-hour brine, do this directly), trim any large pieces of excess fat from the interior of the lamb. Spread the lamb out with the interior facing up on a large cutting board. Drizzle with half of the olive oil. Season the interior generously with half of the kosher salt, black pepper, and rosemary, along with all the minced garlic and parsley.
Now, roll the lamb into a tight cylinder. This is where butcher’s twine comes in. Tie it securely every 1-2 inches to ensure even cooking and a beautiful shape. If you don’t have butcher’s twine, metal skewers can also help hold it together.
Finally, cut small slits into the lamb’s exterior and insert the roughly sliced garlic cloves. Coat the outside of the lamb with the remaining olive oil and season with the rest of the salt, pepper, and rosemary.
Step 2: Achieve the Perfect Sear
This is where our unique twist truly shines! Heat a cast iron skillet or a heavy, oven-safe pan over high heat with a touch of olive oil until it shimmers. Carefully place the boneless leg of lamb in the hot pan and sear on all sides until it develops a deep, rich brown crust. This is the Maillard reaction at work, creating incredibly complex, savory flavors and a crisp exterior that an oven alone simply can’t achieve. This searing happens before the lamb ever sees the oven.
Step 3: Roasting to Perfection
Preheat your oven to 450°F with the rack in the middle position. Once your lamb is beautifully seared, transfer it to a roasting pan elevated with a wire rack. Pour 1 1/2 cups of water into the bottom of the pan, making sure it doesn’t touch the lamb. This creates a moist environment and provides flavorful drippings for gravy later.
Roast the lamb for 15 minutes at 450°F. Then, immediately reduce the oven temperature to 350°F. Continue cooking until the internal temperature reaches 120-125°F for medium-rare lamb. Use an oven-safe digital thermometer inserted into the thickest part of the roast, or check with an instant-read thermometer. Remember, the lamb will continue to cook as it rests, so remove it slightly before your desired final temperature. As a general guideline, expect 15-20 minutes per pound, but always trust your internal temperature reading for true lamb doneness.
Step 4: Rest and Carve
Once your lamb reaches the desired temperature, remove it from the oven and transfer it to a cutting board. Lightly tent it with foil and let it rest for a crucial 10-15 minutes. This resting period is non-negotiable; it allows the juices to reabsorb into the meat, ensuring incredibly juicy lamb. If you carve it immediately, all those delicious juices will run out, leaving you with dry meat.
After resting, remove the twine and carve the roasted leg of lamb into slices. Refer to my detailed carving instructions below for the best presentation and yield.
Mastering Pan Gravy & Carving Your Roast
A perfect roasted leg of lamb deserves equally perfect accompaniments. Here’s how to elevate your meal with a rich pan gravy and expert carving techniques.
Creating a Rich Pan Gravy from Drippings
Don’t let those flavorful drippings go to waste! Here’s how to make a simple, rich pan gravy:
- After removing the lamb to rest, carefully pour off any excess fat from the roasting pan, leaving behind the flavorful drippings and any browned bits.
- Place the roasting pan over two burners on your stovetop over medium heat.
- Add 2 tablespoons of flour or cornstarch to the pan and whisk constantly for 1-2 minutes to create a roux, scraping up all the browned bits from the bottom of the pan.
- Gradually whisk in 1 1/2 to 2 cups of liquid – the water from the roasting pan, beef broth, or even a splash of red wine works wonderfully. Continue whisking until the gravy thickens to your desired consistency.
- Season with salt and black pepper to taste. For an extra smooth gravy, you can strain it through a fine-mesh sieve.
Expert Carving Techniques for a Boneless Roast
Carving a boneless leg of lamb beautifully is simpler than you might think, and it makes all the difference in presentation and tenderness:
- Ensure the lamb has rested for at least 10-15 minutes. This is key for juicy lamb.
- Place the roasted leg of lamb on a stable cutting board. Remove all the butcher’s twine.
- Identify the grain of the meat. For a boneless roast, the grain can sometimes change direction slightly.
- Using a sharp carving knife, slice the lamb against the grain into uniform 1/2 to 3/4-inch slices. Slicing against the grain shortens the muscle fibers, making each bite incredibly tender.
- Arrange the slices neatly on a warm platter, overlapping them slightly for a beautiful presentation.
Pro Tips & Troubleshooting
Here are my best tips to ensure your roasted leg of lamb is a resounding success, and how to avoid common pitfalls.
Pro Tips for Success
- Thorough Drying: Always pat the lamb thoroughly dry with paper towels before dry brining and searing. This is absolutely essential for achieving the best browning and that wonderfully crispier exterior.
- Seasoning Ratio: Stick to the guideline of 3/4 to 1 teaspoon of kosher salt per pound of meat, especially for the dry brine. This ensures optimal flavor penetration throughout the roast.
- Use a Thermometer: An oven-safe digital thermometer or instant-read thermometer is your best friend. It takes the guesswork out of cooking and is crucial for hitting your desired lamb doneness without stress.
- Resting is Non-Negotiable: I cannot overstate the importance of resting the roasted meat for 10-15 minutes before carving. This allows the juices to reabsorb, guaranteeing a juicy roast.
- Tying for Evenness: Tying the boneless leg of lamb into a tight cylinder with butcher’s twine is key. It ensures more even cooking and a consistent temperature throughout the roast.
- Flavor Ahead: Preparing the uncooked lamb with herbs, garlic, and the dry brine a day ahead and storing it uncovered in the refrigerator dramatically enhances flavor penetration.
Common Mistakes to Avoid
- Not Drying Properly: Forgetting to dry the lamb properly before cooking will hinder browning and prevent the formation of that delicious crust.
- Skipping the Thermometer: Not using a meat thermometer is a common mistake that often leads to undercooked or overcooked lamb.
- Carving Immediately: Carving the lamb immediately after roasting is a recipe for disaster, resulting in a significant loss of juices and dry meat.
- Not Tying Boneless Lamb: If you don’t tie your boneless lamb roast, it can cook unevenly and have a less appealing, open presentation.
Serving & Storage
Once your perfect roasted leg of lamb is ready, here’s how to enjoy it and handle any delicious leftovers.
Serving Ideas
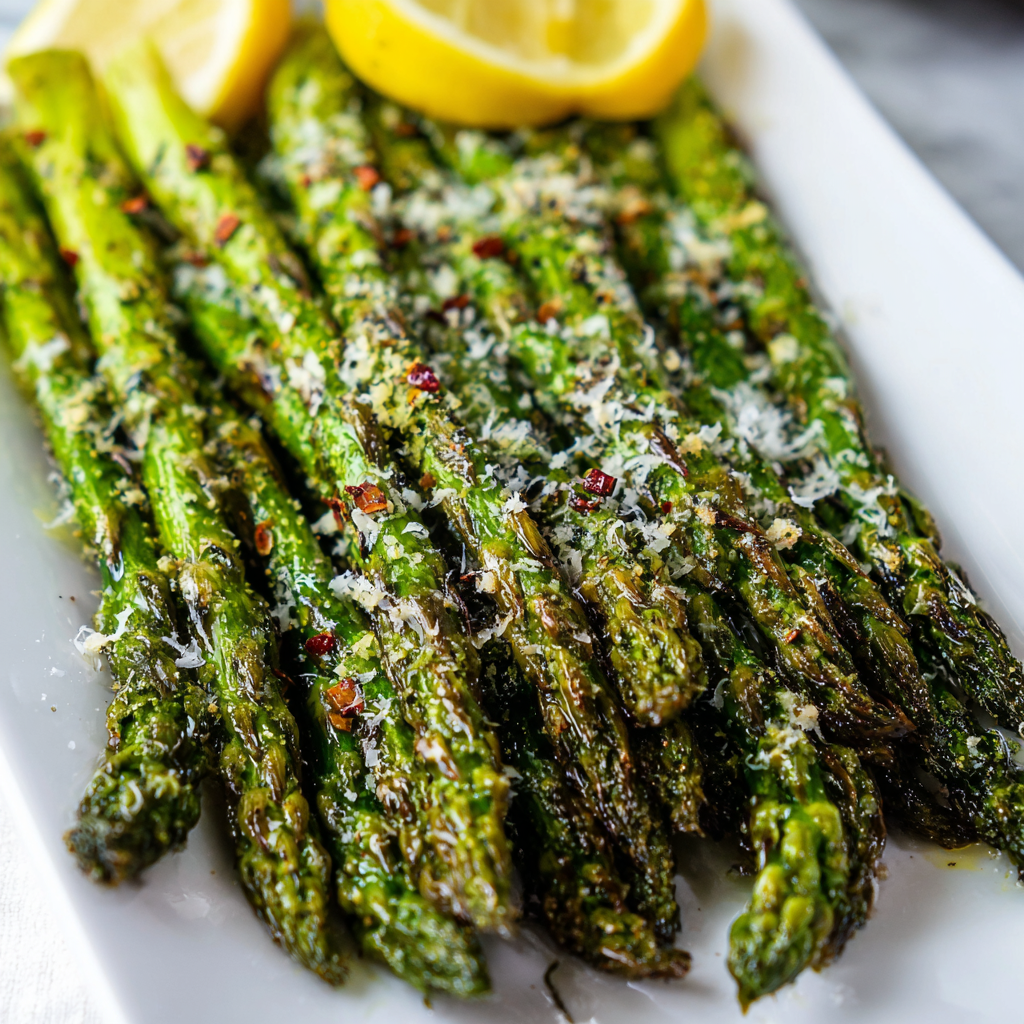
This rosemary garlic roasted leg of lamb is incredibly versatile. I love serving it with classic complementary side dishes like creamy roasted garlic mashed potatoes, crispy lemon garlic roasted potatoes, tender green beans, baked cauliflower, baked artichoke hearts, or roasted broccoli.
For a vibrant burst of flavor, I always recommend serving it with a fresh salsa verde, perhaps one brightened with a hint of mint. Garnish with fresh rosemary sprigs or parsley for an inviting touch.
When it comes to wine pairings, roasted lamb shines with a medium-bodied red. A Pinot Noir, Cabernet Franc, or a classic Bordeaux will beautifully complement the richness of the lamb without overpowering it.
Storage and Make-Ahead
Storing Leftovers: Any leftover roasted lamb should be stored in an airtight container in the refrigerator for up to 3-4 days.
Freezing: For longer storage, slice the roasted lamb and freeze it in an airtight container or vacuum-sealed bag for up to 2-3 months. This prevents freezer burn and makes reheating easier.
Reheating: To reheat roasted lamb, gently warm it in the oven at a low temperature (around 275°F) with a splash of broth or water to keep it moist. This prevents it from drying out. Avoid high heat reheating.
Make-Ahead Prep: The dry brining process, along with applying the initial herb and garlic seasoning, can be done a day ahead. This truly streamlines your cooking on the day of your event, enhancing flavor penetration and making for a stress-free experience.
Adaptations for Special Occasions
This roasted leg of lamb is truly a perfect centerpiece for Easter dinner or any holiday roast. Its impressive presentation and the minimal active cooking time required on the day itself (thanks to the advanced prep) make it an ideal choice for celebrations. It’s elegant, flavorful, and consistently delicious.
Conclusion
I hope you’re excited to try this method for the perfect roasted leg of lamb! With its incredibly juicy, tender, and flavorful results, thanks to the unique dry brine and searing twist, it’s destined to become a staple in your kitchen. Even if you’re a beginner, following these steps will lead to culinary triumph.
Go ahead, embrace the journey, and create a truly memorable meal. Don’t be afraid to experiment with other variations, like adding different herbs, and be sure to share your culinary triumphs with me!
FAQ
What is the ideal internal temperature for roasted leg of lamb and how do I achieve it?
For medium-rare lamb, remove it from the oven when the internal temperature reaches 120-125°F. It will continue to cook as it rests (carryover cooking), rising to a perfect medium-rare. Always use an oven-safe digital thermometer for accuracy.
How long does it typically take to roast a boneless leg of lamb?
Generally, a boneless leg of lamb takes about 15-20 minutes per pound to roast after the initial high-heat sear. However, always rely on the internal temperature rather than just time, as factors like starting temperature and oven calibration can vary.
What are the best side dishes and sauces to serve with rosemary garlic roasted lamb?
Classic pairings include roasted potatoes, mashed potatoes, green beans, baked cauliflower, baked artichoke hearts, or roasted broccoli. A fresh salsa verde is a highly recommended sauce, and for wine, consider medium-bodied reds like Pinot Noir or Cabernet Franc.
Can I prepare a boneless leg of lamb ahead of time for roasting?
Absolutely! The 24-hour dry brine is a fantastic make-ahead step, as is applying the initial herb and garlic seasoning. This allows for optimal flavor penetration and reduces active prep time on the day you plan to roast it.
Why is it crucial to rest the lamb after roasting, and for how long?
Resting meat is crucial because it allows the muscle fibers to relax and reabsorb the juices that have migrated to the center during cooking. This ensures incredibly juicy lamb. I recommend resting for 10-15 minutes, lightly tented with foil.
What is the best way to carve a boneless leg of lamb for serving?
After resting, remove the twine and slice the boneless leg of lamb against the grain using a sharp knife. This maximizes tenderness and creates beautiful, even slices for presentation.
What is dry brining and how does it work for lamb?
Dry brining involves rubbing the lamb with kosher salt (about 1 teaspoon per pound) and letting it sit in the refrigerator, often overnight. The salt draws out moisture, which then dissolves the salt and gets reabsorbed into the meat. This process enhances flavor penetration, tenderizes the meat, and promotes a crispier exterior.
What is the Maillard reaction and why is it important for roasting lamb?
The Maillard reaction is a complex chemical process that occurs when proteins and sugars in food are heated, creating hundreds of new flavor compounds and a desirable brown crust. For roasted leg of lamb, a high-heat stovetop sear triggers this reaction, resulting in a superior, deeply flavorful crust that significantly enhances the overall taste and texture of the roast.
How do I store and reheat leftover roasted lamb?
Store leftover roasted lamb in an airtight container in the refrigerator for 3-4 days, or sliced in the freezer for up to 2-3 months. To reheat, gently warm it in a low oven (around 275°F) with a splash of broth or water to maintain its moisture and prevent dryness.
Perfectly Roasted Leg of Lamb: Your Guide to a Tender, Juicy Masterpiece
Ingredients
Equipment
Method
- First, pat your boneless leg of lamb very dry with paper towels. Rub the lamb all over with 1 teaspoon of kosher salt per pound. Place the lamb uncovered in the refrigerator for 24 hours.
- After the dry brine (or if skipping), trim any large pieces of excess fat from the interior of the lamb. Spread the lamb out with the interior facing up on a large cutting board. Drizzle with half of the olive oil. Season the interior generously with half of the kosher salt, black pepper, and rosemary, along with all the minced garlic and parsley.
- Roll the lamb into a tight cylinder. Tie it securely every 1-2 inches with butcher's twine (or use metal skewers) to ensure even cooking and a beautiful shape.
- Finally, cut small slits into the lamb’s exterior and insert the roughly sliced garlic cloves. Coat the outside of the lamb with the remaining olive oil and season with the rest of the salt, pepper, and rosemary.
- Heat a cast iron skillet or a heavy, oven-safe pan over high heat with a touch of olive oil until it shimmers. Carefully place the boneless leg of lamb in the hot pan and sear on all sides until it develops a deep, rich brown crust. This step happens before the lamb ever sees the oven.
- Preheat your oven to 450°F with the rack in the middle position.
- Once your lamb is beautifully seared, transfer it to a roasting pan elevated with a wire rack. Pour 1 1/2 cups of water into the bottom of the pan, making sure it doesn't touch the lamb.
- Roast the lamb for 15 minutes at 450°F. Immediately reduce the oven temperature to 350°F.
- Continue cooking until the internal temperature reaches 120-125°F for medium-rare lamb. Use an oven-safe digital thermometer inserted into the thickest part of the roast, or check with an instant-read thermometer.
- Once your lamb reaches the desired temperature, remove it from the oven and transfer it to a cutting board. Lightly tent it with foil and let it rest for a crucial 10-15 minutes.
- After resting, remove the twine. Place the roasted leg of lamb on a stable cutting board. Identify the grain of the meat. Using a sharp carving knife, slice the lamb against the grain into uniform 1/2 to 3/4-inch slices. Arrange the slices neatly on a warm platter.
- After removing the lamb to rest, carefully pour off any excess fat from the roasting pan, leaving behind the flavorful drippings and any browned bits.
- Place the roasting pan over two burners on your stovetop over medium heat.
- Add 2 tablespoons of flour or cornstarch to the pan and whisk constantly for 1-2 minutes to create a roux, scraping up all the browned bits from the bottom of the pan.
- Gradually whisk in 1 1/2 to 2 cups of liquid – the water from the roasting pan, beef broth, or even a splash of red wine works wonderfully. Continue whisking until the gravy thickens to your desired consistency.
- Season with salt and black pepper to taste. For an extra smooth gravy, you can strain it through a fine-mesh sieve.