 Skip to content
There’s something magical about a plate of Christmas cookies finished with smooth, glossy royal icing. The crisp edges, bright colors, and delicate designs instantly say holiday spirit. This recipe for royal icing Christmas cookies takes the guesswork out of decorating. With just a few pantry staples and a couple of tricks, you’ll get icing that pipes sharp lines, floods cookies evenly, and dries to a picture-perfect shine. Whether you’re planning a family bake night or gearing up for a cookie swap, this method makes decorating as fun as eating the cookies.
Table of Contents
Why You’ll Love This Recipe
- Quick to mix. You whip sugar, water, and meringue powder into a glossy icing in minutes, so you can jump straight to decorating.
- Foolproof consistency cues. A simple 10 to 20 second ribbon test tells you when to outline or flood, which keeps lines clean and finishes smooth.
- Holiday perfect. The icing dries firm for stackable gifts, cookie platters, and make-ahead decorating sessions, and pairs nicely with Italian Christmas cookies on a mixed tray.
- Flexible and safe. Use meringue powder or pasteurized egg whites, add vanilla or peppermint, and tint with gel colors for bold Christmas designs.
- Built-in troubleshooting. Tips for thinning, thickening, and preventing color bleed help your royal icing Christmas cookies look bakery-level at home.
Ingredients Needed
For the Royal Icing
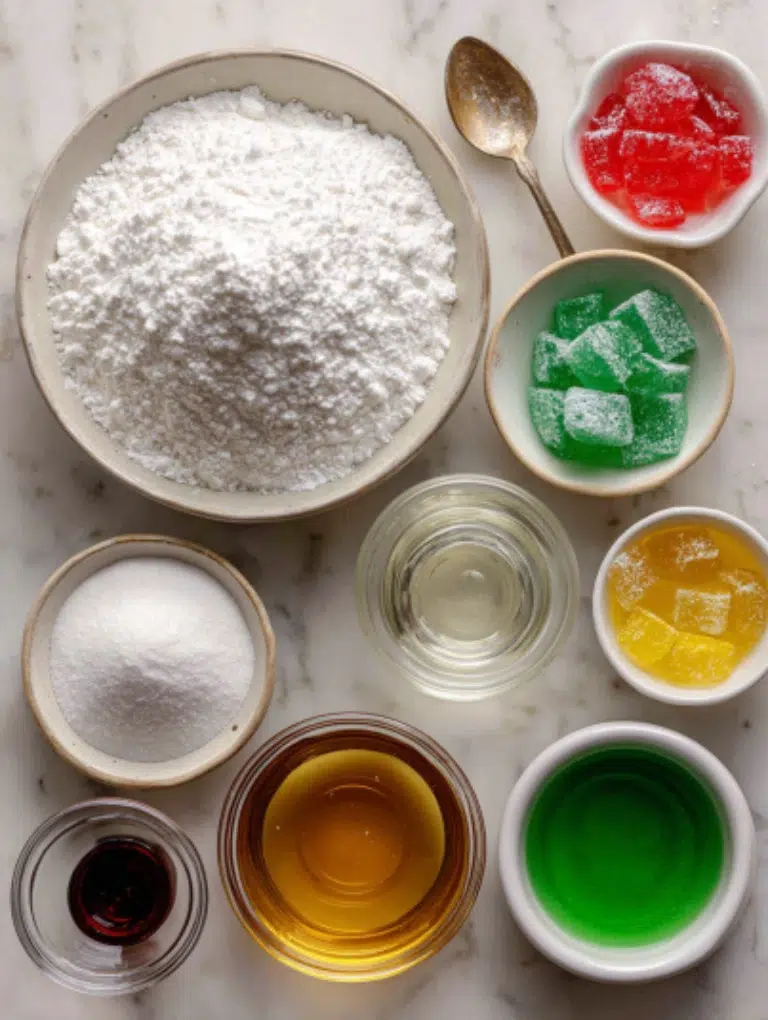
- 4 cups (480 g) confectioners’ sugar, sifted: gives the icing structure and sweetness
- 3 tablespoons meringue powder: the key stabilizer that makes the icing dry firm
- 9 tablespoons room-temperature water: start here, then adjust for consistency
- 1 teaspoon pure vanilla extract (or ½ teaspoon lemon, coconut, or peppermint extract): adds flavor depth
- Gel food coloring: optional, for vibrant holiday shades without thinning the icing
Tools You’ll Need
- Hand mixer or stand mixer with whisk attachment: ensures the icing whips properly
- Piping bags with tips or squeeze bottles: for outlining and flooding cookies
- Toothpicks or a scribe tool: to pop air bubbles and smooth icing
- Small bowls: for dividing icing into colors
Notes & Substitutions
- Meringue powder vs. egg whites: If you prefer, swap in 3 large pasteurized egg whites for the meringue powder and water, since USDA FSIS notes that raw shell eggs can carry Salmonella and pasteurized options reduce that risk.
- Flavor swaps: Almond extract or peppermint extract can give a festive twist. Use sparingly, as these flavors are strong.
- Consistency fixes: Too thick? Add water a teaspoon at a time. Too thin? Add confectioners’ sugar.
- Dietary notes: Many meringue powders are egg-based, but vegan alternatives exist. Always check labels if baking for dietary needs.
How to Make Royal Icing for Christmas Cookies
- Mix dry ingredients first. In a large mixing bowl, whisk the sifted confectioners’ sugar with the meringue powder. This prevents clumps and helps the powder distribute evenly.
- Add water and flavor. Pour in 9 tablespoons of room-temperature water and the vanilla (or other extract). Beat on high speed for 1½ to 2 minutes. The icing should look thick and glossy.
- Check consistency. Lift the whisk and let the icing ribbon back into the bowl. For standard flooding, it should settle back into itself within 10–15 seconds. If it’s too thick, add water a teaspoon at a time. If it’s too thin, whip longer or sift in more sugar.
- Divide and color. Separate the icing into small bowls. Add gel food coloring with a toothpick, mixing slowly to avoid air bubbles. Keep each bowl covered with a damp towel while you work to prevent crusting.
- Fill piping bags. Use small piping tips (#2 or #3 for outlines, #1 for fine details). Fill bags no more than halfway to keep them easy to control.
- Outline first. Pipe a thin border around each cookie to contain the flood icing. Let this outline set for a few minutes before moving on.
- Flood the cookie. Thin some icing with a few drops of water until it passes the 10-second ribbon test. Fill the inside of the outlined cookie, using a toothpick or scribe tool to spread and smooth the icing.
- Add designs. While the base is still wet, pipe dots, lines, or patterns for wet-on-wet designs like snowflakes, ornaments, or polka dots. For layered effects, wait until the first layer is fully dry before adding the next.
- Dry completely. Leave cookies at room temperature for at least 4 hours before stacking. For faster results, place them in front of a small fan or in a food dehydrator on the lowest setting.
Pro Tips & Troubleshooting
Expert Tips
- Nail the consistency. Use the 10–20 second ribbon test: drag a spoon through the icing and count how long it takes to smooth out. Ten seconds is perfect for flooding, 20 seconds works best for outlines.
- Work in small batches. Keep extra icing covered with a damp towel or plastic wrap pressed directly on the surface. This prevents a dry crust from forming.
- Pop the bubbles. Use a scribe tool or toothpick to burst tiny air bubbles as soon as you flood the cookie. This keeps the surface glossy.
- Rest your colors. Let tinted icing sit for 15 minutes before piping. This allows bubbles to rise and the shade to deepen.
Common Mistakes to Avoid
- Overmixing. Beating too long incorporates too much air, creating bubbles that show up on cookies. Stop mixing once the icing is smooth and glossy.
- Over-thinning. A few extra drops of water can make icing run off the cookie. Always add water in tiny amounts.
- Stacking too soon. Even if cookies look dry, they may still be soft inside. Wait at least 4 hours (or overnight) before packaging.
- Skip liquid dyes. Skip liquid dyes that thin icing; use concentrated gel colors and FDA-approved food color additives so you maintain texture and stay within approved uses.
Creative Shortcut
If you’re short on time, outline and flood with white icing first, let it dry, then use edible markers to draw on designs. It’s a simple way to get crisp holiday patterns without mixing multiple colors.
Serving, Storage & Variations
Serving Suggestions
- Set out a tray of iced sugar cookies at your holiday party alongside red velvet crinkle cookies, or package them in festive tins for neighbor gifts.
- Use royal icing Christmas cookies as edible place cards: write names with a fine piping tip.
- Pair them with chocolate thumbprint cookies and hot cocoa for a cozy winter treat.
Storage Guidelines
- Room temperature: Store in an airtight container for up to 1 week. Keep parchment between layers to prevent sticking.
- Freezing: Freeze undecorated sugar cookies, then thaw and ice later. If freezing decorated cookies, let them dry completely, wrap tightly, and freeze for up to 1 month.
- Fridge caution: Avoid refrigerating decorated cookies unless necessary. Humidity can soften the icing and dull the finish.
Reheating
- No reheating is needed, but if the cookies are frozen, bring them back to room temperature before serving.
Variations
- Vegan option: Swap meringue powder with an aquafaba-based substitute and use plant-based food coloring.
- Flavor twists: Add peppermint, almond, or orange extract for holiday flair.
- Gingerbread houses: Make the icing slightly thicker to act as “glue” for gingerbread walls and decorations, or bake a batch of gingerbread cheesecake cookies for a spiced option.
- Chocolate royal icing: Add a few teaspoons of cocoa powder for a chocolatey finish.
Nutritional Information
Here’s an approximate breakdown per decorated cookie (values will vary based on cookie size and thickness of icing):
| Nutrient | Amount (per cookie) |
|---|---|
| Calories | 80 kcal |
| Carbohydrates | 20 g |
| Sugar | 19 g |
| Fat | 0 g |
| Protein | 0 g |
| Sodium | 5 mg |
Nutritional Notes
- Most of the calories come from sugar, since royal icing is essentially sweetened meringue.
- Using meringue powder instead of raw egg whites reduces food safety concerns and makes the recipe more stable for gifting, as the FDA explains that even clean, intact eggs may contain Salmonella and pasteurized products are the safer choice for uncooked uses.
- If you flavor with extracts like peppermint or almond, it doesn’t significantly change the nutrition profile.
- For anyone adjusting ingredients (e.g., sugar alternatives), tools like Cronometer or MyFitnessPal can give updated values.
Conclusion
Royal icing Christmas cookies are more than just a treat they’re a holiday tradition that doubles as an art project. With this recipe, you’ll get icing that’s easy to work with, holds its shape, and dries to a crisp, glossy finish that looks straight out of a bakery. From simple outlines to intricate wet-on-wet snowflakes, the results are always festive and satisfying.
If you give this recipe a try, leave a comment and a star rating below to let us know how it turned out. Share your creations on Pinterest or Facebook so more bakers can join the fun. And here’s a question to spark ideas: What designs did you try this year classic trees, colorful ornaments, or something new? We’d love to hear your decorating stories.
Frequently Asked Questions (FAQ)
Can I make royal icing without egg whites?
Yes, you can use meringue powder or pasteurized egg whites, which help reduce the Salmonella risk associated with raw egg whites in royal icing.
How thin should flood consistency be for smooth Christmas cookies?
Aim for the 10–12 second ribbon test: drag a spoon through the icing and count how long it takes to settle flat. Around 10–12 seconds gives you smooth flooding without over-spreading.
How long does royal icing take to dry before I can stack or gift the cookies?
At room temperature, thin layers dry in about 4–6 hours, while thicker layers may need overnight. For faster results, use a fan or dehydrator on a low setting.
How do I stop color bleed between red and white designs?
Let the first color set slightly before adding the next, and avoid over-thinning your icing. Gel colors are less prone to bleeding than liquid dyes.
What tip size should I use for outlining and detail work?
Use a #2 or #3 tip for outlining, and a #1 for fine details. Larger tips can be helpful for flooding larger cookies.
Can I speed up drying with a dehydrator or fan?
Yes, place cookies in front of a small fan or in a dehydrator on the lowest setting. This speeds drying and helps prevent craters from forming.
Why did my royal icing form craters or pockmarks?
Cratering often happens when icing is too thin or applied in humid conditions. Using pasteurized egg products helps reduce any raw-egg risk during no-cook prep.
Royal Icing Christmas Cookies
Glossy, smooth royal icing Christmas cookies that hold their shape, dry firm, and make holiday decorating fun and festive for all skill levels.
24
cookies10
minutes0
minutes80
kcalIngredients
4 cups (480 g) confectioners’ sugar, sifted
3 tablespoons meringue powder
9 tablespoons room-temperature water
1 teaspoon vanilla extract (or ½ teaspoon lemon, coconut, or peppermint extract)
Gel food coloring (optional)
Directions
- In a large bowl, whisk confectioners’ sugar and meringue powder until combined.
- Add water and extract. Beat on high speed for 1½–2 minutes until glossy.
- Test consistency with the 10–15 second ribbon test. Adjust with sugar or water as needed.
- Divide icing into bowls, add gel colors, and cover with a damp towel to prevent crusting.
- Fill piping bags. Use thicker icing for outlines and thinned icing for flooding.
- Outline cookies, then flood the centers. Smooth with a toothpick or scribe tool.
- Add designs wet-on-wet or let layers dry for stacked effects.
- Dry cookies at room temperature for at least 4 hours before stacking or gifting.
Notes
- Swap meringue powder with 3 pasteurized egg whites for a traditional method.
- Almond or peppermint extract adds a festive flavor twist.
- Keep unused icing covered to avoid crusting.
- Gel coloring works best avoid liquid dyes that thin the icing.
- For gingerbread houses, use a slightly thicker icing as “glue.”
Nutrition Facts
- Calories: 80kcal
- Sodium: 5mg
- Carbohydrates: 20g
- Sugar: 19g


