Skip to content
 St. Patrick’s Day is a time for joyful celebrations, vibrant green, and delicious food that brings everyone together. As a professional chef and recipe developer, I always look for ways to infuse that festive spirit into classic dishes. That’s why I am so excited to share my ultimate recipe for Shamrock Deviled Eggs. This article will not only guide you through making these visually striking and incredibly tasty appetizers but also provide all the tips and tricks for perfect hard-boiling and a special, easy-to-do design. Get ready to impress your guests with a truly memorable St. Patrick’s Day treat!
Why You’ll Love These Shamrock Deviled Eggs
This recipe takes classic deviled eggs to a new level, especially for your St. Patrick’s Day celebration. My unique twist is all about creating a clear, delightful shamrock design directly on the yolk filling.
Instead of just coloring the egg whites green, I guide you to use a small, shamrock-shaped cookie cutter to gently press an outline into the piped yolk. You can then fill this impression with finely minced fresh chives for a vibrant green shamrock, or even a contrasting yellow yolk piped in for a more subtle, classic color theme.
This technique moves beyond simple green coloring, creating a true, clear shamrock visual. It significantly enhances the thematic appeal and adds a subtle texture without compromising the beloved creamy deviled egg flavor. The visual impact is simply stunning and elevates these beyond standard green deviled eggs.
Festive & Fun: These are absolutely perfect for St. Patrick’s Day parties, potlucks, and family gatherings.
Showstopper Appetizer: You will impress your guests with minimal extra effort, making you look like a culinary genius.
Customizable: The option for chives or contrasting yolk for the shamrock detail allows you to tailor them to your taste and aesthetic preferences.
Deliciously Classic: Despite their stunning appearance, these Shamrock Deviled Eggs still deliver that wonderfully creamy, tangy, garlicky flavor everyone loves.
Ingredients Needed

Here is exactly what you will need to create these festive Shamrock Deviled Eggs.
- 10 Large Eggs
- 1 cup Mayonnaise or Miracle Whip
- 1 tbsp. Yellow Mustard
- 1/2 tsp Garlic Powder
- 3-4 drops Green Food Coloring
- Parsley Flakes
- 1 tbsp. White Vinegar
Ingredient Notes & Substitutions
When choosing your eggs, opt for large eggs for the best results, as they provide a good canvas for the filling and design. The quality of your hard-boiled eggs is truly key to the overall success of this recipe.
For the creamy filling, you can use either Mayonnaise or Miracle Whip. Mayonnaise offers a richer, smoother base, while Miracle Whip provides a tangier flavor profile. Both work wonderfully, so choose what you prefer.
Yellow Mustard is essential for classic deviled eggs. It adds that signature tangy zest that perfectly balances the richness of the mayonnaise.
When it comes to Green Food Coloring, you have options. Liquid food coloring works well, but gel food coloring can offer a more vibrant color with fewer drops. Start with a few drops and add more gradually until you achieve your desired shade of green.
For garnishes, Parsley Flakes and Paprika are common choices that add both visual appeal and a hint of flavor. However, for our unique shamrock twist, finely minced fresh chives are an ideal and very effective garnish to highlight the design.

How to Make Shamrock Deviled Eggs
Creating these Shamrock Deviled Eggs is a fun and straightforward process, especially with my step-by-step guidance. Get ready to make a truly festive appetizer!
Step-by-Step Instructions:
1. Prepare the Eggs: Begin by perfectly hard-boiling your eggs. Once cooked, cool them completely in an ice bath, then carefully peel them. (You will find detailed tips on this crucial step in the next section.)
2. Separate and Slice: Carefully slice each peeled hard-boiled egg in half lengthwise. Gently scoop out the creamy Egg yolks into a separate bowl and set aside the hollowed Egg whites.
3. Create the Green Dye Bath: In a bowl or shallow pan, combine 1 cup of boiling water with 1 tbsp. White Vinegar and 3-4 drops of Green Food Coloring. Stir until the color is fully dissolved and well combined.
4. Dye the Egg Whites: Gently place the halved Egg whites into the vibrant green water bath. Allow them to soak for 15-20 minutes, or until they reach your desired shade of festive green. For a deeper, more intense color, you can leave them slightly longer.
5. Dry the Egg Whites: Carefully remove the now green egg whites from the water. Place them cut-side down on paper towels to thoroughly dry, ensuring no excess liquid remains before filling.
6. Prepare the Yolk Filling: Meanwhile, in the bowl with the reserved Egg yolks, mash them thoroughly with a fork until they are mostly smooth. Stir in the 1 cup Mayonnaise or Miracle Whip, 1 tbsp. Yellow Mustard, and 1/2 tsp Garlic Powder. For an exceptionally smoother, lump-free, and creamy filling, I highly recommend using an Electric mixer on low speed until everything is well combined.
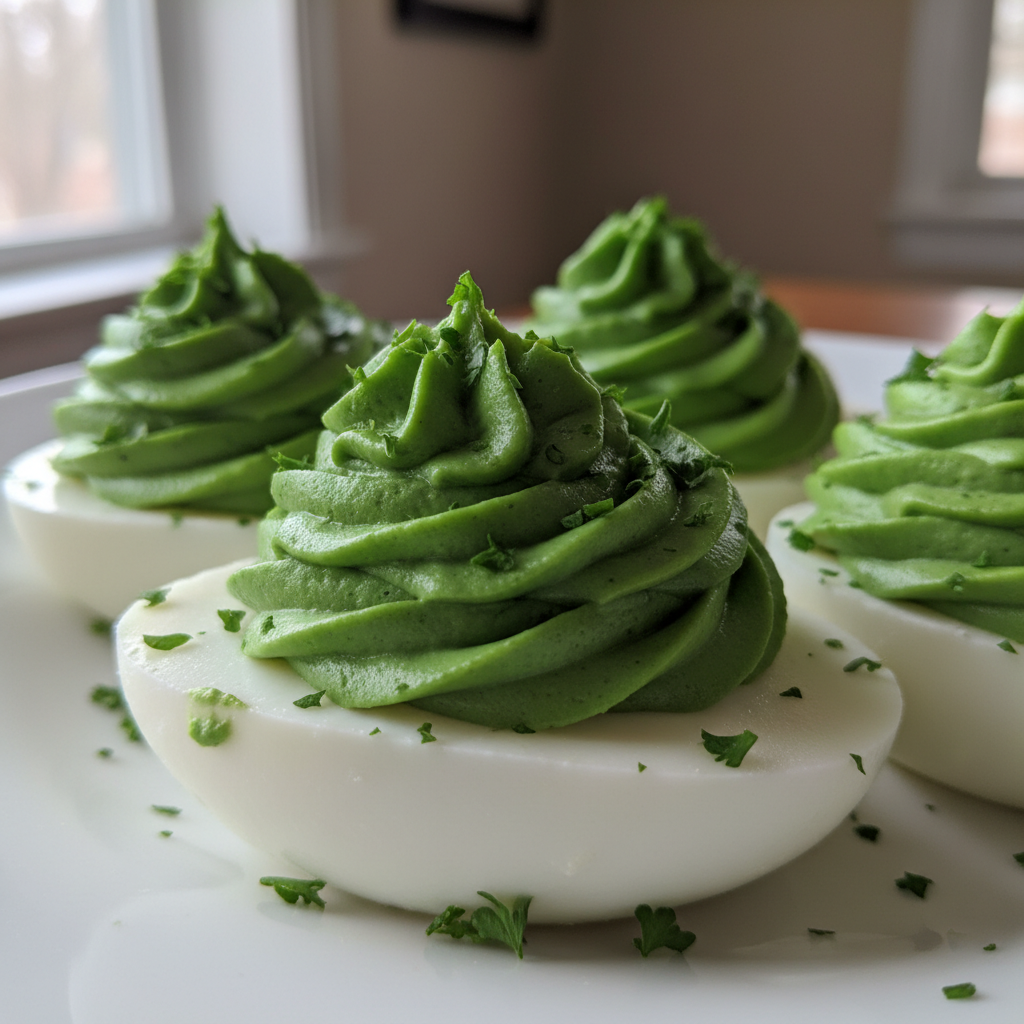
7. Pipe the Filling: Transfer the creamy yolk mixture into a Piping bag fitted with a star tip. If you do not have a piping bag, a sturdy plastic baggie with a corner snipped off works just as well. Pipe the filling artfully into the green egg white halves.
8. Add the Unique Shamrock Twist: This is where the magic happens and your deviled eggs become truly special.
For some eggs, gently press a small, clean shamrock-shaped cookie cutter (ensure it’s food-safe) into the piped yolk filling to create a light impression.
Carefully fill this shamrock impression with finely minced fresh chives for a vibrant green, natural shamrock, or with a small amount of contrasting plain yellow yolk (reserved from a few undyed eggs if preferred) piped in using a very small tip for a classic color theme.
9. Final Garnish: Finish by sprinkling with Parsley Flakes or Paprika around the shamrock design for extra color and a hint of flavor.
Mastering Perfect Hard-Boiled Eggs & Vibrant Color
Perfect deviled eggs start with perfectly hard-boiled eggs. Let me walk you through my tried-and-true method for consistent results, along with tips for achieving that vibrant green color.
To hard-boil eggs perfectly, place your eggs in a single layer in a saucepan and cover them with about an inch of cold water. Bring the water to a rolling boil over high heat, then immediately remove the pan from the heat, cover it, and let the eggs sit in the hot water for 12-15 minutes for firm, well-set yolks. Once the time is up, immediately transfer the eggs to an ice bath for at least 5 minutes. This cold shock stops the cooking process and makes peeling significantly easier.
For easy peeling, once the eggs are cold, gently crackle the shells all over by tapping them on a hard surface or rolling them. Peel them under cool running water, starting from the larger end where the air pocket usually is. This method helps prevent the whites tearing during peeling, ensuring beautiful halves for your deviled eggs.
When it comes to green food coloring, you can use either liquid or gel. Gel food coloring often provides a more intense and vibrant color with fewer drops, so it is a great choice if you want a really deep green. Liquid food coloring is also perfectly fine, just be prepared to use a few more drops to reach your desired shade. Remember to start with a little and add more as needed.
The White Vinegar in the coloring water is not just for show; it serves a crucial purpose. The acid in the vinegar helps the color absorb more effectively into the egg whites and sets the color, which prevents it from bleeding. You will not taste the vinegar in the final product as the whites are rinsed and dried. To achieve your desired shade, simply monitor the egg whites in the dye bath and adjust the soak time. Longer soak times will result in a deeper green.
If you are looking for alternative, natural ways to color egg whites green, you could experiment with very dilute spinach juice for a subtle tint, or even beet juice for pink eggs, or turmeric for yellow eggs. However, be aware that these natural options might impart a slight flavor to the egg whites. For a non-green shamrock theme, consider using regular white egg whites and letting the green chive shamrock really pop against the natural yellow yolk. Another idea is a gold or yellow shamrock using a small amount of turmeric-dyed yolk against plain egg whites, offering a lovely contrast.
Pro Tips & Troubleshooting
Here are some of my top tips and common issues to avoid to ensure your Shamrock Deviled Eggs are absolutely perfect every time.
Pro Tips for Perfect Deviled Eggs
For a truly smooth and creamy yolk filling, I cannot recommend an Electric mixer enough. While mashing with a fork is acceptable, a mixer will break down any tiny lumps and incorporate the ingredients into a luxuriously smooth consistency, making it much easier to pipe.
You can definitely make these Shamrock Deviled Eggs ahead of time! Prepare the Egg whites and the Egg yolks mixture separately. Store the green egg whites in an airtight container lined with a damp paper towel in the refrigerator, and the yolk filling in another airtight container or tightly covered with saran wrap directly on the surface to prevent a skin from forming. Both components can be stored like this for up to 2 days before assembling.
If you do not have a Piping bag, a sturdy freezer bag works perfectly. Simply spoon the filling into one corner, push it down, and snip off a small corner with scissors to create your own piping tip. For greater control and cleaner lines, make sure your filling is smooth and free of lumps.
When using the shamrock cookie cutter for the unique twist, gently press it into the piped yolk filling just enough to make an impression. Do not press too hard, or you risk tearing the yolk. When filling the impression, use a small spoon or a very small piping tip to neatly add your chives or contrasting yolk.
For a subtle flavor boost, consider adding a tiny pinch of cayenne pepper or a dash of your favorite hot sauce to the yolk mixture. It adds a lovely warmth without overpowering the classic deviled egg flavor.
Common Mistakes to Avoid
One common mistake is overmixing the yolk filling, especially if you are doing it by hand. While an electric mixer handles this well, if you are mashing with a fork, mix just until combined to avoid a less smooth, potentially gummy texture.
Improper hard-boiling or peeling can lead to the whites tearing during peeling, which makes for a less visually appealing presentation. Always use the ice bath method and peel gently under water to minimize tearing.
A runny yolk filling is another common issue. This usually happens from adding too much mayonnaise. Start with less mayonnaise than you think you need and add it slowly until you reach your desired creamy consistency. If your filling does turn out a little too runny, a small amount of softened cream cheese can help firm it up.
Uneven green color can occur if the egg whites are not fully submerged in the dye bath or if they are not dried properly before coloring. Ensure full submersion and pat them completely dry to allow for even color absorption.
Always remember that deviled eggs should be served chilled. Leaving them out at room temperature for too long can compromise food safety, especially since they contain mayonnaise. Always keep them refrigerated until just before serving.
Serving & Storage
My Shamrock Deviled Eggs are not just delicious; they are also a versatile and festive addition to any gathering.
Serving Ideas
Deviled eggs are a true Potluck favorite and an indispensable Appetizer or side dish for St. Patrick’s Day. Their festive appearance makes them a focal point on any buffet.
For your St. Patrick’s Day spread, consider serving these alongside other traditional Irish-inspired dishes. They pair beautifully with a hearty Instant Pot Ham and Cabbage Dinner, a comforting Easy Shepherd’s Pie, or even festive Lucky Cupcakes With Irish Cream Frosting. Do not forget a classic Colcannon for a complete meal. The creamy, tangy, garlicky, festive, fun, and visually striking qualities of these deviled eggs complement a wide range of flavors.
Always remember to finish by sprinkling with Parsley Flakes or Paprika, emphasizing the striking visual appeal of the unique shamrock design created with chives.
Storage and Make-Ahead
Can Shamrock Deviled Eggs be prepared in advance? Absolutely! This is one of my favorite make-ahead strategies. As mentioned in the pro tips, keep the green Egg whites and the yolk filling separate until just before serving. Store the egg whites in an airtight container lined with a damp paper towel in the refrigerator, and the yolk mixture in another airtight container, pressed with plastic wrap directly on the surface to prevent air exposure.
As for how long deviled eggs last in the fridge, assembled deviled eggs are best consumed within 2 days for optimal taste and texture. Always follow proper Food safety guidelines by storing them in an airtight container through Refrigeration. Never leave assembled deviled eggs out at room temperature for more than two hours.
I do not recommend freezing deviled eggs. The texture of the egg whites becomes rubbery and unpleasant upon thawing, and the filling can separate.
Conclusion
There you have it: your ultimate guide to creating truly impressive Shamrock Deviled Eggs. These are more than just a St. Patrick’s Day appetizer; they are a vibrant, creamy, and flavorful celebration on a plate. The unique shamrock twist, whether with fresh chives or a contrasting yolk, elevates them from a simple snack to a show-stopping dish.
Even if you are new to making deviled eggs, my detailed instructions and expert tips will help you achieve stunning results every time. I hope you will give this recipe a try for your next St. Patrick’s Day celebration or Potluck. Feel free to experiment with different garnishes or slight flavor adjustments to make them your own. I would love to see your creations, so please share them on social media or leave a comment with your favorite twist!
FAQ
Questions and Answers:
How do you make the perfect hard-boiled eggs for deviled eggs?
For perfect hard-boiled eggs, place them in a single layer in a pot, cover with an inch of cold water, bring to a rolling boil, then remove from heat, cover, and let sit for 12-15 minutes. Immediately transfer to an ice bath for 5 minutes before peeling.
Can Shamrock Deviled Eggs be prepared in advance?
Yes, you can prepare the components ahead of time. Hard-boil and dye the egg whites, and prepare the yolk filling. Store them separately in airtight containers in the refrigerator for up to 2 days. Assemble just before serving.
What are some creative ways to make green deviled eggs for St. Patrick’s Day?
Beyond green egg whites, my recipe features a unique shamrock design pressed into the yolk filling and filled with minced chives. You could also use a stencil for powder garnishes or experiment with natural green dyes like dilute spinach juice for a very subtle shade.
How do you achieve a smooth and creamy deviled egg filling?
To achieve a smooth and creamy filling, mash your egg yolks thoroughly, then mix with mayonnaise, mustard, and garlic powder. For the absolute smoothest texture, I recommend using an electric mixer on low speed until the mixture is completely lump-free.
Does the vinegar in the green coloring water affect the taste of the egg whites?
No, the small amount of white vinegar used in the coloring water does not leave a noticeable taste on the egg whites. Its purpose is to help the green food coloring absorb more effectively and set the color, preventing it from bleeding.
What are the best storage tips for leftover deviled eggs?
Leftover assembled deviled eggs should be stored in an airtight container in the refrigerator and consumed within 2 days. For optimal freshness and food safety, do not leave them at room temperature for more than two hours.
Can I use gel food coloring instead of liquid drops for green deviled eggs?
Yes, absolutely! Gel food coloring is often preferred because it provides a more vibrant and intense green color with fewer drops compared to liquid food coloring.
What kind of mayonnaise should I use for deviled eggs?
You can use either regular mayonnaise for a richer flavor or Miracle Whip for a tangier profile. Both work well, so choose based on your personal preference.
How do you get rid of lumps in deviled egg filling?
The best way to get rid of lumps in deviled egg filling is to mash the yolks thoroughly with a fork before adding other ingredients. Then, for a truly smooth consistency, use an electric mixer on low speed to combine the filling ingredients.
Shamrock Deviled Eggs: Your Ultimate Guide to a Festive St. Patrick's Day Treat
Ingredients
Equipment
Method
- Prepare the Eggs: Begin by perfectly hard-boiling your eggs. Once cooked, cool them completely in an ice bath, then carefully peel them.
- Separate and Slice: Carefully slice each peeled hard-boiled egg in half lengthwise. Gently scoop out the creamy Egg yolks into a separate bowl and set aside the hollowed Egg whites.
- Create the Green Dye Bath: In a bowl or shallow pan, combine 1 cup of boiling water with 1 tbsp. White Vinegar and 3-4 drops of Green Food Coloring. Stir until the color is fully dissolved and well combined.
- Dye the Egg Whites: Gently place the halved Egg whites into the vibrant green water bath. Allow them to soak for 15-20 minutes, or until they reach your desired shade of festive green. For a deeper, more intense color, you can leave them slightly longer.
- Dry the Egg Whites: Carefully remove the now green egg whites from the water. Place them cut-side down on paper towels to thoroughly dry, ensuring no excess liquid remains before filling.
- Prepare the Yolk Filling: Meanwhile, in the bowl with the reserved Egg yolks, mash them thoroughly with a fork until they are mostly smooth. Stir in the 1 cup Mayonnaise or Miracle Whip, 1 tbsp. Yellow Mustard, and 1/2 tsp Garlic Powder. For an exceptionally smoother, lump-free, and creamy filling, I highly recommend using an Electric mixer on low speed until everything is well combined.
- Pipe the Filling: Transfer the creamy yolk mixture into a Piping bag fitted with a star tip. If you do not have a piping bag, a sturdy plastic baggie with a corner snipped off works just as well. Pipe the filling artfully into the green egg white halves.
- Add the Unique Shamrock Twist: This is where the magic happens and your deviled eggs become truly special. For some eggs, gently press a small, clean shamrock-shaped cookie cutter (ensure it's food-safe) into the piped yolk filling to create a light impression. Carefully fill this shamrock impression with finely minced fresh chives for a vibrant green, natural shamrock, or with a small amount of contrasting plain yellow yolk (reserved from a few undyed eggs if preferred) piped in using a very small tip for a classic color theme.
- Final Garnish: Finish by sprinkling with Parsley Flakes or Paprika around the shamrock design for extra color and a hint of flavor.