 Skip to content
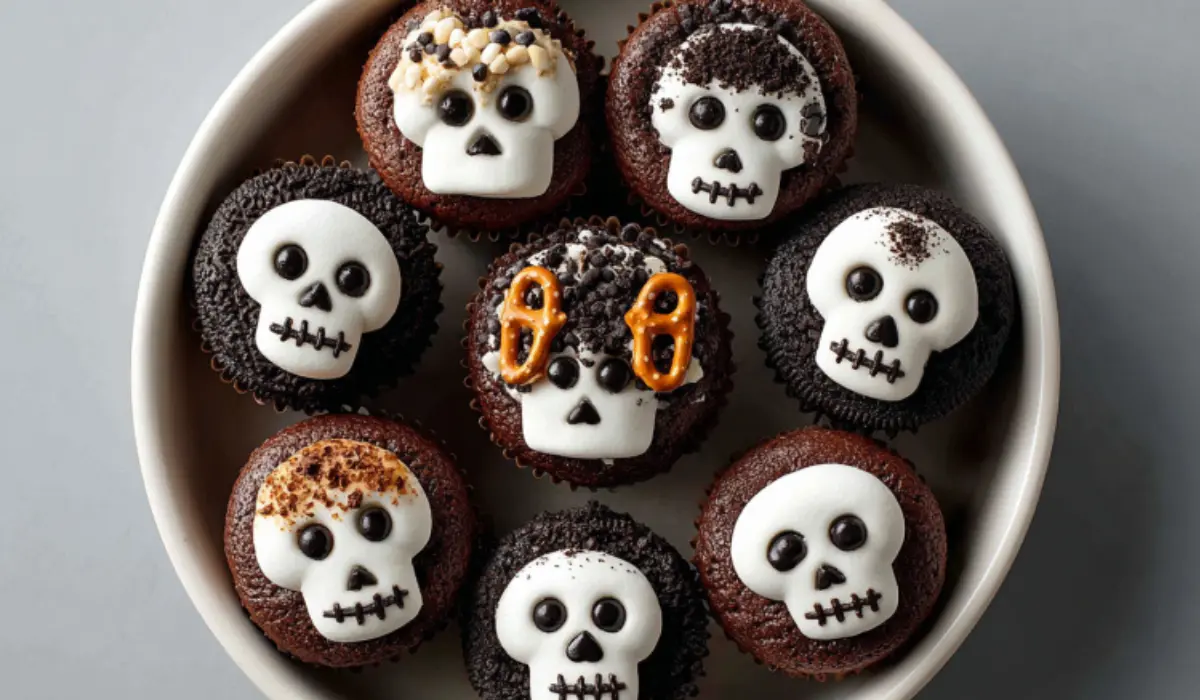
Halloween desserts should be as fun to make as they are to eat, and these Skeleton Cupcakes deliver both. Imagine rich chocolate cupcakes topped with playful skeletons made of pretzels and marshmallows a mix of spooky and sweet that gets everyone smiling. This version keeps the process simple while guaranteeing bakery-level results at home. Whether you’re baking for a classroom party or a themed dinner, these cupcakes promise a crowd-pleasing treat that’s as easy to assemble as it is impressive on display.
Table of Contents
Why You’ll Love This Recipe
These Skeleton Cupcakes are more than just a festive dessert they’re a guaranteed hit at any Halloween gathering. Here’s why you’ll want to make them every year:
- Quick & Easy: Uses simple ingredients and a straightforward process perfect for beginners.
- Kid-Friendly Fun: Kids can help assemble the skeleton toppers, turning baking into an activity.
- Creative Presentation: Pretzel “bones” and marshmallow heads make every cupcake a spooky showstopper.
- Customizable: Start from scratch or use a cake mix to save time—both versions taste amazing.
- Make-Ahead Friendly: The cupcakes and toppers hold up beautifully for parties or school events.
Each bite brings a balance of rich chocolate flavor and crunchy-sweet decoration that feels festive without the fuss.
Ingredients Needed
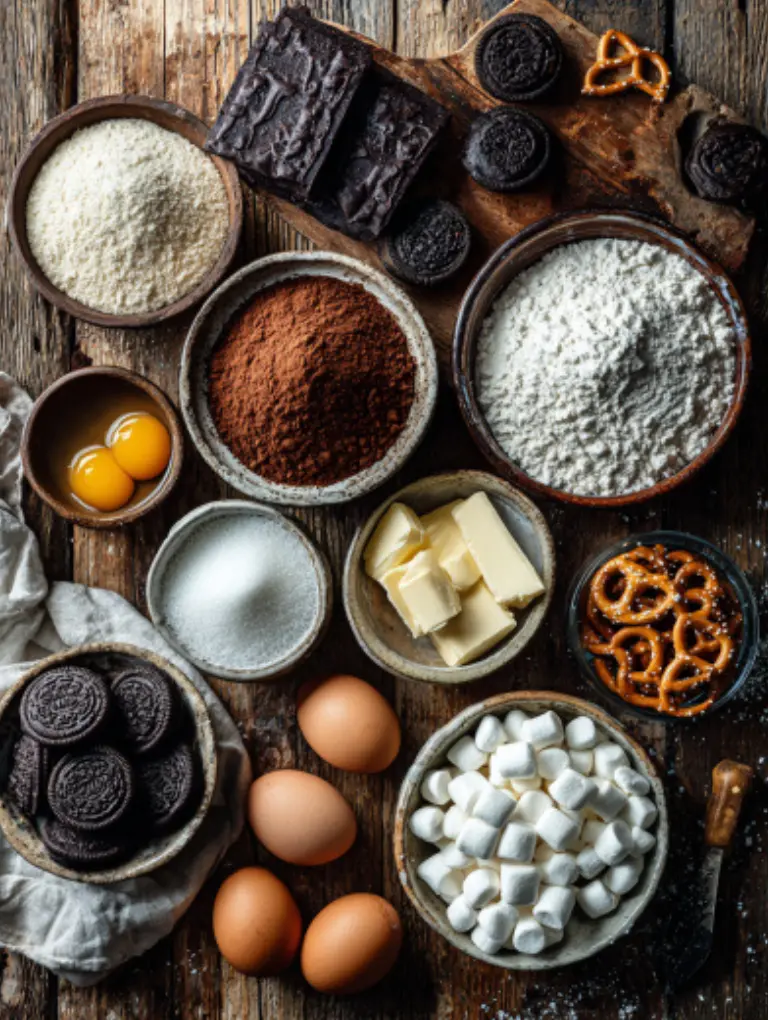
Below you’ll find everything required to make these Halloween-ready Skeleton Cupcakes. Ingredients are grouped for convenience, and notes explain key choices or substitutions.
For the Chocolate Cupcakes (From Scratch)
- 2 cups all-purpose flour
- 1 ¼ teaspoons baking soda
- 1 teaspoon salt
- ¼ teaspoon baking powder
- 1 cup hot water
- ⅔ cup unsweetened cocoa powder
- ¾ cup vegetable oil or melted butter
- 1 ½ cups granulated sugar
- 2 large eggs, room temperature
- 1 teaspoon pure vanilla extract
Notes:
Use high-quality cocoa for a deeper flavor. Vegetable oil keeps cupcakes moist, while butter adds richness. You can replace half the flour with gluten-free blend if needed.
For the Frosting
- ½ cup unsalted butter, softened
- 3 oz unsweetened baking chocolate, melted and cooled
- 2 cups powdered sugar
- 2 teaspoons vanilla extract
- 3 to 4 tablespoons milk or heavy cream
Notes:
Milk yields a lighter texture, while cream gives more structure. For dairy-free, swap butter with plant-based spread and milk with oat or almond milk.
For the Skeleton Toppers
- 24 yogurt-covered or white chocolate covered pretzel twists (for ribs)
- 12 large marshmallows (for heads)
- 24 mini pretzel sticks (for arms and legs)
- Black food-safe marker or decorating gel
- Lollipop sticks or paper straws (to hold structure)
Notes:
Use mini marshmallows for smaller toppers or dye-free markers for sensitive diets.
Optional “Dirt” Layer
- 10 crushed Oreo cookies or chocolate sandwich cookies
Notes:
Press crumbs lightly over the frosting before adding skeletons for a spooky graveyard look.
Substitutions and Variations
- Gluten-Free Option: Use certified gluten-free flour and pretzels.
- Vegan Option: Replace eggs with flaxseed eggs (1 tbsp ground flax + 3 tbsp water per egg).
- Budget Tip: Replace yogurt pretzels with plain white candy-coated ones.
How to Make Skeleton Cupcakes
Follow these simple, detailed steps to bake rich chocolate cupcakes and decorate them with adorable edible skeletons.
Step 1: Prep and Preheat
Set your oven to 350°F (175°C) and line a 12-cup muffin tin with paper liners. If you’re making a double batch, prepare two tins or bake in rounds.
Tip: Room-temperature ingredients blend more evenly and give your cupcakes a lighter crumb.
Step 2: Mix the Batter
In a medium bowl, whisk together flour, baking soda, salt, and baking powder. In a separate small bowl, stir hot water and cocoa powder until smooth—this blooms the cocoa and deepens the flavor.
In a large mixing bowl, beat oil and sugar on medium speed for about 1 minute until glossy. Add eggs one at a time, then vanilla. Reduce speed to low and alternate adding the dry mix and cocoa mixture, beginning and ending with the dry ingredients. Mix until just combined overmixing can make cupcakes dense.
Step 3: Bake the Cupcakes
Fill each liner about two-thirds full. Bake for 20–22 minutes or until a toothpick inserted in the center comes out clean. Let cupcakes cool in the pan for 5 minutes, then transfer to a wire rack to cool completely about 30 minutes.
Visual cue: The tops should spring back gently when pressed.
Step 4: Make the Frosting
In a clean bowl, beat softened butter and melted chocolate together until smooth. Add powdered sugar, vanilla, and 3 tablespoons milk or cream. Beat on low until incorporated, then high for 1–2 minutes until light and fluffy.
If frosting seems thick, add another teaspoon of milk. If too thin, add a tablespoon of sugar.
Tip: For deeper chocolate flavor, mix in 1 tablespoon of unsweetened cocoa.
Step 5: Frost the Cupcakes
Spread or pipe frosting over each cooled cupcake. You can use a round or star tip for swirls or a simple offset spatula for smooth tops.
Optional: Sprinkle crushed Oreos over the frosting for a dirt effect before adding skeletons.
Step 6: Build the Skeleton Toppers
- Pretzel Skeletons: Slide two pretzel twists onto each lollipop stick for the “ribs.”
- Add mini pretzel sticks as arms and legs, pressing gently into the frosting for stability.
- Top each with a marshmallow head.
- Draw faces using a food-safe marker or gel (two dots for eyes, a curved line for a grin).
Tip: To keep toppers upright, insert each stick slightly off-center and press until the pretzels rest firmly in the frosting.
Step 7: Let Them Set
Refrigerate cupcakes for 15–20 minutes before serving to let frosting firm up and toppers stay steady.
These cupcakes look best displayed upright in a tray or cupcake stand.
Pro Tips & Troubleshooting
Even simple recipes can benefit from a few insider tricks. Here’s how to make your Skeleton Cupcakes flawless every time.
Expert Tips
- Room-Temperature Ingredients: Cold eggs or butter can cause uneven texture. Let them sit out for 30 minutes before mixing.
- Bloom the Cocoa: Always dissolve cocoa in hot water to unlock its full chocolate flavor.
- Smooth Frosting Every Time: Beat frosting for at least a minute after all ingredients are added. This traps air for a light, fluffy texture.
- Keep the Skeletons Upright: Insert the sticks while the frosting is slightly soft, then chill for 10–15 minutes so the structure sets.
- Add Character: Use different facial expressions on each marshmallow smiles, surprised faces, or goofy grins make them feel handmade.
- Party Prep Tip: Bake cupcakes the day before and store them unfrosted. Add frosting and toppers a few hours before serving.
Common Mistakes to Avoid
- Overmixing the Batter: Stops the cupcakes from rising properly. Stir until just combined.
- Skipping Cooling Time: Frosting warm cupcakes causes it to melt and slide off.
- Too Much Milk in Frosting: Makes it runny. Start with less and adjust gradually.
- Using Wet Markers on Marshmallows: Can cause faces to smear use edible markers labeled for candy.
- Forgetting Stability: Avoid inserting toppers too early; do it after frosting sets slightly.
Quick Creative Trick
Turn these into Graveyard Skeleton Cupcakes by adding cookie “tombstones.” Write “RIP” on rectangular cookies with black icing and stick one behind each skeleton. It adds a fun 3D effect with zero extra effort.
Serving, Storage & Variations
These Skeleton Cupcakes are designed to impress, but they’re also practical for parties and school events. Here’s how to serve, store, and customize them without losing their charm.
Serving Ideas
- Arrange cupcakes on a black or orange tray for a festive Halloween look.
- Sprinkle a little cocoa powder or crushed Oreos around the base for a “graveyard dirt” vibe.
- Add small candy pumpkins or gummy worms around the skeletons for extra spooky detail.
- Serve chilled for cleaner frosting lines, especially in warm rooms.
Tip: Use cupcake wrappers with Halloween designs or glow-in-the-dark picks for extra fun.
Storage Guidelines
- At Room Temperature: Store decorated cupcakes in an airtight container for up to 2 days. Keep them in a cool, dry place away from direct heat.
- In the Fridge: If the room is warm or humid, refrigerate for up to 5 days. Let them sit at room temperature for 15–20 minutes before serving for best flavor.
- In the Freezer: Unfrosted cupcakes freeze beautifully for up to 2 months. Thaw overnight in the fridge, then frost and decorate before serving.
- Toppers: If making in advance, store the pretzel-and-marshmallow skeletons separately in a dry, airtight container for up to 3 days.
Reheating for Best Texture
Cupcakes are best at room temperature, but if chilled too long, microwave each one for 5–7 seconds just to soften the crumb don’t overheat or the frosting will melt.
Recipe Variations
- Jack Skellington Cupcakes: Draw stitched smiles and large eye circles for a Nightmare Before Christmas theme.
- Gluten-Free Option: Substitute gluten-free flour and pretzels; texture stays nearly identical.
- Dairy-Free Version: Use vegan butter and plant-based milk; coat skeletons with dairy-free white chocolate.
- Flavor Twist: Replace 2 tablespoons of flour with cocoa for richer chocolate, or swap in pumpkin puree for a spiced version.
- Mini Skeletons: Use mini marshmallows and small pretzels for bite-sized treats—perfect for kids.
Nutritional Information
Here’s an approximate nutritional breakdown per serving, based on standard ingredients and average cupcake size. Actual values may vary depending on substitutions or frosting thickness.
| Nutrient | Per Cupcake (1 serving) | Per Batch (12 cupcakes) |
|---|---|---|
| Calories | 280 | 3360 |
| Total Fat | 14 g | 168 g |
| Saturated Fat | 6 g | 72 g |
| Cholesterol | 35 mg | 420 mg |
| Sodium | 210 mg | 2520 mg |
| Total Carbohydrates | 38 g | 456 g |
| Dietary Fiber | 2 g | 24 g |
| Sugars | 26 g | 312 g |
| Protein | 2 g | 24 g |
Nutritional Highlights
- Cocoa adds antioxidants and a rich chocolate depth without excess fat.
- Vegetable oil helps retain moisture, making cupcakes soft even the next day.
- Pretzels and marshmallows provide a playful crunch and texture contrast.
- Moderation Tip: One cupcake satisfies a sweet craving while keeping portions balanced.
If you modify ingredients such as using dairy-free frosting or gluten-free flour use tools like Cronometer or MyFitnessPal to double-check the nutrition values for accuracy.
Conclusion
These Skeleton Cupcakes are the perfect mix of spooky and sweet. Each bite combines moist chocolate cake, smooth frosting, and the playful crunch of edible skeleton toppers. They’re easy enough for beginner bakers yet impressive enough to steal the spotlight at any Halloween party.
Whether you’re making them with kids, prepping for a bake sale, or surprising friends with themed desserts, this recipe guarantees smiles and seconds.
If you try these cupcakes, leave a star rating and a comment below I’d love to hear how yours turned out!
Did you give your skeletons funny faces or spooky grins? Share your creations and tag them on social media so everyone can join the fun.
Frequently Asked Questions (FAQ)
Can I use mini marshmallows instead of regular ones for the heads?
Yes, mini marshmallows work perfectly if you’re making smaller cupcakes or want bite-sized toppers. Just use half-length pretzel sticks and shorten your lollipop stick slightly so the structure stays balanced.
How do I keep the pretzel skeletons from tipping over on the drive to a party?
Chill the cupcakes for at least 20 minutes before traveling. This firms up the frosting and secures the toppers. Arrange them in a cupcake carrier with snug compartments, and place a layer of parchment over the tops if needed to keep them steady.
What frosting holds the toppers best homemade or canned?
Both work, but homemade buttercream or chocolate frosting tends to be thicker and sturdier. If you use canned frosting, refrigerate it for 10 minutes before decorating so it’s firm enough to anchor the sticks.
Can I make Skeleton Cupcakes a day ahead and keep them fresh?
Absolutely. Bake and cool the cupcakes the day before, then store them in an airtight container. Frost and decorate them the next morning or a few hours before serving for the best look and texture.
How do I make these gluten-free without losing crunch?
Use a 1:1 gluten-free baking blend for the cupcakes and certified gluten-free pretzels for the skeletons. The flavor and texture stay nearly identical, and no one will notice the swap.
Can kids help with the decoration, and which steps are safest?
Definitely! Kids can draw faces on marshmallows, press pretzels into the frosting, and add Oreo crumbs for the “dirt.” Leave the baking and chocolate melting to adults, but the rest makes a fun hands-on activity.
Do the marshmallow faces smudge, and how do I set them?
If you use edible markers, let the marshmallows dry for about 5 minutes before placing them on the cupcakes. Avoid moisture or steam near the faces. Once set, they’ll hold up for several hours.
Skeleton Cupcakes
These Skeleton Cupcakes combine moist chocolate cake with whimsical pretzel and marshmallow skeleton toppers a playful, easy-to-make Halloween dessert that delights kids and adults alike.
12
cupcakes20
minutes22
minutes280
kcalIngredients
- For the Chocolate Cupcakes
2 cups all-purpose flour
1 ¼ teaspoons baking soda
1 teaspoon salt
¼ teaspoon baking powder
1 cup hot water
⅔ cup unsweetened cocoa powder
¾ cup vegetable oil or melted butter
1 ½ cups granulated sugar
2 large eggs, room temperature
1 teaspoon pure vanilla extract
- For the Frosting
½ cup unsalted butter, softened
3 oz unsweetened baking chocolate, melted and cooled
2 cups powdered sugar
2 teaspoons vanilla extract
3–4 tablespoons milk or heavy cream
- For the Skeleton Toppers
24 yogurt- or white chocolate–covered pretzel twists
12 large marshmallows
24 mini pretzel sticks
Black food-safe marker or decorating gel
12 lollipop sticks or paper straws
- Optional “Dirt” Layer
10 crushed Oreo cookies or chocolate sandwich cookies
Directions
- Preheat oven to 350°F (175°C). Line a 12-cup muffin pan with paper liners.
- Mix Dry Ingredients: Whisk flour, baking soda, salt, and baking powder in a bowl.
- Bloom Cocoa: Stir hot water and cocoa powder until smooth; this deepens flavor.
- Make Batter: Beat oil and sugar until glossy. Add eggs one at a time, then vanilla. Alternate adding dry ingredients and cocoa mix until just combined.
- Bake: Divide batter evenly among liners (two-thirds full). Bake 20–22 minutes or until a toothpick comes out clean. Cool completely.
- Prepare Frosting: Beat butter and melted chocolate until smooth. Add sugar, vanilla, and milk. Whip until fluffy. Adjust texture by adding more milk or sugar.
- Frost: Spread or pipe frosting on cooled cupcakes. Optionally, sprinkle Oreo crumbs for a dirt effect.
- Build Skeletons: Stack two pretzels on a lollipop stick for ribs. Add pretzel arms and legs, top with a marshmallow head, and draw a face.
- Assemble: Press skeleton toppers into frosted cupcakes and refrigerate for 15–20 minutes to set.
Notes
- Use gluten-free flour and pretzels for an allergy-friendly version.
- For vegan cupcakes, replace eggs with flaxseed eggs and use dairy-free butter.
- Refrigerate decorated cupcakes for up to 5 days or freeze unfrosted ones for 2 months.
- Keep toppers upright by inserting them into slightly soft frosting, then chilling before serving.
Nutrition Facts
- Calories: 280kcal
- Fat: 14g
- Saturated Fat: 6g
- Cholesterol: 35mg
- Sodium: 210mg
- Carbohydrates: 38g
- Fiber: 2g
- Sugar: 26g
- Protein: 2g


