 Skip to content
 There’s nothing quite like the arrival of spring to inspire a little joy in the kitchen, and what better way to celebrate than with a batch of cheerful Spring Cupcakes? If you’re anything like me, you love to create treats that are not only delicious but also beautiful and fun to make. This recipe is designed to bring a smile to your face, whether you’re a seasoned baker or just starting out. We’ll whip up moist, delightful cupcakes and then dive into some easy, adorable decorating ideas that are perfect for any springtime gathering. You’ll even discover a special Lemon Lavender Cloud Frosting that truly sets these apart!
Why You’ll Love These Spring Cupcakes
I am so excited for you to try these Spring Cupcakes, especially because of the special twist that makes them truly unique.
Sophisticated Flavor: We are taking classic white frosting and infusing it with bright lemon zest and a hint of natural purple food coloring or blueberry powder to create what I call ‘Lavender Lemon Cloud Frosting.’ This isn’t just pretty; it offers a sophisticated flavor profile that perfectly complements the sweetness of the cupcakes, making them stand out from typical desserts. You’ll love the fresh, subtle floral notes that just sing of spring. For another take on this unique flavor combination, consider exploring a dedicated lavender buttercream frosting recipe with lemon.
Natural Vibrancy: The beauty of this recipe extends to our natural coloring techniques. For our ‘Baby Birds’ and ‘Sunshine Flowers,’ the lavender-lemon frosting gets its lovely pastel hue from natural sources. Then, for the ‘Happy Spring Grass’ cupcakes, we’ll use natural green food coloring options like matcha or spinach powder. This means vibrant, cheerful Spring Cupcakes without a single drop of artificial dye, which is something I always strive for in my kitchen.
Elevated Yet Easy: What truly sets these Spring Cupcakes apart is how they combine gourmet appeal with beginner-friendly simplicity. The lemon zest provides a bright, authentic spring flavor, while natural food colorings give you those beautiful pastel hues. The ‘cloud’ texture of our frosting adds a delightful lightness. This approach transforms a basic yellow cake mix into a visually stunning and health-aware treat. It’s an easy cupcake recipe that looks professional, is perfect for involving kids in fun family activities, and appeals to those who prefer natural ingredients for their seasonal treats.
Ingredients Needed
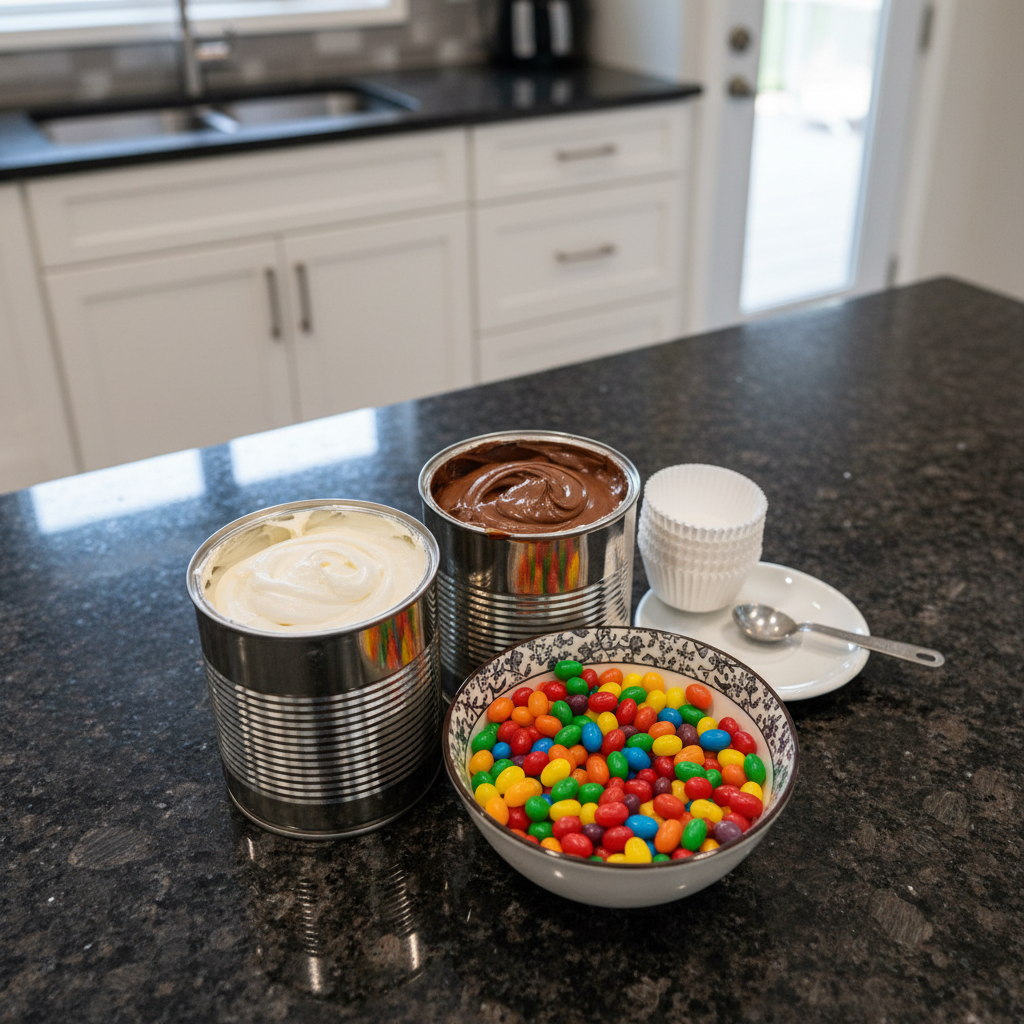
- Yellow cake mix
- White and chocolate frosting (I used store bought, 1 can of each)
- A package of jelly beans
- Toothpicks & scotch tape for the lil signs poked in, we made them, directions below.
- Piping tips I used: #1 & #4 writer tips, #12 round hole filling tip, #65 leaf tip, and # 233 grass tip. (You may not have these exact tips, but you know my theory: Use what you do have! So what tips do you have on hand that are similar? Those will work, I’m sure of it! Because that what I did, was opened my cake tip box to see which ones I could use, to get the effect I wanted)
Ingredient Notes & Substitutions
When I’m making Spring Cupcakes, I like to keep things flexible and delicious for everyone.
Cake Mix: While I often use a classic yellow cake mix for moist cupcakes, you could easily substitute a vanilla or even a lemon cake mix for a different flavor base. The key is to follow the package directions for a consistently moist result.
Frosting: Our special Lavender Lemon Cloud Frosting is made by enhancing store-bought white frosting. Simply add fresh lemon zest and a tiny bit of natural purple food coloring or blueberry powder to a portion of the white frosting. If you prefer to make your own, a simple homemade buttercream frosting or even a cream cheese frosting would be wonderful bases for this twist.
Natural Food Coloring: To get those beautiful spring hues, I love using natural options. For green, try a small amount of matcha powder or even spinach powder (blend a tiny bit of spinach with a spoonful of water, strain well, and add the liquid). For pink, beet powder works wonders, and a touch of spirulina can give you a lovely blue. Remember, a little goes a long way to achieve pastel shades!
Piping Tips: My collection of piping tips is vast, but I always encourage you to use what you have! For writer tips, any small round tip will work. For the round hole filling tip, look for something similar to a #12. For a leaf tip, anything with a V-shape. And for a grass tip, any tip with multiple small holes will give you a similar effect. Don’t let specific tools hold you back!
Jelly Beans: These little candies are perfect for our nest and flower decorations. However, feel free to use other small candies, sprinkles, or even small chocolate eggs if you prefer.
How to Make Spring Cupcakes
Let’s get baking! Here’s how I bring these delightful Spring Cupcakes to life, from the moist cake base to the adorable decorations.
Prepare the Cupcakes
First, we need to get our cupcake bases ready. I usually follow the package directions for a standard yellow cake mix, which typically calls for about 3 eggs, 1/3 cup of oil, and 1 cup of water. Mixing the batter should be just until smooth, avoiding overmixing, which can lead to tough cupcakes. Pour the batter into cupcake liners set in a muffin tin. Bake them according to the package instructions, usually around 350°F (175°C), just until a toothpick inserted into the center comes out clean. This is key for moist cupcakes, as overbaking is a common mistake that leads to dryness. Once baked, let them cool completely on a wire rack before frosting.
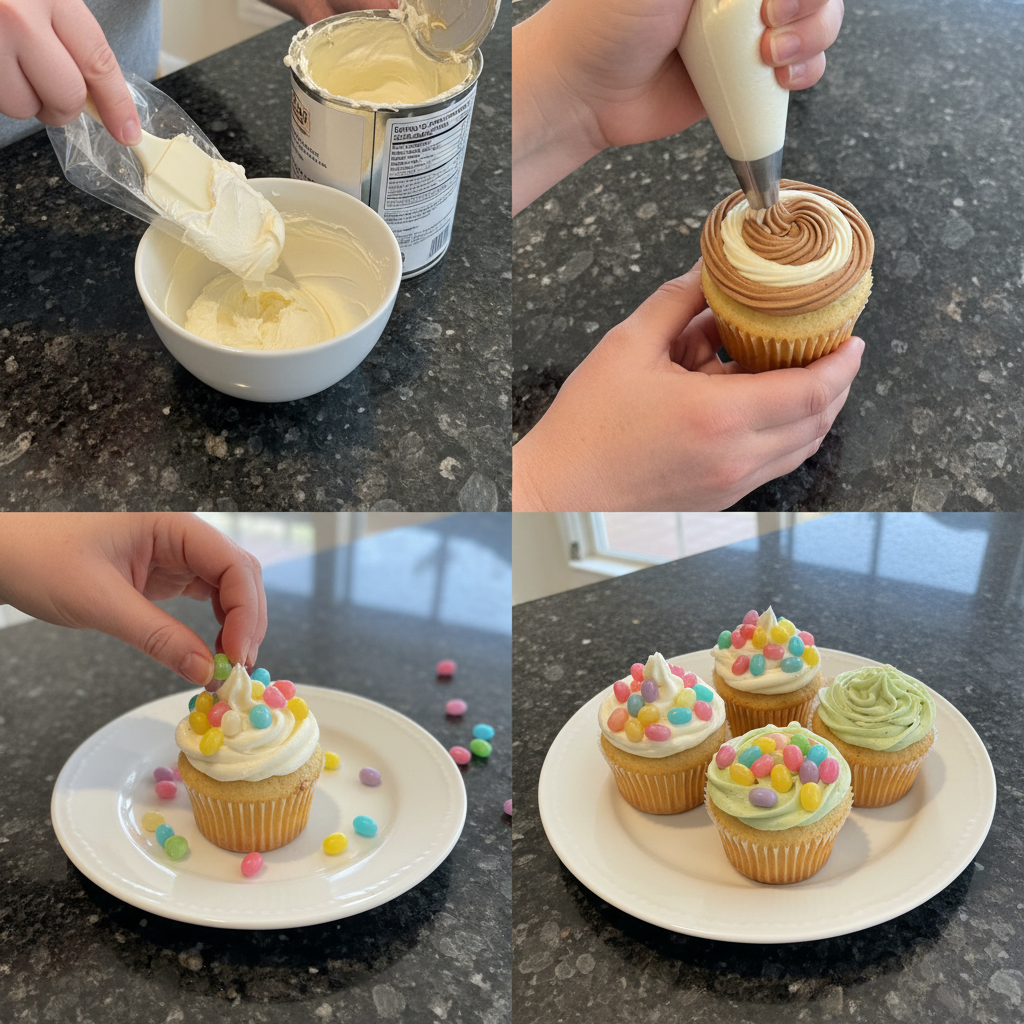
Prepare the Lavender Lemon Cloud Frosting (Unique Twist)
Now for our special frosting! Divide your can of white frosting into a few bowls. In one portion, add about a teaspoon of fresh lemon zest and a tiny pinch of natural purple food coloring or blueberry powder. Stir gently until it achieves a lovely, subtle lavender hue and a light, airy ‘cloud’ texture. In another bowl, mix a portion with matcha powder or a strained spinach puree for green frosting. For yellow frosting, you can use a tiny bit of turmeric (be careful, as too much can add flavor) or a natural yellow food coloring.
Setup for Decorating
Before I start any serious cupcake decorating, I make sure everything is organized. This is an expert tip: Lay out all your frosting colors, piping bags, and the correct piping tips. Fill your icing bags about two-thirds full, twisting the top to secure the frosting. Make sure your tips are firmly in place.
Baby Birds in the Nest Cupcakes
To create these darling baby birds, first frost a cooled cupcake with chocolate frosting as your base. Then, using your #233 grass tip (or any similar multi-hole tip), pipe a small chocolate nest circle in the center of the cupcake. For the sweet baby bird bodies, squeeze three round dollops of blue frosting with your #12 round hole filling tip (or a similar tip). Next, use your #65 leaf tip (or a small V-shaped tip) with yellow frosting to create their tiny beaks. Finally, with your #1 writer tip (or any very small round tip), add small chocolate eyes to bring your little birds to life.
Nest with Eggs Cupcakes
These are super simple and adorable! Frost your cupcake with chocolate frosting first. Then, using your #233 grass tip (the same one we used for the baby bird nests) or even a basic writing tip, pipe a circular string-like nest around the top of the cupcake. Once your nest is formed, gently place 2-3 colorful jelly beans inside to create the illusion of little eggs.
Happy Spring Green Cupcakes
For these, I first dyed a portion of our white frosting a light spring green using matcha powder or spinach powder, and used that to create a smooth base layer on the cupcakes. With whatever light green frosting you have leftover, add just a touch more green dye to deepen the color slightly. Then, with this darker green frosting in an icing bag fitted with a #4 writing tip (or any fine-point writing tip you have), pipe small, upward strokes to create whimsical little sprigs of grass all over the cupcake.
Yellow Sunshine Flower Cupcakes
My oldest daughter loved making these! We dyed our remaining white frosting a cheerful bright yellow (using turmeric or natural yellow food coloring). You can swirl this yellow frosting directly onto the cupcake using virtually any tip to create the effect of soft petals. We didn’t even bother with a base frosting for these. Then, simply place a single jelly bean right in the center for a bright burst of color!
“Happy Spring” Toothpick Signs
These little signs add such a charming touch! My daughter typed “Happy Spring” in green ink on a word document on my laptop. We printed out just one sheet. My expert tip here is to avoid putting a border around the words; it makes punching them out so much easier and cleaner! Then, I used my 1 ½ inch round hand punch to cut out each message. Finally, I simply taped each little sign to a toothpick, and they were ready to adorn our Spring Cupcakes.
Perfecting Your Spring Cupcakes: Baking Times & Natural Colors
Achieving truly perfect Spring Cupcakes involves a bit of knowledge about baking and, of course, mastering those beautiful natural colors.
Baking for Moist & Delicious Results
When you use a standard box cake mix, you can typically expect to yield about 24 cupcakes. For most box mixes, the general guidelines for ingredients are usually around 3 eggs, 1/3 cup of oil, and 1 cup of water, but always double-check your specific box instructions. For baking time and temperature, I always set my oven to 350°F (175°C), and standard cupcakes usually bake for about 18-22 minutes. You’ll know they’re done when the edges are lightly golden, the top springs back when gently touched, and a toothpick inserted into the center comes out clean.
My top tip for moist cupcakes is to avoid overbaking at all costs! As soon as that toothpick comes out clean, take them out of the oven. Also, make sure not to overmix your batter; mix just until combined. Using room temperature ingredients can also contribute to a smoother, more even crumb. Allow them to cool completely on a wire rack to prevent them from getting soggy.
Mastering Natural Frosting Colors
Coloring frosting naturally is a fantastic way to create vibrant spring hues without artificial dyes. For our unique lavender-purple, blueberry powder is excellent, or you can use a small amount of natural purple food coloring. Start with just a tiny bit and add more to achieve your desired pastel shade. For green, matcha powder provides a beautiful, earthy green. Alternatively, you can blend a small handful of fresh spinach with a tiny bit of water, strain the liquid, and add that to your frosting. To learn more about selecting the best natural green food coloring options, various culinary sites offer expert comparisons. For yellow, a minuscule pinch of turmeric powder works, but be careful as it can impart a flavor if used too much. You can also find natural yellow food colorings.
When you’re adding natural colorings or lemon zest, the frosting consistency might change. If your frosting becomes too thin or runny, gradually beat in a tablespoon of powdered sugar at a time until it stiffens to your desired piping consistency. If it’s too stiff, a tiny drop of milk or cream can help thin it out. Optimal frosting consistency is key for beautiful Spring Cupcakes!
Pro Tips & Troubleshooting for Perfect Cupcakes
Even seasoned bakers encounter little challenges, so here are my favorite pro tips and solutions for common mistakes when making Spring Cupcakes.
Pro Tips for Decorating Success
Prep is Key: I can’t stress this enough: organize your frosting colors and piping bags with correct tips before you even start decorating. Lay out all your tools and ingredients. This makes the whole process so much smoother and more enjoyable. It saves time and prevents frustration, especially when doing multiple designs on your Spring Cupcakes.
Mastering the ‘Cloud’ Texture: For that wonderfully light Lavender Lemon Cloud Frosting, lightly whip your white frosting with an electric mixer for a minute or two before adding the lemon zest and color. This incorporates air, giving it that delicate, airy texture.
Smart Frosting Division: When working with multiple colors and decorations, effectively dividing your white frosting is crucial. Estimate how much you’ll need for each color and design (e.g., more for base layers, less for small details). This ensures you don’t run out of a specific color mid-decoration.
DIY Topper Perfection: Remember my expert tip for the toothpick signs: avoid borders around the words for easier punching. To get clean cuts with your paper punch, make sure the paper is fully inserted and centered before you press down firmly.
Kid-Friendly Decorating: Decorating Spring Cupcakes is a fantastic kids activity! Let them place the jelly beans on the nest and flower cupcakes. Older kids can help make the toothpick signs. Even swirling frosting can be a fun, creative task for little hands. Don’t worry about perfection; it’s about the joy of creating together.
Common Mistakes to Avoid
Overbaking Cupcakes: This is probably the most common mistake and the quickest way to dry, crumbly cake. Always bake your cupcakes just until they are done but still moist. Keep a close eye on them, especially during the last few minutes of baking time.
Runny or Stiff Frosting: If your frosting becomes too runny after adding colors or flavorings, gradually mix in a tablespoon of powdered sugar at a time until it reaches a good piping consistency. If it’s too stiff and hard to pipe, add a tiny bit (1/4 teaspoon) of milk or cream and mix until smooth. This prevents messy decorations or a crumbly cake.
Muddy Colors: To avoid colors blending or becoming dull, especially with natural dyes, work cleanly. Use separate spatulas for different colors and clean your piping tips between colors if you’re reusing them. Also, remember that natural dyes can be subtle, so don’t expect extremely vibrant, artificial-looking shades.
Decoration Overload: Sometimes less is more! While it’s fun to add many details, a balanced approach keeps your Spring Cupcakes looking elegant and not cluttered. Focus on one or two main decorative elements per cupcake.
Uneven Frosting: For a smooth base frosting before adding intricate decorations, apply the frosting with an offset spatula and use gentle, even pressure. This creates a clean canvas for your adorable spring designs.
Serving & Storage Suggestions
Once your beautiful Spring Cupcakes are decorated, you’ll want to present them wonderfully and store them correctly to keep them fresh.
Creative Serving Ideas
These Spring Cupcakes are incredibly versatile and perfect for many occasions. Serve them on trays for a church dinner, a celebratory brunch, or simply enjoy them as a delightful dessert tonight with your family. I love arranging the different themed cupcakes—the Baby Birds, Nests with Eggs, Happy Spring Grass, and Yellow Sunshine Flowers—on a tiered stand. This creates a stunning visual impact that makes them even more irresistible! The cute, fun, and darling aesthetic is sure to charm everyone.
For pairing, light and refreshing drinks work best to complement the bright lemon flavor of our unique frosting. Think iced tea, freshly squeezed lemonade, or even sparkling water with a slice of cucumber and mint. They’re also perfect alongside a light fruit salad.
Storage and Make-Ahead Tips
To keep your decorated Spring Cupcakes fresh, store them in an airtight container at room temperature for up to 2 days. If your kitchen is warm or if you’ve used a homemade buttercream frosting with real butter or cream cheese, or especially because of the fresh lemon zest in our unique twist, it’s best to refrigerate them. They will last 3-4 days in the fridge. Allow them to come to room temperature for about 15-20 minutes before serving for the best texture and flavor.
For make-ahead strategy, you can bake the undecorated cupcakes a day in advance and store them in an airtight container. You can also prepare and color your frosting the day before and store it in the refrigerator. Just make sure to bring the frosting to room temperature and give it a quick whip before piping to restore its smooth consistency. This streamlines the decorating process, making it much easier to enjoy the fun on the day of serving.
Adaptations for Special Occasions
These Spring Cupcakes are easily adaptable for other seasonal treats. With just a few tweaks, they become perfect Easter cupcakes. You could use pastel mini chocolate eggs instead of jelly beans, or add small edible flower decorations. The key is to play with different colors and small decorative changes to match the theme of your celebration.
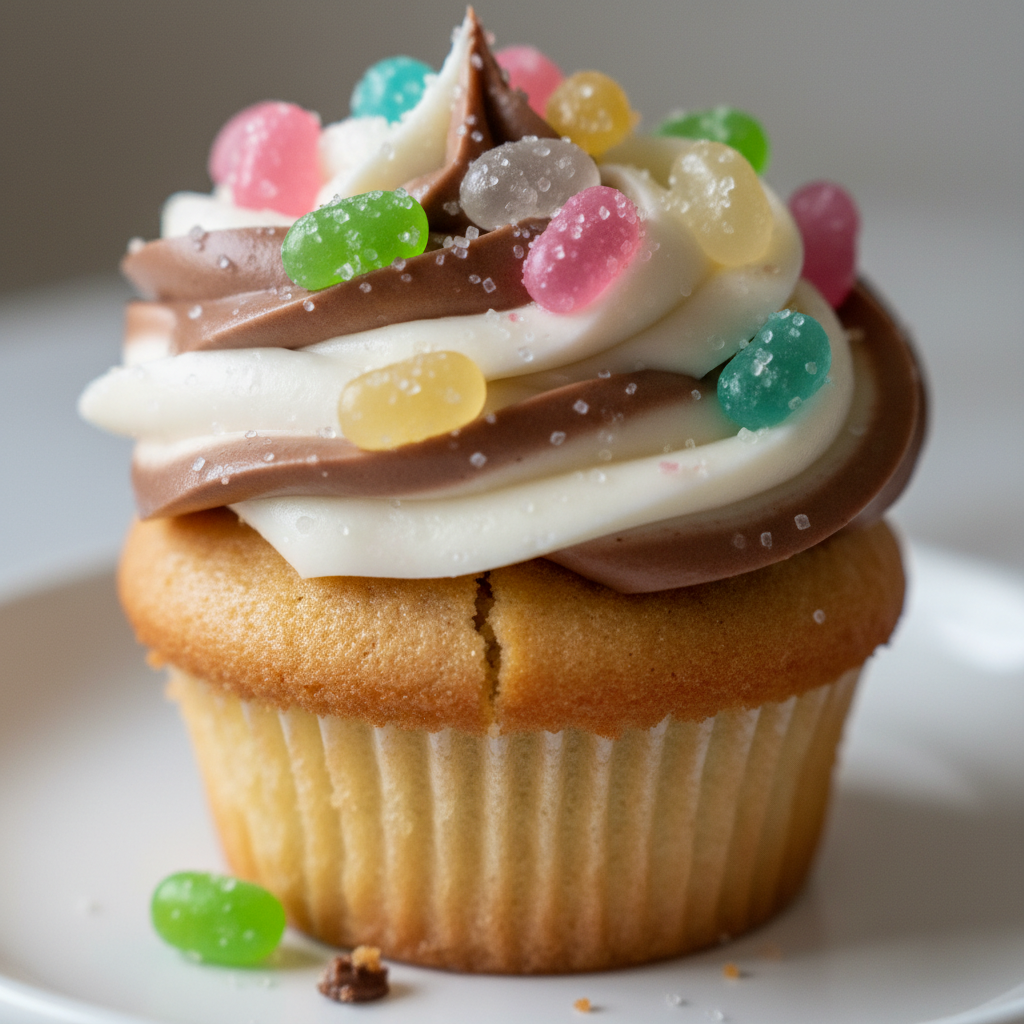
Conclusion
I hope you’re as excited as I am to try these Divine Spring Cupcakes! With our delightful Lemon Lavender Cloud Frosting and those incredibly easy decoration ideas, you’ll create a batch of treats that are as delicious as they are beautiful. Even if you’re a beginner friendly baker, I promise you can achieve stunning results with these step-by-step instructions. The unique flavors and charming visual appeal truly make these Spring Cupcakes a standout dessert.
So, gather your ingredients, get creative with your natural colors, and have fun bringing these adorable designs to life. Don’t forget to print out the recipe, share it with your friends, and explore more seasonal treats on my blog. Happy baking!
FAQ
What are easy decoration ideas for Spring cupcakes?
This recipe offers four super easy and adorable decoration themes: Baby Birds in the Nest (chocolate nests with blue birds, yellow beaks, and chocolate eyes), Nest with Eggs (chocolate nests with colorful jelly bean eggs), Happy Spring Grass (green frosting base with darker green piped grass sprigs), and Yellow Sunshine Flowers (swirled yellow frosting petals with a jelly bean center). We also include instructions for cute “Happy Spring” toothpick signs.
What tools do I need to decorate Spring cupcakes?
You’ll need a few essential items: an icing bag, and various piping tips like writer tips (#1 & #4), a round hole filling tip (#12), a leaf tip (#65), and a grass tip (#233). For the toothpick signs, you’ll need toothpicks, scotch tape, and a 1 ½ inch round paper punch. Remember my theory: use similar tips to what you have on hand; you don’t need the exact ones!
Can I use store-bought ingredients for these cupcakes?
Absolutely! This recipe is specifically designed for ease and explicitly recommends using store-bought yellow cake mix and canned white and chocolate frosting. The unique twist of infusing the white frosting with lemon zest and natural colors elevates these convenient ingredients into a sophisticated and charming dessert.
How can I make my cupcakes moist and delicious?
The key to moist cupcakes is to avoid overbaking. Bake them just until a toothpick inserted into the center comes out clean. Using a good quality cake mix and following the package directions carefully regarding ingredient quantities and mixing time will also contribute to a wonderfully moist and delicious result.
Can kids help decorate these Spring cupcakes?
Yes, absolutely! Decorating these Spring Cupcakes is a fantastic kids activity. Children can help place the jelly beans on the nest and flower cupcakes, assist in making the “Happy Spring” toothpick signs, or even swirl the frosting on the flower cupcakes. It’s a fun, creative way to involve them in the kitchen.
How do I make the ‘Happy Spring’ toothpick signs?
First, type “Happy Spring” in green ink on a document and print it out. Then, use a 1 ½ inch round hand punch to cut out each phrase. My expert tip is to avoid adding a border around the words, as this makes punching them out much easier and cleaner. Finally, simply tape each punched-out circle to a toothpick.
How do I color frosting naturally for Spring themes?
For a beautiful lavender-purple, you can use a small amount of blueberry powder or natural purple food coloring. For green, matcha powder works wonderfully, or you can blend fresh spinach with a tiny bit of water, strain, and add the liquid. For a subtle yellow, a tiny pinch of turmeric powder or natural yellow food coloring can be used. Don’t forget to add lemon zest to your white frosting for that fresh, authentic spring flavor!
How should I store decorated Spring cupcakes?
Store your decorated Spring Cupcakes in an airtight container. If your home is cool, they can typically be kept at room temperature for up to 2 days. However, due to the fresh lemon zest in our unique frosting and if you’ve used butter-based or cream cheese frostings, it’s best to refrigerate them. They will keep well for 3-4 days in the refrigerator. For best taste and texture, let them come to room temperature for 15-20 minutes before serving.
Divine Spring Cupcakes: Lemon Lavender Frosting & Easy Decorations
Ingredients
Equipment
Method
- First, follow the package directions for your yellow cake mix, typically calling for 3 eggs, 1/3 cup of oil, and 1 cup of water. Mix the batter just until smooth, avoiding overmixing.
- Pour the batter into cupcake liners set in a muffin tin. Bake according to package instructions, usually around 350°F (175°C), until a toothpick inserted into the center comes out clean (typically 18-22 minutes).
- Once baked, let the cupcakes cool completely on a wire rack before frosting.
- Divide your can of white frosting into a few separate bowls.
- In one portion, add about a teaspoon of fresh lemon zest and a tiny pinch of natural purple food coloring or blueberry powder. Stir gently until it achieves a subtle lavender hue and a light, airy 'cloud' texture.
- In another bowl, mix a portion of white frosting with matcha powder or strained spinach puree for green frosting. For yellow frosting, you can use a tiny bit of turmeric or natural yellow food coloring.
- Organize all your frosting colors, piping bags, and correct piping tips. Fill your icing bags about two-thirds full, twisting the top to secure the frosting. Ensure your tips are firmly in place.
- Frost a cooled cupcake with chocolate frosting as your base.
- Using your #233 grass tip (or similar), pipe a small chocolate nest circle in the center.
- Squeeze three round dollops of blue (lemon-lavender) frosting with your #12 round hole filling tip (or similar) to create the baby bird bodies.
- Use your #65 leaf tip (or small V-shaped tip) with yellow frosting to create tiny beaks.
- With your #1 writer tip (or very small round tip), add small chocolate eyes.
- Frost your cupcake with chocolate frosting.
- Using your #233 grass tip or a basic writing tip, pipe a circular string-like nest around the top of the cupcake.
- Gently place 2-3 colorful jelly beans inside the nest for eggs.
- Dye a portion of white frosting light spring green using matcha powder or spinach powder, and use it to create a smooth base layer on the cupcakes.
- To the leftover light green frosting, add a touch more green dye to deepen the color slightly.
- With this darker green frosting in an icing bag fitted with a #4 writing tip (or fine-point writing tip), pipe small, upward strokes to create whimsical grass sprigs all over the cupcake.
- Dye the remaining white frosting a cheerful bright yellow using turmeric or natural yellow food coloring. Swirl this yellow frosting directly onto the cupcake using any tip to create the effect of soft petals (no base frosting needed).
- Place a single jelly bean right in the center for a bright burst of color.
- Type "Happy Spring" in green ink on a document and print it out (avoiding borders for easier punching).
- Use a 1 ½ inch round hand punch to cut out each message, ensuring the paper is fully inserted and centered.
- Tape each little sign to a toothpick.


