Skip to content
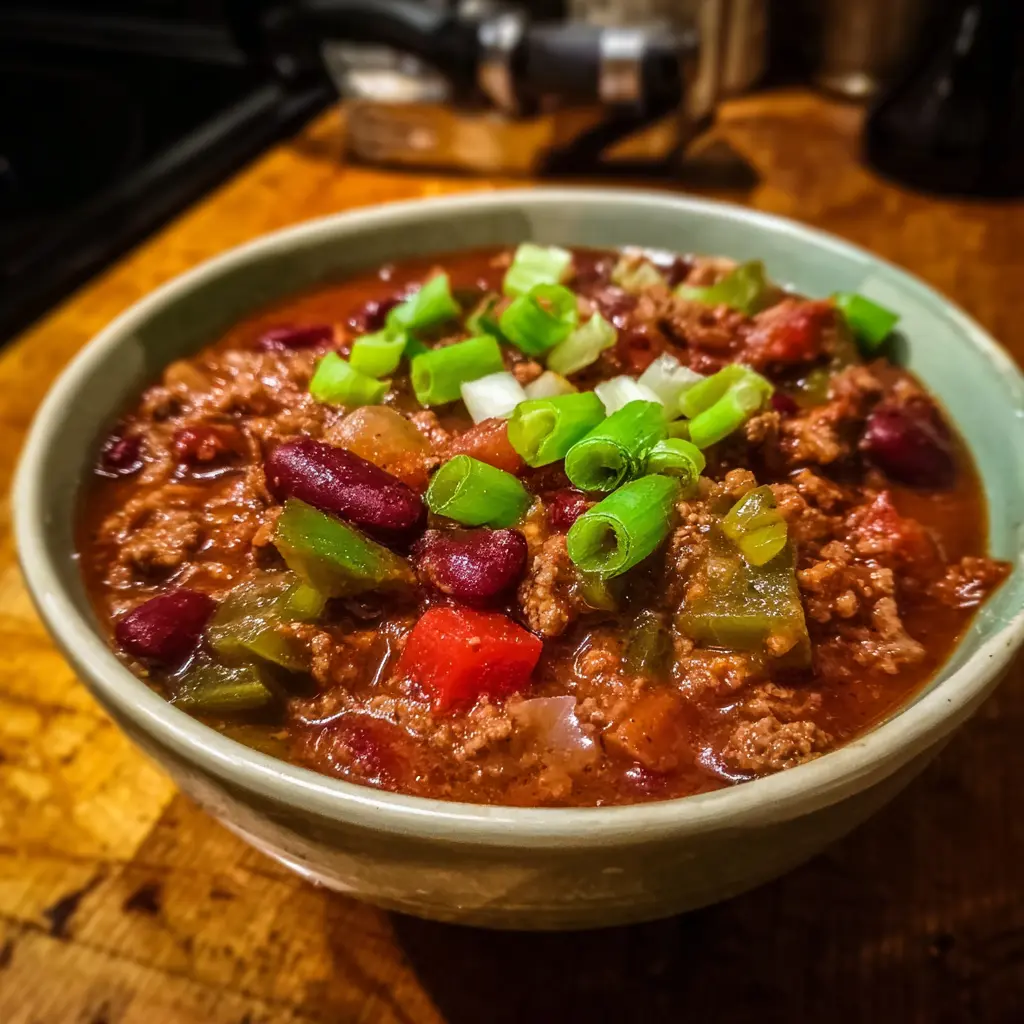
There’s nothing quite like a warm, comforting bowl of chili to bring people together. This homemade chili recipe is packed with robust flavors, hearty ground beef, and a perfect blend of spices. It’s an easy-to-follow dish, ideal for weeknight dinners or game day gatherings. Forget bland chili; this recipe delivers a rich, savory experience that will quickly become a family favorite. Get ready to cook up a masterpiece!
Why You’ll Love This Homemade Chili Recipe
This isn’t just any chili; it’s a crowd-pleasing classic with a delightful depth of flavor. You’ll find countless reasons to make this your go-to recipe.
- Rich Flavor Profile: A perfect balance of savory beef, aromatic vegetables, and a secret ingredient (beer!) creates an incredibly deep and satisfying taste. This chili has layers of deliciousness.
- Hearty and Filling: Loaded with ground beef and beans, this chili is wonderfully substantial. One bowl will leave you feeling completely satisfied and nourished.
- Easy to Prepare: Despite its complex flavor, this homemade chili recipe requires simple steps. Even novice cooks can achieve fantastic results with minimal fuss.
- Customizable: Adapt it to your taste! Adjust the spice level, add your favorite toppings, or include extra vegetables to make it truly your own unique creation.
- Perfect for Any Occasion: Whether it’s a cozy family dinner, a potluck, or a game day feast, this chili is always a hit. It reheats beautifully and tastes even better the next day.
Research suggests that beer, when used in cooking, can add depth and unique malty notes to dishes, enriching their overall flavor profile. For more on this, explore the culinary benefits of cooking with beer.
Ingredients for Your Perfect Homemade Chili
Gathering your ingredients is the first step to a truly delicious meal. This list includes everything you need for a robust and flavorful homemade chili recipe. Don’t forget, quality ingredients make all the difference.
- 2 pounds lean ground beef
- 1 large onion, diced
- 1 jalapeño, seeded and finely diced (remove seeds for less heat)
- 4 cloves garlic, minced
- 2 ½ tablespoons chili powder, divided (adjust to your preferred spice level)
- 1 teaspoon cumin
- 1 green bell pepper, seeded and diced
- 14.5 ounces crushed tomatoes (1 can)
- 19 ounces canned red kidney beans, drained and rinsed thoroughly
- 14.5 ounces canned diced tomatoes, with their juices
- 1 ½ cups beef broth (use low sodium if desired)
- 1 cup beer (a lager or amber ale works best; non-alcoholic beer or extra broth can substitute)
- 1 tablespoon tomato paste
- 1 tablespoon brown sugar, optional (balances acidity and enhances flavor)
- Salt and black pepper, to taste
Ingredient Notes and Substitutions
Choose lean ground beef (85/15 or 90/10) to minimize excess fat, reducing the need for draining. For a different texture, you could use ground turkey or a mix of beef and pork. If you dislike heat, omit the jalapeño or substitute with another bell pepper. Canned green chiles offer a milder pepper flavor. Feel free to use different types of beans, such as black beans or pinto beans, for variety. Adjust chili powder and cumin amounts to match your personal spice preference; start with less and add more if needed. The brown sugar is optional but truly enhances the chili’s depth.
Essential Equipment
You only need a few basic kitchen tools to create this fantastic chili. Having these on hand will make the cooking process smooth and enjoyable.
- Large Dutch oven or heavy-bottomed pot: Essential for browning meat and simmering the chili evenly.
- Wooden spoon or spatula: For stirring and breaking up ground beef.
- Cutting board and sharp knife: For prepping your vegetables efficiently.
- Can opener: To open canned goods quickly.
- Measuring cups and spoons: For accurate ingredient portions.
Step-by-Step Instructions: Crafting Your Homemade Chili
Follow these simple steps to create a rich and satisfying bowl of chili. This method ensures maximum flavor development and a perfectly textured result. Taking your time with each stage builds a robust base for your incredible homemade chili recipe.
Step 1: Prepare the Beef
Begin by seasoning your ground beef. In a medium bowl, combine the 2 pounds of lean ground beef with 1 ½ tablespoons of chili powder. Use your hands to gently mix the seasoning into the meat, ensuring it’s evenly distributed. This pre-seasoning step infuses flavor directly into the beef, setting a delicious foundation for your chili.
Step 2: Brown the Meat and Aromatics
Heat your large Dutch oven or heavy-bottomed pot over medium-high heat. Add the seasoned ground beef, diced onion, finely diced jalapeño, and minced garlic to the hot pot. Break up the ground beef with a wooden spoon as it cooks. Cook for about 8-10 minutes, or until the beef is thoroughly browned and the onions are softened and translucent. Stir occasionally to prevent sticking and ensure even cooking. Once cooked, carefully drain any excess fat from the pot. Removing this fat prevents your chili from becoming greasy.
The USDA recommends cooking ground beef to an internal temperature of 160°F (71°C) to ensure it is safe for consumption and eliminate harmful bacteria. Always check with a food thermometer for accuracy, as detailed in the USDA’s guidelines for cooking ground meat.
Step 3: Add Remaining Ingredients and Simmer
Return the pot to the stove. Add the remaining 1 tablespoon of chili powder and the 1 teaspoon of cumin to the browned beef mixture. Stir for about one minute, allowing the spices to toast slightly and become fragrant. This step deepens their flavor. Next, add the diced green bell pepper, canned crushed tomatoes, drained and rinsed red kidney beans, canned diced tomatoes with their juices, beef broth, beer, and tomato paste. Stir everything together until well combined. If using, stir in the optional 1 tablespoon of brown sugar. Bring the mixture to a full boil over medium-high heat, stirring occasionally.
Step 4: Simmer to Perfection
Once boiling, reduce the heat to low. Let the chili simmer uncovered for 45-60 minutes. Continue stirring occasionally to prevent the chili from sticking to the bottom of the pot. Simmering uncovered allows excess moisture to evaporate, concentrating the flavors and thickening your chili to a perfect consistency. Taste and adjust seasonings as needed, adding more salt and black pepper to your preference. The longer it simmers, the more the flavors meld and deepen, resulting in an exceptionally rich and delicious homemade chili recipe.
Step 5: Serve and Enjoy
Once the chili has reached your desired thickness and flavor, remove it from the heat. Ladle generous portions into bowls. Top with your favorite garnishes like shredded cheddar cheese, sliced green onions, fresh cilantro, sour cream, or crushed corn chips. Serve hot and savor every spoonful of your amazing creation!
Pro Tips and Troubleshooting for the Best Chili
Achieving perfect chili is easy with a few insider tips. These suggestions will help elevate your dish and solve common issues.
- Don’t Rush the Simmer: The longer your chili simmers, the more the flavors meld and deepen. Aim for at least 45 minutes, but 1-2 hours is even better if time allows.
- Layer Flavors: Toasting the spices with the browned meat before adding liquids amplifies their aroma and taste. This simple step makes a big difference in your homemade chili recipe.
- Adjust Consistency: If your chili is too thick, add a splash more beef broth or water. If it’s too thin, simmer it uncovered for longer, stirring frequently until it reaches your desired consistency.
- Control the Heat: For more spice, leave some seeds in the jalapeño or add a pinch of cayenne pepper. For less heat, use only half a jalapeño or omit it entirely.
Serving Suggestions, Storage, & Variations
This versatile chili is fantastic on its own or as part of a larger meal. Get creative with how you enjoy and customize it!
Serving Suggestions
Serve your hearty chili with a variety of toppings to suit everyone’s taste. Classic choices include shredded cheddar cheese, a dollop of sour cream or Greek yogurt, and fresh cilantro. Diced avocado, sliced green onions, and crushed tortilla chips or crackers also make excellent additions. For a complete meal, pair it with warm cornbread, a simple side salad, or even serve it over authentic traditional Mexican rice or baked potatoes. This homemade chili recipe is incredibly versatile for any table.
Storage Instructions
Allow any leftover chili to cool completely before transferring it to an airtight container. It will keep beautifully in the refrigerator for up to 3-4 days. Chili also freezes exceptionally well! Store cooled chili in freezer-safe containers or heavy-duty freezer bags for up to 3 months. Thaw frozen chili overnight in the refrigerator before reheating gently on the stovetop or in the microwave, adding a splash of broth if needed.
Recipe Variations
- Smoky Chili: Add a teaspoon of smoked paprika along with the other spices for an extra layer of depth. A dash of liquid smoke also works wonders.
- Vegetarian Chili: Omit the ground beef and use extra beans (like black beans and pinto beans) and corn. Increase the quantity of vegetables such as carrots and zucchini.
- Spicy Kick: Include an extra jalapeño, a serrano pepper, or a pinch of red pepper flakes for those who love more heat. A touch of chipotle powder adds smoky spice.
- Extra Veggies: Feel free to stir in diced carrots, celery, or corn during the last 20 minutes of simmering. This boosts nutrition and adds texture.
Nutrition Information
Enjoying a delicious meal doesn’t mean sacrificing your health goals. This hearty homemade chili recipe provides a satisfying and nutritious option for your family.
| Nutrients | Per Serving (Estimate) |
|---|---|
| Calories | 420 kcal |
| Total Fat | 18g |
| Saturated Fat | 7g |
| Cholesterol | 85mg |
| Sodium | 780mg |
| Total Carbohydrates | 32g |
| Dietary Fiber | 9g |
| Sugars | 8g |
| Protein | 35g |
Nutritional information is an estimate based on ingredients and preparation. Exact values may vary depending on specific brands and optional ingredients used.
Frequently Asked Questions (FAQ)
Can I make this homemade chili recipe ahead of time?
Absolutely! Chili often tastes even better the next day as the flavors have more time to meld. Prepare it a day in advance, then gently reheat before serving.
What kind of beer works best in chili?
A light lager, amber ale, or even a brown ale works wonderfully. Avoid very hoppy or dark stouts, as their strong flavors can overpower the chili. You can substitute with extra beef broth if you prefer no alcohol.
How can I thicken my chili if it’s too watery?
Simmer the chili uncovered for a longer period, allowing more liquid to evaporate. You can also mix a tablespoon of cornstarch with a tablespoon of cold water, then stir the slurry into the simmering chili until it thickens.
Can I make this chili in a slow cooker?
Yes, you can! After browning the beef and sautéing the aromatics on the stovetop, transfer everything to a slow cooker. Add all remaining ingredients and cook on low for 6-8 hours or on high for 3-4 hours.
Conclusion
This homemade chili recipe delivers on all fronts: rich flavor, hearty texture, and comforting warmth. It’s a truly versatile dish that’s simple enough for a weeknight yet impressive enough for a gathering. From the perfectly seasoned beef to the harmonious blend of spices and vegetables, every spoonful is a delight. We encourage you to make this recipe your own by experimenting with toppings and variations. Enjoy the satisfaction of creating an incredible, flavorful chili from scratch that will surely become a staple in your kitchen!