 Skip to content
 Introduction
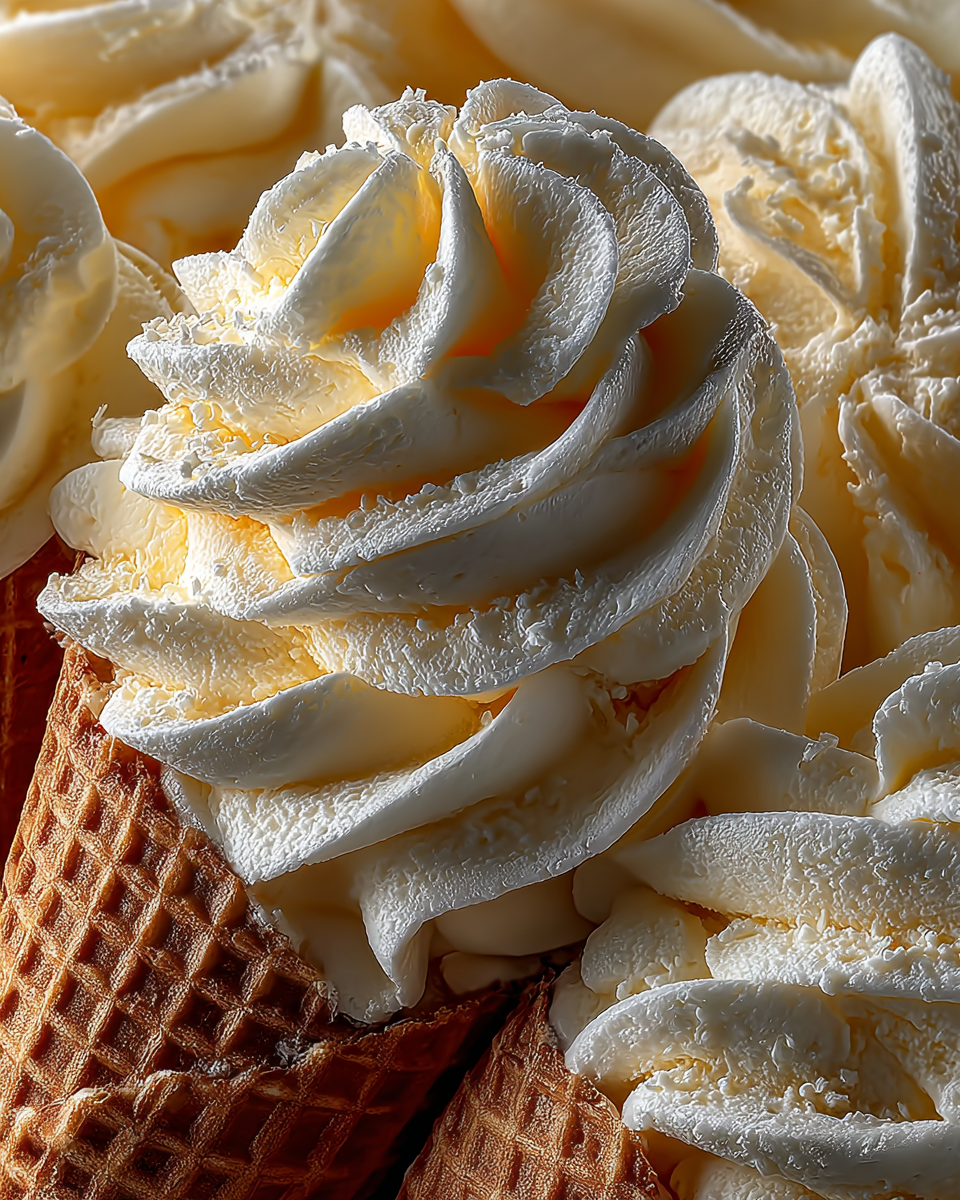
Discover the ultimate homemade ninja creami vanilla ice cream experience right in your kitchen! This recipe uses simple ingredients and your Ninja Creami machine to create a dessert that’s rich, creamy, and utterly delicious. Forget store-bought tubs; you can achieve a perfect texture every time. We’ll explore dietary options and creative serving ideas to make this your go-to frozen treat.
Why You’ll Love This Ninja Creami Vanilla Ice Cream
Making delicious ice cream at home has never been easier, especially with this fantastic recipe.
Beyond the simple joy of a sweet treat, there are numerous benefits to crafting your own frozen desserts at home, as outlined in various guides to homemade ice cream.
Making ice cream at home offers numerous benefits.
You will quickly understand why this ninja creami vanilla ice cream will become a household favorite.
- Incredibly easy to make with minimal steps and effort.
- Requires only 4 common ingredients, many of which you likely have.
- Achieves a luxuriously creamy, rich texture that rivals premium brands.
- Customizable to suit various dietary needs and preferences.
- Serves as a perfect base for countless delicious mix-ins and toppings.
- Offers a superior taste and quality compared to many store-bought options.
Ingredients
Crafting the perfect ninja creami vanilla ice cream starts with a few key ingredients. Each one plays a crucial role in achieving that creamy, dreamy texture.
- 200g thickened cream (heavy/whipping cream in US/UK)
- 150-200g sweetened condensed milk (NOT evaporated milk or any other product)
- 100g full-fat milk
- 1 tsp vanilla bean paste or vanilla bean extract
Notes & Substitutions
- Sweetened Condensed Milk: This ingredient is crucial for both sweetness and the silky-smooth texture of your ice cream. Do not use evaporated milk; it lacks the necessary sugar and consistency. Adjust the quantity (150-200g) to match your preferred sweetness level.
- Cream: In Australia, “thickened cream” has a natural thickener. In the US and UK, use heavy cream or whipping cream. These typically have a fat content of 35% or higher, which is ideal for richness.
- Milk: Always use full-fat milk for the richest flavor and best consistency. Skimping on fat here can lead to a less creamy result. To achieve a luxuriously creamy consistency, the fat content of your dairy products is crucial, as detailed by icecreamscience.com on the role of fat in ice cream.
- Vanilla: The quality of your vanilla makes a significant difference. Vanilla bean paste offers visible specks and a more intense flavor than extract. Use the best quality you can find for truly exceptional vanilla ice cream.
- Lactose-Free/Low FODMAP: For these diets, you can find lactose-free thickened cream and use lactase drops with regular sweetened condensed milk. Alternatively, search for recipes to make homemade lactose-free condensed milk.
- Lower Fat Option: While possible to use light dairy products, be aware that it will likely result in a softer consistency and less rich flavor. The fat contributes significantly to the creamy mouthfeel.
- Xanthan Gum: If your cream lacks natural thickeners (common outside Australia), adding a tiny pinch (1/8 tsp) of xanthan gum can help improve the texture and prevent ice crystals.
- Salt: A small pinch of fine sea salt can wonderfully enhance and balance the sweet vanilla flavor. Add it along with the other liquid ingredients.
Equipment
Making homemade ice cream with your Ninja Creami is straightforward, especially when you have the right tools.
- Ninja Creami machine: The star of the show, essential for transforming your frozen base.
- Ninja Creami 470ml tubs: These are specifically designed for the machine and ensure a perfect fit.
- Measuring scale and spoons: For precise ingredient measurements, which are key to consistent results.
- Whisk or spoon: To thoroughly combine the liquid ingredients before freezing.
Instructions
Creating your perfect ninja creami vanilla ice cream is a breeze with these simple steps. Following them closely ensures a wonderfully creamy and smooth result every time.
- Combine Ingredients: Accurately weigh all your ingredients directly into a Ninja Creami tub. If you have a 470ml tub, this recipe fits perfectly. For other machine sizes, you might need to adjust quantities to fill the tub appropriately, usually up to the MAX FILL line. Ensuring precision with your measurements helps achieve the best texture.
- Mix Thoroughly: Using a whisk or spoon, stir the ingredients vigorously until they are fully combined. It is vital to ensure that the sweetened condensed milk is completely incorporated into the other liquids. You want no streaks or pockets of unmixed condensed milk at the bottom of the tub. This step guarantees uniform flavor and texture throughout your ice cream.
- Freeze: Place the Ninja Creami tub, without its lid, into your freezer. Allow it to freeze for at least 15 to 24 hours. The exact freezing time can vary depending on your freezer’s temperature. You want the mixture to be completely solid and frozen through before processing. Freezing without the lid helps prevent condensation from forming inside the tub and potentially affecting the ice cream texture.
- Process: Once the base is solid, remove the tub from the freezer and place it into the Ninja Creami machine’s outer bowl. Secure the lid and processing paddle. Select the “Ice Cream” function on your machine. The machine will spin and churn the frozen base into a wonderfully creamy consistency. The process takes only a few minutes, transforming the solid block into a scoopable treat.
- Respin (if needed): After the initial “Ice Cream” cycle, check the consistency of your ice cream. Sometimes, especially with certain ingredient ratios or freezer temperatures, the ice cream might appear crumbly, powdery, or “balled up.” If this happens, simply place the tub back into the machine and select the “Respin” function. This additional spin will often smooth out any remaining ice crystals and give you that perfectly creamy texture. You may need to respin once or twice for ideal smoothness.
- Serve and Store: Your homemade ninja creami vanilla ice cream is now ready to enjoy! Scoop it directly from the tub and serve immediately. For any leftovers, simply smooth the top of the remaining ice cream in the tub, place the lid on, and return it to the freezer. When you are ready for more, you can re-process the frozen leftovers using the “Ice Cream” function again to restore its fresh, creamy texture. The Ninja Creami handles spinning a half tub just as effectively as a full one.
Pro Tips for Perfect Ninja Creami Vanilla Ice Cream
Achieving ideal results with your ninja creami vanilla ice cream is easy with these helpful hints. These tips address common issues and enhance your overall experience.
- Freezing Time: Understand your freezer’s temperature. A colder freezer might require less time (15-18 hours), while a warmer one needs closer to 24 hours for the base to freeze solid.
- Consistency: Recipes with higher fat content, like this one, often need fewer respins. Avoid excessive respins, as it can sometimes make the ice cream too soft.
- Machine Noise: The Ninja Creami machine can be quite loud during operation. This is completely normal and no cause for concern; it’s just doing its job.
- Mix-in Timing: If you plan to add solid mix-ins, do so *after* the initial spin. Create a well in the center of the spun ice cream, add your desired mix-ins, then use the “Mix-in” function.
- Adjusting Sweetness: The 150-200g range for condensed milk allows customization. Start with 150g for less sweetness, or go up to 200g for a richer, sweeter vanilla ice cream.
- Refreezing Leftovers: When refreezing leftovers, the ice cream often becomes very hard. A brief re-process on the “Ice Cream” function will bring it back to a perfectly scoopable consistency.
Serving Suggestions, Storage & Variations
Serving Suggestions
This homemade ninja creami vanilla ice cream is incredibly versatile.
- Enjoy it plain to truly savor its classic, rich vanilla flavor.
- Pair it with warm desserts like a chocolate mug cake, fruit crumbles, or sticky date pudding for a delightful contrast.
- Top with fresh berries, sliced bananas, a drizzle of chocolate fudge, or homemade caramel sauce.
Storage
- Store any leftover ice cream in the Ninja Creami tub with its lid securely placed.
- Always return the tub to the freezer promptly to maintain its quality.
- When ready to enjoy again, you can re-process the frozen leftovers using the “Ice Cream” function for a fresh, creamy texture.
Variations
Unlock a world of flavors by transforming your vanilla base.
- McFlurry Inspired: After the initial spin, add crushed Oreo cookies, chocolate chip cookie pieces, or M&Ms, then use the “Mix-in” function.
- Mint Chocolate Chip: Substitute the vanilla extract with 1 teaspoon of mint extract for a refreshing twist. You can also add chocolate chips during the “Mix-in” stage.
- Caramel: Use caramel-flavored sweetened condensed milk instead of regular. Be aware that caramel condensed milk can be thicker, so ensure thorough mixing before freezing.
- Pumpkin Pie: For a seasonal treat, blend in 1/4 cup of pumpkin puree and 1/2 teaspoon of pumpkin pie spice with your base ingredients. This variation might require a bit of testing to perfect the consistency.
- Vegan: For a completely plant-based option, we have a dedicated vegan vanilla ice cream recipe linked here (link to hypothetical vegan recipe).
Nutrition Information
| Nutrient | Per Serving (Estimate) |
|---|---|
| Calories | ~350-400 |
| Total Fat | ~20-25g |
| Saturated Fat | ~15-20g |
| Carbs | ~40-45g |
| Sugars | ~35-40g |
| Protein | ~5-7g |
Frequently Asked Questions (FAQ)
- Can I use evaporated milk instead of sweetened condensed milk? No, you absolutely cannot. Sweetened condensed milk is crucial for the sweetness and the thick, creamy texture of your ninja creami vanilla ice cream. Evaporated milk is unsweetened and much thinner.
- Why is my ice cream too soft or runny after processing? This can happen if the base wasn’t frozen solid enough, if your freezer isn’t cold enough, or if the fat content of your dairy products was too low. Ensure a full 24-hour freeze and use full-fat dairy.
- Can I make it less sweet? Yes, you can easily adjust the sweetness. Start with 150g of sweetened condensed milk, or even slightly less if you prefer a very mildly sweet ice cream.
- Does freezing without a lid make a difference? Freezing without a lid is often recommended to prevent condensation from forming on the inside of the lid, which can drip back into your ice cream and create ice crystals. It also ensures even freezing.
- Can I use light dairy products for a healthier option? Yes, you can use light dairy, but be prepared for a slightly different texture. Lower fat content generally results in a softer, less rich ice cream initially, which might require more respins.
- What are the best mix-ins for this recipe? The best mix-ins depend on your preference! Think crushed cookies, chocolate chips, fresh fruit, chopped nuts, or even a swirl of caramel or fudge sauce added after the initial spin.
Conclusion
You now have the ultimate guide to creating delicious homemade ninja creami vanilla ice cream right in your own kitchen! This recipe highlights simplicity and delivers an incredibly creamy, rich, and versatile frozen treat. With minimal effort, you can enjoy a superior dessert that’s perfectly customizable to your tastes. Give this recipe a try, experiment with your favorite customizations, and elevate your dessert game. We’d love to hear about your experiences and favorite variations in the comments below!
The Best Ninja Creami Vanilla Ice Cream Recipe
Ingredients
Equipment
Method
- Accurately weigh all your ingredients directly into a Ninja Creami tub. This recipe fits perfectly in a 470ml tub; adjust quantities for other machine sizes, usually up to the MAX FILL line.
- Using a whisk or spoon, stir the ingredients vigorously until fully combined. It is vital to ensure that the sweetened condensed milk is completely incorporated into the other liquids, with no streaks or pockets of unmixed condensed milk at the bottom.
- Place the Ninja Creami tub, without its lid, into your freezer. Allow it to freeze for at least 15 to 24 hours, or until the mixture is completely solid and frozen through.
- Once the base is solid, remove the tub from the freezer and place it into the Ninja Creami machine’s outer bowl. Secure the lid and processing paddle, then select the "Ice Cream" function on your machine.
- After the initial "Ice Cream" cycle, check the consistency. If it appears crumbly, powdery, or "balled up," simply place the tub back into the machine and select the "Respin" function. You may need to respin once or twice for ideal smoothness.
- Your homemade vanilla ice cream is now ready to enjoy! Scoop it directly from the tub and serve immediately. For any leftovers, smooth the top of the remaining ice cream, place the lid on, and return it to the freezer. When ready for more, re-process the frozen leftovers using the "Ice Cream" function again.


