 Skip to content
 There are few aromas as comforting and inviting as freshly baked banana nut bread filling your kitchen. The sweet, warm scent promises a delightful treat, and I am here to deliver on that promise. Today, I am sharing my absolute favorite recipe for Banana Nut Bread, a version so incredibly moist and flavorful, it will become your go-to. This recipe goes beyond the basics, incorporating a unique twist and my expert baking insights to ensure your success. Get ready to discover the best homemade banana nut bread you have ever tasted, complete with tips for a perfect bake every time.
Why You’ll Love This Recipe
I know what you are thinking: another banana bread recipe? But trust me, this one is truly special, all thanks to my unique twist. The secret lies in the incorporation of 2 tablespoons of full-fat sour cream (or plain Greek yogurt) into the wet ingredients and the addition of ¼ teaspoon of almond extract. The sour cream or Greek yogurt provides a double dose of magic: extra fat for superior moisture and tenderness, and lactic acid. This acid subtly enhances the flavor with a delightful tang and helps activate the baking soda, contributing to a perfect rise and crumb. The almond extract, on the other hand, adds a sophisticated depth to the classic banana and vanilla notes, beautifully complementing the walnuts for an irresistible aroma that will have everyone asking for more.
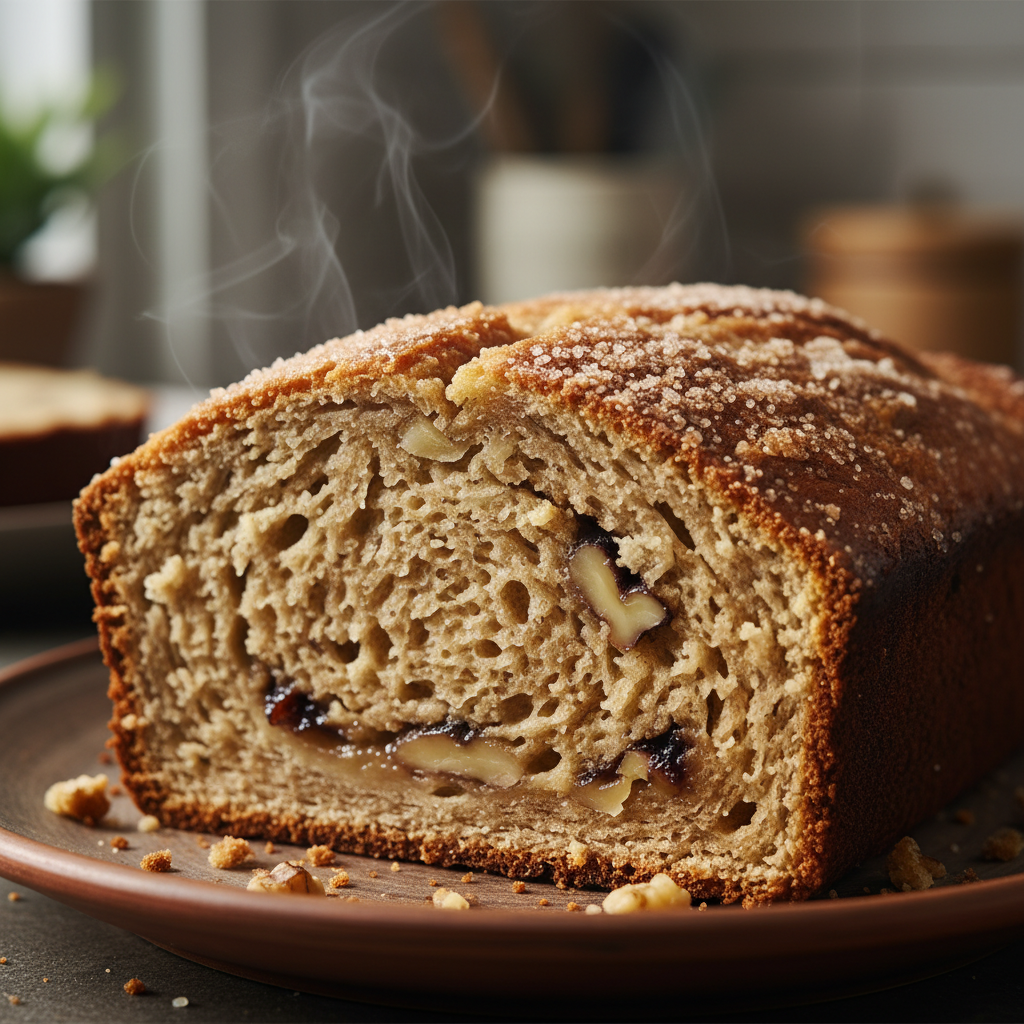
Beyond this incredible twist, you will love this banana nut bread for its delightfully moist and dense texture, a signature of quick breads done right. It boasts an intense banana flavor perfectly paired with aromatic walnuts, creating a truly comforting, family-friendly treat. And the best part? It is surprisingly easy to make, making it perfect for breakfast, a satisfying snack, or a simple yet elegant dessert.
Ingredients Needed
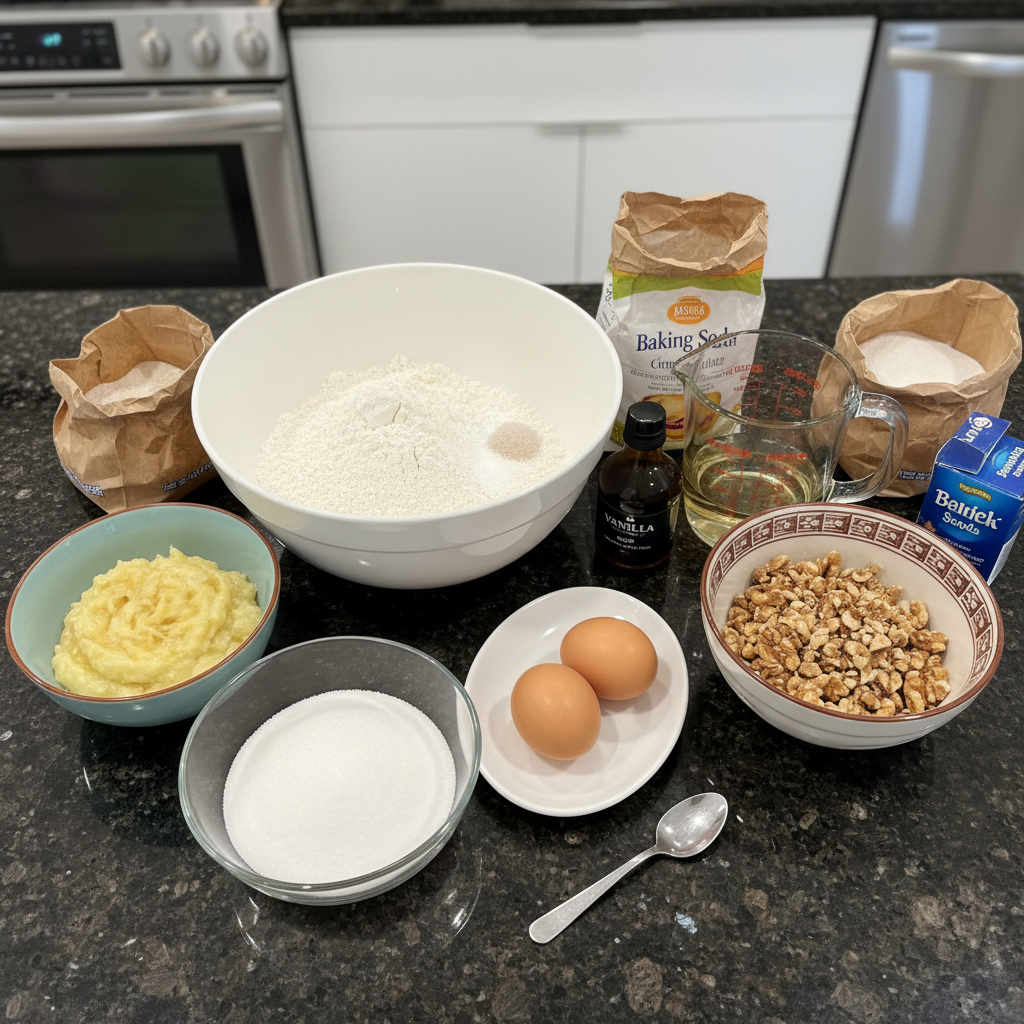
To create this incredibly moist and flavorful banana nut bread, gather the following ingredients:
- 2 cups all-purpose flour
- 1½ teaspoons baking soda
- Pinch salt
- 1 cup granulated sugar
- ½ cup vegetable oil
- 2 eggs
- 1 teaspoon vanilla extract
- 4 medium ripe bananas, mashed (about 1⅓ cups or 303 grams)
- 1 cup coarsely chopped walnuts
- 2 tablespoons full-fat sour cream or plain Greek yogurt
- ¼ teaspoon almond extract
Ingredient Notes & Substitutions
Let’s talk about some key ingredients to ensure your banana nut bread is absolutely perfect.
Ripe Bananas: The star of the show! For the best banana nut bread, look for bananas that are beyond just a few brown spots. You want them to be completely speckled with large brown or black patches, soft to the touch, and emitting a strong, sweet banana aroma. This level of ripeness ensures maximum sweetness and moisture. To measure mashed bananas consistently, I recommend packing them into your measuring cup. If you are short on ripe bananas, you can quickly ripen them by baking unpeeled bananas on a baking sheet at 300°F (150°C) for 15-30 minutes until their skins are black and shiny.
Sour Cream/Greek Yogurt: This is our secret weapon for unparalleled moisture and tenderness. Make sure to use full-fat sour cream or plain Greek yogurt for the best results. The fat content contributes significantly to the bread’s luscious texture.
Vegetable Oil: I choose vegetable oil over butter in this recipe because it yields an ultimately moist and tender crumb that stays soft for longer. Canola oil, grapeseed oil, or a light olive oil are also suitable alternatives.
Walnuts: Coarsely chopped walnuts are traditional in banana nut bread and provide a wonderful crunch and earthy flavor. However, feel free to substitute with other entity keywords like pecans, hazelnuts, cashews, or almonds. You can also omit the nuts entirely if preferred.
Flour & Leavening: We use all-purpose flour as the base. Baking soda is our essential leavening agent, creating the tender, dense texture characteristic of quick breads.
How to Make Your Best Banana Nut Bread
Let’s get baking! Follow these simple steps to create a truly exceptional banana nut bread.
Preparation (Preheat & Pans)
First, preheat your oven to 350°F (175°C). Take two 8×4-inch loaf pans and thoroughly grease them. I like to use a baking spray with flour to ensure easy release, but buttering and flouring also works beautifully. Set them aside.
Dry Ingredients
In a medium bowl, whisk together the all-purpose flour, baking soda, and a pinch of salt. Whisk until these dry ingredients are well combined, then set the bowl aside.
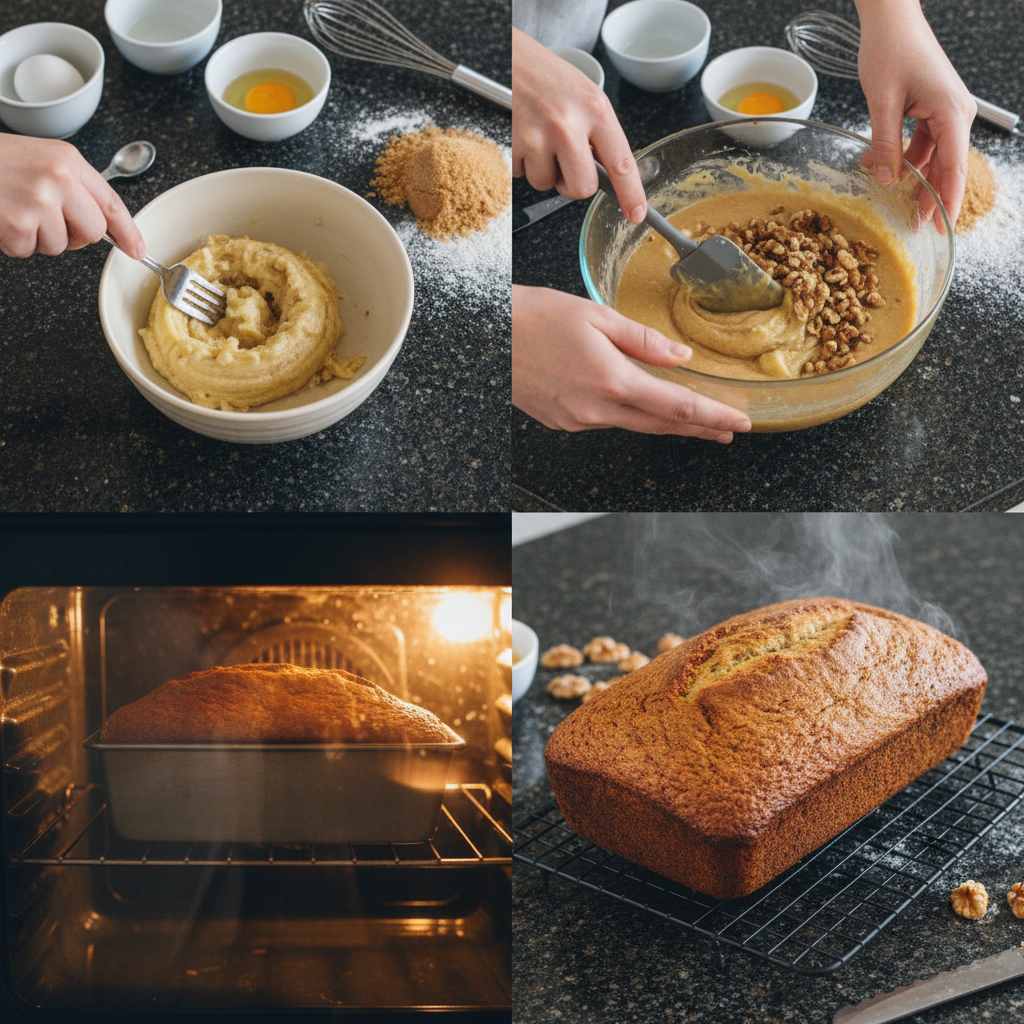
Wet Ingredients (with Twist)
Now for the heart of our flavor. In a large bowl, whisk together the granulated sugar, vegetable oil, eggs, and vanilla extract until the mixture is smooth and well incorporated. Here is where our unique twist comes in: add the 2 tablespoons of full-fat sour cream or plain Greek yogurt and the ¼ teaspoon of almond extract. Whisk these in thoroughly until everything is combined. Then, add your mashed ripe bananas and stir gently, just until they are incorporated into the creamy wet mixture.
Combine Wet and Dry
Add the flour mixture from the medium bowl to the large bowl of wet ingredients. Stir just until everything is completely blended and no dry streaks of flour remain. Remember, it is crucial not to overmix the batter at this stage, as overmixing can develop gluten and result in a tough, dense bread instead of a tender one.
Fold in Walnuts
Using a rubber spatula, gently fold in the coarsely chopped walnuts. This gentle action helps distribute the nuts evenly without crushing them, preserving their texture in the final bread.
Fill Pans
Divide the luscious batter evenly between your two prepared loaf pans. Spread it out gently to ensure an even bake.
Bake
Place the loaf pans in your preheated oven and bake for 35 to 45 minutes. You will know they are done when a thin knife or toothpick inserted into the center of the loaf comes out clean. If you notice the tops of your loaves beginning to get too dark before the centers are fully cooked, simply cover them loosely with aluminum foil about halfway through baking. This will prevent burning and allow the inside to finish baking beautifully.
Cooling & Initial Storage
Once baked to golden perfection, allow the banana nut bread to cool in their pans for 10 minutes. This crucial step prevents them from crumbling when you transfer them. After 10 minutes, turn them out onto a wire rack to cool completely to room temperature. Cooling completely is essential; it prevents condensation and sogginess, ensuring your bread has the ideal texture and flavor. The bread can be stored, wrapped tightly in plastic wrap, at room temperature for up to 5 days. To freeze for longer enjoyment, wrap each loaf tightly in plastic wrap, then again in aluminum foil, and store in the freezer for up to 3 months.
Mastering Your Banana Nut Bread: Tips for Perfect Results
Achieving the perfect banana nut bread goes beyond just following the steps. Here are some insights to help you master this comforting classic.
The Art of the Ripe Banana
When I say “ripe bananas,” I mean truly ripe. Do not settle for just a few brown spots. For baking, you want bananas with skins that are deeply brown or almost entirely black, soft to the touch (but not mushy inside), and emitting a strong, sweet banana aroma. This extreme ripeness is critical because it means the starches in the banana have fully converted to sugars, giving you maximum sweetness and a natural moisture that elevates your banana nut bread. This ripeness also intensifies the banana flavor, making it truly shine in the finished loaf.
When measuring your mashed bananas, consistency is key. I always pack the mashed bananas into a dry measuring cup to ensure I get the specified 1⅓ cups (or 303 grams). For ultimate precision, a kitchen scale is your best friend here. If you find yourself craving banana bread but only have green or yellow bananas, do not despair! You can quickly ripen them. One excellent method is to bake unpeeled bananas on a baking sheet at 300°F (150°C) for 15-30 minutes, or until their skins are completely black and shiny. Another trick is to place them in a paper bag with an apple or avocado for a day or two; the ethylene gas released will speed up ripening.
Understanding Your Bake & Adjusting for Pan Sizes
There is a wonderful bit of kitchen chemistry happening with our bananas and baking soda. The natural acids present in ripe bananas (especially those very ripe ones) react with the baking soda, creating carbon dioxide gas. This reaction helps the bread rise and gives it its signature tender texture. It is important to note, however, that while baking soda aids in the rise, this recipe is designed to produce a dense, moist loaf, not a towering, airy one. The density is intentional and contributes to its rich, concentrated banana flavor, which is a hallmark of truly great quick bread.
You might want to bake this recipe in different pan sizes, and that is perfectly fine! Here is some guidance for adjusting your baking times:
- Single Loaf Pan (e.g., one 9×5-inch or 9×4-inch): If you decide to use one larger pan, your baking time will increase. Expect it to take approximately 55-65 minutes, or until a toothpick inserted into the center comes out clean.
- Mini Loaf Pans: For charming mini loaves, reduce the baking time significantly. They typically bake in about 20-30 minutes. Always use the toothpick test for accuracy.
- Muffins: This recipe adapts beautifully to banana nut muffins! Simply line a muffin pan with paper liners, fill each cup about ¾ full with batter, and bake at 350°F (175°C) for 24-28 minutes. Again, the toothpick test is your reliable indicator of doneness.
No matter what pan size you choose, always rely on the visual cues (golden brown crust, fragrant aroma) and, most importantly, the toothpick test to confirm your banana nut bread is perfectly baked through.
Pro Tips & Troubleshooting
Even the best recipes can benefit from a few expert insights. Here are my pro tips and common mistakes to avoid to ensure your banana nut bread is always a triumph.
Pro Tips for Success
- Don’t Skimp on Ripeness: Seriously, use extremely ripe, brown-spotted bananas for maximum sweetness and the most moist bread. This is the single biggest factor for flavor and texture.
- Gentle Mixing is Key: Once you add the flour, stir the batter just until no dry streaks remain. Overmixing develops gluten, leading to a tough, dry banana nut bread.
- The Foil Trick: If the top of your banana nut bread starts browning too quickly before the center is cooked, loosely tent the loaf pans with aluminum foil about halfway through baking. This protects the crust while the inside finishes baking.
- Embrace the Density: This recipe is designed to yield a wonderfully dense and moist quick bread, not a light and airy cake. This density is intentional and contributes to its rich flavor and delightful texture.
- Cool Completely: Patience is a virtue here! Allow your banana nut bread to cool entirely on a wire rack before slicing or storing. This prevents sogginess from trapped steam and allows the flavors to fully meld and develop.
- The Secret Ingredient’s Impact: Remember, the sour cream and almond extract are doing heavy lifting! They elevate the final product with superior moisture, tenderness, and a unique, sophisticated flavor profile.
Common Mistakes to Avoid
- Using Under-Ripe Bananas: This is a common pitfall. Under-ripe bananas will result in less sweet, less moist bread with a weak banana flavor.
- Overbaking: The quickest way to ruin banana bread is to overbake it. Keep a close eye on your loaves and use the toothpick test. Overbaking leads to a dry, crumbly texture.
- Storing Warm Bread: Never wrap and store your banana nut bread while it is still warm. This traps steam, creating condensation that makes the bread soggy and can encourage mold.
- Overmixing the Batter: As mentioned, overmixing develops gluten, which can turn your tender banana nut bread into a tough, chewy loaf. Stir only until just combined.
- Ignoring the Doneness Test: Visual cues are helpful, but the doneness test (using a thin knife or toothpick) is crucial for confirming the bread is cooked through, especially in the center.
Serving & Storage
Once your Ultra Moist Banana Nut Bread is baked to perfection, you will want to know how best to enjoy and preserve it.
Serving Suggestions
I find this banana nut bread is absolutely heavenly served slightly warm with a generous smear of softened butter. A dollop of cream cheese or a drizzle of honey also makes for a delightful treat. It is wonderfully versatile, perfect as a comforting breakfast alongside your morning coffee, a satisfying afternoon snack, or even a simple yet elegant dessert after dinner. For the cleanest slices, I recommend using a serrated bread knife once the bread has fully cooled. While it is delicious warm, cooling allows for neater slices. Pair it with a hot cup of coffee, a soothing tea, or a cold glass of milk for the ultimate experience.
Storage & Make-Ahead Tips
To keep your banana nut bread fresh and delicious, proper storage is key. The bread can be stored, tightly wrapped in plastic wrap or placed in an airtight container, at room temperature for up to 5 days. Ensure it is wrapped tightly to prevent it from drying out.
Banana nut bread is also an excellent candidate for freezing, making it perfect for gifting or busy weeks when you need a quick treat. To freeze, wrap individual slices or whole loaves first in plastic wrap, ensuring a snug fit. Then, wrap them again in aluminum foil for an extra layer of protection against freezer burn. It will keep beautifully in the freezer for up to 3 months. When you are ready to enjoy, simply thaw frozen banana bread overnight in the fridge or at room temperature. For a fresh-baked taste, you can briefly reheat thawed slices in the microwave, toaster oven, or a conventional oven.
Conclusion
I genuinely believe this Ultra Moist Banana Nut Bread recipe will become a cherished favorite in your home. The unique twist of sour cream and almond extract elevates this classic to new heights, delivering unparalleled moisture, tenderness, and a sophisticated flavor that sets it apart. It is an approachable recipe designed to yield fantastic results for bakers of all skill levels.
So, gather your ripe bananas, preheat your oven, and prepare to fill your kitchen with the most inviting aromas. I encourage you to try this recipe, perhaps experiment with other variations like chocolate chips or a different type of nut, and savor every tender, flavorful slice. I would love to hear about your creations in the comments below!
FAQ
What kind of bananas are best for banana nut bread?
Very ripe bananas with abundant brown or black spots on their skins are ideal. These bananas are significantly sweeter and contribute more moisture, resulting in a more flavorful and tender banana nut bread.
Why is vegetable oil used instead of butter in this banana nut bread recipe?
Vegetable oil contributes to a consistently moist and tender crumb that stays soft for longer. Butter, while flavorful, can sometimes lead to a denser, slightly drier texture in quick breads once cooled.
How can I ripen bananas faster for baking?
You can ripen bananas quickly by baking unpeeled bananas on a baking sheet at 300°F (150°C) for 15-30 minutes until their skins turn black. Another method is to place them in a paper bag with an apple or avocado for 1-2 days; the ethylene gas released will speed up the ripening process.
Can I make banana nut bread into muffins, and what are the adjustments?
Yes, absolutely! To adapt this recipe for muffins, line a muffin pan with paper liners, fill each cup about ¾ full with batter, and bake at 350°F (175°C) for 24-28 minutes, or until a toothpick inserted into the center comes out clean. This recipe should yield about 18-24 muffins.
How long can banana nut bread be stored, and can it be frozen?
Banana nut bread can be stored tightly wrapped in plastic wrap or in an airtight container at room temperature for up to 5 days. For longer storage, you can freeze it for up to 3 months. Wrap individual slices or whole loaves first in plastic wrap, then in aluminum foil, and place in the freezer. Thaw overnight in the fridge or at room temperature, and reheat briefly if desired for a fresh-baked taste.
What are some delicious variations or add-ins for classic banana nut bread?
Beyond walnuts, you can use pecans, almonds, or even a mix of nuts. For extra sweetness, consider adding chocolate chips (milk, dark, white, or butterscotch), dried fruits like raisins or cranberries, or a pinch of warm spices such as cinnamon or nutmeg. Keep total add-ins to about 1 to 1.5 cups.
Why didn’t my banana bread rise very high?
This particular recipe is designed to produce a dense, moist, and tender loaf, not a high-rising one. The concentrated banana flavor and rich texture are its intended hallmarks. A moderate rise is normal and expected for this type of quick bread. Ensuring your baking soda is fresh and you are not overmixing the batter also helps ensure the best possible rise for this dense style.
How do I prevent the top of my banana bread from getting too dark during baking?
If the top of your banana bread starts to brown too quickly before the center is fully cooked, simply cover the loaf pans loosely with aluminum foil about halfway through the baking process. This will shield the top from direct heat and prevent over-browning while the interior finishes baking.
Ultra Moist Banana Nut Bread: Our Secret Sour Cream Recipe
Ingredients
Equipment
Method
- First, preheat your oven to 350°F (175°C). Take two 8x4-inch loaf pans and thoroughly grease them. You can use a baking spray with flour or butter and flour. Set them aside.
- In a medium bowl, whisk together the all-purpose flour, baking soda, and a pinch of salt until well combined. Set the bowl aside.
- In a large bowl, whisk together the granulated sugar, vegetable oil, eggs, and vanilla extract until the mixture is smooth. Add the 2 tablespoons of full-fat sour cream or plain Greek yogurt and the ¼ teaspoon of almond extract. Whisk these in thoroughly until everything is combined. Then, add your mashed ripe bananas and stir gently, just until incorporated into the creamy wet mixture.
- Add the flour mixture from the medium bowl to the large bowl of wet ingredients. Stir just until everything is completely blended and no dry streaks of flour remain. Do not overmix the batter to avoid a tough bread.
- Using a rubber spatula, gently fold in the coarsely chopped walnuts to distribute them evenly without crushing.
- Divide the batter evenly between your two prepared loaf pans and spread it out gently to ensure an even bake.
- Place the loaf pans in your preheated oven and bake for 35 to 45 minutes. They are done when a thin knife or toothpick inserted into the center comes out clean. If the tops brown too quickly, loosely cover them with aluminum foil halfway through baking.
- Once baked, allow the bread to cool in their pans for 10 minutes. Then, turn them out onto a wire rack to cool completely to room temperature. The bread can be stored, wrapped tightly in plastic wrap, at room temperature for up to 5 days. For longer enjoyment, wrap each loaf tightly in plastic wrap, then again in aluminum foil, and store in the freezer for up to 3 months.


