 Skip to content
 There’s something truly special about a homemade snack, isn’t there? The ability to create delicious, healthy treats right in my own kitchen brings me so much joy. Today, I’m thrilled to share a recipe that perfectly embodies that feeling: my irresistible homemade blackberry fruit leather. Imagine a naturally sweet, tart, and wonderfully chewy snack that’s pliable and bursting with fruity flavor. It’s truly a delight! If you’re looking for a foolproof guide to making perfect fruit leather, including a special twist for the best texture and nutrition, you’ve come to the right place. Get ready to transform fresh blackberries into a healthy and satisfying treat.
Why You’ll Love This Chewy Blackberry Fruit Leather (The Chia Secret!)
I am so excited to share my secret ingredient for making the best chewy blackberry fruit leather: ground chia seeds! This unique twist changes the game. Chia seeds are incredible; they naturally thicken the puree and bind everything together, giving you a perfectly uniform and slightly chewier texture that I absolutely adore. This natural gelling action also helps to reduce the drying time because those tiny seeds are busy absorbing moisture. Plus, it’s a fantastic nutritional boost, adding extra fiber and omega-3s without ever compromising that beautiful blackberry flavor.
This recipe is truly a healthy treat that’s perfect for snacks and lunchboxes. It’s naturally gluten-free and vegan-friendly, making it a wonderful option for many dietary needs. It’s also an ingenious way to preserve your berry harvest or use up ripe fruit, making it incredibly family-friendly and kind to your budget.
Ingredients Needed
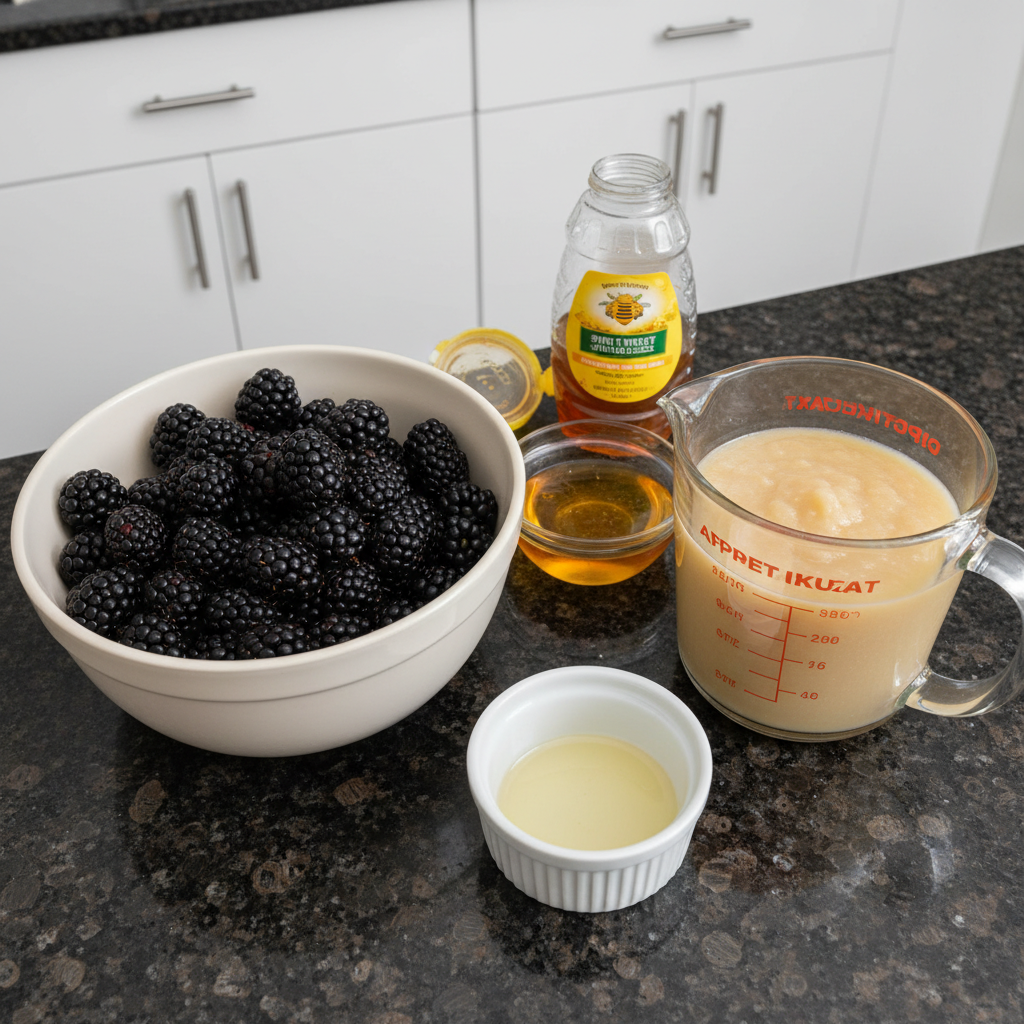
Here’s what you’ll need to make this delightful blackberry fruit leather:
- 4 cups fresh blackberries (or about 3 cups of frozen blackberries, thawed)
- 2 cups applesauce (applesauce makes the leather more flexible and adds sweetness)
- 2 Tablespoons honey or maple syrup (optional)
- 1 Tablespoon lemon juice (optional – this helps preventing darkening, but adds tartness)
Ingredient Notes & Substitutions
Let’s talk a little more about these simple yet powerful ingredients.
Blackberries: Whether you use fresh blackberries or frozen blackberries, both work beautifully. If you’re using fresh berries, look for plump, dark berries that are firm but yield slightly to pressure. Ripe or even slightly overripe fruit works best for fruit leather, as it blends easily and is naturally sweeter. If using frozen, make sure they are fully thawed and drained before starting.
Applesauce: I add applesauce to my blackberry fruit leather for two key reasons: it significantly improves the flexibility of the leather and adds a lovely natural sweetness. If you don’t have applesauce, you can absolutely substitute it with unsweetened pear puree or even pumpkin puree. Just make sure whatever you use is unsweetened so you can control the sugar content yourself.
Sweeteners (Honey/Maple Syrup): Honey or maple syrup are optional, depending on how sweet your blackberries are and your personal preference. Keep in mind that honey and sugar can also act as natural preservatives, extending the shelf life of your fruit leather. If your berries are very ripe, you might find you don’t need any added sugar at all, which is a great bonus for a healthy snack!
Lemon Juice: A touch of lemon juice is also optional, but it helps prevent the fruit leather from darkening too much during drying and provides a nice balance to the sweetness, especially if your blackberries are on the sweeter side.
The Chia Secret: And of course, our star secret ingredient! The ground chia seeds are here to boost fiber, improve texture, and act as a natural thickener for a truly superior fruit leather.
How to Make Blackberry Fruit Leather (Step-by-Step Guide)
Making blackberry fruit leather is simpler than you might think. Just follow these steps, and you’ll have a batch of delicious, chewy homemade fruit leather in no time!
Step 1: Prepare Your Blackberries
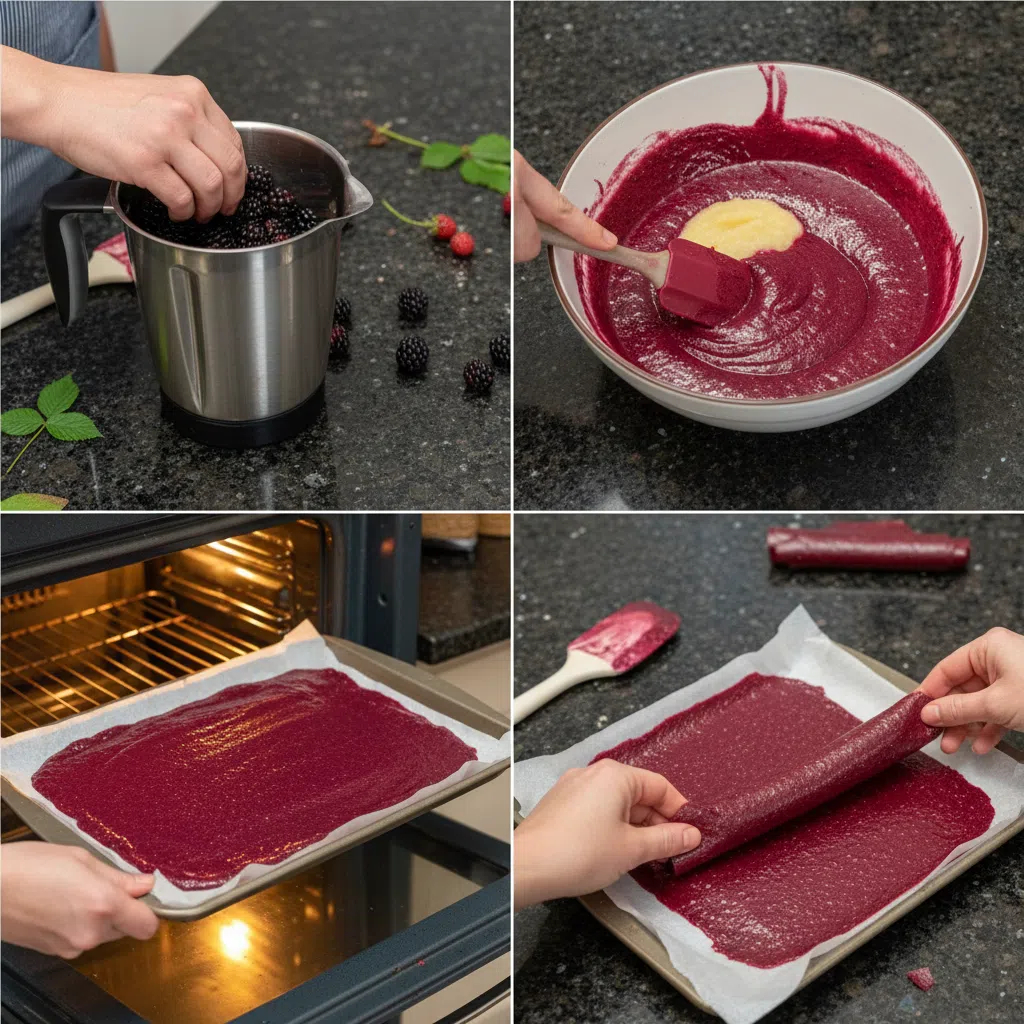
If you’re using fresh blackberries, give them a good rinse under cold water and gently remove any stems. If you have frozen blackberries, make sure they are fully thawed and drained of any excess liquid. For berries that are a bit firm, I like to place them in a small stockpot and use a potato masher to break them down. Then, cook them gently over low heat until they’ve softened. This makes for a much easier puree.
Step 2: Create a Silky Puree (with our Chia Boost!)
Now for the fun part: making that smooth, vibrant puree. For a truly seedless blackberry fruit leather, I recommend straining the mashed berries through a fine mesh strainer or a dedicated food strainer to remove all those tiny seeds. This step is optional, but it creates a beautifully smooth texture. Alternatively, you can simply blend the cooked blackberries in a blender or food processor until smooth. This is the crucial point for our unique twist: After your initial puree, add 1-2 tablespoons of ground chia seeds along with the applesauce and any optional sweeteners. Blend briefly, just enough to thoroughly combine the chia seeds evenly throughout the puree.
Step 3: Sweeten and Season
Next, add the applesauce to your blackberry puree. If you’re using honey or maple syrup, add that in too. Give it another brief blend to combine everything. This is your chance to taste the puree and adjust the sweetness and tartness as needed. If you want a little more zing, add the optional lemon juice now.
Step 4: Prepare for Drying
Whether you’re using a dehydrator or an oven, you’ll need to prepare your drying surface. Line your dehydrator trays with fruit leather sheets or parchment paper. If you’re using an oven, line a baking sheet with parchment paper or a silicone baking mat. Pour the puree onto the prepared surface and spread it evenly, aiming for about 1/8 inch thick. An even thickness of puree helps immensely with even drying, ensuring no sticky spots or overly brittle edges.
Step 5: Drying in a Dehydrator
If you have a dehydrator, set it to 135°F (57°C). Let it run for about 6-8 hours. The blackberry fruit leather is done when it’s no longer sticky to the touch and peels away easily from the tray. It should be pliable, but not wet.
Step 6: Drying in an Oven (No Dehydrator? No Problem!)
No dehydrator? No worries! You can absolutely make this in your oven. Line a baking sheet as described above. Set your oven to its lowest possible temperature, usually around 140°F to 150°F (60°C to 65°C). It’s very important to place the baking sheet in the oven and leave the oven door slightly ajar. This allows moisture to escape, which is key for proper food drying. Drying in an oven can take anywhere from 4-8 hours. Check regularly, and rotate the baking sheet if needed to ensure even drying.
Step 7: Cool, Cut & Store
Once your fruit leather is completely dried and passes the stickiness test, let it cool to room temperature. This makes it much easier to handle. Carefully peel the leather off the parchment paper or silicone baking mat. I like to use kitchen scissors or a sharp knife to cut it into strips or squares, whatever shape suits my snacking mood! Store your beautiful homemade fruit roll in an airtight container.
Fueling Your Day: Nutritional Benefits & Recipe Yield
Making your own fruit leather isn’t just fun; it’s a smart choice for your health. Let’s look at why homemade truly wins.
Nutrition Boost: Why Homemade Wins
When you make fruit leather at home, you’re in control of every ingredient. This means you can significantly reduce the amount of added sugar compared to many store-bought varieties. Per serving, homemade blackberry fruit leather offers a wonderful boost of fiber, thanks to the fresh blackberries and our special addition of chia seeds. Blackberries are also packed with antioxidants, which are fantastic for your overall health. You get all the natural goodness of the fruit without any unwanted additives or excessive calories, making it a truly healthy treat.
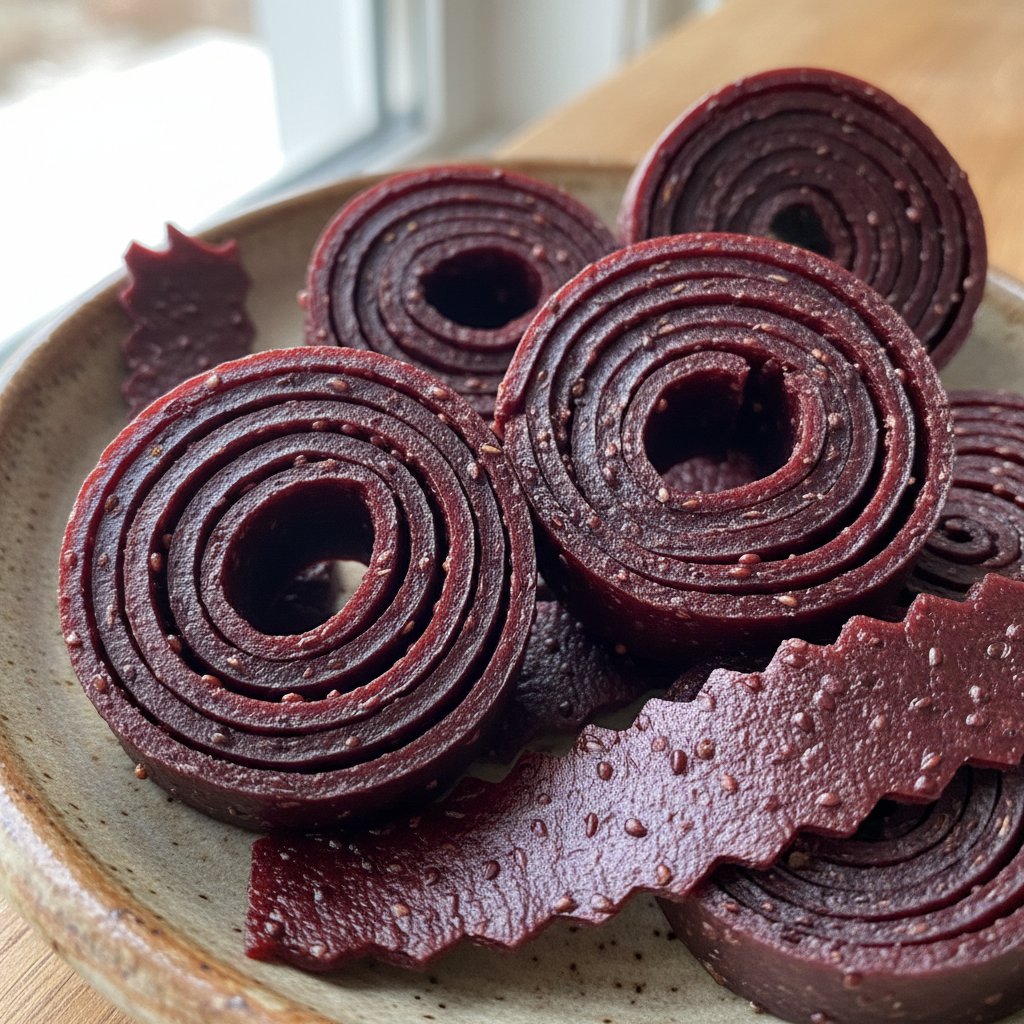
What to Expect: Estimated Yield
This recipe, using 4 cups of fresh blackberries and 2 cups of applesauce, typically yields two large sheets of fruit leather. From these two sheets, you can easily cut about 12-16 individual rolls or 20-24 snack-sized pieces. This makes it perfect for meal-prep, ensuring you have healthy treats on hand for lunches or quick energy boosts throughout the week.
Pro Tips & Troubleshooting for Perfect Fruit Leather
Even though this recipe is straightforward, a few expert tips can ensure your blackberry fruit leather turns out perfectly every time. And if you run into a snag, I’ve got you covered with some troubleshooting advice.
Pro Tips for Success
- Fruit Ripeness: Always use ripe or even slightly overripe fruit. It’s naturally sweeter, blends more easily, and results in a more flavorful fruit leather.
- Even Spreading: This is key! Spread your puree to an even thickness of about 1/8 inch. This ensures consistent drying, so you don’t end up with some parts brittle and others still sticky.
- The Chia Advantage: Remember, those ground chia seeds are doing double duty. They contribute to that wonderful chewy texture and can even help reduce the drying time by absorbing excess moisture.
- Parchment Protection: To keep dried fruit leather from sticking together during storage, I always recommend placing parchment paper between layers or rolling individual pieces in parchment.
- Doneness Cues: Your fruit leather is perfectly done when it’s pliable and slightly tacky to the touch, but not sticky. It should peel away easily from the drying surface without tearing.
- Sweetness Control: Always taste your puree before drying! This allows you to adjust the sweetness and tartness to your liking before it’s too late.
Common Mistakes to Avoid
- Wrong Drying Surfaces: Never use wax paper or aluminum foil for drying. Wax paper is difficult to remove from the dried fruit, and aluminum foil can react with fruit acids, leading to discoloration and off-flavors. Stick to parchment paper or silicone baking mats.
- Leather Too Brittle: If your fruit leather turns out too brittle, it’s likely been dried for too long or spread too thin. For a softer texture, try reducing the drying time slightly next time.
- Leather Too Sticky in the Middle: This usually indicates uneven spreading or insufficient drying time. Ensure your puree is spread uniformly across the sheet, and if using an oven, rotate the sheet periodically for even drying. You might also need to extend the drying time.
- Dark Spots: Sometimes, very ripe fruit or slightly higher drying temperatures can lead to dark spots due to the Maillard reaction. This is usually harmless but can be minimized by ensuring even heat distribution and not exceeding recommended drying temperatures.
- Overcrowding Dehydrator/Oven: Proper air circulation is absolutely crucial for efficient food drying. Avoid overcrowding your dehydrator trays or oven racks, as this can trap moisture and lead to longer drying times and potentially uneven results.
Serving & Storage
Once you’ve made your delicious homemade fruit leather, you’ll want to enjoy it and store it properly to keep it fresh.
Serving Ideas: Beyond the Snack
Of course, this homemade fruit roll is fantastic on its own as an easy snack, perfect for packing in lunchboxes for kids and adults alike, or just as a healthy treat to grab when you need a little something sweet. But don’t stop there! I love spreading a thin layer of peanut butter on my fruit leather for added protein and a delicious PB&J flavor combination. You can also pair it with a few nuts or a slice of cheese for a more substantial snack.
Storage and Make-Ahead for Longevity
- Room Temperature: Your fruit leather will last about a month or even longer if stored in an airtight container in a cool, dark place.
- Refrigeration: For even longer shelf life, especially if you live in warm and humid climates, or if your leather is on the softer side, refrigeration is a great option. It will last several months in the fridge.
- Freezing: For long term storage and food preservation, you can freeze fruit leather for up to a year. Wrap individual pieces tightly in parchment paper, then place them in an airtight container or a freezer-safe bag. Thaw at room temperature when you’re ready to enjoy.
The less moisture remaining in your fruit leather, the longer it will last, so ensuring it’s properly dried before storage is important.
Conclusion: Your Homemade Fruit Leather Adventure Awaits!
I hope you feel inspired to try this delightful blackberry fruit leather recipe! It’s so easy to make, incredibly delicious, and packed with natural goodness. Our unique twist with chia seeds ensures a superior texture and adds a fantastic nutritional boost that you’ll love. Whether you’re a seasoned chef or new to the kitchen, homemade fruit leather is an achievable and rewarding project for all skill levels. Don’t hesitate to try variations, explore different serving ideas, and truly enjoy your healthy, satisfying creation. Happy snacking!
FAQ: Your Blackberry Fruit Leather Questions Answered
I get a lot of questions about making fruit leather, so let me answer some of the most common ones for you.
Q: How long does homemade blackberry fruit leather last?
A: When stored in an airtight container, homemade blackberry fruit leather can last about a month at room temperature. In the refrigerator, it will last for several months, and in the freezer, it can be stored for up to a year.
Q: What is the best way to remove seeds from blackberries for fruit leather?
A: The best way to remove seeds for a smooth fruit leather is to press the cooked and mashed blackberries through a fine mesh strainer or a dedicated food strainer. This will separate the pulp from the seeds.
Q: Can I make fruit leather in an oven if I don’t have a dehydrator?
A: Absolutely! You can make fruit leather in a regular oven. Set your oven to its lowest temperature (around 140-150°F or 60-65°C) and leave the oven door slightly ajar to allow moisture to escape. Drying times will vary, usually between 4-8 hours.
Q: How do you know when blackberry fruit leather is perfectly dried?
A: Your fruit leather is perfectly dried when it is no longer sticky to the touch, feels pliable and somewhat leathery, and peels away easily from the drying surface without tearing or leaving wet spots.
Q: What are some variations for blackberry fruit leather?
A: You can easily add variations! Try mixing in other fruits like pears for a blackberry-pear leather. A pinch of cinnamon or a dash of vanilla extract can also add lovely flavor notes. Remember, our chia seeds already provide a fantastic nutritional boost!
Q: Why is applesauce added to blackberry fruit leather and can I substitute it?
A: Applesauce is added to blackberry fruit leather primarily to make the leather more flexible and to add natural sweetness. Yes, you can substitute it with other unsweetened fruit purees like pear puree or pumpkin puree.
Q: Should I use fresh or frozen blackberries for fruit leather?
A: Both fresh and frozen blackberries work wonderfully for fruit leather. If using fresh, make sure they are ripe. If using frozen, thaw them completely and drain any excess liquid before puréeing.
Q: Can I make blackberry fruit leather without added sugar?
A: Yes, you can absolutely make blackberry fruit leather without any added sugar. If your blackberries are very ripe and naturally sweet, the applesauce will provide enough sweetness on its own, resulting in a delicious and naturally sweet snack.
Chewy Blackberry Fruit Leather (with Chia!)
Ingredients
Equipment
Method
- If using fresh blackberries, rinse them under cold water and remove any stems. If using frozen, ensure they are fully thawed and drained of excess liquid.
- For firm berries, place them in a small stockpot, mash, and cook gently over low heat until softened for easier puréeing.
- For a seedless fruit leather, press the mashed berries through a fine mesh strainer or food strainer to remove seeds. Alternatively, blend the cooked blackberries in a blender or food processor until smooth.
- After initial puréeing, add 1-2 tablespoons of ground chia seeds along with the applesauce and any optional sweeteners. Blend briefly to combine the chia seeds evenly.
- Add the applesauce, and if using, honey or maple syrup, to your blackberry puree. Blend briefly to combine.
- Taste the puree and adjust sweetness and tartness as needed. Add the optional lemon juice now if desired for extra zing.
- Line your dehydrator trays with fruit leather sheets or parchment paper. If using an oven, line a baking sheet with parchment paper or a silicone baking mat.
- Pour the puree onto the prepared surface and spread it evenly, aiming for about 1/8 inch thick, to ensure consistent drying.
- Set your dehydrator to 135°F (57°C) and dry for about 6-8 hours. The leather is done when it’s no longer sticky to the touch and peels away easily, remaining pliable but not wet.
- If using an oven, line a baking sheet. Set your oven to its lowest possible temperature, usually 140°F to 150°F (60°C to 65°C). Place the baking sheet in the oven and leave the oven door slightly ajar to allow moisture to escape.
- Dry for 4-8 hours, checking regularly and rotating the baking sheet if needed for even drying.
- Once completely dried, let the fruit leather cool to room temperature. Carefully peel it off the parchment paper or silicone baking mat.
- Cut into strips or squares using kitchen scissors or a sharp knife. Store your homemade fruit roll in an airtight container.


