
Ingredients
Equipment
Method
Step 1: Prepare Your Blackberries
- If using fresh blackberries, rinse them under cold water and remove any stems. If using frozen, ensure they are fully thawed and drained of excess liquid.
- For firm berries, place them in a small stockpot, mash, and cook gently over low heat until softened for easier puréeing.
Step 2: Create a Silky Puree (with our Chia Boost!)
- For a seedless fruit leather, press the mashed berries through a fine mesh strainer or food strainer to remove seeds. Alternatively, blend the cooked blackberries in a blender or food processor until smooth.
- After initial puréeing, add 1-2 tablespoons of ground chia seeds along with the applesauce and any optional sweeteners. Blend briefly to combine the chia seeds evenly.
Step 3: Sweeten and Season
- Add the applesauce, and if using, honey or maple syrup, to your blackberry puree. Blend briefly to combine.
- Taste the puree and adjust sweetness and tartness as needed. Add the optional lemon juice now if desired for extra zing.
Step 4: Prepare for Drying
- Line your dehydrator trays with fruit leather sheets or parchment paper. If using an oven, line a baking sheet with parchment paper or a silicone baking mat.
- Pour the puree onto the prepared surface and spread it evenly, aiming for about 1/8 inch thick, to ensure consistent drying.
Step 5: Drying in a Dehydrator
- Set your dehydrator to 135°F (57°C) and dry for about 6-8 hours. The leather is done when it’s no longer sticky to the touch and peels away easily, remaining pliable but not wet.
Step 6: Drying in an Oven (No Dehydrator? No Problem!)
- If using an oven, line a baking sheet. Set your oven to its lowest possible temperature, usually 140°F to 150°F (60°C to 65°C). Place the baking sheet in the oven and leave the oven door slightly ajar to allow moisture to escape.
- Dry for 4-8 hours, checking regularly and rotating the baking sheet if needed for even drying.
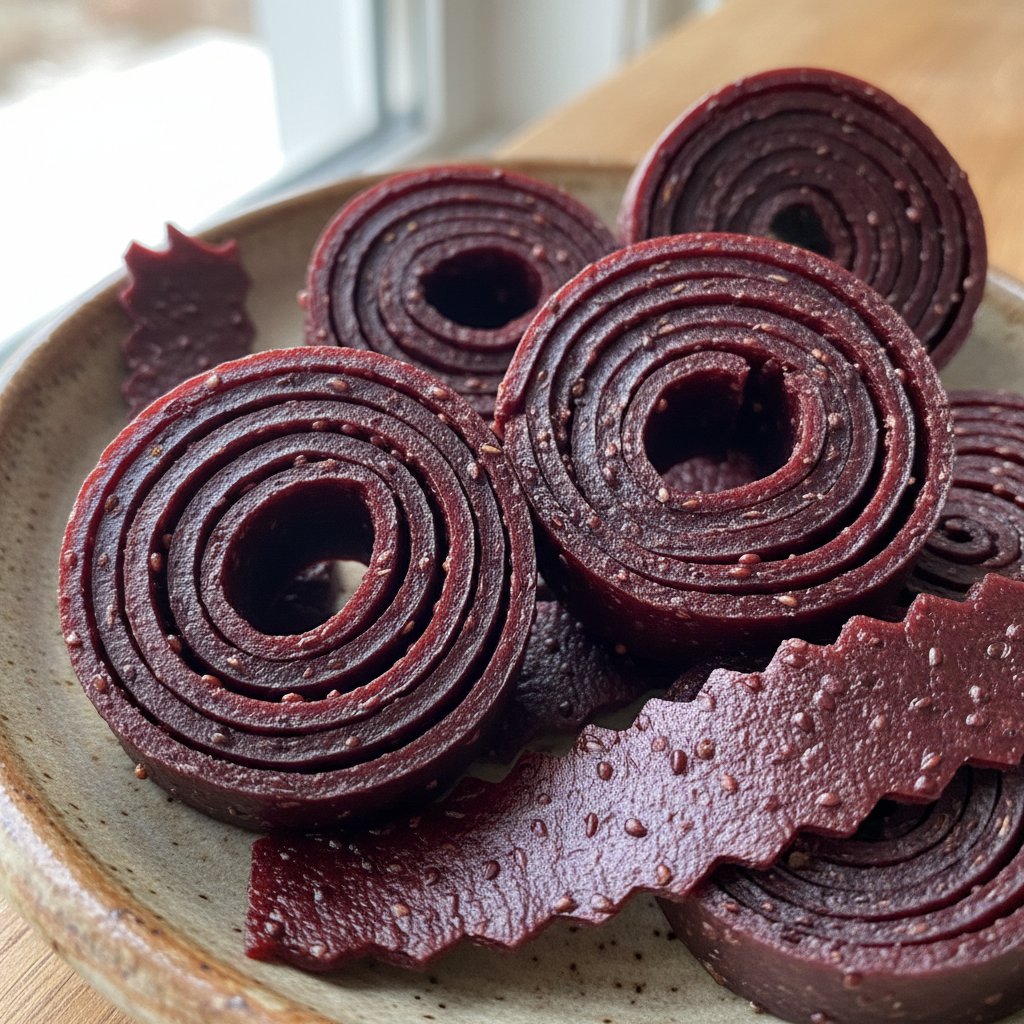
Step 7: Cool, Cut & Store
- Once completely dried, let the fruit leather cool to room temperature. Carefully peel it off the parchment paper or silicone baking mat.
- Cut into strips or squares using kitchen scissors or a sharp knife. Store your homemade fruit roll in an airtight container.
Nutrition
Notes
For best results, use ripe or slightly overripe fruit and spread the puree evenly to about 1/8 inch thickness. Store fruit leather in an airtight container at room temperature for up to a month, or refrigerate/freeze for longer preservation. Place parchment between layers to prevent sticking. Nutrition information is estimated based on common ingredients and serving sizes and may vary.