 Skip to content
 There’s nothing quite like the bright, zesty burst of a perfectly made lemon bar, and in my kitchen, I’ve perfected a recipe for creamy lemon bars that will absolutely dazzle your taste buds. This isn’t just any lemon bar recipe; it’s an elevated classic featuring a unique brown butter Nilla wafer crust that adds an incredible depth of flavor. If you’re looking for a reliable recipe with expert tips to achieve a truly superior dessert experience, you’ve come to the right place. Get ready to create a dessert that’s both comforting and sophisticated!
Why You’ll Love This Recipe
What makes these creamy lemon bars truly stand out is my signature **Brown Butter Nilla Wafer Crust**. I’ve always believed that the crust is just as important as the filling, and browning the butter before incorporating it into the Nilla wafers creates a magical transformation.
- Elevated Flavor Profile: The Maillard reaction from browning the butter develops rich, nutty, and caramelized notes that perfectly complement the bright, tangy lemon-cream cheese filling. This simple step adds a sophisticated depth you won’t find in traditional lemon bars.
- Surprisingly Easy: Despite its gourmet taste, this recipe is straightforward and accessible for bakers of all skill levels. You’ll be amazed at the professional results you can achieve with minimal fuss.
- Perfect for Any Occasion: These lemon dessert bars are incredibly versatile. They’re a hit at potlucks, elegant enough for brunches, and a refreshing treat for summer gatherings.
- Delightful Texture Contrast: The crisp, slightly crumbly brown butter Nilla wafer crust provides a wonderful textural counterpoint to the silky, smooth, and creamy lemon filling, making every bite an experience.
Ingredients Needed

Gathering your ingredients is the first step to creating these delightful creamy lemon bars. Here’s exactly what you’ll need:
- 20 Nilla Wafers (finely crushed)
- ½ cup flour
- ¼ cup brown sugar (firmly packed)
- ¼ cup butter (cold, no substitutions)
- 1 8-ounce package cream cheese (1/3-less fat cream cheese is okay)
- 1 cup granulated sugar
- 2 eggs (room temperature; just place eggs in a bowl of warm water for about 10 mins)
- 1 ½ teaspoons vanilla extract
- 2 tablespoons flour
- 3 tablespoons lemon peel ( grated, divided)
- ¼ cup lemon juice (fresh highly recommended)
- ¼ teaspoon baking powder
- powdered sugar
Ingredient Notes & Substitutions
Understanding your ingredients can make all the difference in the final outcome of your lemon bars.
- Cream Cheese: For that truly “creamy” texture, I always recommend full-fat or 1/3-less fat cream cheese. Fat-free versions can lead to a less rich, sometimes rubbery texture, so avoid them if possible. Remember to bring your cream cheese to room temperature for smooth, lump-free blending!
- Lemons: Fresh is best! Using fresh lemon zest and lemon juice is non-negotiable for optimal, bright flavor. Bottled juice and dried zest simply can’t compare. For efficient zesting, use a microplane and avoid the bitter white pith.
- Butter: For the crust, cold butter is crucial. It helps create a tender, crumbly texture when cut into the dry ingredients, ensuring your brown butter Nilla wafer crust is perfectly flaky.
- Flour: In the filling, the small amount of all-purpose flour provides essential structure, helping to set the creamy custard and prevent it from becoming too soft or curdled.
- Dietary Variations: For a gluten-free crust, you can easily substitute gluten-free graham crackers or a specific gluten-free shortbread cookie blend for the Nilla wafers. If you’re exploring sugar substitutes, erythritol or stevia blends can work in the filling, though they might slightly alter the texture. For dairy-free alternatives, look for plant-based cream cheese and vegan butter, keeping in mind that the flavor and texture might vary from the original.

How to Make Creamy Lemon Bars
Let’s get baking! Follow these steps for perfect creamy lemon bars every time.
Prepare for Baking
First, preheat your oven to 350ºF. Line an 8-inch square baking pan with foil, ensuring the ends extend over the sides of the pan for easy removal later. Give it a light spray with non-stick spray and set it aside.
Craft the Brown Butter Nilla Wafer Crust
In a medium bowl, combine the finely crushed Nilla Wafer crumbs, ½ cup flour, and the firmly packed brown sugar. Now for the star of the show: chop your cold butter into small pieces. Use a pastry blender to cut the butter into the crumb mixture until it resembles coarse crumbs. If you don’t have a pastry blender, two knives or even your fingertips can do the trick! This step helps create that wonderfully flaky and tender crust. Press the crumb mixture firmly and evenly onto the bottom of your prepared pan. Bake this fragrant crust for 15 minutes, allowing those nutty brown butter notes to develop beautifully.
Whip Up the Silky Lemon Filling
While the crust is baking, it’s time to prepare the luscious filling. In a large mixing bowl, beat the room temperature cream cheese and granulated sugar with an electric mixer on medium speed until they are wonderfully smooth and well blended. This is where the magic of room temperature ingredients shines, ensuring a lump-free base. Add the eggs (also at room temperature), vanilla extract, 2 tablespoons of flour, and the baking powder. Mix well until everything is thoroughly incorporated. Finally, blend in 1 tablespoon of fresh lemon zest and the fresh lemon juice, pouring the vibrant mixture over your warm, pre-baked crust.
Bake and Chill to Perfection
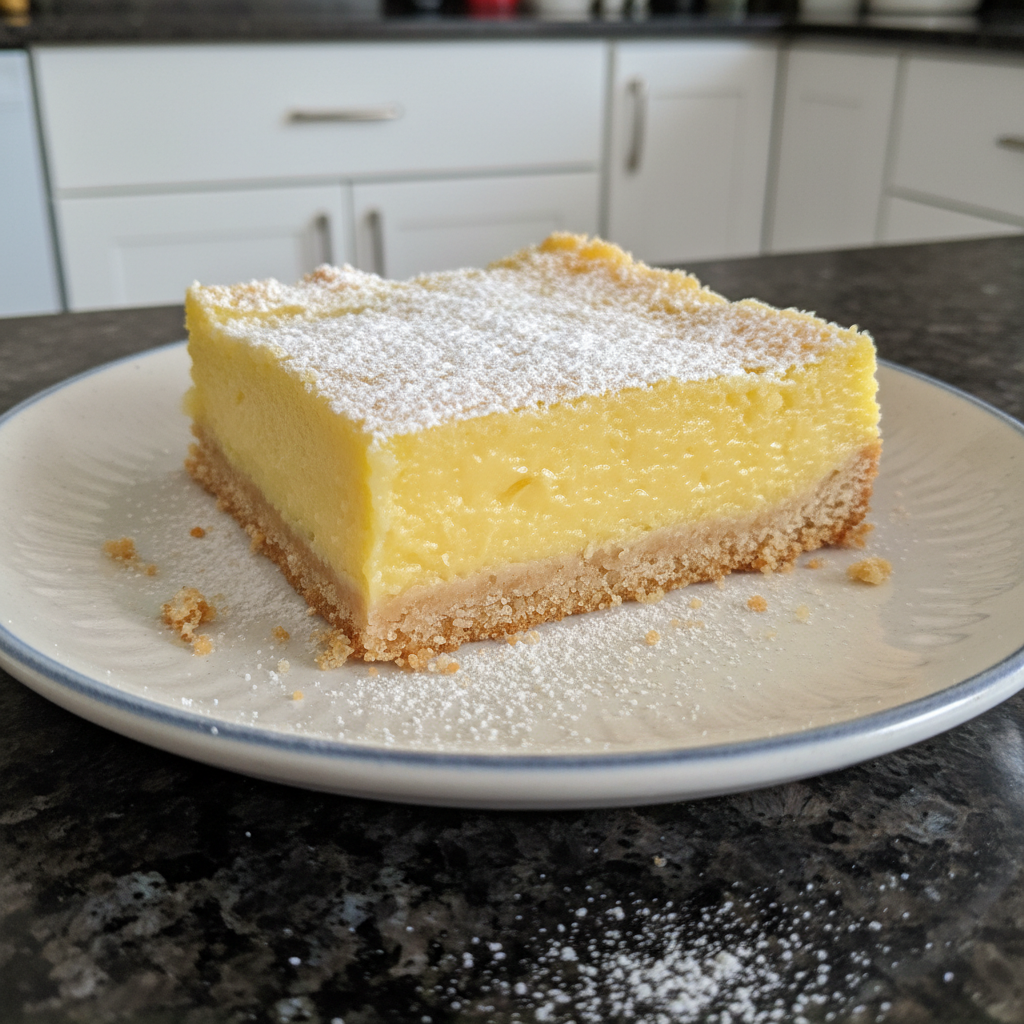
Carefully transfer the pan back to the oven. Bake for 25 to 30 minutes, or until the center is just set with a slight jiggle. The filling should look mostly firm but not completely solid. Over-baking can lead to a dry filling, so watch it closely! Once baked, remove the pan from the oven and allow the bars to cool completely on a wire rack. This patience is key! After cooling, cover the pan and refrigerate the creamy lemon bars for at least 2 hours, but preferably overnight. Trust me, these bars truly improve with time as the flavors meld and the texture sets. Just before cutting into squares to serve, sprinkle them with powdered sugar and the remaining 2 tablespoons of grated lemon peel for a beautiful, aromatic finish.
Mastering Your Lemon Bars: Key Techniques & Ingredient Science
Understanding the “why” behind each step and ingredient is what truly elevates you from a baker to a pastry artist. Let’s dive into some of the science and techniques for perfect creamy lemon bars.
The Science of the Filling
The filling is a delicate balance of ingredients working in harmony to create that signature creamy, tangy texture.
- Flour: The small amount of flour added to the cream cheese mixture isn’t just for bulk. It’s crucial for providing structure to the custard-like filling. It helps thicken the mixture and prevents it from curdling or becoming too runny during baking, ensuring a smooth, sliceable bar.
- Baking Powder: This leavening agent might seem surprising in a bar recipe, but a touch of baking powder gives the filling a slight lift and creates a more tender, less dense texture. It contributes to a delicate, melt-in-your-mouth feel.
- Cream Cheese & Eggs: These two are the foundation of the filling’s luxurious custard texture. The eggs, especially when at room temperature, help create a stable emulsification with the fats in the cream cheese, leading to an incredibly smooth and creamy consistency. They bind the mixture together and set beautifully as they bake.
Perfect Zesting
Zesting properly extracts the flavorful oils from the lemon peel without incorporating any bitterness. My top tips for zesting lemons efficiently and safely:
- Choose the Right Tool: A fine grater or a microplane is your best friend here. These tools create tiny, aromatic shavings that disperse beautifully through the filling.
- Gentle Touch: Only grate the bright yellow part of the lemon. The white pith underneath is bitter and will detract from your lemon bars. Rotate the lemon as you zest, stopping as soon as you see any white.
- Freshness First: Always zest your lemons just before you need them for maximum aroma and flavor.
Choosing Your Pan
The right pan can make a difference in even baking and easy removal.
- Ideal Pan Materials: I prefer using a metal 8-inch square baking pan for these creamy lemon bars. Metal pans conduct heat more efficiently, leading to a more evenly baked crust and filling. While glass pans can be used, they heat up and cool down slower, which might require slight adjustments to baking time.
- Easy Removal is Key: Always line your pan with foil or parchment paper, leaving an overhang on the sides. This creates “handles” that allow you to lift the entire batch of cooled bars out of the pan effortlessly, making cutting clean and simple.
Pro Tips & Troubleshooting
Achieving bakery-quality creamy lemon bars is all about technique and avoiding common pitfalls. Here are my expert tips and how to dodge those baking blunders.
Pro Tips for Success
- For a Flaky Crust: To truly maximize the tender, crumbly texture of your brown butter Nilla wafer crust, grate your cold (or even slightly frozen) butter directly into the dry ingredients. This distributes the butter more evenly and keeps it cold, resulting in a delightfully flaky crumb.
- Room Temperature Reigns: Always, always use room temperature eggs and cream cheese. This ensures they emulsify smoothly and completely, leading to a perfectly lump-free, silky filling that bakes evenly.
- Line Your Pan: I can’t stress this enough! Lining your 8-inch square baking pan with foil or parchment paper with an overhang makes lifting the entire batch out incredibly easy, allowing for clean, precise cuts.
- Patience is Key: While it’s tempting to dive in, these creamy lemon bars truly improve with time when refrigerated, ideally overnight. This allows the filling to fully set, the flavors to meld, and the crust to firm up beautifully.
- Dust Just Before Serving: To prevent the powdered sugar from melting into the moist bars, sprinkle it and the remaining lemon peel only just before you’re ready to cut and serve.
Common Mistakes to Avoid
- Skipping Fresh Citrus: Using bottled lemon juice or dried zest is a cardinal sin in my book for lemon bars. They simply lack the vibrant, fresh, and complex acidity that defines a truly great lemon bar.
- Fat-Free Cream Cheese: While it might seem like a healthier option, fat-free cream cheese will compromise the luxurious, rich, and creamy texture of the filling. Stick to full-fat or 1/3-less fat for optimal results.
- Warm Butter in Crust: If your butter is too warm, it will melt into the dry ingredients prematurely, leading to a less tender and more dense crumb rather than the desired flaky texture for your Nilla wafer crust.
- Under-Chilling: Not refrigerating the bars for long enough (a minimum of 2 hours, but ideally overnight) will result in a soft, unset filling and bars that are difficult to cut cleanly. The chilling time is crucial for both setting and flavor development.
- Over-Baking the Filling: Keep an eye on your oven! Over-baking the filling can lead to a dry, cracked, and less creamy interior. Bake only until the center is just set with a slight jiggle, resembling a delicate custard.
Serving & Storage
Once your creamy lemon bars are perfectly chilled, it’s time to enjoy and think about how to keep them fresh!
Serving Ideas
- Elegant Garnishes: My favorite way to finish these bars is by dusting them with a cloud of powdered sugar and a sprinkle of fresh grated lemon peel just before serving. It adds both beauty and a burst of aroma.
- Complementary Pairings: These tangy treats are wonderful on their own, but they also shine alongside fresh berries like raspberries or blueberries. For an extra special touch, serve them with a scoop of vanilla bean ice cream or a dollop of freshly whipped cream.
- Occasion Perfect: These lemon bars are versatile desserts. They’re ideal for summer barbecues, potlucks, receptions, brunches, or any gathering where a light, tangy, and refreshing dessert is desired.
- Clean Cuts: For best practices for portioning and cutting bars cleanly, use a warm, sharp knife. Heat your knife under hot water, wipe it dry, and then make your cuts. Wipe the blade clean between each slice for professional-looking squares.
Storage and Make-Ahead
- Refrigerator Storage: Store any leftover creamy lemon bars squares in an airtight container in the refrigerator for up to 3-5 days. As I mentioned, they often improve with time as the flavors continue to develop and meld.
- Freezer Storage: Creamy lemon bars can be frozen for longer-term storage! Once the bars are completely chilled and firm, cut them into individual squares. Wrap each square tightly in plastic wrap, then wrap again with foil to prevent freezer burn. Store the wrapped bars in an airtight freezer-safe container for up to 2-3 months. To thaw, simply transfer them to the refrigerator overnight.
- Make-Ahead Tips: These lemon bars are an excellent make-ahead dessert! You can prepare them a day or two in advance of an event, allowing them ample time to chill and for the flavors to fully develop. This makes entertaining a breeze!
Conclusion
I hope you’re as excited as I am about these creamy lemon bars with their incredible brown butter Nilla wafer crust. This recipe truly offers a unique and satisfying twist on a beloved classic, delivering a perfect balance of tangy lemon and rich, creamy sweetness. Even if you’re a beginner in the kitchen, you can absolutely achieve spectacular results with these easy-to-follow steps and expert tips.
Don’t hesitate to make this recipe your own—perhaps try it with lime or orange for a different baking experience! I encourage you to whip up a batch, share your creations, and savor every bright, zesty bite. Happy baking!
FAQ
What makes these lemon bars “creamy” compared to traditional ones?
These lemon bars are “creamy” due to the addition of cream cheese in the filling. Traditional lemon bars typically use a simple lemon custard, while our recipe creates a richer, smoother, and more luxurious texture akin to a cheesecake bar with a pronounced tang.
Can I make these creamy lemon bars ahead of time and how should I store them?
Yes, creamy lemon bars are an excellent make-ahead dessert! You can prepare them 1-2 days in advance. Once cooled, cover the pan or store cut squares in an airtight container and refrigerate. The flavors often deepen and improve with time.
Can creamy lemon bars be frozen for longer storage?
Absolutely! Once the bars are completely chilled and firm, cut them into squares. Wrap each square individually in plastic wrap, then in foil, and store in an airtight freezer-safe container for up to 2-3 months. Thaw them overnight in the refrigerator before serving.
What type of lemon is best for achieving the perfect flavor in lemon bars?
For the best flavor, I highly recommend using fresh, ripe Eureka or Lisbon lemons. Their vibrant lemon juice and fragrant lemon zest provide the ideal balance of tartness and aroma for these lemon bars.
How long do creamy lemon bars last in the refrigerator?
When stored in an airtight container in the refrigerator, these creamy lemon bars will stay fresh and delicious for 3-5 days.
What are the best techniques for cutting and serving creamy lemon bars cleanly?
For clean cuts, ensure the bars are thoroughly chilled (preferably overnight). Use a sharp knife, heating the blade under hot water and wiping it dry between each cut. The foil or parchment paper overhang also allows you to lift the entire batch out of the pan for easier slicing.
Why do these bars improve with time after refrigeration?
Refrigeration allows the flavors in the filling, especially the lemon and cream cheese, to fully meld and deepen. It also helps the filling set completely, resulting in a firmer, more stable texture that is easier to cut and enjoy, creating a more harmonious taste experience.
Why are fresh lemon juice and zest recommended over bottled/dried?
Fresh lemon juice provides a bright, natural acidity and vibrant flavor that bottled juice simply cannot replicate. Fresh lemon zest contains aromatic oils that contribute a profound depth of lemon essence, which dried zest largely lacks.
What essential equipment do I need to make these lemon bars?
You’ll need an 8-inch square baking pan, foil or parchment paper, a pastry blender (or two knives), an electric mixer, a fine cheese grater or microplane for zesting, and several mixing bowls. An oven is, of course, essential for baking!
Creamy Lemon Bars: The Ultimate Tangy Treat
Ingredients
Equipment
Method
- Preheat your oven to 350ºF. Line an 8-inch square baking pan with foil, ensuring the ends extend over the sides of the pan for easy removal later. Give it a light spray with non-stick spray and set it aside.
- In a medium bowl, combine the finely crushed Nilla Wafer crumbs, ½ cup flour, and the firmly packed brown sugar. Chop your cold butter into small pieces. Use a pastry blender to cut the butter into the crumb mixture until it resembles coarse crumbs. Press the crumb mixture firmly and evenly onto the bottom of your prepared pan. Bake this fragrant crust for 15 minutes, allowing those nutty brown butter notes to develop beautifully.
- While the crust is baking, prepare the luscious filling. In a large mixing bowl, beat the room temperature cream cheese and granulated sugar with an electric mixer on medium speed until they are wonderfully smooth and well blended. Add the eggs (also at room temperature), vanilla extract, 2 tablespoons of flour, and the baking powder. Mix well until everything is thoroughly incorporated. Finally, blend in 1 tablespoon of fresh lemon zest and the fresh lemon juice, pouring the vibrant mixture over your warm, pre-baked crust.
- Carefully transfer the pan back to the oven. Bake for 25 to 30 minutes, or until the center is just set with a slight jiggle. Once baked, remove the pan from the oven and allow the bars to cool completely on a wire rack. After cooling, cover the pan and refrigerate the creamy lemon bars for at least 2 hours, but preferably overnight. Just before cutting into squares to serve, sprinkle them with powdered sugar and the remaining 2 tablespoons of grated lemon peel for a beautiful, aromatic finish.


