 Skip to content
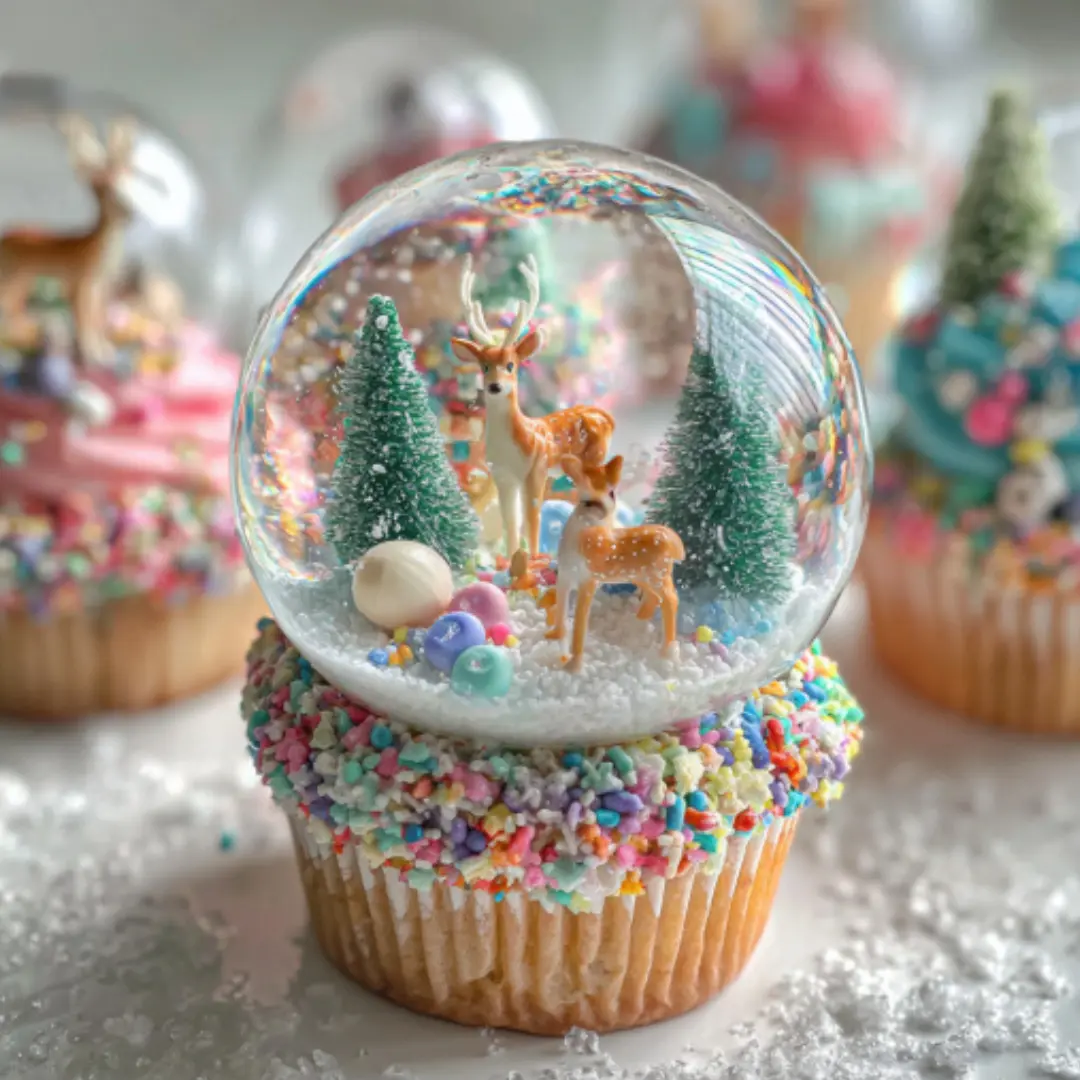
 Get ready to transform ordinary cupcakes into extraordinary edible art with these charming Snow Globe Cupcakes! Imagine tiny, magical winter scenes encased in shimmering, transparent domes. This guide makes creating these impressive, delicious treats simple. Delight your family and friends with a dessert that brings a sprinkle of holiday cheer to any celebration.
Why You’ll Love These Snow Globe Cupcakes
- Stunning Edible Art: Craft beautiful, clear gelatin domes that resemble actual snow globes.
- Perfect for Holidays: These delightful snow globe desserts are a showstopper for Christmas parties or winter gatherings.
- Impress Your Guests: You’ll receive endless compliments on these unique and enchanting treats.
- Fun & Customizable: It’s a fantastic, kid-friendly activity with endless possibilities for mini edible scenes.
- Beginner-Friendly: Our step-by-step instructions ensure success, even for first-time bakers and crafters.
Ingredients
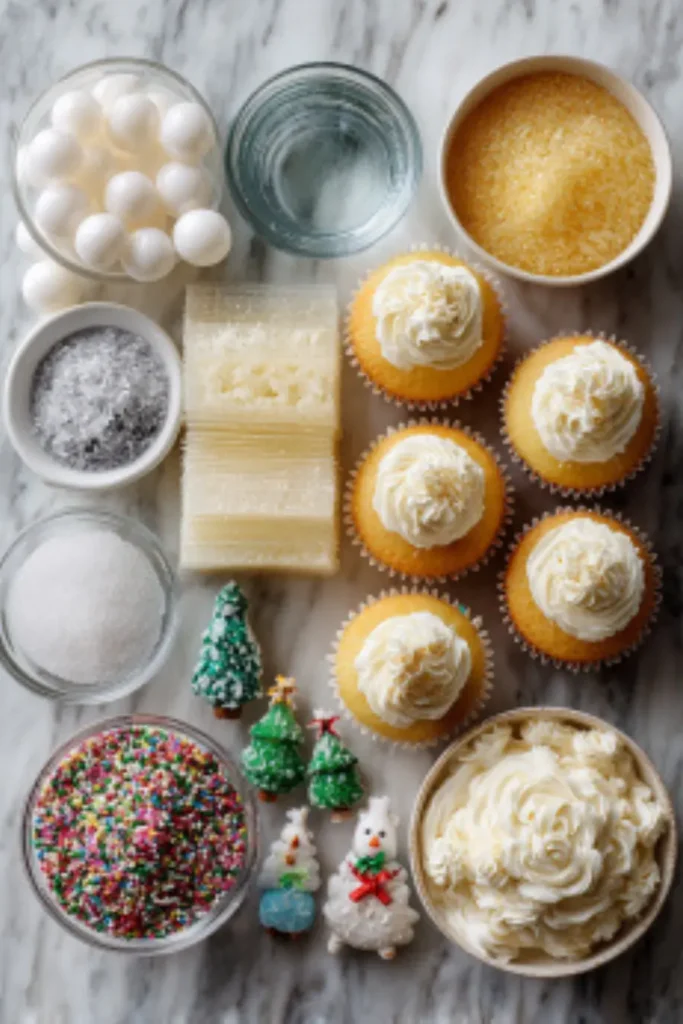
Making incredible Snow Globe Cupcakes starts with gathering a few simple components for your edible winter wonderland treats.
For the Gelatin Globes:
- 10 Platinum gelatin sheets
- 8 Mini or water balloons (Regular balloons work in a pinch)
- 2 tablespoons Granulated sugar (optional, for extra sparkle)
- 1 cup Water (ice water for soaking, tap for melting)
For the Cupcakes & Decorations:
- 8 Baked cupcakes (store-bought or your favorite homemade recipe)
- 1 batch Buttercream frosting (enough for 8 cupcakes)
- Edible sprinkles (white, silver, or blue for “snow”)
- Miniature edible decorations (small candy trees, chocolate deer, mini gumdrop snowmen, or other festive candies)
- Ice water (for soaking gelatin)
Notes & Substitutions:
Platinum gelatin sheets create the clearest, strongest globes. While powdered gelatin can work, sheets generally offer superior results and are easier to handle for this specific technique. To save time, don’t hesitate to use pre-made cupcakes and store-bought frosting. Get creative with your edible decorations; small candies, sugared cranberries, or even tiny cookie pieces work wonderfully!
According to culinary experts, platinum gelatin sheets provide a clearer and more transparent product compared to powdered gelatin. Learn more about the differences between gelatin sheets and powdered gelatin.
Equipment
You’ll need a few basic tools to craft your perfect gelatin globes and assemble your Snow Globe Cupcakes.
- Small saucepan or Instant Pot (for creating a double boiler)
- Heat-proof bowl (for melting gelatin over the double boiler)
- String and 8 clothespins (for hanging and drying balloons; tie string from a cabinet or a high point)
- Scissors (for trimming globes)
- Cupcake liners (if baking from scratch)
- Mixing bowls, whisk or electric mixer (if making homemade cupcakes and frosting)
Instructions
Crafting these holiday treats is a fun, two-part process. Follow these steps carefully to create beautiful Snow Globe Cupcakes.
Part 1: Preparing Your Edible Snow Globes
- Soak Gelatin Sheets: Submerge the platinum gelatin sheets in a bowl of ice water for 5-10 minutes. They should become soft and pliable. This rehydrates the gelatin, preparing it for melting.
- Inflate Balloons: Blow up your mini or water balloons to the desired size for your globes. Remember, smaller balloons are easier to manage and less likely to burst. Tie them securely.
- Melt Gelatin Mixture: Create a double boiler by placing a heat-proof bowl over a small saucepan filled with simmering water. Squeeze excess water from the soaked gelatin sheets and add them to the heat-proof bowl. Add 1 cup of tap water and the optional granulated sugar. Stir constantly until the gelatin completely dissolves and the mixture is clear and smooth.
- Cool Gelatin: Remove the bowl from the heat. Let the gelatin mixture cool down to lukewarm. It should be comfortable to touch, but not cold. If it’s too hot, it can pop the balloons. If it’s too cool, it will set too quickly.
- Dip Balloons: Lightly spray each balloon with cooking spray, then wipe off any excess, leaving just a very thin film. This helps the gelatin release later. Holding the tied end, dip a balloon into the lukewarm gelatin mixture, coating about halfway up. Let any excess drip off, then dip a second time for a stronger globe.
- Hang and Dry: Immediately hang the dipped balloons upside down using clothespins on a string. Ensure they hang freely without touching anything. Allow them to dry completely at room temperature for at least 24 hours. This long drying time is crucial for sturdy, clear globes.
- Remove Globes: Once the gelatin is completely dry and firm, carefully snip a small hole in the balloon near the knot. Slowly deflate the balloon. The gelatin should separate easily. Use scissors to gently trim any uneven edges around the base of your edible globes.
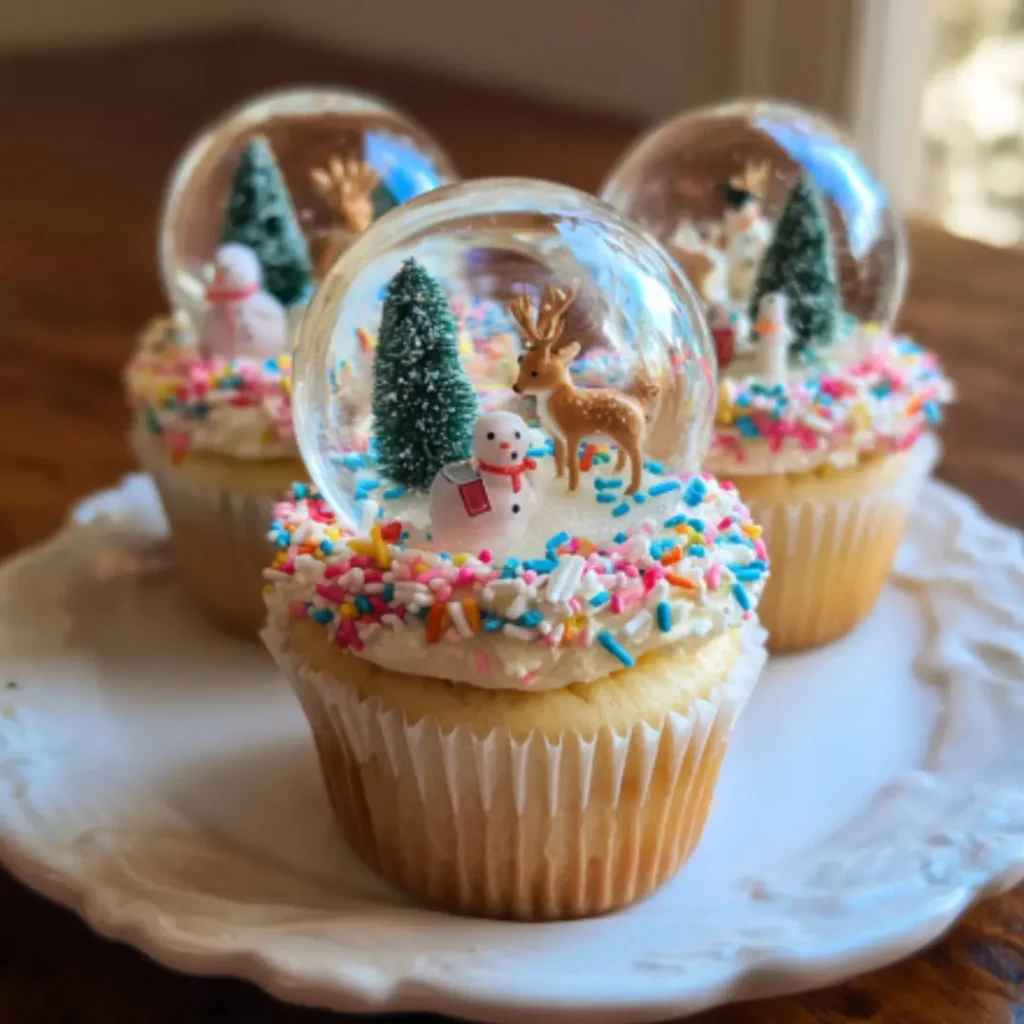
Part 2: Assembling Your Snow Globe Cupcakes
Once your globes are ready, assembling your beautiful Snow Globe Cupcakes is simple and fun.
- Bake Cupcakes (Optional): If you haven’t already, bake your favorite cupcake recipe according to instructions. Ensure they are completely cool before frosting. You can also use good quality store-bought cupcakes.
- Frost Cupcakes: Apply a generous layer of buttercream frosting onto each cooled cupcake. This creates the “snowy” base for your scene. You want enough frosting for decorations to sit securely.
- Decorate Base: Gently place your miniature edible decorations (trees, deer, candies) onto the frosted cupcake. Arrange them to create a festive winter scene inside where the globe will sit. Sprinkle edible glitter or white sprinkles around the base for a snowy effect.
- Add Gelatin Globe: Carefully pick up one of your edible gelatin globes. Gently place it over your decorated cupcake scene, pressing lightly into the frosting to secure it. Repeat for all your Snow Globe Cupcakes.
Pro Tips & Troubleshooting
Achieving perfect edible globes for your Snow Globe Cupcakes takes a little patience. For best results, allow a full 24-hour drying time for your gelatin globes. This ensures they are strong and clear, preventing them from collapsing or sticking. Always make sure your melted gelatin is lukewarm, not hot, before dipping balloons. Hot gelatin will pop the balloons, while cold gelatin will set too quickly and create lumps.
If your globes turn out sticky, they likely didn’t dry long enough; try letting them hang for another 12-24 hours. Cloudy globes often mean the gelatin mixture wasn’t completely dissolved or wasn’t stirred enough. For easier release, consider pre-washing and drying your mini balloons before lightly spraying with cooking spray.
Serving, Storage & Variations
These enchanting Snow Globe Cupcakes are best displayed and served immediately to showcase their magical quality. The gelatin globes are delicate and look their best shortly after assembly.
For optimal freshness and to prevent foodborne illness, it’s important to follow proper food safety guidelines when storing homemade baked goods. Review essential food safety tips for baking to ensure your treats are safe and delicious.
Storage:
If you need to store finished cupcakes briefly, keep them at room temperature in a cool, dry place for a few hours. For longer storage, refrigerate them in an airtight container for up to 1-2 days. The globes might become slightly tacky or cloudy over time due to moisture, so fresh is always best.
Variations:
Get creative with your scenes! Use sugared rosemary sprigs with fresh cranberries for a natural winter look. These clear edible globes also work beautifully on top of frosted cookies or brownies, making these delightful snow globe treats incredibly versatile for any occasion.
Nutrition Information
While specific nutritional values for homemade Snow Globe Cupcakes can vary widely based on ingredients and portion sizes, we provide a general estimate. This recipe primarily features sugar, fat from frosting, and the protein from gelatin. It’s a festive treat meant for enjoyment, not a health food.
| Component | Per Cupcake (Estimate) |
|---|---|
| Calories | 250-350 |
| Total Fat | 12-18g |
| Saturated Fat | 7-10g |
| Carbohydrates | 35-50g |
| Sugars | 25-40g |
| Protein | 2-4g |
Note: This is an estimated nutritional breakdown and will vary based on specific brands and ingredients used for the cupcakes and frosting.
Conclusion
Creating these magical Snow Globe Cupcakes is a truly rewarding experience, perfect for adding a touch of enchantment to your holiday season. From dipping balloons to decorating miniature winter scenes, each step brings you closer to a festive masterpiece. Don’t be afraid to experiment with your designs and let your creativity shine! We encourage you to try this delightful craft and share your unique creations with us. Leave a comment below and tell us how your edible snow globes turned out!
FAQ
Can I use powdered gelatin for these Snow Globe Cupcakes?
While you can try, platinum gelatin sheets are highly recommended for their clarity and strength, which are crucial for stable, transparent globes. Powdered gelatin often results in cloudier or less durable globes.
How long do snow globe cupcakes last?
The assembled cupcakes are best enjoyed within 24 hours. The gelatin globes can become a little tacky or absorb moisture over time, affecting their appearance.
Can I make the globes ahead of time?
Yes, you can prepare the gelatin globes up to 3-4 days in advance. Store them carefully in an airtight container at room temperature, away from moisture, until you are ready to assemble your cupcakes.
What if my globes aren’t clear?
Cloudy globes usually indicate the gelatin wasn’t fully dissolved or the mixture cooled too quickly. Ensure you stir thoroughly and maintain a consistent, lukewarm temperature during dipping.
Are these safe for kids?
Yes, the gelatin globes are completely edible! Just ensure the mini decorations used inside are also edible and appropriately sized for safe consumption, especially for very young children.
Snow Globe Cupcakes
Ingredients
Equipment
Method
- Submerge the platinum gelatin sheets in a bowl of ice water for 5-10 minutes until soft and pliable.
- Blow up mini balloons to desired size, tie them securely.
- Create a double boiler with a heat-proof bowl over simmering water. Add softened gelatin, 1 cup tap water, and optional sugar. Stir until fully dissolved and smooth.
- Let gelatin mixture cool to lukewarm — comfortable to touch but not cold or hot.
- Lightly spray balloons with cooking spray, wipe off excess, and dip halfway into gelatin. Let drip and dip again for strength.
- Hang dipped balloons upside down using clothespins and string. Let dry for at least 24 hours.
- Snip balloons to release air and gently peel away from gelatin. Trim edges with scissors.
- If needed, bake cupcakes and let cool completely.
- Frost cupcakes with a generous layer of buttercream to create the snowy base.
- Add edible decorations like mini trees or candies. Sprinkle glitter or sprinkles for snow.
- Carefully place a gelatin globe over each decorated cupcake, pressing slightly into the frosting.


