Skip to content
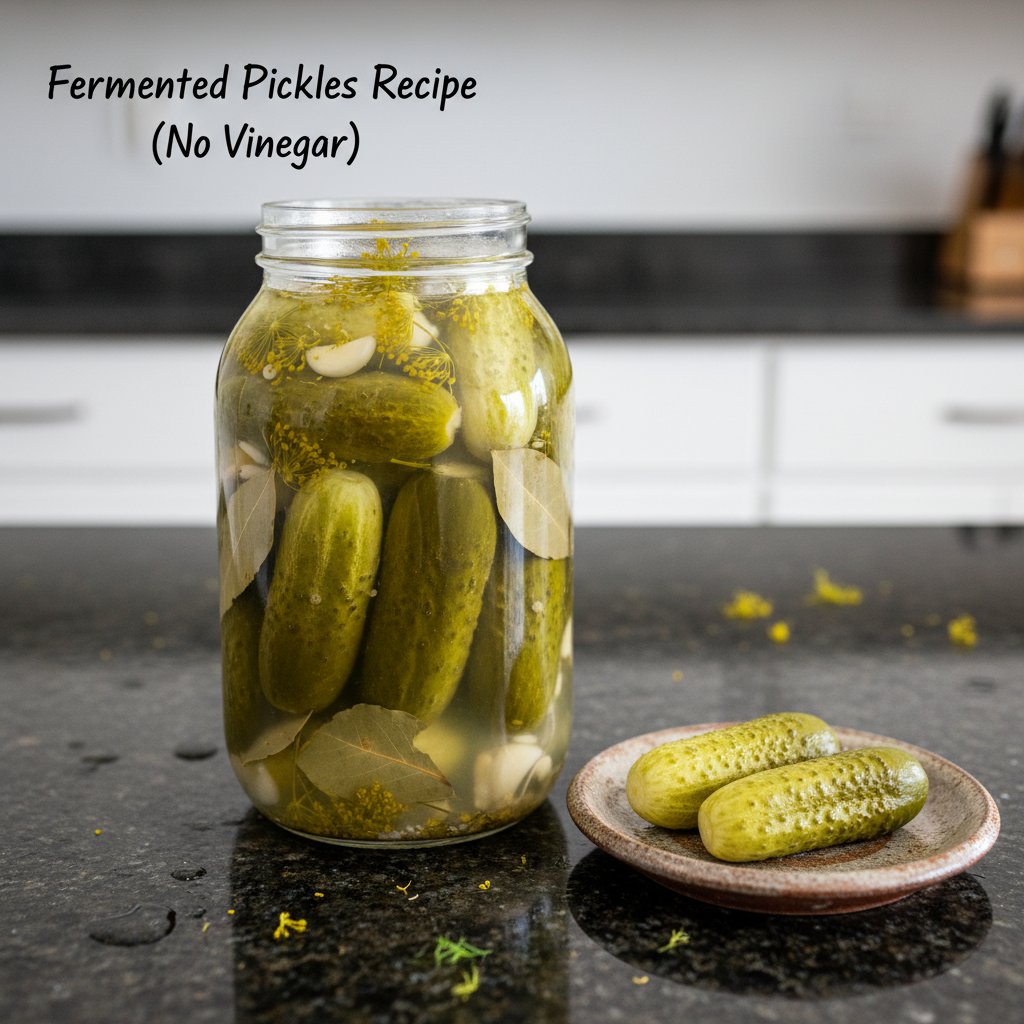
 There’s nothing quite like the crisp, tangy bite of a homemade pickle, especially when it’s bursting with probiotic goodness and doesn’t rely on a drop of vinegar. If you’ve been dreaming of crafting your own gut-healthy, old-fashioned fermented pickles, you’ve come to the right place! In my kitchen, making this Fermented Pickles Recipe (No Vinegar) is a truly rewarding experience, and I’m here to guide you through every step. We’ll cover everything from selecting the best cucumbers to my secret for achieving ultimate crunch and troubleshooting any bumps along the way. Get ready to transform simple ingredients into a fermented masterpiece!
Why You’ll Love This Recipe: The Secret to Max Crunch!
I know what you’re thinking – how can I guarantee truly crunchy fermented pickles without vinegar? Well, I’ve got a unique twist that will change your pickle game forever. The secret lies in a careful **Blossom End Trim for Max Crunch** and an optional, quick ice bath for cut cucumbers. Cucumbers naturally contain pectinase enzymes, especially at the blossom end, which can cause softening during fermentation. By thoroughly trimming both ends, we minimize these enzymes. For any cucumbers you slice into spears, a short 15-30 minute ice bath before packing works wonders, rapidly firming up their cell walls for superior crispness!
Beyond that incredible crunch, you’ll love this Fermented Pickles Recipe (No Vinegar) for so many reasons:
- Gut Health Powerhouse: This isn’t just a snack; it’s a superfood! Through lacto-fermentation, we cultivate beneficial bacteria that transform into natural probiotics, essential for a healthy gut microbiome and overall well-being.
- Old-Fashioned Flavor: Forget those one-note vinegar pickles! Traditional fermentation delivers a deep, zesty, tart, and wonderfully complex flavor profile that simply can’t be replicated. It’s the taste of tradition in every bite.
- Surprisingly Easy & Rewarding: While fermentation might sound intimidating, I promise you, this recipe makes it straightforward. You’ll find immense satisfaction in creating your own wholesome, flavor-packed pickles right at home.
Ingredients Needed

Gathering your ingredients is the first step to delicious homemade fermented pickles. Make sure to choose fresh, high-quality items for the best results.
- Cucumbers (enough to fill the jar) (Small pickling cucumbers are best)
- 1¼ tsp Coriander Seeds (whole)
- 5-10 Cloves
- 2 cloves Garlic (sliced)
- handful Dill Flowers or Fresh Dill Weed (sub with dill seeds if you don’t have fresh dill available.)
- 5 Bay Leaves
- 1 Rounded tbsp Fine Salt (use a salt that not contain anti-caking agents.)
- 1 quart water
Ingredient Notes & Substitutions
Understanding your ingredients is key to successful fermentation. Here are my notes on each component:
- Cucumbers: For the best Fermented Pickles Recipe (No Vinegar), I highly recommend using small pickling cucumbers. These varieties are naturally firmer and have fewer seeds. Garden or farmer’s market cucumbers are ideal because they retain their natural beneficial bacteria; store-bought cucumbers are often power-washed, removing these crucial microbes. If you’re buying from a farmer, always ask if they’ve been washed! Whole cucumbers also tend to retain their firmness better than slices or spears.
- Salt: This is critical! Always use a fine salt without anti-caking agents. Pure sea salt, pickling salt, or kosher salt (ensure it’s additive-free) are excellent choices. Anti-caking agents and iodine can interfere with the delicate fermentation process, leading to failure.
- Dill: Fresh is best, whether it’s dill flowers or dill weed, for that authentic flavor. If fresh isn’t available, dill seeds are a good substitute; you’ll add them to the bottom of the jar.
- Tannins (Bay Leaves): Don’t skip the bay leaves! They contain tannins, which play a crucial role in maintaining pickle crispness during fermentation. You can also experiment with other tannin sources like clean grape leaves or oak leaves for extra firmness without negatively altering the taste.
- Water: The quality of your water matters significantly. Tap water often contains chlorine or chloramines, which can inhibit or even kill the beneficial bacteria needed for lacto-fermentation. I recommend using filtered water. Alternatively, you can boil tap water for 15-20 minutes and let it cool completely to room temperature; this process helps dissipate the chlorine.

How to Make Crunchy Fermented Pickles
Making your own Fermented Pickles Recipe (No Vinegar) is a simple pleasure. Follow these steps for crunchy, gut-healthy results!
1. Prepare Your Brine
First, let’s get that brine ready! In a clean bowl, combine your 1 rounded tablespoon of fine salt with 1 quart of water. This creates a 2.25% brine concentration, which is perfect for inhibiting unwanted bacteria while allowing our beneficial Lactobacillus to thrive. Stir thoroughly until the salt is completely dissolved. The brine will shimmer with clarity.
2. Clean Your Jars (No Sterilization Needed!)
For fermentation, thorough cleaning is key, but don’t worry about sterilization. Simply wash your mason jars in hot, soapy water and rinse well. Unlike canning, sterilization isn’t required because the fermentation process itself, creating an acidic environment, handles the preservation.
3. Select & Prepare Cucumbers for Max Crunch
Choosing the right cucumbers makes all the difference! Opt for fresh, crisp pickling cucumbers, ideally from a garden or farmer’s market, as they retain natural beneficial bacteria on their skin. Lightly rinse them only if they have visible dirt; never use produce soap or power rinse, as this strips away the microbes vital for fermentation. Now for the crunch secret: thoroughly trim both ends of each cucumber, paying special attention to the blossom end. If you’re slicing your cucumbers into spears, follow this with a 15-30 minute ice bath this rapidly firms their cell walls for exceptional crispness!
4. Layer Aromatics
To infuse your pickles with incredible flavor, start by adding 1¼ tsp of coriander seeds, 5-10 cloves, some fresh dill (or all of your dill seeds if substituting), and 2 sliced garlic cloves to the bottom of your clean jar. This aromatic base will work its magic as the cucumbers ferment.
5. Pack Your Jar
Now, tightly pack your jar with the prepared cucumbers. Remember, whole cucumbers tend to retain their firmness best. As you fill, tuck the 5 bay leaves (for their crispness-enhancing tannins!), more garlic slices, and extra dill between the cucumbers. Pack them in snugly to minimize floating once the brine is added.
6. Leave Headspace & Add Weight
Once your jar is packed, top it off with any remaining dill. Ensure you leave a 2-3 inch (5cm) headspace at the top of the jar. This is crucial because your cucumbers will float, and everything must stay submerged beneath the brine to prevent mold. Place your fermentation weight firmly on top of the cucumbers. Do not skip this step!
7. Pour the Brine
Carefully pour your prepared salt brine over the cucumbers and the fermentation weight. Make sure everything is completely submerged beneath the liquid. This brine acts as a protective shield, guarding your food from mold and other undesirable pathogens.
8. Set Up for Fermentation
Place a loose lid on your jar. This is a clever trick: a loose lid allows the fermentation gases to escape naturally, so you won’t need to “burp” your jar during the process. This keeps the environment stable for your lacto-fermentation.
9. Ferment
Find a spot on your counter, away from direct sunlight, and let your jar sit for 5 to 8 days. Optimal fermentation temperatures are typically between 65-70°F (18-21°C) for firmer pickles. Begin taste-testing daily from day 5 to find your perfect balance of texture and tangy flavor. I don’t recommend fermenting longer than 8 days, as this can lead to a loss of firmness.
10. Post-Fermentation Care
Once your pickles taste just right, remove the fermentation weight with clean hands. You might notice a thin, white film on the surface; this is likely kahm yeast. It’s harmless, though unattractive, and can be easily skimmed off. (I demonstrate this visually in my video.)
11. Store for Longevity
For long-term storage, there’s no need to return the weight. Simply secure the lid tightly on your jar and transfer your delicious Fermented Pickles Recipe (No Vinegar) to the refrigerator. This cold storage is vital for fermented foods, significantly slowing the fermentation process and preserving them for many months, just as a root cellar would in the olden days.
Mastering Fermentation: Brine, Environment & Troubleshooting
Making fermented pickles successfully involves understanding a few key principles beyond just the steps. Let’s dive deeper into the science and common issues.
Understanding Your Brine: The Salt Science
The 2.25% brine concentration used in this Fermented Pickles Recipe (No Vinegar) is crucial. This precise ratio (approximately 22.5 grams of salt per liter of water) is carefully calibrated. It provides enough salt to inhibit undesirable spoilage bacteria while creating the perfect environment for beneficial Lactobacillus bacteria to thrive. These good bacteria produce lactic acid, which lowers the pH, increases acidity, and creates a safe zone against harmful pathogens. Always remember to use pure, additive-free fine salt, as anti-caking agents can disrupt this delicate microbial balance.
Water Quality Matters
I cannot stress enough how important water quality is for successful fermentation. Tap water often contains chlorine or chloramines, which are disinfectants designed to kill bacteria – including the beneficial ones we want for our lacto-fermentation! To avoid this, I always recommend using filtered water. If you only have tap water, you can boil it for 15-20 minutes and then let it cool completely to room temperature before mixing your brine; this effectively dissipates the chlorine.
Environmental Factors for Success
While often overlooked, the environment where you ferment plays a significant role:
- Temperature: As mentioned, an ideal range of 65-70°F (18-21°C) helps create firmer pickles. Warmer temperatures will speed up fermentation but can also lead to softer textures. Cooler temperatures will slow the process down, yielding firmer results but taking longer.
- Light Exposure: Keep your fermenting jars out of direct sunlight. Excessive light can sometimes encourage the growth of unwanted bacteria or algae, and can also degrade some nutrients in your vegetables. A dark cupboard or shaded counter is perfect.
- Humidity: While less critical for jar fermentation, a stable environment generally contributes to more predictable results. Avoid extreme fluctuations.
Troubleshooting Beyond Kahm Yeast
Even with the best practices, issues can sometimes arise. Here’s how to troubleshoot:
- True Mold vs. Kahm Yeast: It’s vital to distinguish between harmless kahm yeast and actual mold. Kahm yeast is typically a thin, white, powdery, or wrinkled film that forms on the surface; it’s not fuzzy and doesn’t have color. True mold, however, is usually fuzzy, often green, black, pink, or blue, and can have a slimy texture. If you see true fuzzy mold, unfortunately, you should discard the entire batch.
- Off-Smells: A healthy ferment should smell pleasantly sour, tangy, and sometimes yeasty. If you detect putrid, sulfuric, rancid, or otherwise unpleasant odors, it’s a strong indication that something has gone wrong, and it’s best to discard the batch.
- Excessively Soft Pickles: This is a common concern for a Fermented Pickles Recipe (No Vinegar). Reasons can include fermenting for too long, a too-warm environment, poor quality or old cucumbers, insufficient salt, or a lack of tannins (like from bay leaves). Our unique blossom end trim also directly addresses this!
- pH & Safety Zone: For optimal safety, a healthy fermented pickle should reach a pH below 4.5. This low pH level ensures the safety zone against harmful pathogens. While not strictly necessary for home fermenters, a pH meter or test strips can be used to monitor this.
Pro Tips & Common Mistakes to Avoid
To ensure your Fermented Pickles Recipe (No Vinegar) turns out perfectly crunchy and flavorful every time, keep these expert tips in mind and learn from common pitfalls.
Pro Tips for Perfect Fermented Pickles
- Embrace the Natural Microbes: Remember, the beneficial bacteria vital for fermentation are naturally present on your cucumber skins. Avoid scrubbing with produce soap or power rinsing, which washes them away. Garden or farmer’s market cucumbers are often best for this reason—ask your farmer about their washing practices!
- Maximize Crunch with Tannins & Our Twist: Boost crispness by adding bay leaves (or grape/oak leaves) for their natural tannins. And don’t forget my unique twist: the blossom end trim combined with an optional ice bath for cut cucumbers is your ultimate weapon against mushy pickles!
- Essential Fermentation Weights: This is non-negotiable! Always use a fermentation weight to keep your cucumbers fully submerged beneath the brine. This prevents exposure to air, which is the primary cause of mold and spoilage during lacto-fermentation.
- Loose Lids for Gas Release: To make fermentation easier, simply place a loose lid on your mason jar or use specialized airlock lids. This allows the fermentation gases to escape naturally, eliminating the need to “burp” the jars daily.
- Temperature Control for Texture: Fermenting in a slightly cooler location, ideally between 65-70°F (18-21°C), can slow the fermentation process. This slower pace often results in a firmer, more satisfying crunchiness.
- Taste Test for Perfection: Don’t be afraid to taste! Start sampling your fermented pickles from day 5. This allows you to stop the fermentation precisely when the texture and flavor are perfect for your palate.
Common Mistakes to Avoid
- Washing Away Good Bacteria: Vigorously scrubbing cucumbers with produce soap or power rinsing them will strip away the very beneficial bacteria needed to start fermentation. A light rinse for dirt is all that’s needed.
- Forgetting the Weight: Skipping the fermentation weight is a surefire way to invite mold. Floating vegetables are exposed to air, making them susceptible to spoilage.
- Using the Wrong Salt: Using salt that contains anti-caking agents or iodine can hinder or even completely fail the fermentation process. Always opt for pure, fine salt like pickling salt or additive-free sea salt.
- Over-Fermenting: While taste is personal, fermenting for too long (generally beyond 8 days for pickles) can lead to excessively soft, mushy pickles that lose their delightful crunch.
- Incorrect Storage: Leaving fermented pickles at room temperature for extended periods after fermentation is complete will lead to spoilage. Always transfer them to cold storage in the refrigerator for long-term preservation.
- Suboptimal Tannin Sources: While tannins are great, avoid using black or green tea bags as a source. These can impart unwanted, sometimes bitter, flavors to your fermented pickles. Stick to bay, grape, or oak leaves.
Serving & Storage Suggestions
Once you’ve successfully made your Fermented Pickles Recipe (No Vinegar), it’s time to enjoy them! Here are some of my favorite ways to savor these tangy treats and keep them fresh.
Creative Ways to Enjoy Your Fermented Pickles
- Classic Snack & Side: The simplest way is often the best! Grab a pickle straight from the jar for a probiotic-rich snack, or serve them as a tangy side to complement any meal.
- Sandwiches & Burgers: Sliced fermented pickles add a fantastic zesty, crunchy contrast to sandwiches and burgers. Their bright flavor cuts through richness beautifully.
- Salad Enhancer: Dice or slice them into your favorite salads. They boost flavor, add a satisfying crunch, and, of course, provide those beneficial microbes.
- Low-Carb Pickle Wraps: Get creative with pickle wraps! Simply wrap slices of your fermented pickles in deli meats or large lettuce leaves for a delicious, low-carb snack.
- Homemade Relish & Salsa: Chop them finely to make a vibrant homemade relish – perhaps with a touch of mustard and onion. They also make an exciting addition to fresh salsa with tomatoes, onions, and cilantro.
- Utilize the Brine: Don’t discard that precious pickle juice! It can be a flavorful base for salad dressings, a tangy marinade for meats or vegetables, or even a healthy shot for an extra probiotic boost.
Optimal Storage for Long-Lasting Freshness
- Immediate Cold Storage: Once your fermented pickles have reached your desired flavor and texture, it’s crucial to transfer them to the refrigerator immediately. Secure the lid tightly on the jar.
- Longevity: Properly stored, your homemade Fermented Pickles Recipe (No Vinegar) will last for many months in the refrigerator often up to 6 months or even longer!
- Understanding Cold Storage: Cold storage (refrigerator temperatures of 38-45°F / 3-8°C) is essential because it significantly slows down the fermentation process. This prevents the pickles from becoming overly soft or spoiling, mimicking the traditional function of a root cellar.
- No Freezing: I don’t recommend freezing fermented pickles. Freezing can destroy their crisp texture, turning them mushy upon thawing.
Conclusion
There you have it your comprehensive guide to creating the most delicious and crunchy Fermented Pickles Recipe (No Vinegar) right in your own kitchen! We’ve unlocked the secret to superior crunchiness with our unique blossom end trim and explored the incredible gut health benefits that come from these probiotic powerhouses. Making fermented pickles is an accessible and deeply rewarding skill, perfect for home cooks of all levels. I encourage you to try this recipe, experiment with subtle flavor variations, and get creative with the many serving ideas. Happy fermenting, and don’t forget to share your amazing creations with me!
FAQ: Your Fermented Pickle Questions Answered
What is the difference between vinegar pickles and fermented pickles?
The main difference lies in their preservation method. Vinegar pickles use an acidic vinegar brine to preserve vegetables, resulting in a tart, sharp flavor. Fermented pickles, like this Fermented Pickles Recipe (No Vinegar), rely on lacto-fermentation. Beneficial bacteria naturally present on the vegetables consume sugars and produce lactic acid, which preserves the pickles and creates a complex, zesty, probiotic-rich food.
How do you ensure fermented pickles stay crunchy and firm?
To ensure maximum crunch, start with fresh, crisp pickling cucumbers. Our unique twist, the blossom end trim, is key, as is the optional ice bath for cut cucumbers. Additionally, adding tannins (like bay leaves or grape leaves), using a fermentation weight to keep everything submerged, and avoiding over-fermentation by controlling fermentation time and temperature are crucial strategies.
How do I know if my fermented pickles are safe to eat?
Healthy fermentation is indicated by bubbling activity, cloudy brine, and a pleasant, sour, tangy aroma. If you see true fuzzy mold (colored green, black, pink, or blue), or detect putrid, sulfuric, or rancid off-smells, the batch has gone bad and should be discarded. Harmless kahm yeast, a thin white film, is normal and doesn’t affect safety. A healthy fermented pickle should also reach a pH below 4.5, indicating a safety zone.
What kind of salt and cucumbers should I use for fermentation?
For salt, always use fine salt without anti-caking agents or iodine (like pickling salt or pure sea salt), as additives can inhibit fermentation. For cucumbers, small pickling cucumbers are best. Opt for those from a garden or farmer’s market, as they retain the natural beneficial bacteria on their skins that are essential for successful lacto-fermentation.
What is kahm yeast, and is it harmful if it appears on my ferment?
Kahm yeast is a common, harmless, white, powdery, or wrinkled film that can form on the surface of your ferment. It’s not mold and does not mean your ferment has gone bad, though it can look unappealing. You can simply skim it off with a clean spoon for aesthetic reasons.
How long should I ferment my pickles, and what are the best storage methods?
I recommend fermenting your pickles for 5 to 8 days. Begin taste-testing daily from day 5 to find your preferred texture and flavor. For long-term preservation, transfer your fermented pickles to cold storage in the refrigerator immediately after fermentation is complete. Properly stored, they will last for many months.
What are the health benefits of fermented pickles?
Fermented pickles are packed with probiotics, which are beneficial bacteria essential for gut health and improved digestion. Through lacto-fermentation, the bioavailability of nutrients increases, and they can also contribute to an increase in B-vitamins, making them a truly healthful addition to your diet.
What is the optimal brine concentration for fermented pickles?
In this recipe for Fermented Pickles Recipe (No Vinegar), we use a 2.25% brine concentration. This specific ratio of salt to water is optimal for balancing flavor, ensuring safety by inhibiting harmful microbes, and encouraging the robust growth of beneficial Lactobacillus bacteria.
Are there any specific cleaning requirements for fermentation jars?
For fermentation jars, washing them thoroughly in hot, soapy water is sufficient. Unlike canning, sterilization is not required for fermentation. The process of lacto-fermentation, where beneficial bacteria create an acidic environment, naturally preserves the food and renders sterilization unnecessary.
Fermented Pickles Recipe (No Vinegar)
Ingredients
Equipment
Method
- In a clean bowl, combine your 1 rounded tablespoon of fine salt with 1 quart of water. This creates a 2.25% brine concentration, which is perfect for inhibiting unwanted bacteria while allowing our beneficial Lactobacillus to thrive. Stir thoroughly until the salt is completely dissolved. The brine will shimmer with clarity.
- Simply wash your mason jars in hot, soapy water and rinse well. Unlike canning, sterilization isn't required because the fermentation process itself, creating an acidic environment, handles the preservation.
- Opt for fresh, crisp pickling cucumbers, ideally from a garden or farmer's market, as they retain natural beneficial bacteria on their skin. Lightly rinse them only if they have visible dirt; never use produce soap or power rinse, as this strips away the microbes vital for fermentation. Thoroughly trim both ends of each cucumber, paying special attention to the blossom end. If you're slicing your cucumbers into spears, follow this with a 15-30 minute ice bath—this rapidly firms their cell walls for exceptional crispness!
- To infuse your pickles with incredible flavor, start by adding 1¼ tsp of coriander seeds, 5-10 cloves, some fresh dill (or all of your dill seeds if substituting), and 2 sliced garlic cloves to the bottom of your clean jar. This aromatic base will work its magic as the cucumbers ferment.
- Tightly pack your jar with the prepared cucumbers. Remember, whole cucumbers tend to retain their firmness best. As you fill, tuck the 5 bay leaves (for their crispness-enhancing tannins!), more garlic slices, and extra dill between the cucumbers. Pack them in snugly to minimize floating once the brine is added.
- Once your jar is packed, top it off with any remaining dill. Ensure you leave a 2-3 inch (5cm) headspace at the top of the jar. This is crucial because your cucumbers will float, and everything must stay submerged beneath the brine to prevent mold. Place your fermentation weight firmly on top of the cucumbers. Do not skip this step!
- Carefully pour your prepared salt brine over the cucumbers and the fermentation weight. Make sure everything is completely submerged beneath the liquid. This brine acts as a protective shield, guarding your food from mold and other undesirable pathogens.
- Place a loose lid on your jar. This is a clever trick: a loose lid allows the fermentation gases to escape naturally, so you won’t need to "burp" your jar during the process. This keeps the environment stable for your lacto-fermentation.
- Find a spot on your counter, away from direct sunlight, and let your jar sit for 5 to 8 days. Optimal fermentation temperatures are typically between 65-70°F (18-21°C) for firmer pickles. Begin taste-testing daily from day 5 to find your perfect balance of texture and tangy flavor. I don't recommend fermenting longer than 8 days, as this can lead to a loss of firmness.
- Once your pickles taste just right, remove the fermentation weight with clean hands. You might notice a thin, white film on the surface; this is likely kahm yeast. It’s harmless, though unattractive, and can be easily skimmed off.
- For long-term storage, there's no need to return the weight. Simply secure the lid tightly on your jar and transfer your delicious Fermented Pickles Recipe (No Vinegar) to the refrigerator. This cold storage is vital for fermented foods, significantly slowing the fermentation process and preserving them for many months, just as a root cellar would in the olden days.