 Skip to content
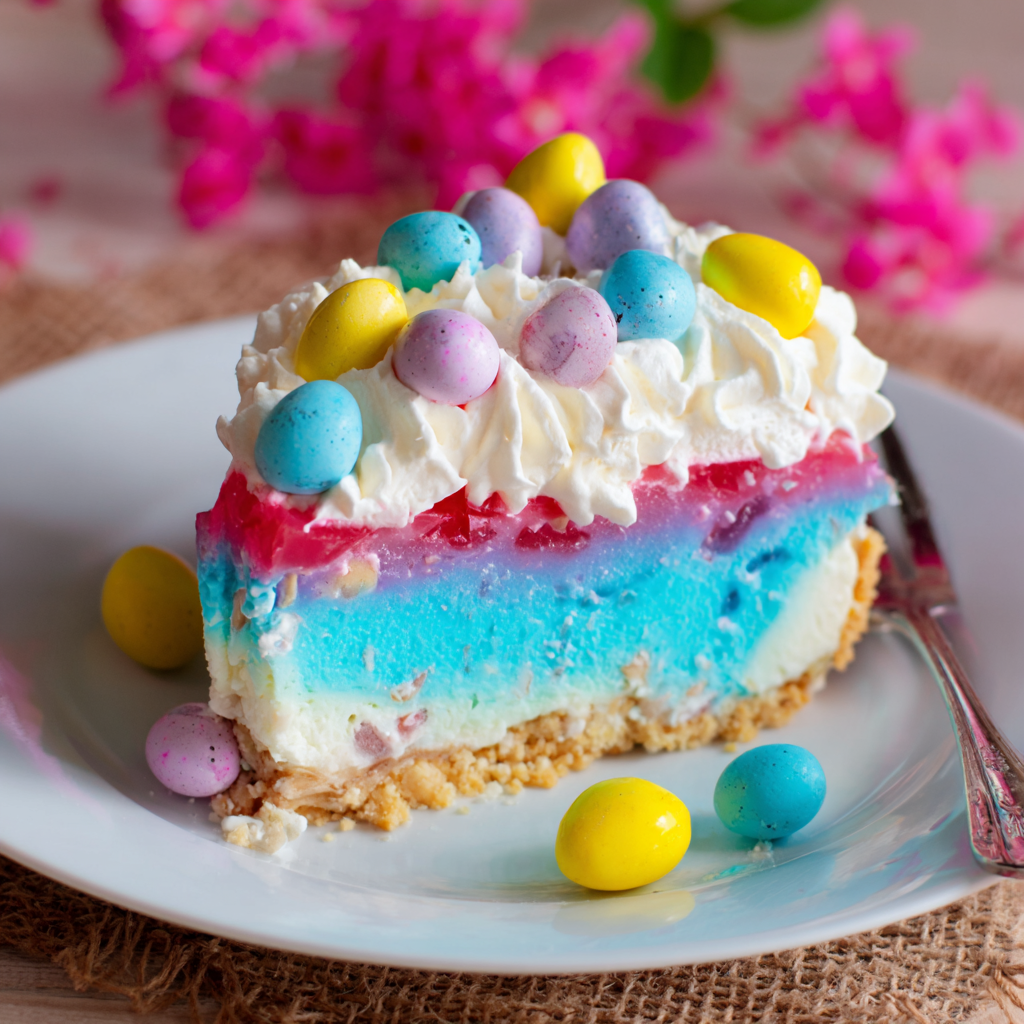
 Welcome to your new favorite holiday dessert! This easy, vibrant Easter Jello cheesecake (no-bake) is simple to create, making it ideal for busy celebrations. Forget the oven and whip up a stunning, layered treat that’s guaranteed to impress. Get ready for a delightful, festive dessert with minimal effort and maximum flavor.
Why You’ll Love This No-Bake Easter Jello Cheesecake
You will adore this incredible dessert for so many reasons. Its convenience alone makes it a holiday hero.
- No Oven Required: Perfect for freeing up oven space during busy holiday cooking.
- Visually Stunning: Features beautiful, pastel layers that scream springtime and festivity.
- Light & Refreshing: Offers a creamy, airy texture that’s perfect after a big meal.
- Kid-Friendly: Both making it and eating it are fun for all ages.
- Minimal Effort, Maximum Impact: Impress your guests with a gorgeous dessert without stress.
Ingredients
Creating your own beautiful Easter Jello cheesecake requires just a few simple items. Gather these ingredients to build your delightful, layered dessert. This recipe uses specific components to ensure that creamy, dreamy texture and vibrant color.
- 1 box Jell-O no-bake Classic cheesecake mix (includes crust and filling)
- Ingredients listed on box to make the cheesecake filling (typically milk and butter)
- Cooking spray
- 3 tablespoons blue Jell-O granules (about ½ of a 3 oz. box)
- 3 tablespoons strawberry or cherry Jell-O granules (about ½ of a 3 oz. box)
- 3 (8 oz.) tubs Cool Whip, divided
- Water (boiling and ice-cold)
- Cadbury Pastel Mini Eggs, for garnish
Notes & Substitutions
Feel free to customize your no-bake Easter dessert. You can experiment with other Jell-O flavors like lime, orange, or grape to create different color palettes. For a homemade touch, prepare a graham cracker crust from scratch using crushed cookies and melted butter. If you prefer, substitute fresh whipped cream for Cool Whip, but note it might be less stable. Any other small Easter candies or sprinkles make excellent garnishes.
Equipment
Having the right tools makes assembling this Easter Jello cheesecake a breeze. These essential items help achieve perfect layers and easy presentation.
- 9-inch springform pan
For best results and easy release, mastering how to use a springform pan effectively is key for delicate desserts like this cheesecake.
- Mixing bowls (at least two large)
- Whisk
- Rubber spatula
- Measuring cups and spoons
- Disposable piping bags and 1M piping tip (optional, for decorating)
Instructions
Follow these clear, simple steps to assemble your stunning Easter Jello cheesecake (no-bake). Each stage ensures distinct layers and a perfectly set dessert.
First, prepare the crust according to the Jell-O no-bake Classic Cheesecake package directions. Press it firmly into a 9-inch springform pan that has been coated with cooking spray. Ensure an even layer.
Next, prepare the classic cheesecake filling layer according to the package instructions. Pour this creamy mixture directly on top of your prepared crust.
Place the pan in the refrigerator to set for about 30 minutes. This initial chill helps firm up the base.
Meanwhile, place the blue Jell-O powder in a large bowl. Pour in 1/3 cup boiling water. Whisk vigorously until all the granules are fully dissolved, which takes about two to three minutes. Add ½ cup ice-cold water and mix until the mixture is cool to the touch.
Gently fold in one (8 oz.) tub of Cool Whip until it is thoroughly combined and no streaks remain. Place this blue mixture bowl in the refrigerator for 30 minutes.
After the 30 minutes, retrieve the cheesecake. Evenly spread the chilled blue mixture onto the partially set cheesecake layer for your second vibrant layer.
Refrigerate the cheesecake again for at least 2 hours before you begin preparing the pink layer. This extended chill is crucial for solid layers.
Next, place the red (strawberry or cherry) Jell-O powder in a separate large bowl. Pour in ½ cup boiling water. Whisk until the granules are fully dissolved. Add ½ cup ice-cold water and whisk until the mixture cools.
Fold in another (8 oz.) tub of Cool Whip until thoroughly combined. Place this pink mixture bowl in the refrigerator for 30 minutes to firm up slightly. After 30 minutes, evenly spread the red mixture on top of the blue layer.
Refrigerate the entire no-bake cheesecake for a minimum of 4 hours, or ideally, overnight. This long chill allows all layers to set completely.
Before serving, carefully remove the springform pan sides. Decorate the top with the remaining (8 oz.) tub of Cool Whip using a piping bag and tip, if desired. Garnish with the pastel chocolate eggs for a festive finish. You can also make individual servings using mini canning jars for a charming presentation.
Pro Tips for the Best No-Bake Easter Jello Cheesecake
Achieving a picture-perfect Easter Jello cheesecake is simple with a few expert tricks. These tips ensure your dessert sets beautifully and tastes amazing.
- Layer Setting: Ensure each Jell-O layer is fully set before adding the next. Understanding how gelatin works as a setting agent helps prevent colors from bleeding and ensures a firm structure.
- Thorough Whisking: Whisk the Jell-O granules completely with boiling water until no crystals remain. This prevents a gritty texture.
- Gentle Folding: Gently fold in the Cool Whip to maintain its airiness. Overmixing can deflate it, leading to a denser layer.
- Ample Chill Time: Chill the assembled cheesecake long enough for clean, sharp slices. Overnight chilling is always best.
Common Mistakes to Avoid
Avoid these pitfalls to ensure your Easter Jello cheesecake turns out perfectly every time.
- Insufficient Setting: Not letting layers set sufficiently is the most common mistake, resulting in messy layers.
- Overmixing Jell-O and Cool Whip: This can make the Jell-O layer too thin or watery.
- Too Much Hot Water: Using more than the specified amount of hot water can weaken the Jell-O’s setting power.
- Early Unmolding: Attempting to unmold the cheesecake too early will cause it to collapse.
Serving, Storage, and Variations
This versatile no-bake Easter treat offers many possibilities for presentation and enjoyment.
Serving Suggestions
Serve this delightful Jello cheesecake chilled for the best texture and refreshing flavor. A sprig of fresh mint or a few fresh berries like raspberries or blueberries add a lovely touch. For parties, consider preparing individual jar servings using mini canning jars, perfect for grab-and-go treats.
Storage Instructions
Store your finished Easter Jello cheesecake covered loosely with plastic wrap in the refrigerator. It will stay fresh and delicious for up to 3-4 days. We do not recommend freezing this cheesecake, as the Jell-O and Cool Whip layers can become watery and lose their texture upon thawing.
Recipe Variations
Get creative with your no-bake Easter dessert! Try different color combinations using various Jell-O flavors for unique holiday themes. You could even incorporate fruit purees, like raspberry or mango, for natural color and flavor in place of or alongside the Jell-O. Make mini cheesecakes in muffin tins lined with cupcake wrappers for individual portions. A sprinkle of toasted coconut flakes on top or between layers adds wonderful texture.
Nutrition Information
| Component | Amount (per serving) |
|---|---|
| Calories | 350 |
| Total Fat | 20g |
| Saturated Fat | 12g |
| Cholesterol | 25mg |
| Sodium | 300mg |
| Total Carbs | 40g |
| Sugars | 30g |
| Protein | 4g |
FAQ
Q: Q: Can I use sugar-free Jell-O?
A: A: Yes, you absolutely can! Sugar-free Jell-O works well as a substitute and will set just as effectively.
Q: Q: How far in advance can I make this?
A: A: You can prepare this cheesecake up to two days in advance. Ensure it stays covered in the refrigerator.
Q: Q: Can I use other crusts besides graham cracker?
A: A: Definitely! Shortbread cookie crumbs or even crushed vanilla wafers make excellent alternatives for the crust.
Q: Q: Why isn’t my Jell-O layer setting?
A: A: This usually happens if the Jell-O granules weren’t fully dissolved or if the mixture wasn’t chilled long enough. Ensure proper whisking and sufficient refrigeration time.
Conclusion
This Easter Jello cheesecake (no-bake) is truly a game-changer for your holiday menu. Its vibrant colors, creamy layers, and incredible ease make it a must-try dessert for any spring celebration. Whip up this stunning Easter Jello cheesecake (no-bake) today and delight your family and friends. We love seeing your creations, so please share your beautiful cheesecakes with us online!
Festive No-Bake Easter Jello Cheesecake
Ingredients
Equipment
Method
- Prepare the crust according to the Jell-O no-bake Classic Cheesecake package directions. Press it firmly into a 9-inch springform pan that has been coated with cooking spray. Ensure an even layer.
- Next, prepare the classic cheesecake filling layer according to the package instructions. Pour this creamy mixture directly on top of your prepared crust.
- Place the pan in the refrigerator to set for about 30 minutes. This initial chill helps firm up the base.
- Meanwhile, place the blue Jell-O powder in a large bowl. Pour in 1/3 cup boiling water. Whisk vigorously until all the granules are fully dissolved, which takes about two to three minutes. Add ½ cup ice-cold water and mix until the mixture is cool to the touch.
- Gently fold in one (8 oz.) tub of Cool Whip until it is thoroughly combined and no streaks remain. Place this blue mixture bowl in the refrigerator for 30 minutes.
- After the 30 minutes, retrieve the cheesecake. Evenly spread the chilled blue mixture onto the partially set cheesecake layer for your second vibrant layer.
- Refrigerate the cheesecake again for at least 2 hours before you begin preparing the pink layer. This extended chill is crucial for solid layers.
- Next, place the red (strawberry or cherry) Jell-O powder in a separate large bowl. Pour in ½ cup boiling water. Whisk until the granules are fully dissolved. Add ½ cup ice-cold water and whisk until the mixture cools.
- Fold in another (8 oz.) tub of Cool Whip until thoroughly combined. Place this pink mixture bowl in the refrigerator for 30 minutes to firm up slightly. After 30 minutes, evenly spread the red mixture on top of the blue layer.
- Refrigerate the entire no-bake cheesecake for a minimum of 4 hours, or ideally, overnight. This long chill allows all layers to set completely.
- Before serving, carefully remove the springform pan sides. Decorate the top with the remaining (8 oz.) tub of Cool Whip using a piping bag and tip, if desired. Garnish with the pastel chocolate eggs for a festive finish.


