Skip to content
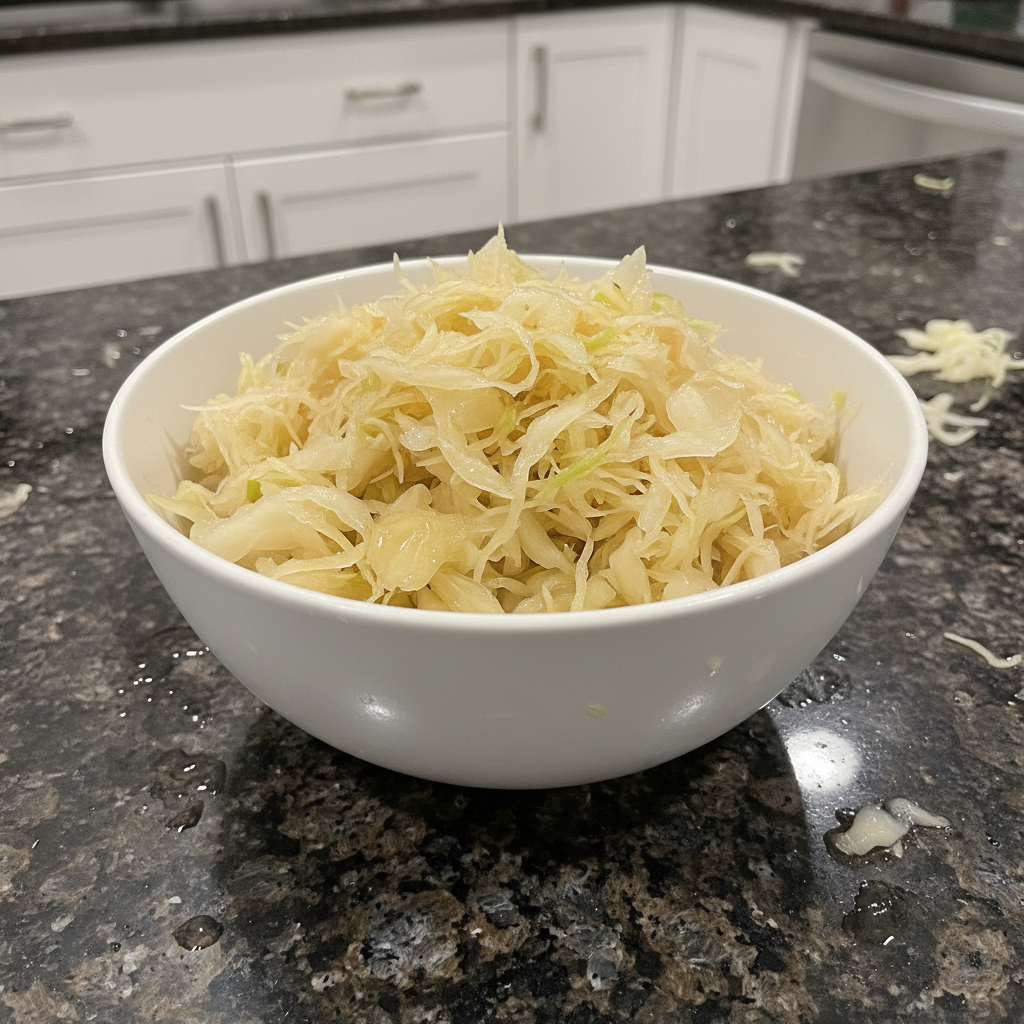
 There’s something incredibly satisfying about transforming humble cabbage into a vibrant, tangy, and gut-healthy condiment right in your own kitchen. If you’ve ever been intimidated by fermentation, let me assure you, making a truly amazing homemade sauerkraut recipe is much simpler than you think. I’m going to guide you through my favorite method to create a batch that boasts an unbelievable crunch and a perfectly balanced tang every single time. Get ready to embark on a delicious journey that’s great for your gut and even better for your taste buds!
Why You’ll Love This Recipe
My secret to the best homemade sauerkraut? It’s all about the initial brining and pressing method. Instead of immediately packing the cabbage into a jar, we let it sit in a large bowl with salt for an hour, allowing the salt to draw out a significant amount of liquid. After this initial brine, I recommend a quick pulse in a food processor to lightly shred and break down the cabbage cell walls even further.
Unbelievable Crunch: This approach guarantees that the cabbage releases its own abundant brine, eliminating the need for added water. This self-brining process, coupled with the light shredding, ensures every strand of cabbage is perfectly submerged and ferments evenly, leading to an incredibly crisp texture that you just won’t get from other methods.
Superior Flavor Development: By kickstarting the liquid release and allowing the salt to really penetrate, you create an optimal environment for the beneficial lactic acid bacteria to thrive. This leads to a richer, more complex tangy flavor profile in your finished kraut.
Foolproof Fermentation: Using the cabbage’s own juices dramatically reduces the risk of spoilage and mold, making this homemade sauerkraut recipe remarkably forgiving, even for beginners. It’s a budget-friendly way to boost your gut health and adds incredible flavor to so many meals.
Ingredients Needed

- 1 large head green cabbage (about 3-4 lbs)
- 2 tablespoons sea salt (non-iodized)
- Optional flavorings: 1 tablespoon caraway seeds, 1/2 teaspoon black peppercorns
Ingredient Notes & Substitutions
Choosing the right ingredients is key to a successful homemade sauerkraut. I always start with the freshest possible cabbage.
Cabbage Types: While green cabbage is traditional and works beautifully, you can experiment with red cabbage for a vibrant purple kraut, or even savoy cabbage for a slightly different texture. Look for firm, dense heads with crisp leaves. Avoid any that look wilted or have significant blemishes.
Sea Salt: This is crucial. Always use non-iodized salt like fine sea salt, pickling salt, or kosher salt. Iodine can inhibit the beneficial bacteria necessary for fermentation, and anti-caking agents found in some table salts can make the brine cloudy. The salt draws water out of the cabbage and creates an anaerobic environment where lactic acid bacteria can thrive while preventing undesirable microorganisms.
Optional Flavorings: Caraway seeds are a classic addition, offering a warm, slightly peppery flavor that complements cabbage perfectly. Black peppercorns add a subtle kick. Feel free to experiment with other spices like juniper berries, dill seeds, or even grated carrots or apples for different flavor profiles and textures. Just ensure any additions are organic and thoroughly washed.

How to Make Homemade Sauerkraut
Making your own sauerkraut is a rewarding process, and with my method, you’ll be amazed at how simple it is to get a perfect crunch every time. Let’s walk through it step-by-step.
Prepare the Cabbage
First, remove any bruised or damaged outer leaves from your large head of green cabbage. You’ll want to reserve a few of the cleanest, largest outer leaves for later to act as a protective layer. Quarter the cabbage, remove the core, and then finely shred it. My favorite way to do this is with a mandoline or a food processor fitted with a shredding disc for speed and consistency. Aim for thin, uniform shreds.
Brine and Massage
Place the shredded cabbage in a very large, sturdy bowl. Sprinkle the 2 tablespoons of non-iodized sea salt evenly over the cabbage. If you’re using optional flavorings like caraway seeds or black peppercorns, add them now. Begin to massage the cabbage vigorously with your clean hands, squeezing and pressing it. You’ll feel it start to soften and “weep” liquid. Cover the bowl with a clean kitchen towel and let it rest at room temperature for at least 1 hour. This initial brining step is key to drawing out ample liquid.
Process for Extra Crunch (The Twist!)
After the hour, you’ll notice a significant amount of liquid at the bottom of the bowl. At this point, I like to take about half of the cabbage and pulse it briefly in a food processor – just 2-3 short pulses. This isn’t meant to make a puree, but rather to break down the cell walls slightly further, enhancing the liquid release and ultimately leading to an even crunchier final product. Return the pulsed cabbage to the bowl with the un-pulsed portion and mix well. You should have a visibly wet, pliable mixture.
Pack the Fermentation Jar
Now it’s time to pack your clean fermentation jar or crock. Take handfuls of the cabbage mixture and firmly pack them into the jar. Use a tamper, the back of a spoon, or even your fist to press down on the cabbage with significant force. The goal is to eliminate air pockets and encourage more liquid to rise. You’ll see the brine starting to cover the cabbage. Continue this process until all the cabbage is in the jar, leaving about 2-3 inches of headspace from the rim.
Once packed, ensure the cabbage is fully submerged under its own brine. If, by some chance, there isn’t enough liquid to cover the cabbage after pressing firmly, you can make a simple brine by dissolving 1 teaspoon of sea salt in 1 cup of filtered water and adding just enough to cover. However, with this method, I rarely find that necessary.
Weight and Seal
Place one or two of those reserved whole cabbage leaves on top of the packed cabbage to create a barrier. Then, place a fermentation weight directly on top of the leaves. The weight is critical as it keeps the shredded cabbage submerged under the brine, creating the anaerobic (oxygen-free) environment necessary for good fermentation and preventing mold growth. Fit your airlock lid onto the jar, ensuring it’s properly sealed. If using a basic jar, you can use a clean plastic bag filled with brine as a weight and cover with a tight-fitting lid, burping daily.
Ferment
Place your fermentation jar in a cool, dark place, away from direct sunlight, at room temperature (ideally between 60-75°F or 15-24°C). Ferment for 1-4 weeks. The warmer the temperature, the faster the fermentation. You’ll notice bubbles forming as the lactic acid bacteria get to work. Start tasting after about a week; it should be tangy and pleasantly sour. When it reaches your desired flavor and crunch, it’s ready! The kraut will become more sour and softer the longer it ferments.
Store
Once fermented to your liking, remove the fermentation weight and lid. Transfer the sauerkraut to smaller, clean airtight jars, ensuring it’s still submerged in its brine. Store in the refrigerator, where it will keep for several months.
Understanding Your Fermentation Journey
Fermentation might seem like magic, but it’s actually a fascinating science. Knowing a little about what’s happening in your jar can help you achieve perfect results every time.
Essential Equipment for Fermentation
While you can start with basic kitchen supplies, having specific fermentation equipment makes the process much easier and more reliable for your homemade sauerkraut recipe.
- Fermentation Jars or Crocks: Wide-mouth mason jars (quart or half-gallon) are excellent for beginners. For larger batches, a ceramic fermentation crock with a water seal is ideal. These maintain an anaerobic environment crucial for good fermentation.
- Fermentation Weights: These glass or ceramic weights are designed to keep your cabbage fully submerged under the brine. This prevents exposure to oxygen, which can lead to undesirable mold growth.
- Airlock Lids: These special lids, often used with mason jars, allow gases produced during fermentation to escape without letting outside air in. This maintains a sterile, anaerobic environment and reduces the need for manual “burping.”
- Cabbage Shredder/Mandoline: While a sharp knife works, a mandoline or a food processor with a shredding disc ensures uniform, thin shreds, which ferment more consistently and yield better texture.
- Tamper: A simple wooden tamper helps you firmly pack the cabbage into the jar, releasing more brine and eliminating air pockets.
The Science of Sauerkraut: What’s Happening?
At its heart, sauerkraut production is a beautiful example of lactic acid fermentation. This process is driven by naturally occurring bacteria on the cabbage leaves, primarily from the genus Lactobacillus.
When you salt and pack the cabbage, you create an anaerobic environment (without oxygen). This environment, combined with the salt, inhibits the growth of most spoilage bacteria and yeasts. The beneficial lactic acid bacteria then begin to break down the sugars in the cabbage, producing lactic acid as a byproduct. This lactic acid lowers the pH of the kraut, preserving the cabbage and giving it its characteristic tangy flavor and crisp texture.
The temperature plays a significant role: warmer temperatures (70-75°F) speed up fermentation, resulting in a more sour kraut faster, but can sometimes lead to a softer texture. Cooler temperatures (60-68°F) slow down the process, allowing for more complex flavor development and often a crisper texture. The bubbles you see are carbon dioxide, another byproduct of this microbial activity.
Pro Tips & Troubleshooting
Even with the best instructions, a few expert tips can elevate your homemade sauerkraut recipe, and knowing how to troubleshoot common issues will save your batch.
Pro Tips
- Use Organic Cabbage: If possible, choose organic cabbage to minimize pesticide residues that could interfere with fermentation and ensure a healthy microbial starting point.
- Cleanliness is Key: Always ensure your hands, utensils, and fermentation vessels are spotlessly clean. While fermentation encourages good bacteria, you want to avoid introducing unwanted molds or yeasts.
- Consistent Shredding: Uniformly shredded cabbage ferments more evenly. A mandoline or food processor is a great investment for this.
- Don’t Skimp on the Initial Brine: My twist of letting the cabbage sit with salt for an hour before packing is crucial. It draws out ample natural brine, which is superior to adding water.
- Taste As You Go: Fermentation times are a guideline. Taste your sauerkraut regularly after the first week to find your preferred level of tang and texture.
- Optimal Temperature: Aim for a consistent room temperature between 65-72°F (18-22°C) for ideal flavor development and texture.
Common Mistakes to Avoid
- Not Enough Salt: Insufficient salt won’t draw out enough liquid, and it won’t inhibit undesirable bacteria, leading to spoilage. Stick to the recommended ratio.
- Too Much Salt: While salt is necessary, excessive amounts can kill off the beneficial bacteria, slowing or halting fermentation. It can also make the kraut unpleasantly salty.
- Exposure to Air: If the cabbage is not submerged under the brine, it can be exposed to oxygen, leading to mold growth. Always use a weight to keep it submerged and an airlock or tight lid to prevent air ingress.
- Improper Weighting: A weight that is too light won’t keep the cabbage submerged. Ensure your weight is heavy enough to keep everything firmly pressed under the brine.
- Confusing Kahm Yeast with Mold: Kahm yeast (a thin, white film on the surface) is harmless and can be scraped off. Mold, however, is fuzzy, often colored (green, black, pink), and indicates spoilage. If you see mold, it’s best to discard the batch to be safe.
- Using Iodized Salt: As mentioned, iodine can interfere with fermentation. Always use non-iodized sea salt, pickling salt, or kosher salt.
Serving & Storage
Once your homemade sauerkraut is perfectly tangy and crisp, the real fun begins – enjoying it!
Serving Ideas
This versatile homemade sauerkraut recipe is much more than just a condiment; it can elevate so many dishes. Here are some of my favorite ways to serve it:
- Classic Pairings: Absolutely essential with grilled bratwurst, hot dogs, or kielbasa on a bun.
- Reuben Sandwich Staple: Layer it generously in a classic Reuben with corned beef, Swiss cheese, and Russian dressing on rye bread.
- Roasted Meats: Serve alongside roasted pork, chicken, or duck for a bright, acidic counterpoint that cuts through richness.
- Salad Topper: Add a spoonful to green salads or potato salads for an extra layer of crunch and zing.
- Savory Bowls: Incorporate into grain bowls with roasted vegetables and protein for a probiotic boost.
- Eggs & Breakfast: A surprising but delicious addition to scrambled eggs or alongside a hearty breakfast hash.
- With Cheese & Crackers: A small mound of kraut can be a fantastic addition to a charcuterie board.
Storage and Make-Ahead
Once your sauerkraut has reached your desired level of fermentation, it’s time to move it to cold storage to slow down the fermentation process.
Refrigeration: Transfer the finished sauerkraut, along with its brine, to clean, airtight jars (like mason jars). Make sure the kraut remains submerged in the brine. Store these jars in the refrigerator. Homemade sauerkraut will keep beautifully in the fridge for several months, often up to 6 months or even longer, continuing to develop flavor as it ages slowly.
Make-Ahead: This is an ideal make-ahead food! Since it ferments over weeks and then stores for months, you can always have a batch ready. Start a new batch as one is finishing up, and you’ll have a continuous supply.
Freezing: While refrigeration is the preferred method for maintaining the live cultures, you can freeze sauerkraut. Freezing will preserve the flavor and most of the texture, but it may diminish some of the probiotic benefits as some bacteria may not survive the freezing and thawing process. If you do freeze, pack it tightly in freezer-safe containers, leaving some headspace for expansion.
Conclusion
I hope you feel empowered to try this homemade sauerkraut recipe! My simple brining and processing twist ensures an incredibly crunchy, tangy, and probiotic-rich kraut that will quickly become a staple in your kitchen. It’s a surprisingly easy and deeply satisfying culinary project that offers immense health benefits and versatile deliciousness.
Don’t be afraid to experiment with different flavorings or serving ideas once you’ve mastered the basic technique. Your fermentation journey starts now, and I can’t wait for you to taste the incredible results. Happy fermenting!
FAQ
What kind of salt should I use for sauerkraut?
Always use non-iodized salt, such as fine sea salt, pickling salt, or kosher salt. Iodine and anti-caking agents found in some table salts can inhibit beneficial bacteria and affect the fermentation process.
How do I know if my sauerkraut has gone bad?
Good sauerkraut smells pleasantly sour and tangy. If you notice a foul, putrid, or truly off-putting smell, or if you see fuzzy, colored mold (green, black, pink), it’s best to discard the batch to be safe. A thin, white film (kahm yeast) is usually harmless and can be scraped off.
Can I use a plastic container for fermenting?
It’s generally recommended to use food-grade glass or ceramic containers for fermenting sauerkraut to avoid any potential leaching of chemicals from plastic, especially over long fermentation periods. If using plastic, ensure it’s specifically rated for food storage and fermentation.
What is kahm yeast and is it safe?
Kahm yeast is a common, harmless, thin white film that can form on the surface of fermented foods when exposed to a little too much oxygen. It’s not mold and usually won’t ruin your batch, though it can sometimes impart a slightly off-flavor. You can simply skim it off, ensure your kraut is submerged, and continue fermenting.
How long does sauerkraut need to ferment?
Fermentation time varies based on temperature and desired flavor. Typically, homemade sauerkraut ferments for 1 to 4 weeks at room temperature (60-75°F or 15-24°C). Taste it periodically after the first week until it reaches your preferred level of tanginess and texture.
What are the health benefits of eating homemade sauerkraut?
Homemade sauerkraut is a fantastic source of probiotics, which support gut health, aid digestion, and boost the immune system. For more information on the broad advantages, you can read about the health benefits of fermented foods.
Homemade Sauerkraut Recipe: Easy, Probiotic & Perfect Crunch
Ingredients
Equipment
Method
- First, remove any bruised or damaged outer leaves from your large head of green cabbage. Reserve a few of the cleanest, largest outer leaves for later to act as a protective layer. Quarter the cabbage, remove the core, and then finely shred it. Aim for thin, uniform shreds using a mandoline or a food processor with a shredding disc.
- Place the shredded cabbage in a very large, sturdy bowl. Sprinkle the 2 tablespoons of non-iodized sea salt evenly over the cabbage. If using optional flavorings like caraway seeds or black peppercorns, add them now. Begin to massage the cabbage vigorously with your clean hands, squeezing and pressing it until it starts to soften and weep liquid. Cover the bowl with a clean kitchen towel and let it rest at room temperature for at least 1 hour. This initial brining step is key to drawing out ample liquid.
- After the hour, you'll notice a significant amount of liquid at the bottom of the bowl. Take about half of the cabbage and pulse it briefly in a food processor – just 2-3 short pulses. This is not meant to make a puree but to break down the cell walls further, enhancing liquid release and leading to an even crunchier final product. Return the pulsed cabbage to the bowl with the un-pulsed portion and mix well. You should have a visibly wet, pliable mixture.
- Now, pack your clean fermentation jar or crock. Take handfuls of the cabbage mixture and firmly pack them into the jar. Use a tamper, the back of a spoon, or even your fist to press down with significant force, eliminating air pockets and encouraging more liquid to rise. Continue this process until all the cabbage is in the jar, leaving about 2-3 inches of headspace from the rim.
- Once packed, ensure the cabbage is fully submerged under its own brine. If by chance there isn't enough liquid, you can make a simple brine by dissolving 1 teaspoon of sea salt in 1 cup of filtered water and adding just enough to cover.
- Place one or two of those reserved whole cabbage leaves on top of the packed cabbage to create a barrier. Then, place a fermentation weight directly on top of the leaves. The weight is critical to keep the shredded cabbage submerged under the brine, creating an anaerobic environment and preventing mold growth. Fit your airlock lid onto the jar, ensuring it's properly sealed.
- Place your fermentation jar in a cool, dark place, away from direct sunlight, at room temperature (ideally between 60-75°F or 15-24°C). Ferment for 1-4 weeks. The warmer the temperature, the faster the fermentation. You'll notice bubbles forming as the lactic acid bacteria get to work. Start tasting after about a week; it should be tangy and pleasantly sour. When it reaches your desired flavor and crunch, it's ready!
- Once fermented to your liking, remove the fermentation weight and lid. Transfer the sauerkraut to smaller, clean airtight jars, ensuring it's still submerged in its brine. Store in the refrigerator, where it will keep for several months.