 Skip to content
 There’s nothing quite like the allure of a red velvet dessert, especially when it’s combined with the irresistible crunch of Oreo cookies. In my kitchen, I’ve taken this classic pairing and elevated it to new heights with these spectacular Red Velvet Oreo Cookies. Get ready for a baking adventure that promises soft, chewy cookies with a truly unique, gooey center thanks to a special tangy cream cheese swirl. This recipe isn’t just about making cookies; it’s about crafting a showstopping, bakery-quality treat right in your own home that will delight everyone.
Why You’ll Love These Red Velvet Oreo Cookies with a Cream Cheese Swirl
I am absolutely thrilled to share the secret to what makes these Red Velvet Oreo Cookies truly special: their unique, tangy cream cheese swirl baked right into the center of each cookie. It’s a game-changer!
- The Tangy Twist: The classic pairing of red velvet and cream cheese frosting is iconic for a reason. By incorporating a rich, tangy cream cheese swirl directly into the cookie dough, you get an incredible burst of flavor and a moist, creamy interior in every bite. This swirl perfectly complements the chewy red velvet cookie and crunchy Oreos, enhancing the overall flavor and texture without the need for additional frosting after baking.
- Irresistible Flavor & Texture: These cookies offer a perfect balance of sweet, tangy, and chocolatey notes. The varied textures – a chewy cookie base, crunchy Oreo pieces, and a creamy, gooey center – create an utterly delightful experience that keeps you coming back for more.
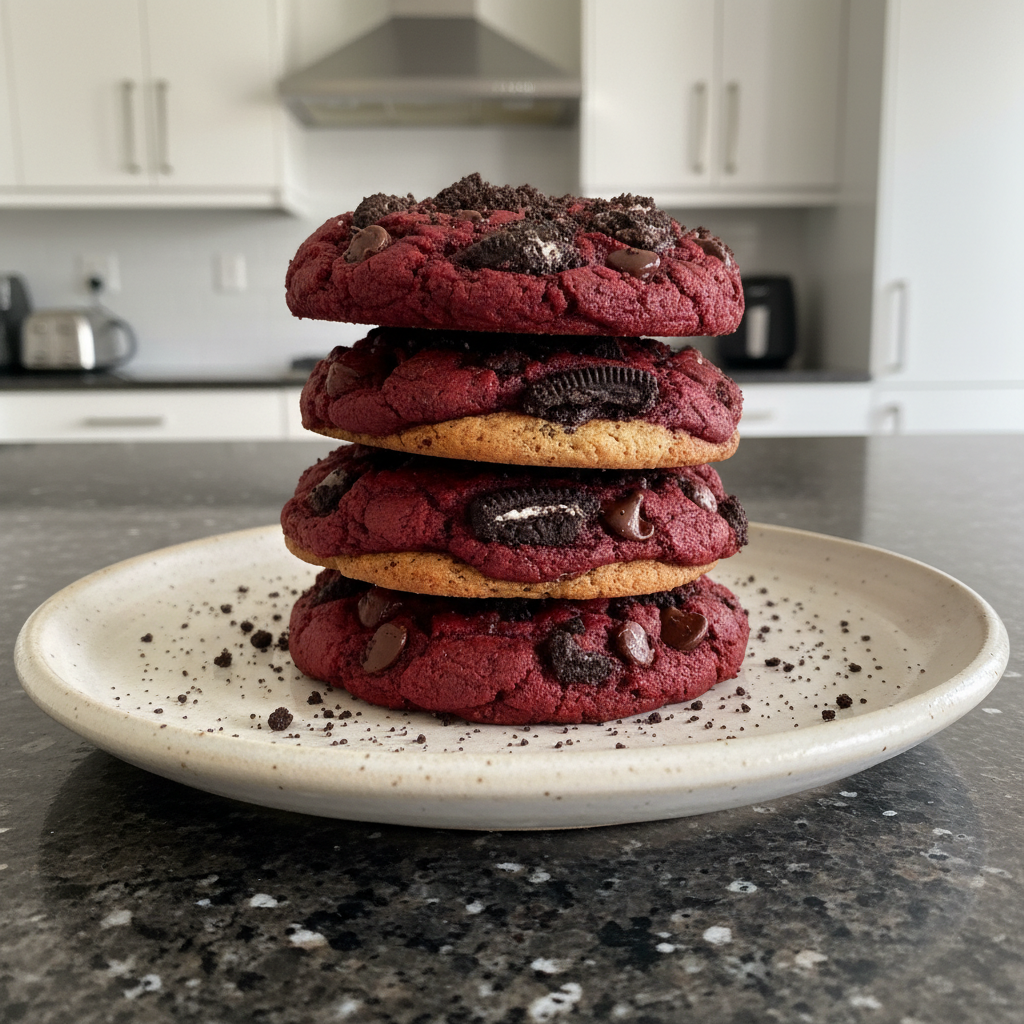
- Showstopper Dessert: With their vibrant red hue and an abundance of Oreo crumbles and chocolate chips, these cookies are visually stunning. They make the perfect Valentine’s Day dessert or a festive addition to your Christmas cookies spread, guaranteed to impress at any gathering.
- Make-Ahead Friendly: For all my busy bakers out there, I’ve got good news! The cookie dough for these beauties can be prepared in advance. This means you can whip up the dough when you have time, chill it, and then bake fresh cookies whenever a craving strikes or guests arrive.
Ingredients You’ll Need for Red Velvet Oreo Cookies

Gathering your ingredients is the first step to creating these incredible Red Velvet Oreo Cookies. Here’s exactly what you’ll need:
- 2 1/2 (313 g) cups All purpose flour
- 1/4 (21 g) cup Dutch processed cocoa powder
- 1 teaspoon Baking soda
- 1 teaspoon Cornstarch
- 3/4 teaspoon Kosher salt
- 1 (227 g) cup Unsalted butter (melted and cooled )
- 2 large Eggs
- 3/4 (165 g) cups Light brown sugar (packed)
- 3/4 (150 g) cup Granulated sugar
- 1 tablespoon Vanilla extract
- 1 teaspoon Red gel food coloring
- 1/4 cup Oreo cookie crumbs (about 3 Oreo cookies )
- 6 Crushed Oreo cookie pieces (6 Oreo cookies blended into bitesized pieces, plus more for topping )
- 3/4 cup Semisweet chocolate chips (plus more for topping )
Ingredient Notes & Substitutions
Understanding your ingredients is key to successful baking. Here are some notes and substitution tips for these Red Velvet Oreo Cookies:
- Dutch Processed Cocoa Powder: This is crucial for achieving that authentic red velvet flavor and rich color. Dutch processed cocoa powder has a milder, less acidic chocolate flavor compared to natural cocoa, which allows the red color to truly shine without turning brownish. It also reacts with the baking soda to give a subtle lift.
- Oreo Cookies: I recommend using classic Oreo cookies for this recipe. While tempting, Double Stuff Oreos can introduce too much extra cream filling, which may pull moisture from your cookie dough, leading to drier cookies. Feel free to experiment with chocolate or even red velvet-flavored Oreos for fun variations! If you’re looking for another simple and versatile cookie, check out our easy icebox cookie recipe.
- Red Gel Food Coloring: For the most vibrant red color without altering the dough’s consistency, always opt for red gel food coloring over liquid food coloring. Liquid can thin out the dough, affecting the final chewy texture.
- Unsalted Butter: Using unsalted butter allows you to control the salt content precisely. Make sure it’s fully melted and cooled before incorporating it into the recipe to ensure proper dough consistency and prevent your cookies from spreading too much. Similarly, ensure your large eggs and cream cheese are at room temperature for smooth incorporation.
- Cornstarch: This might seem like an unusual ingredient for cookies, but cornstarch is my secret weapon! It contributes significantly to the incredibly soft and chewy texture of these cookies, preventing them from becoming too cakey or dry.
- Gluten-Free Variation: If you’re looking for a gluten-free variation, I’ve had great success using a high-quality cup-for-cup gluten-free flour blend. Just ensure you also use gluten-free Oreos.
- Chocolate Chips: While semisweet chocolate chips are my go-to, you can easily substitute them with white chocolate, milk chocolate, or even dark chocolate chips to suit your preference.

Step-by-Step: How to Make Red Velvet Oreo Cookies
Let’s get baking! Here’s how to create these showstopping Red Velvet Oreo Cookies with their delicious cream cheese swirl.
Cream Cheese Swirl Preparation
Before we dive into the cookie dough, let’s prepare that amazing cream cheese swirl:
- In a small bowl, combine 4 oz of softened cream cheese, 2 tablespoons of powdered sugar, and 1/2 teaspoon of vanilla extract.
- Beat these ingredients together with a fork or small whisk until the mixture is completely smooth and creamy.
- Transfer the cream cheese swirl to a small piping bag with the tip snipped off, or simply use a spoon. Chill briefly in the refrigerator to firm it up slightly, which will make it easier to work with.
Cookie Dough & Baking Steps
Now, onto the vibrant red velvet dough!
1. Melt Butter: Cut the unsalted butter into 1-inch slices. In a medium saucepan, melt the butter over medium heat. Once melted, pour it into the bowl of a stand mixer to cool down. Alternatively, you can melt the butter in the microwave in 30-second intervals. It’s crucial to allow the butter to cool fully while you prepare the other ingredients.
2. Prep Oreos: Using a food processor or blender, blend about 3 Oreo cookies into fine crumbs. For the crushed Oreo cookie pieces, use a food processor or place 6 Oreos in a large ziplock bag and crush them with a rolling pin until you have bite-sized pieces. Set both aside.
3. Combine Dry Ingredients: In a medium mixing bowl, sift together the all-purpose flour, Dutch processed cocoa powder, cornstarch, and baking soda. Whisk in the kosher salt to ensure even distribution. Set this mixture aside.
4. Cream Butter & Sugars: In the bowl of your stand mixer with the cooled melted butter, beat together the light brown sugar (packed) and granulated sugar using the paddle attachment on medium-high speed. Continue until the mixture is creamy and fluffy, about 2 minutes, remembering to stop and scrape down the sides of the bowl halfway through.
5. Add Eggs & Flavor: Reduce the mixer speed to medium. Beat in the large eggs one at a time, mixing until each is fully combined before adding the next. With the last egg, add the vanilla extract and red gel food coloring. Mix until the vibrant red color is evenly distributed throughout the dough.
6. Incorporate Dry Ingredients & Mix-ins: With the mixer on low speed, gradually add the flour mixture in 3 additions. Mix only until just combined; you should still see a few streaks of flour, as overmixing can lead to tough cookies. Remove the mixing bowl from the stand mixer. Now, add the semisweet chocolate chips, Oreo cookie crumbs, and crushed Oreo cookie pieces. Using a rubber spatula, gently fold everything together until just combined. Cover the bowl tightly with plastic wrap and refrigerate for 3 hours. For best results and to prevent spreading, chilling dough overnight is even better.
7. Scoop & Swirl: Line a plate with wax paper and set it aside. Remove the chilled dough from the fridge. Using a large cookie scoop (about 2.5 oz or approx. 3 tablespoons), measure out each portion of dough. Flatten each dough portion slightly in the palm of your hand. Pipe or spoon a small dollop (about 1 teaspoon) of the prepared cream cheese swirl into the center. Carefully enclose the cream cheese with the cookie dough, gently rolling it into a ball and smoothing out any cracks. The goal is to fully encase the swirl. Place the dough balls on the wax paper-lined plate and put them back in the fridge, uncovered, to firm up for about 10-15 minutes while your oven preheats.
8. Preheat & Prep Baking Sheet: Line a large baking sheet with parchment paper and set aside. Preheat your oven to 350 degrees F.
9. Bake Cookies: Place 5 dough balls onto the prepared baking sheet, ensuring they are about two inches apart to allow for spreading. Keep any remaining dough balls in the fridge until you’re ready to bake them. Bake the cookies for 12–14 minutes. For a soft, gooey cookie, I recommend baking for 12 minutes. If you prefer a slightly firmer cookie (still deliciously soft inside), bake for 14 minutes. At the halfway mark (around 6-7 minutes), remove the cookies from the oven and firmly tap the baking sheet on a heatproof surface – this little trick helps create those beautiful crinkles! Rotate the baking sheet and return the cookies to the oven. The cookies are ready when the edges are set, and the center still looks slightly wet and gooey.
10. Cool & Garnish: As soon as the cookies come out of the oven, use a biscuit cutter or a wide cup (larger than your cookies) to scoot warm cookies into perfect rounds with a gentle circular motion. Immediately top the cookies with extra chocolate chips and crushed Oreos for an appealing, bakery-worthy finish. Allow the cookies to cool on the baking sheet for 5 minutes; this crucial step allows their gooey center to set before you carefully transfer them to a cooling rack to cool completely. They will be very soft right out of the oven, so patient cooling is key. Enjoy your magnificent Red Velvet Oreo Cookies!
Essential Tools & Red Velvet Flavor Explained
Having the right equipment and understanding the science behind your ingredients will help you achieve baking perfection every time.
Must-Have Kitchen Equipment
To make these Red Velvet Oreo Cookies a breeze, here’s the equipment I recommend:
- Stand Mixer with Paddle Attachment: Absolutely essential for efficiently creaming butter and sugars and mixing the dough until it’s perfectly combined.
- Food Processor or Blender: You’ll need this to create both fine Oreo cookie crumbs and the coarser crushed Oreo cookie pieces.
- Rubber Spatula: Great for scraping down the sides of your mixing bowl and gently folding in the mix-ins without overworking the dough.
- Large Cookie Scoop: This ensures all your cookies are uniform in size, which leads to even baking. I use a 2.5 oz or approximately 3 tablespoon scoop for these.
- Baking Sheets & Parchment Paper: Baking sheets are a given, and parchment paper is a non-negotiable for non-stick results, easy cleanup, and promoting even heat distribution.
- Cooling Rack: Essential for allowing air to circulate around your cookies as they cool, preventing soggy bottoms.
- Biscuit Cutter or Wide Glass/Bowl: My secret weapon for the “cookie scooting” technique, which helps shape warm cookies into perfectly round, professional-looking treats.
The Science Behind Red Velvet: Flavor & Texture
Let’s dive into why these specific ingredients make these Red Velvet Oreo Cookies so incredibly delicious:
- Dutch Processed Cocoa Powder: This special cocoa provides a rich, mellow chocolate flavor. Because it’s less acidic than natural cocoa, it doesn’t fight with the red gel food coloring, allowing the vibrant red hue to truly shine through. It also interacts with the baking soda to contribute to the cookie’s subtle rise and tender crumb.
- Cornstarch: Here’s a little secret for an amazing chewy texture. Adding cornstarch to the dough creates an incredibly soft and pliable cookie, preventing it from drying out or becoming too cake-like. It’s truly a game-changer for chewy cookies.
- Melted Butter: Unlike recipes that call for softened, creamed butter, using melted butter here is intentional. It contributes to a denser, fudgier, and gooey center, creating that delightful chewiness instead of a crumbly, cake-like texture.
- Brown Sugar: The molasses in light brown sugar adds not only a lovely depth of flavor but also crucial moisture and chewiness to your cookies, distinguishing them from cookies made with granulated sugar alone.
Optimal Baking Sheets for Perfect Cookies
The type of baking sheet you use can actually impact your cookies! Here’s what I recommend:
- Light-colored vs. Dark-colored baking sheets: I always opt for light-colored baking sheets. They reflect heat, which leads to more even baking and prevents the bottom of your cookies from becoming overly browned or burnt. Darker sheets absorb more heat, often resulting in crispier, darker bottoms.
- Parchment Paper: Always use parchment paper! It’s not just for non-stick benefits and easy cleanup; it also helps promote even baking by creating a buffer between the hot sheet and your cookie dough.
Expert Tips for Perfect Red Velvet Oreo Cookies
Achieving bakery-quality cookies at home is totally possible with these pro tips and by avoiding common mistakes. I’ve learned these through plenty of trial and error in my own kitchen!
Pro Baking Tips
- Measure Flour Properly: This is arguably the most important tip! Too much flour is the primary culprit for dry, crumbly cookies. I highly recommend using a kitchen scale for accuracy. If you don’t have one, use the scoop and level method: fluff your flour, spoon it into your measuring cup, and then level it off with a straight edge.
- Don’t Overmix: When you add the dry ingredients, mix only until just combined. Seeing a few streaks of flour is perfectly fine! Overmixing develops gluten, which leads to tougher, less tender cookies.
- Slightly Underbake: For that irresistible soft, gooey cookie texture, underbaking slightly is absolutely key. The edges should look set, but the center should still appear a little wet or slightly puffed. Remember, your cookies will continue to bake on the baking sheet as they cool.
- Chill Your Dough: Chilling dough for at least 3 hours (or even overnight, which I prefer!) is crucial. This allows the melted butter to solidify, prevents your cookies from spreading excessively, and results in thicker, chewier cookies with a more concentrated flavor.
- The Cookie Scoot: For a truly professional finish, immediately after baking, use a biscuit cutter or a wide cup (larger than your cookie) to scoot warm cookies into perfect rounds in a circular motion.
- Room Temperature Ingredients: Always ensure your large eggs and cream cheese for the swirl are at room temperature. This allows them to incorporate smoothly and evenly into the dough and swirl, creating a better emulsion and a more consistent final product.
Common Mistakes to Avoid
- Using Too Much Flour: As mentioned, this is the main reason for dry and crumbly cookies. Invest in a kitchen scale!
- Not Chilling the Dough Enough: Insufficient chilling dough will almost certainly cause your cookies to spreading excessively in the oven. This leads to thin, crispy cookies instead of the thick, chewy ones we’re aiming for.
- Overbaking: Overbaking the cookies will result in a firmer, less gooey texture and can make them dry. Keep an eye on those slightly wet centers!
- Using Double Stuff Oreos: While tempting, the extra cream filling in Double Stuff Oreos can actually pull moisture from the cookie dough, potentially leading to drier cookies. Stick to classic Oreos for best results.
- Warm Dough: If your dough feels too warm while scooping or you notice your cookies are spreading more than they should in the oven, simply pop the baking sheet or the remaining dough back into the refrigerator for 10-15 minutes to firm up.
Serving & Storing Your Red Velvet Oreo Cookies
Once your Red Velvet Oreo Cookies are baked to perfection, here’s how to best enjoy and keep them fresh.
Delicious Serving Ideas
- Classic Pairing: I love serving these chewy, soft cookies warm, straight from the oven, with a scoop of creamy vanilla ice cream. A tall, cold glass of milk is also the ultimate indulgence!
- Coffee Break Treat: These cookies pair wonderfully with your morning coffee or an afternoon tea, making for an elevated snack any time of day.
- Garnishing: For that extra touch of perfection, don’t forget to top with extra chocolate chips and crushed Oreos while the cookies are still warm. This creates a beautiful, bakery-worthy finish.
- Holiday Appeal: With their striking red color and decadent flavor, these Red Velvet Oreo Cookies are an absolute hit for Valentine’s Day dessert, Christmas cookies, or any festive occasion that calls for something special.
Storage & Make-Ahead Tips
- Storing Baked Cookies: Once your red velvet Oreo cookies have completely cooled on a cooling rack, store them in an airtight container at room temperature for up to 3-4 days. For optimal freshness and that perfect gooey center, I find they are best enjoyed within a day or two.
- Freezing Baked Cookies: Yes, you can freeze baked cookies! Place them in a freezer-safe bag or container, separated by parchment paper, for up to 2-3 months. Thaw them at room temperature or gently warm them in the microwave for a fresh-baked feel.
- Freezing Cookie Dough: The prepared cookie dough, with the cream cheese swirl already incorporated into balls, freezes beautifully. Simply place the scooped and rolled dough balls on a parchment paper-lined baking sheet and freeze until solid. Then, transfer them to a freezer-safe bag or container for up to 3 months.
- Baking from Frozen Dough: When you’re ready for fresh cookies, there’s no need to thaw the frozen dough! Place the frozen dough balls directly onto a parchment paper-lined baking sheet. You’ll just need to add an extra 2-4 minutes to the original baking time.
Bake Your Best Red Velvet Oreo Cookies Yet!
I truly hope you’re as excited as I am to try these Red Velvet Oreo Cookies! With their vibrant color, perfect chewy, soft, gooey texture, and that irresistible tangy cream cheese swirl baked right in, they are sure to become a new favorite. This recipe delivers all the classic red velvet flavor you love, amplified by the delightful crunch of Oreo cookies.
Whether you’re a seasoned baker or just starting out, my detailed instructions and expert tips are designed to help you achieve delicious, bakery-quality results right in your own kitchen. Don’t be shy—give these a try! I’d love to hear how they turn out in the comments below, or feel free to share your creations. Happy baking!
Frequently Asked Questions About Red Velvet Oreo Cookies
What type of Oreos should I use for these cookies?
I highly recommend using classic Oreo cookies for this recipe. While tempting, Double Stuff Oreos contain extra filling that can pull moisture from your cookie dough, potentially leading to drier cookies. If you’re feeling adventurous, you could try chocolate or red velvet flavored Oreos for a twist, but classic is best for the base recipe.
What makes red velvet cookies chewy and soft?
Several factors contribute to the wonderfully chewy and soft texture of these cookies. The addition of cornstarch is a key ingredient for softness and chewiness. Using melted butter instead of softened butter also helps create a denser, gooey center. Additionally, light brown sugar adds moisture, and underbaking the cookies slightly ensures they remain soft and continue to set on the baking sheet as they cool.
How can I prevent my red velvet Oreo cookies from spreading too much?
The most crucial step to prevent excessive spreading is chilling dough! I recommend at least 3 hours, but overnight is even better. This allows the melted butter to re-solidify. Also, ensure your baking sheet isn’t too warm between batches, and be careful not to use too much flour, which can also affect spread.
Can I prepare the red velvet Oreo cookie dough ahead of time?
Absolutely! This recipe is excellent for make-ahead baking. You can refrigerate the prepared dough for up to 3 days. For longer storage, you can freeze the scooped and swirled dough balls for up to 3 months. When you’re ready to bake from frozen dough, simply add an extra 2-4 minutes to the baking time.
How should I store these red velvet Oreo cookies?
Once completely cooled on a cooling rack, store your baked red velvet Oreo cookies in an airtight container at room temperature for 3-4 days. The cream cheese swirl actually helps them stay moist and delicious! For longer storage, they can be frozen for several months in a freezer-safe bag or container.
What is the difference between Dutch processed cocoa powder and regular cocoa powder in baking?
Dutch processed cocoa powder has been treated to reduce its acidity, giving it a darker color and a milder, less bitter chocolate flavor. This is ideal for red velvet recipes as it allows the red gel food coloring to really pop. Regular (natural) cocoa powder is acidic and reacts with baking soda to create leavening; Dutch-processed cocoa requires an additional leavening agent (like baking soda, as used here) to achieve the desired rise.
What equipment do I need for this recipe?
You’ll need a stand mixer with a paddle attachment for mixing the dough efficiently. A food processor or blender is essential for crushing the Oreo cookies. Other key tools include a large cookie scoop for uniform cookies, baking sheets lined with parchment paper, and a cooling rack. A biscuit cutter or wide cup is also handy for shaping perfect rounds right after baking!
Red Velvet Oreo Cookies with a Tangy Cream Cheese Swirl
Ingredients
Equipment
Method
- In a small bowl, combine 4 oz of softened cream cheese, 2 tablespoons of powdered sugar, and 1/2 teaspoon of vanilla extract.
- Beat these ingredients together with a fork or small whisk until the mixture is completely smooth and creamy.
- Transfer the cream cheese swirl to a small piping bag with the tip snipped off, or simply use a spoon. Chill briefly in the refrigerator to firm it up slightly, which will make it easier to work with.
- Cut the unsalted butter into 1-inch slices. In a medium saucepan, melt the butter over medium heat. Once melted, pour it into the bowl of a stand mixer to cool down. Alternatively, you can melt the butter in the microwave in 30-second intervals. Allow the butter to cool fully.
- Using a food processor or blender, blend about 3 Oreo cookies into fine crumbs. For the crushed Oreo cookie pieces, use a food processor or place 6 Oreos in a large ziplock bag and crush them with a rolling pin until you have bite-sized pieces. Set both aside.
- In a medium mixing bowl, sift together the all-purpose flour, Dutch processed cocoa powder, cornstarch, and baking soda. Whisk in the kosher salt to ensure even distribution. Set this mixture aside.
- In the bowl of your stand mixer with the cooled melted butter, beat together the light brown sugar (packed) and granulated sugar using the paddle attachment on medium-high speed. Continue until the mixture is creamy and fluffy, about 2 minutes, remembering to stop and scrape down the sides of the bowl halfway through.
- Reduce the mixer speed to medium. Beat in the large eggs one at a time, mixing until each is fully combined before adding the next. With the last egg, add the vanilla extract and red gel food coloring. Mix until the vibrant red color is evenly distributed throughout the dough.
- With the mixer on low speed, gradually add the flour mixture in 3 additions. Mix only until just combined; you should still see a few streaks of flour. Remove the mixing bowl from the stand mixer. Now, add the semisweet chocolate chips, Oreo cookie crumbs, and crushed Oreo cookie pieces. Using a rubber spatula, gently fold everything together until just combined. Cover the bowl tightly with plastic wrap and refrigerate for 3 hours. Chilling dough overnight is even better.
- Line a plate with wax paper and set it aside. Remove the chilled dough from the fridge. Using a large cookie scoop (about 2.5 oz or approx. 3 tablespoons), measure out each portion of dough. Flatten each dough portion slightly in the palm of your hand. Pipe or spoon a small dollop (about 1 teaspoon) of the prepared cream cheese swirl into the center. Carefully enclose the cream cheese with the cookie dough, gently rolling it into a ball and smoothing out any cracks. The goal is to fully encase the swirl. Place the dough balls on the wax paper-lined plate and put them back in the fridge, uncovered, to firm up for about 10-15 minutes while your oven preheats.
- Line a large baking sheet with parchment paper and set aside. Preheat your oven to 350 degrees F.
- Place 5 dough balls onto the prepared baking sheet, ensuring they are about two inches apart. Keep any remaining dough balls in the fridge until you're ready to bake them. Bake the cookies for 12–14 minutes. For a soft, gooey cookie, bake for 12 minutes. If you prefer a slightly firmer cookie, bake for 14 minutes. At the halfway mark (around 6-7 minutes), remove the cookies from the oven and firmly tap the baking sheet on a heatproof surface. Rotate the baking sheet and return the cookies to the oven. The cookies are ready when the edges are set, and the center still looks slightly wet and gooey.
- As soon as the cookies come out of the oven, use a biscuit cutter or a wide cup (larger than your cookies) to scoot warm cookies into perfect rounds with a gentle circular motion. Immediately top the cookies with extra chocolate chips and crushed Oreos for an appealing finish. Allow the cookies to cool on the baking sheet for 5 minutes; this allows their gooey center to set before you carefully transfer them to a cooling rack to cool completely.


