
Ingredients
Equipment
Method
Cream Cheese Swirl Preparation
- In a small bowl, combine 4 oz of softened cream cheese, 2 tablespoons of powdered sugar, and 1/2 teaspoon of vanilla extract.
- Beat these ingredients together with a fork or small whisk until the mixture is completely smooth and creamy.
- Transfer the cream cheese swirl to a small piping bag with the tip snipped off, or simply use a spoon. Chill briefly in the refrigerator to firm it up slightly, which will make it easier to work with.
Cookie Dough & Baking Steps
- Cut the unsalted butter into 1-inch slices. In a medium saucepan, melt the butter over medium heat. Once melted, pour it into the bowl of a stand mixer to cool down. Alternatively, you can melt the butter in the microwave in 30-second intervals. Allow the butter to cool fully.
- Using a food processor or blender, blend about 3 Oreo cookies into fine crumbs. For the crushed Oreo cookie pieces, use a food processor or place 6 Oreos in a large ziplock bag and crush them with a rolling pin until you have bite-sized pieces. Set both aside.
- In a medium mixing bowl, sift together the all-purpose flour, Dutch processed cocoa powder, cornstarch, and baking soda. Whisk in the kosher salt to ensure even distribution. Set this mixture aside.
- In the bowl of your stand mixer with the cooled melted butter, beat together the light brown sugar (packed) and granulated sugar using the paddle attachment on medium-high speed. Continue until the mixture is creamy and fluffy, about 2 minutes, remembering to stop and scrape down the sides of the bowl halfway through.
- Reduce the mixer speed to medium. Beat in the large eggs one at a time, mixing until each is fully combined before adding the next. With the last egg, add the vanilla extract and red gel food coloring. Mix until the vibrant red color is evenly distributed throughout the dough.
- With the mixer on low speed, gradually add the flour mixture in 3 additions. Mix only until just combined; you should still see a few streaks of flour. Remove the mixing bowl from the stand mixer. Now, add the semisweet chocolate chips, Oreo cookie crumbs, and crushed Oreo cookie pieces. Using a rubber spatula, gently fold everything together until just combined. Cover the bowl tightly with plastic wrap and refrigerate for 3 hours. Chilling dough overnight is even better.
- Line a plate with wax paper and set it aside. Remove the chilled dough from the fridge. Using a large cookie scoop (about 2.5 oz or approx. 3 tablespoons), measure out each portion of dough. Flatten each dough portion slightly in the palm of your hand. Pipe or spoon a small dollop (about 1 teaspoon) of the prepared cream cheese swirl into the center. Carefully enclose the cream cheese with the cookie dough, gently rolling it into a ball and smoothing out any cracks. The goal is to fully encase the swirl. Place the dough balls on the wax paper-lined plate and put them back in the fridge, uncovered, to firm up for about 10-15 minutes while your oven preheats.
- Line a large baking sheet with parchment paper and set aside. Preheat your oven to 350 degrees F.
- Place 5 dough balls onto the prepared baking sheet, ensuring they are about two inches apart. Keep any remaining dough balls in the fridge until you're ready to bake them. Bake the cookies for 12–14 minutes. For a soft, gooey cookie, bake for 12 minutes. If you prefer a slightly firmer cookie, bake for 14 minutes. At the halfway mark (around 6-7 minutes), remove the cookies from the oven and firmly tap the baking sheet on a heatproof surface. Rotate the baking sheet and return the cookies to the oven. The cookies are ready when the edges are set, and the center still looks slightly wet and gooey.
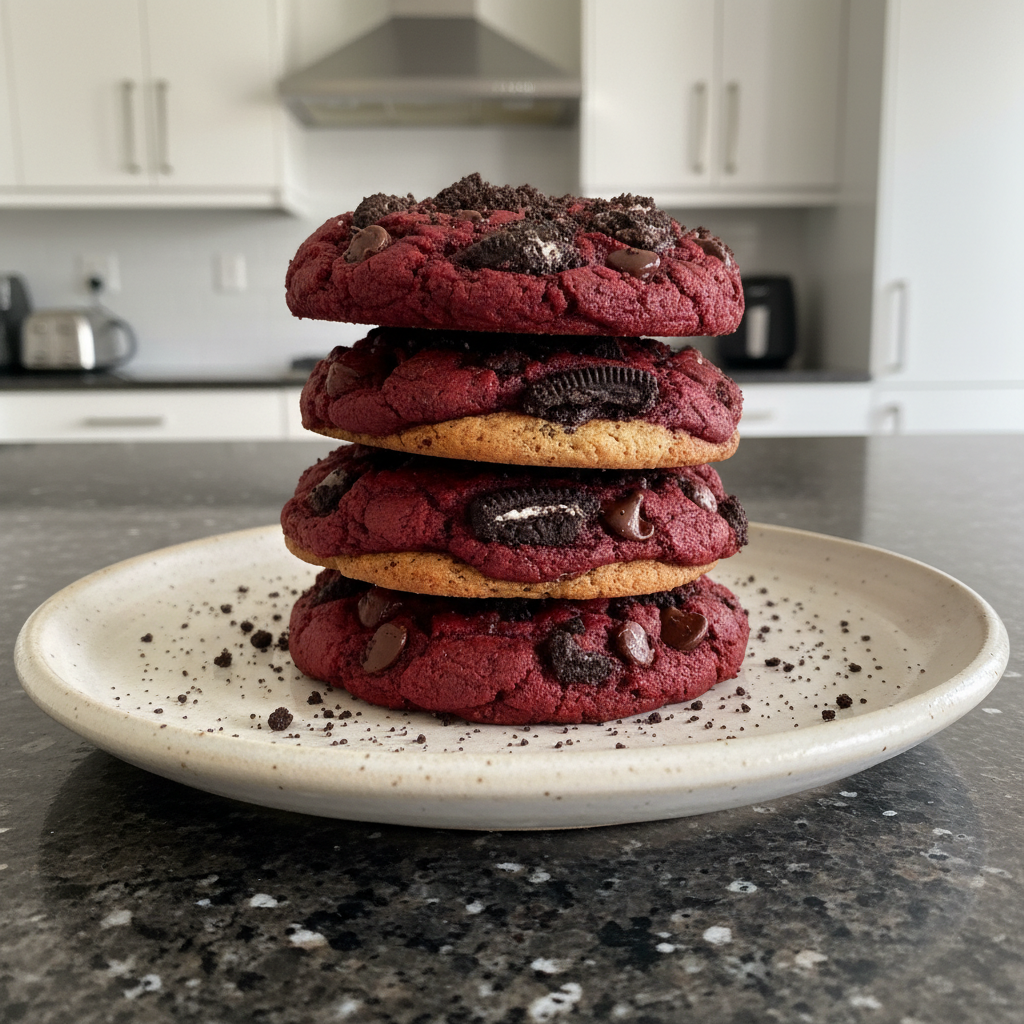
- As soon as the cookies come out of the oven, use a biscuit cutter or a wide cup (larger than your cookies) to scoot warm cookies into perfect rounds with a gentle circular motion. Immediately top the cookies with extra chocolate chips and crushed Oreos for an appealing finish. Allow the cookies to cool on the baking sheet for 5 minutes; this allows their gooey center to set before you carefully transfer them to a cooling rack to cool completely.
Nutrition
Notes
Store baked Red Velvet Oreo Cookies in an airtight container at room temperature for 3-4 days. For longer storage, freeze baked cookies for 2-3 months or freeze scooped dough balls for up to 3 months. This recipe is excellent for make-ahead baking, ensuring you always have a delightful treat ready. Nutrition information is estimated based on common ingredients and serving sizes and may vary.