Skip to content
 There’s something truly special about unleavened bread. It’s a culinary tradition that spans centuries, simple in its ingredients yet profound in its history and versatility. Whether you’re preparing for a special occasion like Passover or a Nativity dinner, or simply looking for a quick, wholesome flatbread to enjoy with your meals, this Unleavened Bread Recipe is a revelation. I will guide you through making perfectly pliable and flavorful bread right in your kitchen, complete with a secret ingredient that ensures a superior texture every single time. Get ready to master this ancient art and discover endless serving possibilities!
Why You’ll Love This Recipe
In my kitchen, I’ve found that the simplest recipes often hold the greatest power. This unleavened bread recipe is a perfect example, but with a small twist that makes all the difference. I incorporate a tablespoon of good quality olive oil directly into the dough. This clever addition makes the dough incredibly pliable and a dream to work with, preventing any sticky situations on your skillet. To truly enhance the flavor, I also recommend a finishing touch of herb-infused olive oil or melted garlic butter.
The reasoning behind this olive oil twist is simple yet effective. The oil helps to create a more tender dough that is easier to roll out, and it prevents the bread from becoming tough. It also ensures the bread doesn’t stick to your skillet and contributes to that beautiful golden-brown color from the Maillard reaction, locking in a richer flavor. Plus, I will explicitly guide you to lightly oil the skillet before cooking each piece, directly addressing a common frustration I hear from fellow home cooks.
Here’s why I know you will love making and eating this unleavened bread:
Quick & Simple: This basic recipe comes together incredibly fast, making it perfect for those busy weeknights.
Incredibly Versatile: It is excellent with all kinds of dips, hearty soups, or as a base for various toppings, providing endless ways to enjoy it.
Consistently Delicious: With my unique technique, you will achieve soft, flavorful flatbreads every time, without fail.
Ingredients Needed

- 1/2 teaspoon Salt
- 2 Cups Flour (plus 2 Tablespoons)
- 1 Cup Water (cold)
Ingredient Notes & Substitutions
Flour: I typically use all-purpose flour for this unleavened bread recipe, which gives you a wonderfully consistent and standard result. However, for those looking to boost the fiber and nutrient content, feel free to experiment with whole-grain flour. Just be aware that using whole-grain flour like whole wheat will yield a denser texture, but it is still incredibly delicious.
Water: You might wonder why cold water is specified. In my experience, cold water is key here because it helps to slow down gluten development. This makes the dough much easier to work with, preventing it from becoming overly elastic too quickly. The result is a more manageable and pliable dough, which is ideal for unleavened bread.
Salt: Salt is not just for flavor; it also plays a crucial role in how the dough interacts with the flour. It helps to enhance the natural flavors of the bread. If you decide to use different flours or plan to add other savory elements later, remember you can always adjust the salt to your personal taste.
Olive Oil: The choice of olive oil really matters in this recipe. Using a good quality olive oil not only in the dough but also for finishing, significantly contributes to both the flavor and the pliability of the bread. If you are looking for an alternative for finishing, melted butter works beautifully too, adding its own rich aroma and taste.

How to Make Delicious Unleavened Bread
Step 1: Mixing the Dough
In a large bowl, combine the 1/2 teaspoon of salt with the 2 cups of all-purpose flour. Give them a good stir to ensure they are well mixed. Now, pour in the 1 cup of cold water and, this is my unique twist, add 1 tablespoon of olive oil. Stir everything together until the dough starts to come together in a shaggy ball. It should look cohesive but still a bit rustic. Once it forms a ball, transfer it to a lightly floured surface. Knead the dough for a full 5 minutes. This kneading process is vital for unleavened bread; it develops the gluten, which provides structure and elasticity without the need for yeast, resulting in a wonderfully pliable dough. You will feel the dough become smoother and more elastic as you work it.
Step 2: Preparing the Skillet
Place your skillet over medium-low heat. You want it warm enough to cook the bread gently without burning it. A visual cue for the right temperature is when a light sheen of oil (if testing with a tiny drop) begins to shimmer but not smoke. It is crucial to lightly oil the skillet before cooking EACH piece of unleavened bread. This step is a game-changer for preventing sticking and ensuring a beautiful, even browning every time.
Step 3: Forming and Rolling
Pinch off about 5 to 7 equal-sized pieces of dough. Roll each piece between your palms to form smooth, round balls. On a lightly floured surface, take one dough ball and roll it out with a rolling pin. Aim for a diameter of about 6 inches and a thickness of approximately 1/8 inch. This specific thickness is key for achieving the perfect balance of crispness and tenderness. Repeat with the remaining dough balls.
Step 4: Cooking
Carefully place one rolled-out piece of dough onto your preheated, lightly oiled skillet. You know the skillet is hot enough when a drop of water sizzles instantly. Cook the bread for about 2 minutes on the first side. You will see it puff up slightly and start to develop lovely golden-brown spots. Flip it over and cook for another 2 minutes on the second side, until it also has golden spots and feels cooked through with a slightly crisp exterior. Immediately after removing the warm bread from the skillet, brush it generously with herb-infused olive oil or melted garlic butter for an incredible burst of flavor and aroma. I love using fresh herbs like parsley or cilantro for this. Serve your delicious unleavened bread warm, or store it covered.
Mastering Unleavened Bread: Beyond the Basics
Baking Unleavened Bread in the Oven: An Alternative Method
While pan-frying yields a delightful chew, sometimes you might prefer baking your unleavened bread. Many people ask, “Can I bake the dough in the oven instead?” The answer is yes, absolutely! If you are opting to bake rather than fry, place your rolled-out dough pieces on a baking sheet lined with parchment paper. Preheat your oven to 400 degrees Fahrenheit and bake for about 3 minutes on each side. When it is ready, the bread will be lightly golden, slightly puffed, and have crisp edges. The texture difference compared to pan-frying is subtle; baked unleavened bread tends to be a bit crisper, while skillet-cooked versions are often chewier.
Adapting Your Recipe: Whole Grains & Sourdough Discard
This unleavened bread recipe is wonderfully adaptable, allowing you to experiment with different flours and even sourdough discard for added depth.
Whole-Grain Flour: You can easily substitute some or all of the all-purpose flour with whole-grain flour, such as whole wheat. Keep in mind that whole-grain dough tends to absorb more water, so you might need to slightly adjust the hydration levels to achieve the right consistency. It will also result in a denser texture, but it is a fantastic way to boost the fiber and nutritional content.
Sourdough Discard: For an extra layer of flavor and a subtle tang, incorporating sourdough discard is a fantastic idea. Even though this is an unleavened bread, the discard adds complexity and can even aid digestion, without acting as a leavening agent here. I recommend replacing about 1/4 cup of the water and 1/4 cup of the flour with an equal amount of sourdough discard, or simply adding 1/4 cup of discard directly to the dough. Be prepared to adjust the overall hydration slightly, as the thickness of your discard can vary. No proofing times are necessary since you are not relying on it for rise.
Pro Tips & Troubleshooting
Pro Tips for Perfect Unleavened Bread
Consistent Rolling: The key to evenly cooked unleavened bread is consistent rolling. Aim for about 1/8 inch thick across the entire surface of each piece. This ensures they cook uniformly and reach that perfect texture.
Don’t Skimp on Kneading: Even without yeast, kneading is incredibly important for this recipe. It is how you develop the gluten in the dough, which provides the necessary structure and pliability. A good 5 minutes of kneading will build character into your bread, making it easier to roll and more tender to eat.
Preheat is Key: Always allow your skillet to properly preheat to medium-low heat before adding the dough. You want a consistent, gentle heat. Visual cues like a drop of water sizzling on contact but no smoke will tell you it is ready.
Oil the Skillet Lightly: This is a critical step I cannot emphasize enough. Lightly oil the skillet before EACH piece of bread. Use a paper towel to wipe off any excess oil. This prevents sticking and promotes beautiful, even browning, which is part of my unique twist for this recipe.
Finishing Touch Matters: For maximum flavor impact, brush your warm unleavened bread with herb-infused olive oil or garlic butter immediately after it comes off the skillet. It makes a huge difference in aroma and taste.
Adjust Salt for Flavor: If you are planning to add other savory elements to your bread or are experimenting with specialty flours, remember to adjust the salt levels to your personal preference. Taste and adjust is always my motto!
Common Mistakes to Avoid
Not Oiling the Pan Enough: This is one of the most common mistakes, and it inevitably leads to your unleavened bread sticking to the skillet and cooking unevenly. Always lightly oil the skillet for each piece, as I mentioned above.
Using Too Much Oil: While not enough oil is an issue, using excessive oil in the pan can make your bread chewy and greasy. A very light film is all you need for the perfect texture and browning.
Overcooking: Overcooking your unleavened bread is a surefire way to end up with dry, brittle pieces. Aim for just 1 to 2 minutes per side, until golden spots appear, then remove it from the heat.
Under-Kneading: If your dough is stiff and crumbly, difficult to roll, or the final product is tough, chances are you have under-kneaded it. Remember, 5 minutes of kneading is essential for gluten development, which makes the dough pliable.
Rolling Too Thick/Thin: If your bread is too thick, it will have an undercooked, doughy center. If it is too thin, it will become brittle and easily overcooked. Stick to that 1/8-inch consistency for the best results.
Using Hot Water: While it might seem counterintuitive, using hot water can prematurely activate the gluten and make your dough sticky and incredibly difficult to handle. This is why cold water is specifically recommended in this recipe.
Serving & Storage
Delicious Serving Ideas
Unleavened bread is incredibly versatile, making it a perfect companion for a wide array of dishes. Here are some of my favorite ways to enjoy it:
Classic Pairings: Serve it warm alongside your favorite dips. It is fantastic with an easy homemade hummus, creamy baba ghanoush, or refreshing tzatziki.
Soup Companion: This bread is absolutely excellent for scooping up hearty stews and warming soups, adding a comforting touch to any meal.
Meal Base: Get creative and use it as a quick base for mini pizzas, open-faced sandwiches, or simple wraps. The possibilities are endless!
Cultural Significance: Beyond everyday meals, unleavened bread holds deep cultural meaning. It is a traditional component of a Nativity dinner menu and plays a significant role in Passover observances (similar to matzo, which is a very specific type of unleavened bread). Incorporating it can be a wonderful way to honor these traditions.
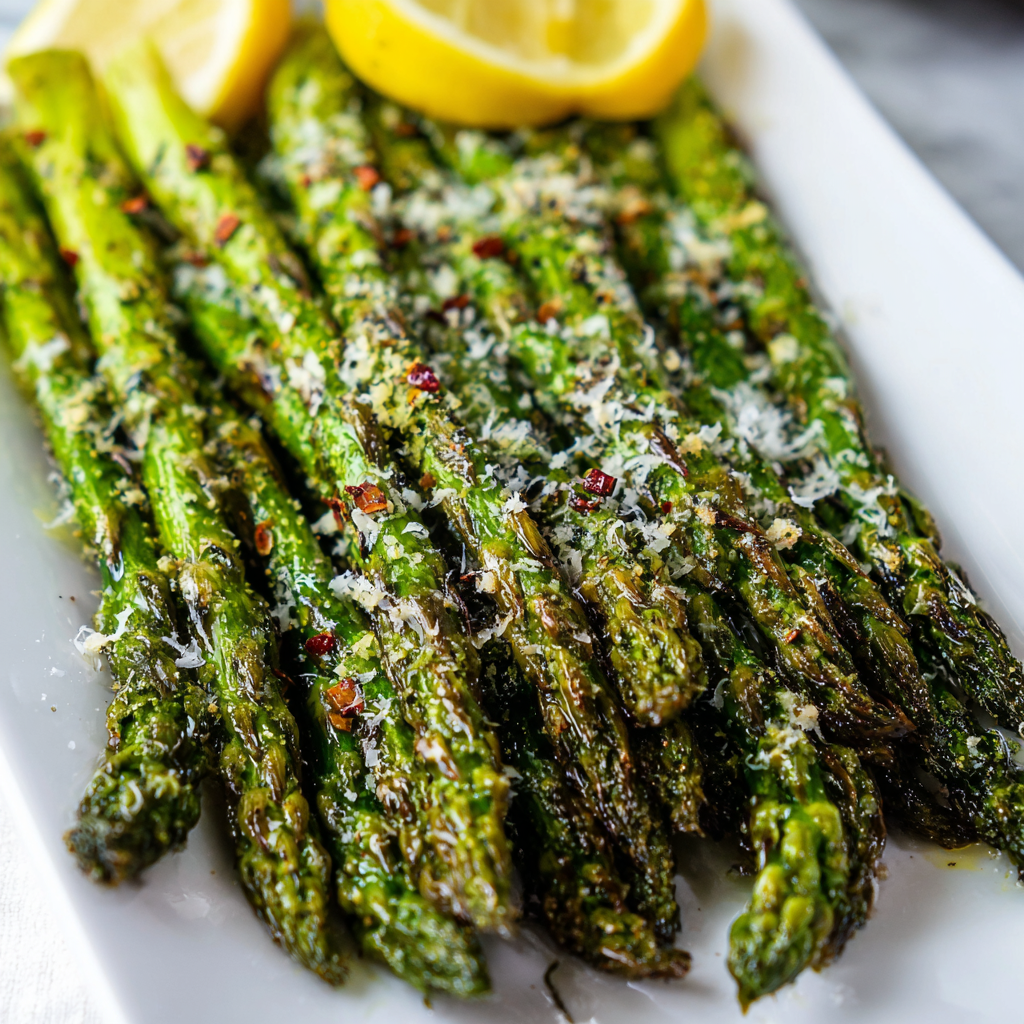
Garnishing: To elevate the flavors even further, always remember that finishing touch! Brush your warm bread with melted butter or my herb-infused olive oil, and then sprinkle with fresh parsley or cilantro for a burst of freshness and aroma.
Storage and Make-Ahead Tips
You have made this delicious bread, now what? Here is how to keep it fresh:
Room Temperature Storage: Homemade unleavened bread is truly best when enjoyed fresh, right off the skillet. However, if you have leftovers, you can store them in an airtight container at room temperature for 1 to 2 days. This keeps them from drying out.
Freezing: Yes, unleavened bread can be frozen successfully! To do so, allow the bread to cool completely. Then, layer the cooled pieces with parchment paper to prevent sticking and place them in a freezer-safe bag or container. It will keep well in the freezer for up to 1 to 2 months.
Reheating Instructions: When you are ready to enjoy your stored or frozen unleavened bread, I recommend reheating it gently. My preferred method is in a dry skillet over medium-low heat for 1 to 2 minutes per side, until it is warm and pliable again. A toaster oven also works wonderfully. I generally advise against using a microwave, as it can sometimes make the bread rubbery.
Conclusion
Mastering this Unleavened Bread Recipe is a rewarding experience, offering you a versatile and delicious flatbread that is simple to make and incredibly satisfying. My unique twist of incorporating olive oil into the dough ensures exceptional pliability and flavor, while the guidance on perfectly oiling the skillet guarantees no sticking and beautiful browning. And of course, the delightful herb or butter finish truly elevates each bite.
Even if you are a beginner in the kitchen, you can achieve fantastic results with these straightforward steps and expert tips. I encourage you to experiment with different flours, explore various toppings, and discover your own favorite serving ideas. Make this ancient bread your own kitchen staple!
Feel free to share your unleavened bread creations with me on social media, or print out this recipe card for easy access during your next cooking adventure.
FAQ
What is unleavened bread and how is it traditionally used?
Unleavened bread is simply bread made without any leavening agent, such as yeast or baking powder, meaning it does not rise. It holds deep historical and cultural significance, famously used in religious traditions like Passover (where it is known as matzo) and as part of Nativity dinners. Its simplicity reflects its ancient roots as one of the earliest forms of bread.
Can I bake unleavened bread instead of cooking it on a skillet?
Yes, you can absolutely bake unleavened bread! If you prefer baking, place the rolled-out dough on parchment paper on a baking sheet. Bake it in an oven preheated to 400°F for approximately 3 minutes per side, until it is lightly golden and slightly puffed.
How can I prevent my unleavened bread from sticking to the pan?
To prevent sticking, the most crucial step is to lightly oil your skillet before cooking EACH piece of bread. Also, ensure your skillet is properly preheated to medium-low heat; an evenly heated, lightly oiled surface is key.
What kind of flour can I use for unleavened bread, and how does it affect the result?
This recipe primarily uses all-purpose flour for a classic result. However, you can use whole-grain flours like whole wheat for a denser texture and added nutrients. Be aware that whole-grain flours may require slight adjustments to the water content as they absorb liquid differently.
How long can homemade unleavened bread be stored, and can it be frozen?
Homemade unleavened bread is best enjoyed fresh, but it can be stored in an airtight container at room temperature for 1 to 2 days. Yes, it freezes beautifully! Layer cooled bread with parchment paper in a freezer-safe bag for 1 to 2 months. Reheat gently in a dry skillet or toaster oven.
Is unleavened bread a healthy dietary choice?
Unleavened bread, made with basic ingredients like flour, water, and salt, is a relatively simple and often low-fat option. Our recipe’s addition of olive oil contributes healthy fats. Opting for whole-grain flour can boost its fiber content, making it a good source of carbohydrates. Its overall healthiness depends on serving size and accompaniments.
Are pita bread and tortillas considered unleavened bread?
Traditional pita bread is typically leavened with yeast, which makes it puff up into pockets, so it is not strictly unleavened. Many tortillas, especially corn tortillas and some flour tortillas, are indeed made without leavening agents, making them a type of unleavened flatbread. However, they are distinct in their cultural origins and ingredient compositions.
Why is my unleavened bread tough or dry?
Unleavened bread often becomes tough or dry due to overcooking, insufficient kneading of the dough, or the dough being too dry initially. For a tender texture, ensure proper kneading (about 5 minutes), optimal dough hydration, and precise cooking times (1 to 2 minutes per side) until golden spots appear.
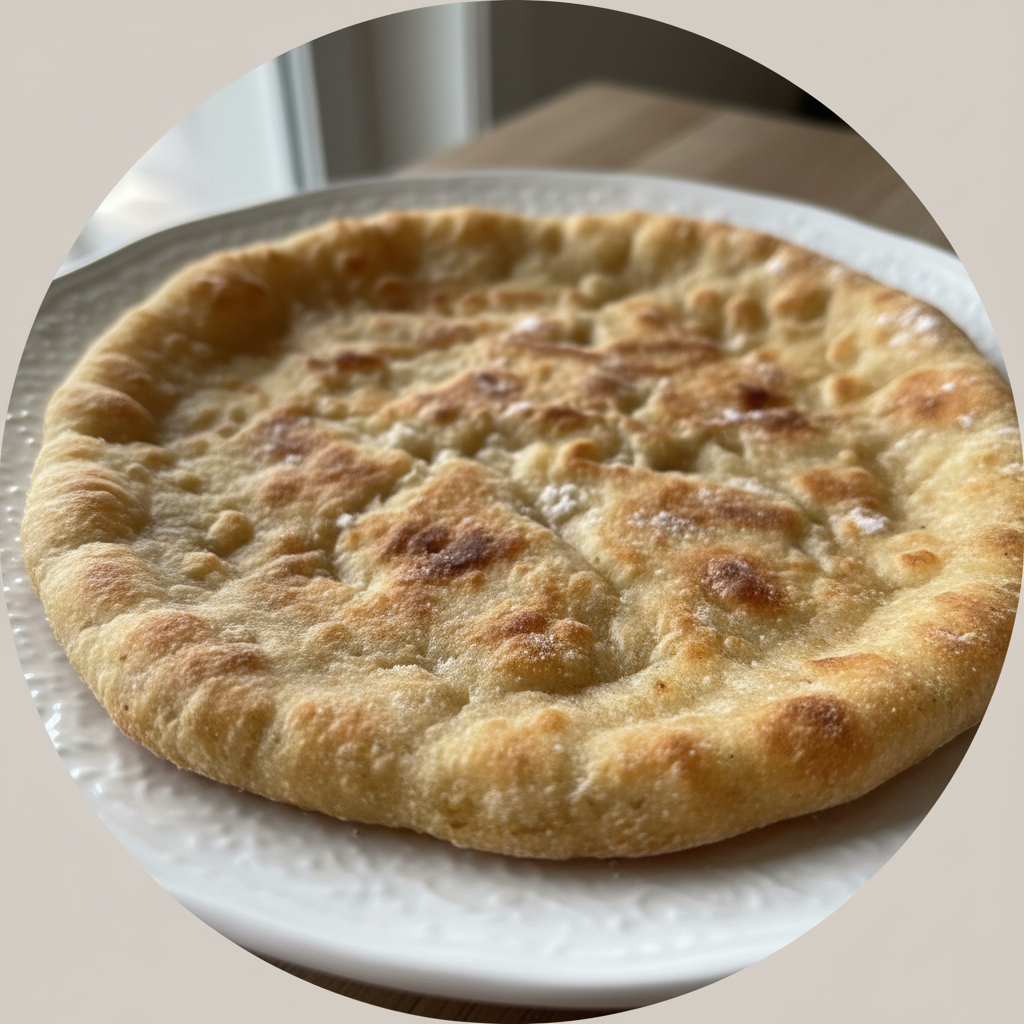
Easy & Flavorful Unleavened Bread Recipe with Olive Oil Twist
Ingredients
Equipment
Method
- In a large bowl, combine the 1/2 teaspoon of salt with the 2 cups of all-purpose flour. Stir them well. Pour in the 1 cup of cold water and add 1 tablespoon of olive oil. Stir everything until the dough forms a shaggy, cohesive ball.
- Transfer the dough to a lightly floured surface. Knead the dough for a full 5 minutes until it becomes smoother and more elastic, developing the gluten needed for pliability.
- Place your skillet over medium-low heat. Ensure it is warm enough to cook gently without burning; a light sheen of oil should shimmer. Lightly oil the skillet before cooking EACH piece of unleavened bread to prevent sticking and ensure even browning.
- Pinch off about 5 to 7 equal-sized pieces of dough. Roll each piece into smooth, round balls between your palms.
- On a lightly floured surface, take one dough ball and roll it out with a rolling pin to a diameter of about 6 inches and a thickness of approximately 1/8 inch. Repeat with the remaining dough balls.
- Carefully place one rolled-out piece of dough onto your preheated, lightly oiled skillet (a drop of water should sizzle instantly). Cook for about 2 minutes on the first side until it puffs slightly and develops golden-brown spots.
- Flip the bread and cook for another 2 minutes on the second side, until it also has golden spots and feels cooked through with a slightly crisp exterior. Immediately remove the warm bread from the skillet.
- Brush the warm bread generously with herb-infused olive oil or melted garlic butter for enhanced flavor and aroma. Serve warm or store covered.