
Ingredients
Equipment
Method
Prepare the Crust
- Place a jumbo silicone muffin pan on a baking sheet. Blitz the shortbread cookies in a food processor, or crush them in a plastic bag with a rolling pin until they are fine crumbs.
- Mix the crumbs in a small mixing bowl with the melted butter.
- Divide the shortbread crumbs between the 6 cavities in the muffin pan and press them firmly into the bottom to form the crust.
Hydrate Gelatin
- Place the cold water in a small bowl. Sprinkle the gelatin on top, then whisk them together.
- Let the bowl sit for 5 minutes so the gelatin can hydrate and absorb the water, becoming firm.
Prepare Cheesecake Base
- Meanwhile, put the room temperature cream cheese in the bowl of a large stand mixer fitted with a paddle attachment. Beat it until smooth, creamy, and lump-free. A hand mixer can also be used.
- Add the sugar, lemon juice, vanilla bean paste, and salt. Mix well, scraping the bottom and sides of the bowl occasionally.
- With the mixer running on low speed, gradually add the room temperature heavy cream, mixing until everything is smooth and well-combined.
Melt and Combine Gelatin
- Once the gelatin feels very firm, microwave it for 10-15 seconds, until fully melted, liquid, and warmer than room temperature but not hot.
- Use a small whisk or spoon to stir the gelatin and ensure it is lump-free.
- Add the warm liquid gelatin to the room temperature cheesecake filling and mix it in by hand, scraping the sides and bottom well.
Divide and Color
- Divide the cheesecake into 4 portions; each should be about 7 oz if you want to measure them out.
- Stir a drop of gel food coloring into each portion, mixing until the color is smooth and uniform.
Layer and Freeze
- Take your first color and divide it between the 6 cavities (a cookie scoop is fastest). Spread it into a smooth layer with the back of a spoon.
- Add a second color on top of the first. Continue to layer the cheesecake colors until all 4 have been added to the pan.
- Smooth the tops of the cheesecakes. Place them in the freezer for at least 2 hours to firm up; they should feel very solid to the touch before unmolding.
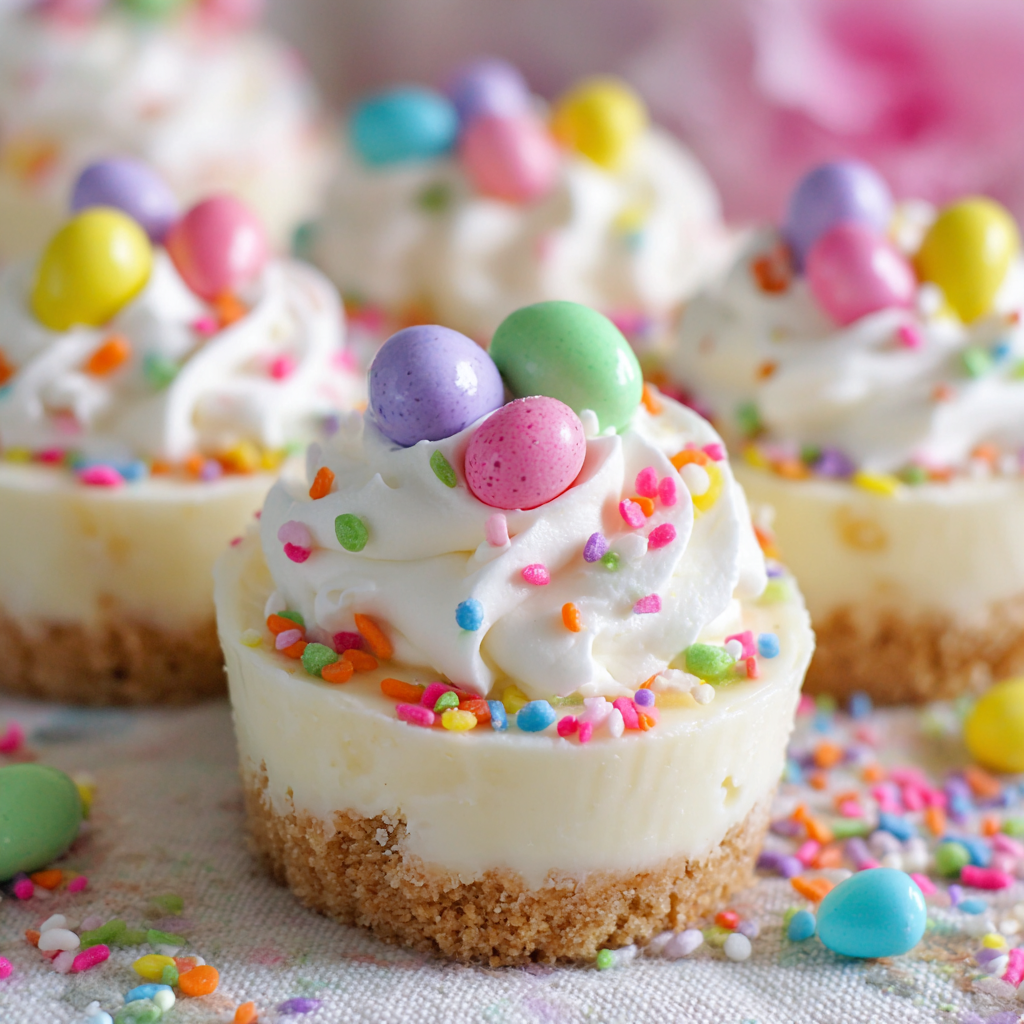
Unmold and Decorate
- Press from the bottom of one of the silicone cavities and turn it upside-down, pushing the cheesecake out into your hand. Repeat for all cheesecakes.
- Let the cakes sit at room temperature for 30 minutes to warm slightly before serving.
- Top each cheesecake with a swirl of whipped cream, a pinch of sprinkles, and a few candy eggs, if desired. Serve chilled but not frozen.
Storage
- Store the cheesecakes, well-wrapped, for 4-5 days in the refrigerator.
Nutrition
Notes
For the crust, graham cracker crumbs or vanilla wafers are suitable alternatives. Gelatin is crucial for stability and unmolding; omit if serving in jars for a looser dessert. Ensure cream cheese is at room temperature for a lump-free filling. Use gel food coloring for vibrant hues and work quickly when layering. Proper chilling is essential for beautiful results. Nutrition information is estimated based on common ingredients and serving sizes and may vary.