
Ingredients
Equipment
Method
Prepare Your Pan and Preheat
- First, preheat your oven to 350°F (175°C). Line a 9x9 inch baking pan with parchment paper, ensuring it covers all sides and hangs over the edges slightly. This will make it much easier to lift the cooled brownies out later. Set the prepared pan aside.
Whip Up the Cheesecake Layer
- Next, let's create that smooth, creamy cheesecake layer. In a stand mixer fitted with the paddle attachment, combine the softened cream cheese, room temperature egg, granulated sugar, and vanilla extract. Beat these cheesecake ingredients together on medium speed until they are just combined and smooth, about 2 minutes. Be careful not to over-beat the cheesecake batter, as this can incorporate too much air and lead to cracks during baking. Set this creamy mixture aside.
Craft the Rich Brownie Layer
- Now for the fudgy brownie layer! In a microwave-safe bowl, melt the butter. Once melted, remove it from the microwave and stir in the granulated sugar. Place the mixture back into the microwave for another 30 seconds. Stir again, then microwave for 60 seconds more. You're looking for the sugar and butter to bubble slightly, but not burn – this process helps dissolve the sugar for an incredibly fudgy texture. This amount of time should do the trick for a perfectly molten mixture.
- Remove the hot butter-sugar mixture from the microwave. Immediately stir in the finely chopped bittersweet chocolate until it melts completely and the mixture is glossy and smooth. If any chocolate chunks remain, pop it back in the microwave for just 15 more seconds, then stir again.
- To the glossy chocolate mixture, add the eggs, egg yolk, and vanilla extract. Beat until they are just combined. Finally, add the all-purpose flour, cocoa powder (along with your instant espresso powder for that intensified chocolate flavor!), and salt. Mix until everything is just combined and no streaks of flour remain. Be careful not to overmix at this stage to ensure a tender, fudgy brownie.
Prepare the Swirl Batter
- This is where our unique twist comes in! Remove about 1/2 cup of the rich brownie batter and place it in a separate small bowl. Now, instead of water, add one to two tablespoons of melted unsalted butter or a neutral oil (like vegetable or canola) to this reserved batter. Whisk it together until it's a thinner, yet still rich, consistency. This specially thinned batter will create those distinct, beautiful brownie swirls on top.
Assemble and Swirl Your Brownies
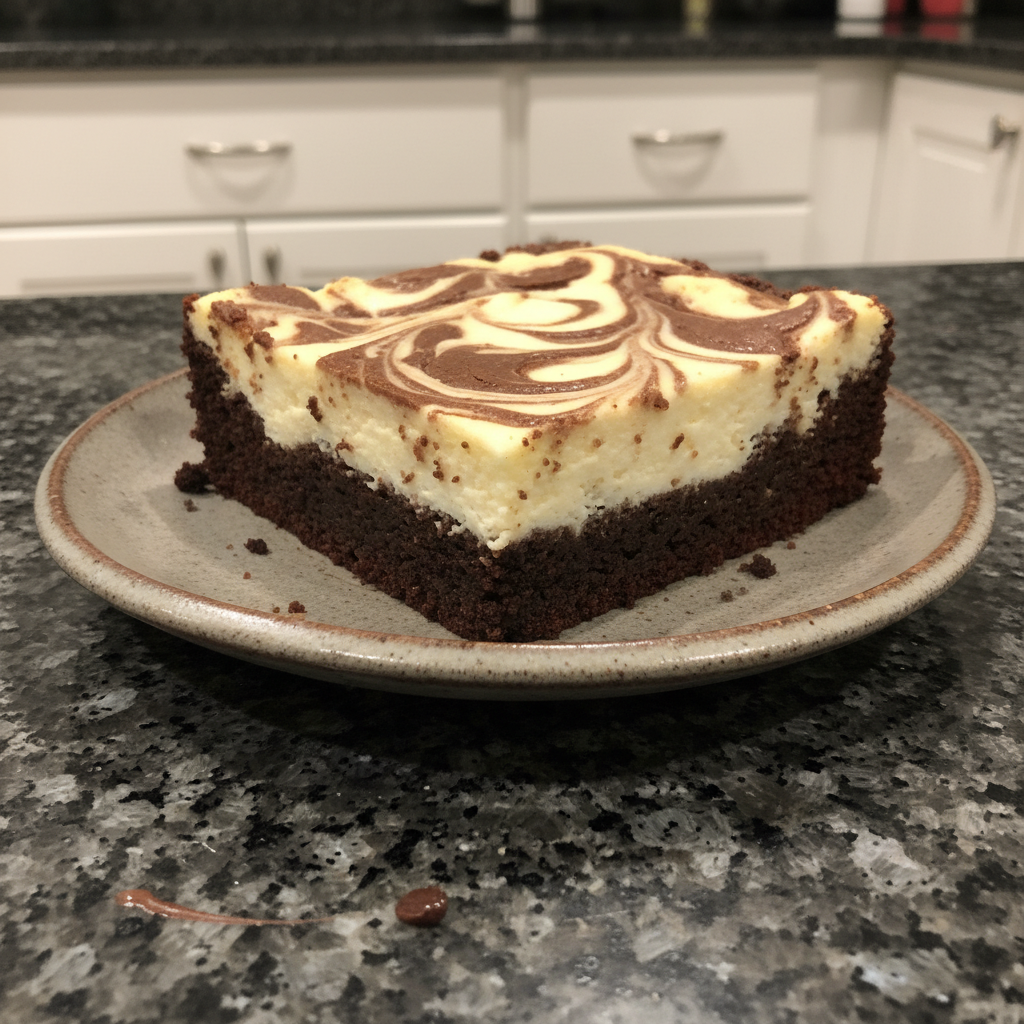
- Pour the remaining, thicker brownie batter into your prepared 9x9 inch pan, spreading it into an even layer with an offset spatula or the back of a spoon. Next, carefully pour the creamy cheesecake batter evenly over the brownie layer. Now, drop spoonfuls of your thinned-out brownie swirl batter onto the cheesecake layer. Take a knife, or even a skewer, and gently drag it through the batters to create a few big, sweeping swirls. The key here is to not over-swirl! You want big, separate swirls of cheesecake and brownie, not a muddled, uniform color. The melted fat in the swirl batter will help create those clear, defined lines.
Bake to Perfection
- Place the pan into your preheated oven and bake for about 30 minutes. You’ll know the cheesecake brownies are done when the edges of the cheesecake layer are set, and a knife inserted into the center of the brownies comes out mostly clean with maybe a few moist crumbs. The cheesecake center should still have a slight wobble. Do not over bake, as this will lead to dry, crumbly brownies and a rubbery cheesecake. The fudginess relies on pulling them out at just the right moment!
Cool and Chill for Clean Cuts
- Once baked, remove the pan from the oven and allow the cheesecake brownies to cool completely on a wire rack at room temperature. Patience is key here! After they’ve cooled, transfer the pan to the refrigerator and chill for at least an hour. This crucial chilling time allows the cheesecake layer to fully set, ensuring a firm texture and making it much easier to cut into beautiful, clean squares. When ready to serve, lift the brownies out of the pan using the parchment paper overhang and cut into 9 large squares for a generous treat, or 16 smaller brownies for a crowd!
Nutrition
Notes
These decadent cheesecake brownies are best served chilled for a firm, creamy texture. You can cut them into 9 large squares for a generous treat or 16 smaller brownies for a crowd. Store leftovers in an airtight container in the refrigerator for up to 5-7 days. They can also be frozen for up to 3 months. Always ensure brownies are completely cooled and chilled before cutting for the cleanest slices. Nutrition information is estimated based on common ingredients and serving sizes and may vary.