Skip to content
 There’s something incredibly satisfying about a perfectly fried egg. That gleam of a runny yolk, the tender, set white, and the promise of a delicious meal – it’s pure culinary magic. For many, frying an egg seems simple, yet achieving consistent results can be a challenge. Whether you’re aiming for a sunny-side up stunner or an over-easy delight, mastering the art of the egg fried to perfection is a skill every home cook deserves. I’m here to guide you through a foolproof technique that guarantees tender whites and perfectly runny yolks every time, even if you’re a complete beginner. Get ready to elevate your egg game with my signature ‘Low & Slow Cold Pan Start’ method.
Why You’ll Love This Recipe
In my kitchen, the secret to an impeccably fried egg lies in one game-changing technique: the ‘Low & Slow Cold Pan Start’ method. This isn’t just another way to fry an egg; it’s a scientific approach that ensures tender whites and gloriously runny yolks without fuss.
The logic is simple yet brilliant. By starting your large egg in a cold, buttered nonstick pan over medium-low heat, the egg white proteins set gradually. This gentle heat prevents the aggressive bubbling and crisping that can lead to rubbery, tough whites. Instead, the whites cook through softly and evenly, remaining beautifully tender. This method gives you unparalleled control, allowing you to achieve your desired doneness, from sunny-side up to over-hard, with ease and consistency. The optional butter basting not only adds incredible flavor but also helps set the top of the egg white without clouding that vibrant, runny yolk. It’s quick, versatile for any meal, budget-friendly, and truly elevates a simple ingredient into a culinary star.
Ingredients Needed
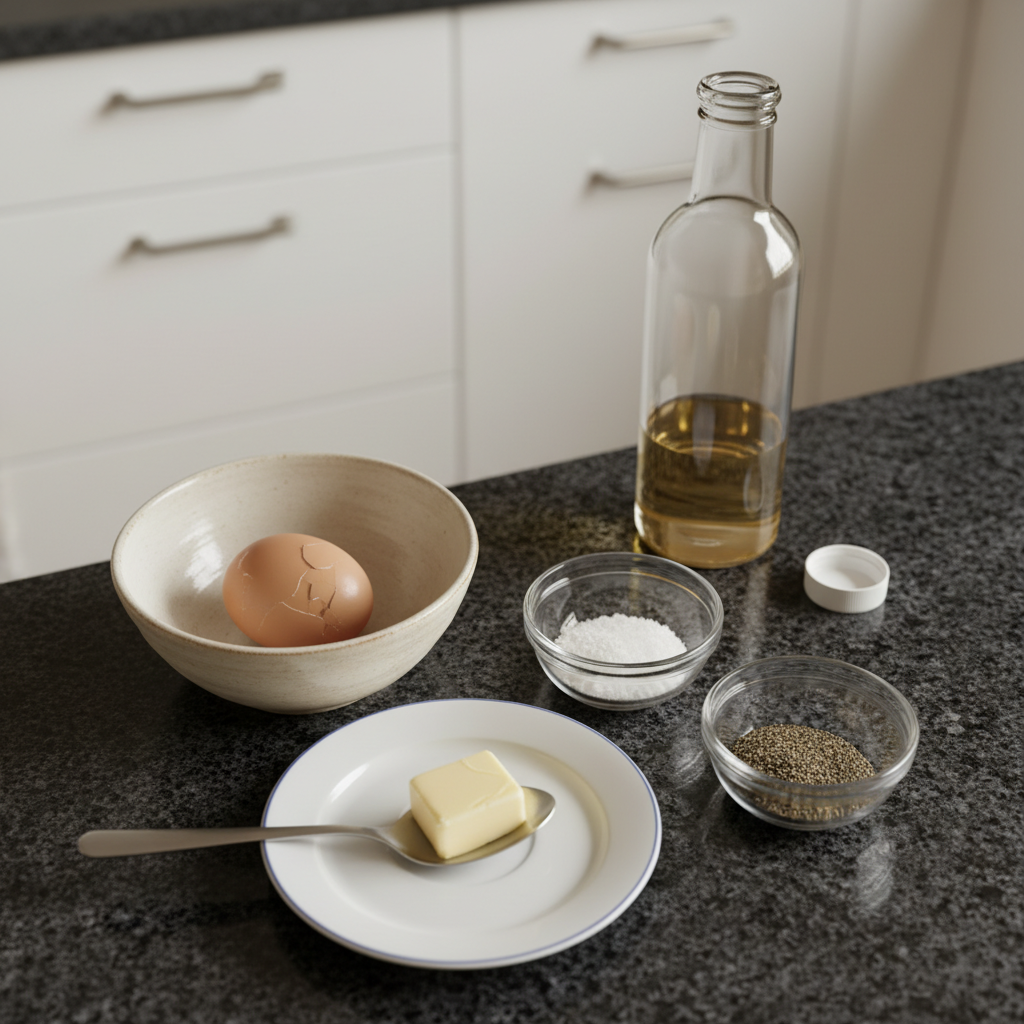
- 1 large egg
- 1 tsp. (or more) unsalted butter or neutral oil
- Kosher salt
- Freshly ground black pepper
Ingredient Notes & Substitutions
Eggs: The freshness of your egg makes a difference! Fresher eggs often have a higher, firmer egg white and yolk, making for a more compact and aesthetically pleasing fried egg. Older eggs tend to spread more, with thinner whites. I always recommend using large eggs for consistent results in this recipe.
Fat (Butter vs. Oil): Unsalted butter offers an incredible depth of flavor and a beautiful golden color to your fried egg. For a dairy-free option or if you prefer a higher smoke point, a neutral oil like canola, vegetable, or grapeseed oil works well. Ghee is also a fantastic butter alternative. When using a metal skillet, neutral oil is often preferred for its higher heat tolerance.
Seasoning: Kosher salt is essential for seasoning, bringing out the egg’s natural flavors. Freshly ground black pepper adds a delightful aromatic kick. Don’t be shy to experiment with other seasonings later, but these are your foundational flavor builders.
How to Make the Perfect Fried Egg
Mastering the perfect fried egg is a joy, and with this method, you’ll be frying like a pro in no time. Follow these steps for consistently delicious results.
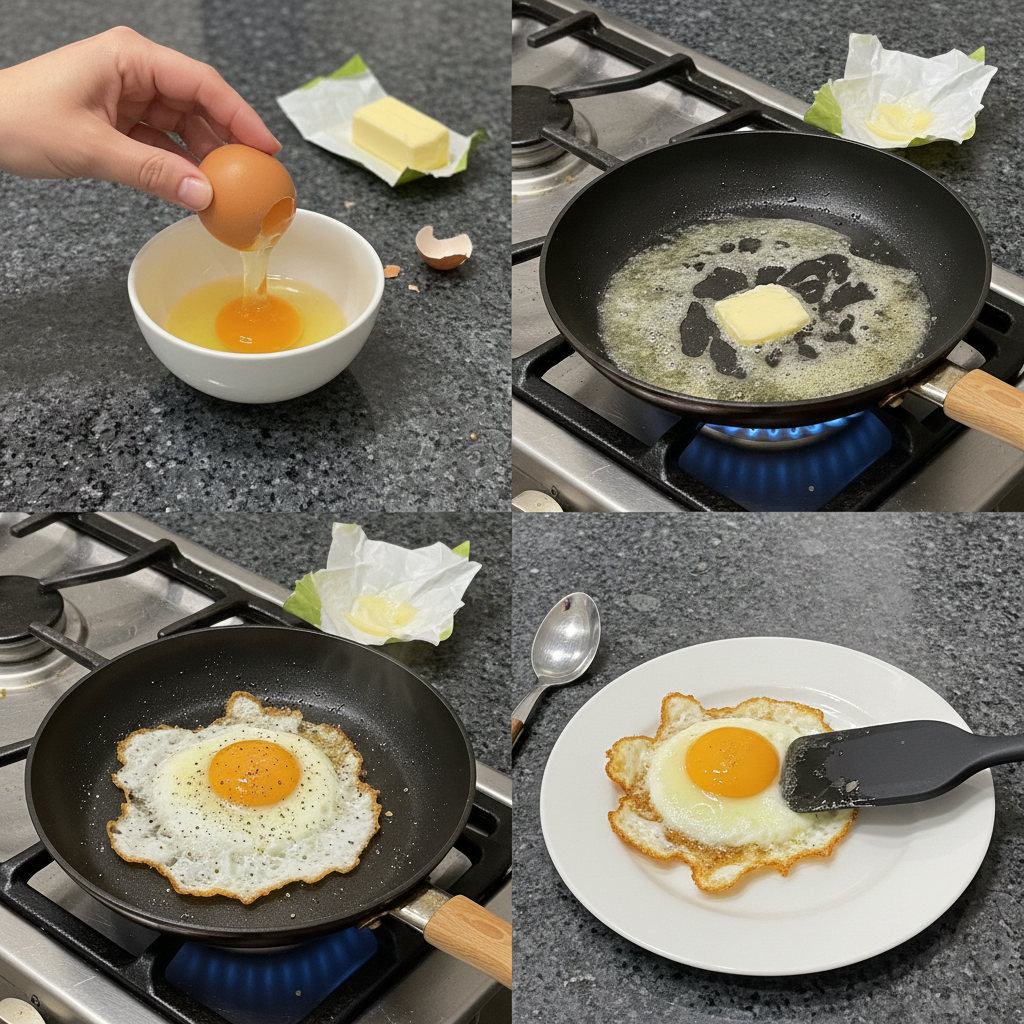
Step 1: Prepare Your Egg (and Pan)
Begin by cracking your large egg into a small pinch bowl. This expert tip ensures no shell bits contaminate your egg and allows for a smooth, controlled transfer to the pan, helping maintain a perfectly rounded shape.
For the ‘Low & Slow Cold Pan Start’ method, place your nonstick pan on the stovetop and add 1 tsp. unsalted butter. Only then, turn the heat to medium-low heat. The butter will gently melt as the pan heats, evenly coating it. If you’re using a metal skillet for a crispier edge, heat it over medium-high heat until a drop of water sizzles and evaporates immediately upon contact. Then, add 1 tsp. neutral oil and gently swirl it to evenly coat the pan.
Step 2: Introduce the Egg and Season
Gently slip the egg from your pinch bowl into the center of the pan. You should hear a gentle sizzle, not an aggressive roar. Immediately season the egg with a pinch of kosher salt.
Optional: For an ultra-even, flat white, especially for sunny-side up eggs, use a fork to gently poke and flatten any very thick parts of the egg white near the yolk. This helps the egg white cook more uniformly.
Step 3: Cook to Your Desired Doneness
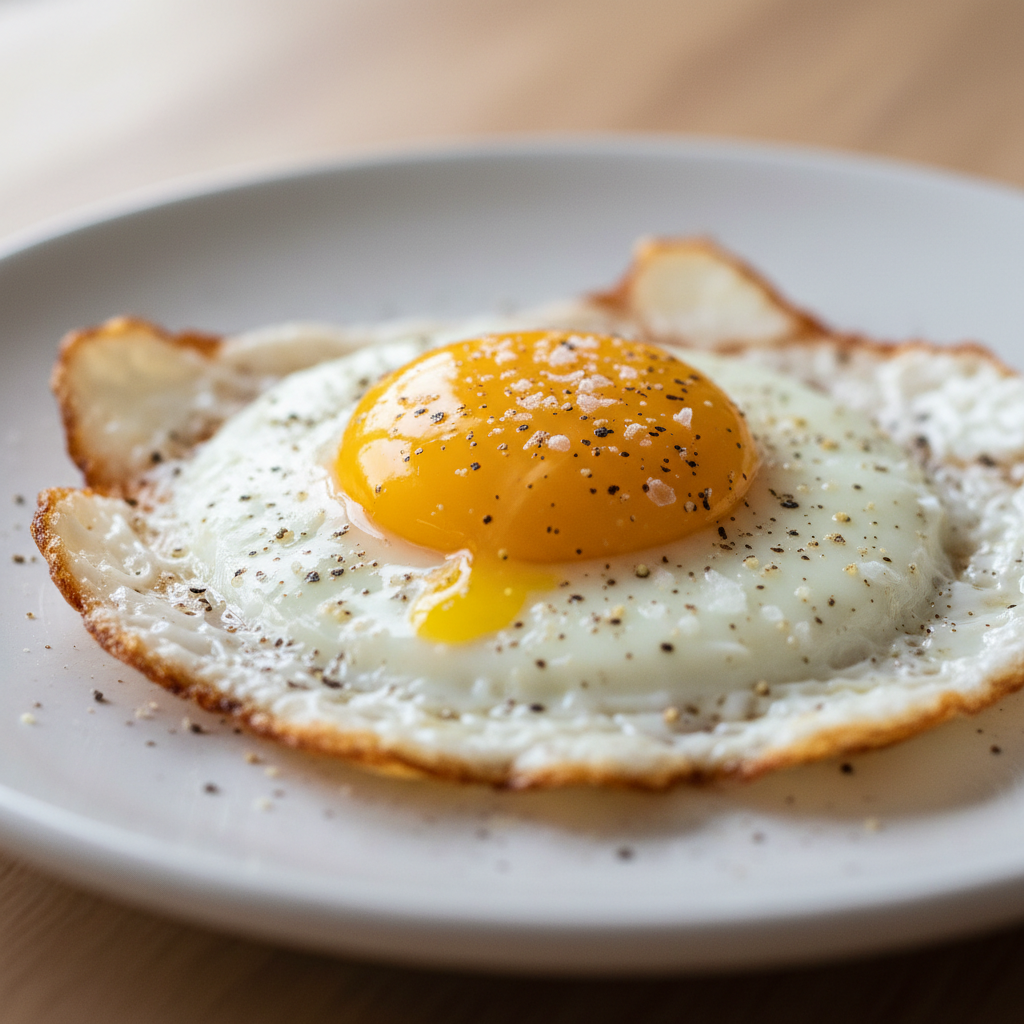
For Sunny-Side Up: Cook, undisturbed, until the egg white is fully set on top but the yolk is still wonderfully runny and warm. This typically takes about 3 minutes. If the very top of the egg white remains slightly translucent, add an additional 1 tsp. butter to the pan, let it melt, then carefully spoon the hot melted butter over the top of the egg white. This basting technique helps finish cooking the top without flipping.
For Over-Easy Egg: Cook, undisturbed, until the egg white is no longer runny but still not totally set, about 1 to 2 minutes. Use a flexible rubber spatula to gently flip the egg. Cook for just 30 to 60 seconds on the second side until the bottom is set but the yolk remains deliciously runny.
For Over-Medium Egg: Follow the initial cook and flip method for an over-easy egg. After flipping, continue to cook until the edges of the yolk feel firm when pressed, but the center still jiggles slightly, about 1 to 2 minutes.
For Over-Hard Egg: Follow the initial cook and flip method for an over-easy egg. Cook until the entire yolk feels solid with only a slight bit of fudginess left in the center, about 2 to 3 minutes.
Step 4: Final Seasoning and Serve
Season your perfectly fried egg with freshly ground black pepper to taste. Using a flexible rubber spatula, carefully transfer the egg to a plate and enjoy immediately.
Beyond the Basics: Essential Equipment & Perfecting Your Fry
To truly master the fried egg, understanding your tools and the nuances of cooking is key. I’ll share my recommendations for equipment and delve into the science of the perfect fry.
Essential Equipment for Perfect Fried Eggs
Pan: My top recommendation is a small (6″ or 8″) nonstick pan, ideally one you dedicate solely for eggs. Nonstick surfaces are crucial for easy release and beautifully formed eggs without sticking. While a metal skillet can be used for a crispier edge, it requires different heat management and more fat.
Spatula: A flexible rubber spatula is non-negotiable for nonstick pans. It prevents scratches and allows for gentle flipping and easy transfer. If you’re using a metal skillet, a thin metal spatula can work well.
Pinch Bowl: A small bowl for cracking eggs, also known as a pinch bowl, is invaluable. It helps you avoid shell bits and allows for a controlled, smooth slip of the egg into the pan, preventing a broken yolk.
Optimal Temperature & Egg Doneness Guide
Understanding heat is critical. For the tender white method in a nonstick pan, start cold and maintain medium-low heat. This allows the egg white to gently set without becoming rubbery. For traditional frying in a nonstick, medium heat is a good starting point.
If you’re using a metal skillet, begin with medium-high heat for that initial crisping, then reduce slightly to medium heat to finish cooking. Cook time will vary based on your pan, heat, and desired yolk doneness. A runny yolk will take the least time, a jiggly yolk a bit longer, followed by a firm yolk, and finally a fudgy yolk for over-hard.
Egg freshness also impacts the fry. Newer eggs have stronger albumin (egg white protein) which means the whites hold their shape better and are less likely to spread. Older eggs have thinner whites that spread more, which can impact the formation of a crispy white and overall presentation.
Mastering the Egg Cracking Technique
For beginners, proper egg cracking is vital to prevent a broken yolk or shell fragments. Instead of cracking on the rim of a bowl, gently tap the center of the egg on a flat, hard surface (like your countertop). This creates a clean break without pushing shell pieces inward. Then, hold the egg over your pinch bowl with both thumbs on the crack and gently pull the shell apart, allowing the egg to fall cleanly into the bowl.
Pro Tips & Troubleshooting
Even with the best instructions, little tricks and knowing what to avoid can make all the difference in achieving consistently perfect fried eggs.
Pro Tips for Consistently Perfect Fried Eggs
Pre-Crack for Perfection: Always crack your egg into a small bowl first. This allows for easy removal of any shell bits and ensures a perfectly rounded shape when gently slipped into the pan, minimizing yolk breakage.
Flatten Whites (Optional): For an ultra-even egg white, especially for sunny-side up, gently poke any thick portions of the egg white with a fork to help it spread and cook uniformly.
Mind the Sizzle: Monitor heat closely. Aim for a gentle, consistent sizzle. Too high heat results in crispy white and bubbly yolks; too low prevents proper cooking and can lead to a sticky egg.
Basting or Steaming for Set Whites: If sunny-side up egg white tops remain translucent, spoon hot melted butter over them (the basting technique) or add 1 tsp. water to the pan and cover for 15 seconds to steam. Note: steaming may slightly cloud the yolk.
Dedicated Egg Pan: For best results and to prevent sticky eggs, consider dedicating a small (6″ or 8″) nonstick pan solely for eggs. Clean it immediately and store carefully to avoid scratches, preserving its nonstick quality.
Use the Right Spatula: Always use a flexible rubber spatula with nonstick pans to avoid damage. Never use metal.
Common Mistakes to Avoid
Cracking Directly into the Pan: This risks shell contamination, yolk breakage, and uneven spreading, leading to a less appealing fried egg.
Incorrect Pan Temperature: Too high heat leads to overly crispy white and rubbery whites with bubbly yolks. Too low heat results in a slow cook, sticky eggs, and a less appealing texture.
Using the Wrong Spatula: A metal spatula on a nonstick pan will scratch and damage the surface, reducing its effectiveness and lifespan.
Aggressive Handling: Flipping too early or too forcefully can break the yolk or distort the egg shape, ruining your perfectly fried egg.
Ignoring Pan Cleanliness: Food residue can cause sticky eggs and impact the next fry. Always clean your pan after each use.
Serving & Storage
A perfectly fried egg is a versatile star, ready to elevate any meal. Here are some of my favorite ways to enjoy it, and what to know about storage.
Delicious Serving Suggestions
Fried eggs are amazing any time of day! For breakfast or brunch, classic pairings include crispy bacon, golden potatoes (hash browns or home fries), oven-baked tomatoes, or nestled atop creamy avocado toast. Don’t forget a rich cream cheese bagel on the side!
Beyond breakfast, let your creativity shine. A fried egg makes a luxurious topping for a steaming bowl of ramen, adds richness to a juicy burger, or transforms a simple salad into a hearty meal. Experiment with dishes like pesto egg-in-a-hole, a rustic steak & eggs, or vibrant frico fried egg tostadas with fresh pico de gallo. Finish your masterpiece with a sprinkle of fresh herbs, a dash of chili flakes, or more freshly ground black pepper for an extra pop of flavor.
Storage and Reheating Fried Eggs
Fried eggs are truly best enjoyed immediately after cooking for that optimal sensory experience – the gleaming runny yolk and tender white. If you have leftovers, allow them to cool completely before storing them in an airtight container in the refrigerator for up to 1-2 days. Be aware that the yolk will firm up significantly during storage.
Reheating fried eggs is generally not recommended if you’re aiming for that fresh-cooked runny yolk consistency. The texture will inevitably change. If absolutely necessary, you can warm them gently in a nonstick pan over very low heat for a minute or two, or briefly in a microwave. However, be prepared for the whites to become rubbery and the yolk to solidify. The original, beautiful texture and flavor are truly best achieved when served fresh.
Conclusion
And there you have it – the secret to consistently perfect fried eggs, every single time. By embracing the ‘Low & Slow Cold Pan Start’ method, you’ve unlocked a technique that delivers tender whites, beautifully runny yolks, and incredible flavor without the stress. Even if you’re new to the kitchen, this approach ensures success. I encourage you to confidently experiment with different doneness levels and explore the wide array of serving ideas and variations I’ve shared. Print this recipe, share your delicious creations, and discover just how much joy a perfectly fried egg can bring to your table. Happy frying!
FAQ
What are the different types of fried eggs?
The main types of fried eggs are sunny-side up (runny yolk, fully set white on the bottom), over easy (runny yolk, lightly cooked on both sides), over medium (partially set yolk, fully cooked white), and over hard (fully cooked, firm yolk and white).
What is the best temperature and pan for frying an egg?
For our ‘Low & Slow Cold Pan Start’ method, a small nonstick pan over medium-low heat is ideal. For traditional frying, medium heat in a nonstick pan works well. If using a metal skillet, start with medium-high heat then reduce to medium after adding the egg.
How do I get a perfectly set egg white with a runny yolk?
My ‘Low & Slow Cold Pan Start’ method is designed for this. Cook the egg gently over medium-low heat until the white is set. If the top of the white is still translucent, gently spoon hot melted butter over it (basting) to finish cooking without overcooking the runny yolk.
How do you prevent fried eggs from sticking to the pan?
Always use a good quality nonstick pan, ensure it’s properly seasoned (if not nonstick), and use enough fat (butter or oil) to coat the pan evenly. Starting with a cold pan and gradually heating it, as in our method, also helps prevent sticking.
What are some common mistakes to avoid when frying eggs?
Common mistakes include cracking the egg directly into the pan (risking shell bits and yolk breakage), using too high heat (leading to rubbery whites), using the wrong spatula (damaging nonstick pans), and aggressive handling during cooking or flipping.
Can you store or reheat fried eggs?
Fried eggs are best enjoyed fresh for optimal taste and texture, especially if you desire a runny yolk. You can store cooked fried eggs in an airtight container in the refrigerator for 1-2 days, but reheating is not recommended as the whites often become rubbery and the yolk will firm up.
How do you get a flat egg white when frying?
After gently slipping the egg into the pan, you can use the tines of a fork to gently poke and spread any very thick portions of the egg white near the yolk. This encourages it to flatten into a more even, uniform layer as it cooks.
How much butter/oil should I use for one egg?
For one egg, 1 teaspoon of unsalted butter or neutral oil is usually sufficient to coat the pan and provide enough fat for frying. You can add a little more if basting the egg or if you prefer a richer flavor.
Master the Perfect Fried Egg: Low & Slow Cold Pan Start
Ingredients
Equipment
Method
- Begin by cracking your large egg into a small pinch bowl. This expert tip ensures no shell bits contaminate your egg and allows for a smooth, controlled transfer to the pan, helping maintain a perfectly rounded shape.
- For the 'Low & Slow Cold Pan Start' method, place your nonstick pan on the stovetop and add 1 tsp. unsalted butter. Only then, turn the heat to medium-low. The butter will gently melt as the pan heats, evenly coating it.
- If you're using a metal skillet for a crispier edge, heat it over medium-high heat until a drop of water sizzles and evaporates immediately upon contact. Then, add 1 tsp. neutral oil and gently swirl it to evenly coat the pan.
- Gently slip the egg from your pinch bowl into the center of the pan. You should hear a gentle sizzle, not an aggressive roar. Immediately season the egg with a pinch of kosher salt.
- Optional: For an ultra-even, flat white, especially for sunny-side up eggs, use a fork to gently poke and flatten any very thick parts of the egg white near the yolk. This helps the egg white cook more uniformly.
- For Sunny-Side Up: Cook, undisturbed, until the egg white is fully set on top but the yolk is still wonderfully runny and warm. This typically takes about 3 minutes. If the very top of the egg white remains slightly translucent, add an additional 1 tsp. butter to the pan, let it melt, then carefully spoon the hot melted butter over the top of the egg white. This basting technique helps finish cooking the top without flipping.
- For Over-Easy Egg: Cook, undisturbed, until the egg white is no longer runny but still not totally set, about 1 to 2 minutes. Use a flexible rubber spatula to gently flip the egg. Cook for just 30 to 60 seconds on the second side until the bottom is set but the yolk remains deliciously runny.
- For Over-Medium Egg: Follow the initial cook and flip method for an over-easy egg. After flipping, continue to cook until the edges of the yolk feel firm when pressed, but the center still jiggles slightly, about 1 to 2 minutes.
- For Over-Hard Egg: Follow the initial cook and flip method for an over-easy egg. Cook until the entire yolk feels solid with only a slight bit of fudginess left in the center, about 2 to 3 minutes.
- Season your perfectly fried egg with freshly ground black pepper to taste. Using a flexible rubber spatula, carefully transfer the egg to a plate and enjoy immediately.